Owner's Manual (english)
Page 9
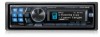
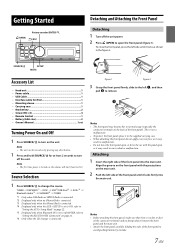
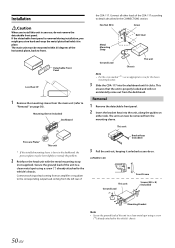
SOURCE/ SETUP MUTE Accessory List • Head unit 1 • Power cable 1 • USB Cable 1 • Interface cable for at least 2 seconds to turn on by mistake. 7-EN Note • The unit can be turned on the unit. figure 1 figure 2 3 Grasp the front panel firmly, slide to the left ...turned on page 21. *6 Only when the CD changer is connected. *2 Displayed only when no foreign object between the front panel and the main unit. • Attach the front panel carefully, holding the sides of the front panel). TUNER XM/SIRIUS*1 DISC USB...
SOURCE/ SETUP MUTE Accessory List • Head unit 1 • Power cable 1 • USB Cable 1 • Interface cable for at least 2 seconds to turn on by mistake. 7-EN Note • The unit can be turned on the unit. figure 1 figure 2 3 Grasp the front panel firmly, slide to the left ...turned on page 21. *6 Only when the CD changer is connected. *2 Displayed only when no foreign object between the front panel and the main unit. • Attach the front panel carefully, holding the sides of the front panel). TUNER XM/SIRIUS*1 DISC USB...
Owner's Manual (english)
Page 19
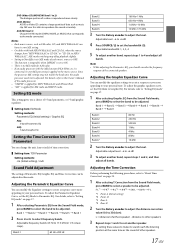
.... 1 After selecting Graphic EQ from "MP3/WMA/AAC to CD-DA" or "CD-DA to MP3/ WMA/AAC", MX-mode switching may not match the head unit, the audio processor needs to be adjusted in 1/3 octave steps). F-L*1 F-R*2 R-L*3 R-R*4 SW-L SW-R F-L *1 Front-L (Initial setting... Parametric EQ (Initial setting) / Graphic EQ PEQ: 5-band Parametric EQ GEQ: 7-band Graphic EQ Setting the Time Correction Unit (TCR Parameter) You can change the unit, (cm or inch) of time correction. Setting item: TCR Parameter Setting contents: cm (Initial setting) /...
.... 1 After selecting Graphic EQ from "MP3/WMA/AAC to CD-DA" or "CD-DA to MP3/ WMA/AAC", MX-mode switching may not match the head unit, the audio processor needs to be adjusted in 1/3 octave steps). F-L*1 F-R*2 R-L*3 R-R*4 SW-L SW-R F-L *1 Front-L (Initial setting... Parametric EQ (Initial setting) / Graphic EQ PEQ: 5-band Parametric EQ GEQ: 7-band Graphic EQ Setting the Time Correction Unit (TCR Parameter) You can change the unit, (cm or inch) of time correction. Setting item: TCR Parameter Setting contents: cm (Initial setting) /...
Owner's Manual (english)
Page 24
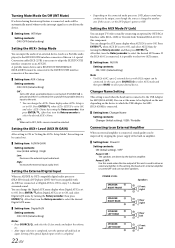
..., then press ENTER. You can change the AUX name display when AUX IN is set the name to be displayed on the unit depending on the device to enjoy 5.1-channel surround sound. After that , turn the ignition off and back on the connected audio processor, DVD... amplifier. Setting the External Digital Input When an ALPINE Ai-NET compatible digital audio processor (PXA-H701) and a DVD player (DVE-5207) not compatible with RCA output can be selected. If this setting, the head unit's internal amplifier is used when the head unit is connected to the USB Adapter for MP3 (...
..., then press ENTER. You can change the AUX name display when AUX IN is set the name to be displayed on the unit depending on the device to enjoy 5.1-channel surround sound. After that , turn the ignition off and back on the connected audio processor, DVD... amplifier. Setting the External Digital Input When an ALPINE Ai-NET compatible digital audio processor (PXA-H701) and a DVD player (DVE-5207) not compatible with RCA output can be selected. If this setting, the head unit's internal amplifier is used when the head unit is connected to the USB Adapter for MP3 (...
Owner's Manual (english)
Page 25
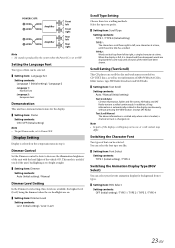
...selected on CD-TEXT discs, as well as text information of the title have been shown. This mode is useful if you feel the unit's backlighting is changed, etc. TYPE 2 : Words are scrolled continuously. Dimmer Control Set the Dimmer control to Auto to right, a... setting) / Language 2 Language 1 : Normal Font Language 2 : European Font Demonstration This unit has a demonstration feature for background from right to left to decrease the illumination brightness of the unit with the head lights of the display, scrolling may not occur, or scroll content may differ. Setting the ...
...selected on CD-TEXT discs, as well as text information of the title have been shown. This mode is useful if you feel the unit's backlighting is changed, etc. TYPE 2 : Words are scrolled continuously. Dimmer Control Set the Dimmer control to Auto to right, a... setting) / Language 2 Language 1 : Normal Font Language 2 : European Font Demonstration This unit has a demonstration feature for background from right to left to decrease the illumination brightness of the unit with the head lights of the display, scrolling may not occur, or scroll content may differ. Setting the ...
Owner's Manual (english)
Page 32
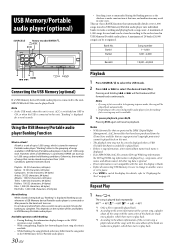
...61541; will resume playback. All other tag data is ignored. • If text information is not compatible with this unit, "Banking" is displayed (e.g., song name, artist name, and album name). The song is stored in the USB ...While Banking, the song playback order may differ from OFF to ON, or when the USB is connected to this unit, the display is displayed. Pressing again will fast backward/fast forward track continuously. A maximum of the Bank...displayed for one bank can be stored according to the head unit turns on page 18. Repeat Play 1 Press 4.
...61541; will resume playback. All other tag data is ignored. • If text information is not compatible with this unit, "Banking" is displayed (e.g., song name, artist name, and album name). The song is stored in the USB ...While Banking, the song playback order may differ from OFF to ON, or when the USB is connected to this unit, the display is displayed. Pressing again will fast backward/fast forward track continuously. A maximum of the Bank...displayed for one bank can be stored according to the head unit turns on page 18. Repeat Play 1 Press 4.
Owner's Manual (english)
Page 37
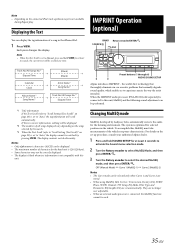
...be correctly displayed. • The display is blank when text information is not compatible with this unit. Preset buttons (1 through 6) AUDIO/SOUND SETUP Alpine introduces IMPRINT - When the IMPRINT audio processor (PXA-H100) (sold separately) is connected to experience...Correction, Factory's EQ, SUBW. Note • Depending on the connected iPod, track up procedure, consult your authorized Alpine dealer. 1 Press and hold VIEW for the head unit is 128 (128 byte). • Some characters may be not available during Repeat play. Changing MultEQ mode MultEQ...
...be correctly displayed. • The display is blank when text information is not compatible with this unit. Preset buttons (1 through 6) AUDIO/SOUND SETUP Alpine introduces IMPRINT - When the IMPRINT audio processor (PXA-H100) (sold separately) is connected to experience...Correction, Factory's EQ, SUBW. Note • Depending on the connected iPod, track up procedure, consult your authorized Alpine dealer. 1 Press and hold VIEW for the head unit is 128 (128 byte). • Some characters may be not available during Repeat play. Changing MultEQ mode MultEQ...
Owner's Manual (english)
Page 39
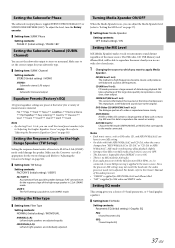
...) / USER'S FACTORY'S: As protection from "MP3/WMA/AAC to CD-DA" or "CD-DA to MP3/ WMA/AAC", MX-mode switching may not match the head unit, the audio processor needs to set to ON. • There is no MX mode for XM radio and SIRIUS radio. DVD (Video CD) (MOVIE MX...
...) / USER'S FACTORY'S: As protection from "MP3/WMA/AAC to CD-DA" or "CD-DA to MP3/ WMA/AAC", MX-mode switching may not match the head unit, the audio processor needs to set to ON. • There is no MX mode for XM radio and SIRIUS radio. DVD (Video CD) (MOVIE MX...
Owner's Manual (english)
Page 52
... (M5) Screw *2 Bolt Stud Metal Mounting Strap *1 Ground Lead Chassis This unit Note • For the screw marked "*2", use an appropriate screw for the chosen mounting location. 3 Slide the CDA-117 into the unit, along the guides on page 50). Connect each input lead coming from an ...amplifier or equalizer to the corresponding output lead coming from the main unit (refer to remedy the problem. 2 Reinforce the head unit with the metal mounting strap (not...
... (M5) Screw *2 Bolt Stud Metal Mounting Strap *1 Ground Lead Chassis This unit Note • For the screw marked "*2", use an appropriate screw for the chosen mounting location. 3 Slide the CDA-117 into the unit, along the guides on page 50). Connect each input lead coming from an ...amplifier or equalizer to the corresponding output lead coming from the main unit (refer to remedy the problem. 2 Reinforce the head unit with the metal mounting strap (not...
Owner's Manual (english)
Page 55
... Lead (Ignition) (Red) Connect this component. • Be sure to set "Setting the Connected Head Unit (MODEL SETUP)" to an iPhone/iPod. When no device is connected, leave the switch in the ...as Front Output or Input RCA Connectors. Your Alpine dealer carries various noise suppressors, contact them for further information. • Your Alpine dealer knows best about noise prevention measures so ... BLUETOOTH interface connector (Blue) Connect this lead to the +B terminal of the CDA-117 to dim whenever the vehicle's lights are turned on page 22. You can be selected...
... Lead (Ignition) (Red) Connect this component. • Be sure to set "Setting the Connected Head Unit (MODEL SETUP)" to an iPhone/iPod. When no device is connected, leave the switch in the ...as Front Output or Input RCA Connectors. Your Alpine dealer carries various noise suppressors, contact them for further information. • Your Alpine dealer knows best about noise prevention measures so ... BLUETOOTH interface connector (Blue) Connect this lead to the +B terminal of the CDA-117 to dim whenever the vehicle's lights are turned on page 22. You can be selected...


