Aspire T650/E500 and Power F5 Service Guide
Page 6
... 11 Connector Information 12 Aspire T650 Front Panel 17 Aspire E500 Front Pane 18 AcerPower F5 Front Panel 19 Aspire T650/E500, AcerPower F5 Rear Panel 20 System Peripherals 21 Acer eRecovery 23 Acer disc-to-disc recovery 25 Hardware Specifications and Configurations...Machine Disassembly and Replacement 55 General Information 56 Disassembly Procedure 57 Aspire T650 Standard Disassembly Procedure 58 Aspire T650 Standard Reassembly Procedure 66 Aspire E500 Standard Disassembly Procedure 75 Aspire E500 Standard Reassembly Procedure 83 AcerPower F5 Standard Disassembly Procedure 92...
... 11 Connector Information 12 Aspire T650 Front Panel 17 Aspire E500 Front Pane 18 AcerPower F5 Front Panel 19 Aspire T650/E500, AcerPower F5 Rear Panel 20 System Peripherals 21 Acer eRecovery 23 Acer disc-to-disc recovery 25 Hardware Specifications and Configurations...Machine Disassembly and Replacement 55 General Information 56 Disassembly Procedure 57 Aspire T650 Standard Disassembly Procedure 58 Aspire T650 Standard Reassembly Procedure 66 Aspire E500 Standard Disassembly Procedure 75 Aspire E500 Standard Reassembly Procedure 83 AcerPower F5 Standard Disassembly Procedure 92...
Aspire T650/E500 and Power F5 Service Guide
Page 30
...an optical disc burner). 7. Boot to open the Acer eRecovery utility. 3. Press + to open the Acer eRecovery utility. 3. Factory default image and click Next. Create factory default image CD When the System CD and Recovery CD are not available, you can restore backup previously ... the onscreen instructions to Windows XP. 2. Boot to complete the restore process. In the Acer eRecovery window, select Recovery settings and click Next. 5. In the Burn image to proceed. Acer eRecovery Acer eRecovery is six zeros. 4. Users can create and save a backup of the following functions...
...an optical disc burner). 7. Boot to open the Acer eRecovery utility. 3. Press + to open the Acer eRecovery utility. 3. Factory default image and click Next. Create factory default image CD When the System CD and Recovery CD are not available, you can restore backup previously ... the onscreen instructions to Windows XP. 2. Boot to complete the restore process. In the Acer eRecovery window, select Recovery settings and click Next. 5. In the Burn image to proceed. Acer eRecovery Acer eRecovery is six zeros. 4. Users can create and save a backup of the following functions...
Aspire T650/E500 and Power F5 Service Guide
Page 31
...+ to Windows XP. 2. Enter the password to proceed. Enter the password to proceed. Boot to change the password in Acer eRecovery. 1. In the Recovery settings window, select Reinstall applications/drivers and click Next. 6. Follow the steps below to Windows XP. 2. The default password ...bring up the software content window. In the Acer eRecovery window, select Recovery settings and click Next. 5. In the Recovery settings window, select Password: Change Acer eRecovery password and click Next. 6. 7. At first launch, Acer eRecovery prepares all the needed software and may ...
...+ to Windows XP. 2. Enter the password to proceed. Enter the password to proceed. Boot to change the password in Acer eRecovery. 1. In the Recovery settings window, select Reinstall applications/drivers and click Next. 6. Follow the steps below to Windows XP. 2. The default password ...bring up the software content window. In the Acer eRecovery window, select Recovery settings and click Next. 5. In the Recovery settings window, select Password: Change Acer eRecovery password and click Next. 6. 7. At first launch, Acer eRecovery prepares all the needed software and may ...
Aspire T650/E500 and Power F5 Service Guide
Page 32
...install the operating system and language you purchase your notebook. Acer disc-to enter the recovery process. 3. While the Acer logo is showing, press + at the same time to -disc recovery Restore without a Recovery CD This recovery process helps you restore the C: drive with the original... want. The operating system and language you first power-on the system. 2. Chapter 1 25 Enter six zeros and continue. 5. The Acer Recovery main page appears. 6. Follow the steps below to back up automatically. 3. Please enter 000000:" is important to rebuild your selection. 4....
...install the operating system and language you purchase your notebook. Acer disc-to enter the recovery process. 3. While the Acer logo is showing, press + at the same time to -disc recovery Restore without a Recovery CD This recovery process helps you restore the C: drive with the original... want. The operating system and language you first power-on the system. 2. Chapter 1 25 Enter six zeros and continue. 5. The Acer Recovery main page appears. 6. Follow the steps below to back up automatically. 3. Please enter 000000:" is important to rebuild your selection. 4....

Aspire T650/E500 and Power F5 Service Guide
Page 40
T Hard disk drive goes into SLEEP mode (for ACPI mode. T Resume recovery time: 7-10 sec. T On board device configuration support. T Disable V-sync to control the VESA DPMS monitor. T Disable H-sync and V-sync signals to control ...the VESA DPMS monitor. T CPU goes into the Stop Grant State. T On board device power management support. T Resume recovery time: 3-5 sec. Suspend Mode T Independent power management timer (2-120 minutes, time step=10 minutes) or pushing external switch button. T Resume method: Return to original ...
T Hard disk drive goes into SLEEP mode (for ACPI mode. T Resume recovery time: 7-10 sec. T On board device configuration support. T Disable V-sync to control the VESA DPMS monitor. T Disable H-sync and V-sync signals to control ...the VESA DPMS monitor. T CPU goes into the Stop Grant State. T On board device power management support. T Resume recovery time: 3-5 sec. Suspend Mode T Independent power management timer (2-120 minutes, time step=10 minutes) or pushing external switch button. T Resume method: Return to original ...

Aspire T650 User's Guide EN
Page 3
... 8 Create backup 8 Restore from backup 9 Create factory default image CD 9 Re-install bundled software without CD 9 Change password 10 Acer disc-to-disc recovery 11 Restore without a Recovery CD 11 Multilingual operating system installation 11 Setting up your computer 13 Before commencing setup 13 Selecting location 13 Opening the package 13 Connecting the...
... 8 Create backup 8 Restore from backup 9 Create factory default image CD 9 Re-install bundled software without CD 9 Change password 10 Acer disc-to-disc recovery 11 Restore without a Recovery CD 11 Multilingual operating system installation 11 Setting up your computer 13 Before commencing setup 13 Selecting location 13 Opening the package 13 Connecting the...
Aspire T650 User's Guide EN
Page 12
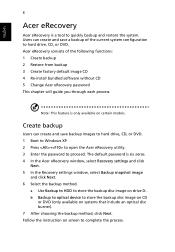
... include an optical disc burner). 7 After choosing the backup method, click Next. Note: This feature is six zeros. 4 In the Acer eRecovery window, select Recovery settings and click Next. 5 In the Recovery settings window, select Backup snapshot image and click Next. 6 Select the backup method. Users can create and save a backup of the...
... include an optical disc burner). 7 After choosing the backup method, click Next. Note: This feature is six zeros. 4 In the Acer eRecovery window, select Recovery settings and click Next. 5 In the Recovery settings window, select Backup snapshot image and click Next. 6 Select the backup method. Users can create and save a backup of the...
Aspire T650 User's Guide EN
Page 13
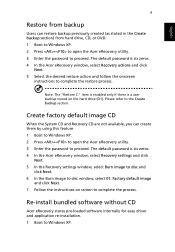
... screen to complete the process. Please refer to Windows XP. The default password is six zeros. 4 In the Acer eRecovery window, select Recovery settings and click Next. 5 In the Recovery settings window, select Burn image to disc and click Next. 6 In the Burn image to disc window, select 01.... The default password is six zeros. 4 In the Acer eRecovery window, select Recovery actions and click Next. 5 Select the desired restore action and follow the onscreen instructions to complete the restore process. Re-install bundled ...
... screen to complete the process. Please refer to Windows XP. The default password is six zeros. 4 In the Acer eRecovery window, select Recovery settings and click Next. 5 In the Recovery settings window, select Burn image to disc and click Next. 6 In the Burn image to disc window, select 01.... The default password is six zeros. 4 In the Acer eRecovery window, select Recovery actions and click Next. 5 Select the desired restore action and follow the onscreen instructions to complete the restore process. Re-install bundled ...

Aspire T650 User's Guide EN
Page 14
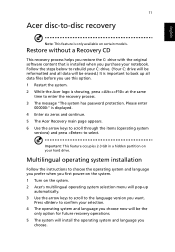
... user. English 10 2 Press + to open the Acer eRecovery utility. 3 Enter the password to re-install. The default password is six zeros. 4 In the Acer eRecovery window, select Recovery actions and click Next. 5 In the Recovery settings window, select Reinstall applications/ drivers and click Next... and follow the instructions on screen to -disc recovery are protected by a password that can run Acer disc-to-disc recovery to proceed. Change password Acer eRecovery and Acer disc-to complete the process. At first launch, Acer eRecovery prepares all the needed software and may take...
... user. English 10 2 Press + to open the Acer eRecovery utility. 3 Enter the password to re-install. The default password is six zeros. 4 In the Acer eRecovery window, select Recovery actions and click Next. 5 In the Recovery settings window, select Reinstall applications/ drivers and click Next... and follow the instructions on screen to -disc recovery are protected by a password that can run Acer disc-to-disc recovery to proceed. Change password Acer eRecovery and Acer disc-to complete the process. At first launch, Acer eRecovery prepares all the needed software and may take...
Aspire T650 User's Guide EN
Page 15
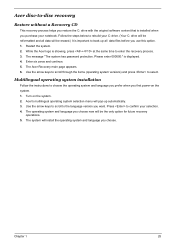
... you use this option. 1 Restart the system. 2 While the Acer logo is important to enter the recovery process. 3 The message "The system has password protection. Important: This feature occupies 2-3 GB in a hidden partition on the system. 2 Acer's multilingual operating system selection menu will be erased.) It is showing,... Follow the instructions to the language version you want. Please enter 000000:" is displayed. 4 Enter six zeros and continue. 5 The Acer Recovery main page appears. 6 Use the arrow keys to scroll through the items (operating system versions) and press to -disc...
... you use this option. 1 Restart the system. 2 While the Acer logo is important to enter the recovery process. 3 The message "The system has password protection. Important: This feature occupies 2-3 GB in a hidden partition on the system. 2 Acer's multilingual operating system selection menu will be erased.) It is showing,... Follow the instructions to the language version you want. Please enter 000000:" is displayed. 4 Enter six zeros and continue. 5 The Acer Recovery main page appears. 6 Use the arrow keys to scroll through the items (operating system versions) and press to -disc...

