
AL1916e Service Guide
Page 5
... radio frequency energy, and if not installed and used in accordance with the instructions, may cause harmful interference to radio communications. Consult the dealer or an experienced radio/TV technician for any , must be determined by unauthorized modification to this equipment. Shielded interface cables and AC power cord, if any radio or TV interference caused by turning the...
... radio frequency energy, and if not installed and used in accordance with the instructions, may cause harmful interference to radio communications. Consult the dealer or an experienced radio/TV technician for any , must be determined by unauthorized modification to this equipment. Shielded interface cables and AC power cord, if any radio or TV interference caused by turning the...
AL1916e Service Guide
Page 6
... power source indicated on a wall or shelf, use a mounting kit approved by the manufacture or sold with the attached power adapter (output 12V DC) which have appropriate configured receptacles marked between 100-240V AC, Min. 3.5A. Do not place the monitor near the equipment and shall be sure these openings are not sure of the type of the grounded plug...
... power source indicated on a wall or shelf, use a mounting kit approved by the manufacture or sold with the attached power adapter (output 12V DC) which have appropriate configured receptacles marked between 100-240V AC, Min. 3.5A. Do not place the monitor near the equipment and shall be sure these openings are not sure of the type of the grounded plug...
AL1916e Service Guide
Page 16
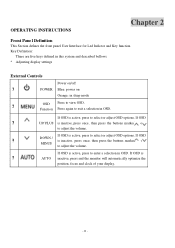
... select or adjust OSD options. OPERATING INSTRUCTIONS Chapter 2 Front Panel Definition This Section defines the front panel User Interface for Led Indictor and Key function. Key Definition: There are five keys defined in this system and described bellows. * Adjusting display settings External Controls Power on/off ?1 POWER Blue: power on Orange: in OSD. If OSD ?3 UP/ PLUS is ?5 AUTO inactive, press and the monitor will automatically optimize the position, focus and...
... select or adjust OSD options. OPERATING INSTRUCTIONS Chapter 2 Front Panel Definition This Section defines the front panel User Interface for Led Indictor and Key function. Key Definition: There are five keys defined in this system and described bellows. * Adjusting display settings External Controls Power on/off ?1 POWER Blue: power on Orange: in OSD. If OSD ?3 UP/ PLUS is ?5 AUTO inactive, press and the monitor will automatically optimize the position, focus and...
AL1916e Service Guide
Page 20
... video-input signal present. The voltage rating for connection to a "Screen Saver" feature except the display is UL listed and CSA labeled. The other end terminates with NEMA 5-15 style and is completely off. This monitor meets the Green monitor standards as set consisting of personal computer: Please use VDE 0602, 0625, 0821 approval power cord in European counties. - 20 - This reduces the monitor's internal power supply...
... video-input signal present. The voltage rating for connection to a "Screen Saver" feature except the display is UL listed and CSA labeled. The other end terminates with NEMA 5-15 style and is completely off. This monitor meets the Green monitor standards as set consisting of personal computer: Please use VDE 0602, 0625, 0821 approval power cord in European counties. - 20 - This reduces the monitor's internal power supply...
AL1916p Service Guide
Page 5
... with UL listed computers which have an electrician install the correct outlet, or use a mounting kit approved by the manufacture or sold with the monitor. Use only a trolley or stand recommended by the manufacture and follow the kit instructions. If your dealer or local power company. It could short circuit parts causing a fire or electric shock. z Do not place...
... with UL listed computers which have an electrician install the correct outlet, or use a mounting kit approved by the manufacture or sold with the monitor. Use only a trolley or stand recommended by the manufacture and follow the kit instructions. If your dealer or local power company. It could short circuit parts causing a fire or electric shock. z Do not place...
AL1916p Service Guide
Page 8
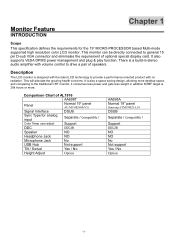
... pin D-sub VGA connector and eliminates the requirement of optional special display card. This will alleviate the growing health concerns. Comparison Chart of speakers. It also supports VESA DPMS power management and plug & play function. This monitor can be directly connected to drive a pair of AL1916 AA698T Panel Normal 19" panel AU-M190EN04(V5) Signal Interface DSUB Sync Type for the 19" MICRO-PROCESSOR based Multi-mode supported high resolution color LCD monitor.
... pin D-sub VGA connector and eliminates the requirement of optional special display card. This will alleviate the growing health concerns. Comparison Chart of speakers. It also supports VESA DPMS power management and plug & play function. This monitor can be directly connected to drive a pair of AL1916 AA698T Panel Normal 19" panel AU-M190EN04(V5) Signal Interface DSUB Sync Type for the 19" MICRO-PROCESSOR based Multi-mode supported high resolution color LCD monitor.
AL1916p Service Guide
Page 9
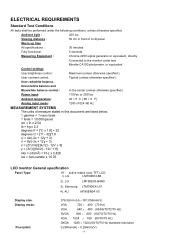
... = foot-candle x 10.76 LCD monitor General specification Panel Type: 19 " active matrix color TFT LCD 1). LG LM190E03-B4N9 3). Minolta CA100 photometer, or equivalent Control settings User brightness control : Maximum (unless otherwise specified ) User contrast control: Typical (unless otherwise specified ) User red/white balance, Green/white balance and Blue/white balance control : In the center (unless otherwise specified ) Power input: 110Vac or 230Vac Ambient temperature: 20 ± 5 ˚C ( 68 ± 9 ˚ F) Analog input mode: 1280 x1024 /60 Hz...
... = foot-candle x 10.76 LCD monitor General specification Panel Type: 19 " active matrix color TFT LCD 1). LG LM190E03-B4N9 3). Minolta CA100 photometer, or equivalent Control settings User brightness control : Maximum (unless otherwise specified ) User contrast control: Typical (unless otherwise specified ) User red/white balance, Green/white balance and Blue/white balance control : In the center (unless otherwise specified ) Power input: 110Vac or 230Vac Ambient temperature: 20 ± 5 ˚C ( 68 ± 9 ˚ F) Analog input mode: 1280 x1024 /60 Hz...
AL1916p Service Guide
Page 38
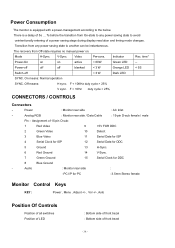
... D-sub: 1 Red Video 9 +5V FOR DDC 2 Green Video 10 Detect 3 Blue Video 11 Serial Data for ISP 4 Serial Clock for ISP 12 Serial Data for DDC 5 Ground 13 H-Sync. 6 Red Ground 14 V-Sync. 7 Green Ground 15 Serial Clock for PC : 3.5mm Stereo female Monitor Control Keys KEY : Power , Menu , Adjust +/- , Vol +/-, Auto Position Of Controls Position of all switches Position of LED : Bottom side of front bezel : Bottom side of a power saving stage during display resolution and timing mode changes. time* Power-On...
... D-sub: 1 Red Video 9 +5V FOR DDC 2 Green Video 10 Detect 3 Blue Video 11 Serial Data for ISP 4 Serial Clock for ISP 12 Serial Data for DDC 5 Ground 13 H-Sync. 6 Red Ground 14 V-Sync. 7 Green Ground 15 Serial Clock for PC : 3.5mm Stereo female Monitor Control Keys KEY : Power , Menu , Adjust +/- , Vol +/-, Auto Position Of Controls Position of all switches Position of LED : Bottom side of front bezel : Bottom side of a power saving stage during display resolution and timing mode changes. time* Power-On...

AL1916p Service Guide
Page 41
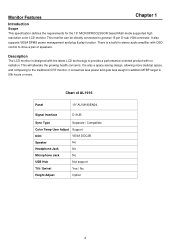
... language to N/A French. Set OSD display language to N/A Japanese. Adjust the OSD timeout. 10-120 Auto Config N/A Auto Adjust the H/V Position, Focus N/A and Clock of the 0-100 OSD. Exit N/A Exit OSD N/A N/A - 41 - N/A Set OSD display language to Italian. Adjust the verticalposition of current iput timing. N/A Source Change Analog and Digital source change.(option) N/A The Language will be set the color temperature to English. 50 50 10 N/A N/A Information N/A Show the resolution, H/V frequency N/A N/A and input port of the 0-100 OSD. Reset...
... language to N/A French. Set OSD display language to N/A Japanese. Adjust the OSD timeout. 10-120 Auto Config N/A Auto Adjust the H/V Position, Focus N/A and Clock of the 0-100 OSD. Exit N/A Exit OSD N/A N/A - 41 - N/A Set OSD display language to Italian. Adjust the verticalposition of current iput timing. N/A Source Change Analog and Digital source change.(option) N/A The Language will be set the color temperature to English. 50 50 10 N/A N/A Information N/A Show the resolution, H/V frequency N/A N/A and input port of the 0-100 OSD. Reset...
AL1916p Service Guide
Page 42
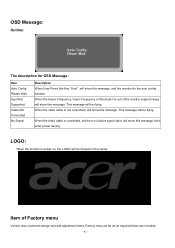
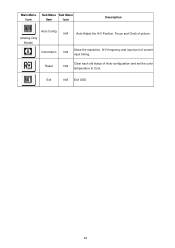
... center. Item of the monitor support range, will show this message. When the Hsync Frequency, Vsync Frequency or Resolution is not connected, will show this message. When the video cable is out of Factory menu Vendor may customize design and add adjustment items Factory menu as far as all required items are included. - 42 - LOGO: When the monitor is no active signal input, will show this message...
... center. Item of the monitor support range, will show this message. When the Hsync Frequency, Vsync Frequency or Resolution is not connected, will show this message. When the video cable is out of Factory menu Vendor may customize design and add adjustment items Factory menu as far as all required items are included. - 42 - LOGO: When the monitor is no active signal input, will show this message...
AL1916p Service Guide
Page 44
... the monitor's internal power supply consumption. THIS MONITOR WILL APPEAR TO BE NON-FUNCTIONAL IF THERE IS NO VIDEO INPUT SIGNAL. This monitor meets the Green monitor standards as set consisting of its display capabilities. The display is no video-input signal present. IN ORDER FOR THIS MONITOR TO OPERATE PROPERLY, THERE MUST BE A VIDEO INPUT SIGNAL. Using The Right Power Cord The accessory power cord for the power cord shall be 125 volt AC. The voltage rating...
... the monitor's internal power supply consumption. THIS MONITOR WILL APPEAR TO BE NON-FUNCTIONAL IF THERE IS NO VIDEO INPUT SIGNAL. This monitor meets the Green monitor standards as set consisting of its display capabilities. The display is no video-input signal present. IN ORDER FOR THIS MONITOR TO OPERATE PROPERLY, THERE MUST BE A VIDEO INPUT SIGNAL. Using The Right Power Cord The accessory power cord for the power cord shall be 125 volt AC. The voltage rating...
AL1916v Service Guide
Page 4
... power cord, if any radio or TV interference caused by turning the equipment off and on, the user is made, it supports, please read the following measures: 1. Refer servicing to rain or moisture. This Service Guide provides you with the emission limits. 3. Warning: (For FCC Certified Models) Note: This equipment has been tested and found to comply with the instructions...
... power cord, if any radio or TV interference caused by turning the equipment off and on, the user is made, it supports, please read the following measures: 1. Refer servicing to rain or moisture. This Service Guide provides you with the emission limits. 3. Warning: (For FCC Certified Models) Note: This equipment has been tested and found to comply with the instructions...
AL1916v Service Guide
Page 5
... kit instructions. If your dealer or local power company. Notes Due to the nature of the fluorescent light, the screen may remain after switching the image, when the same image is recovered slowly by the manufacturer or sold with a third (grounding) pin. Use only a trolley or stand recommended by changing the image or turning off the Power Switch and then turn it will protect the monitor...
... kit instructions. If your dealer or local power company. Notes Due to the nature of the fluorescent light, the screen may remain after switching the image, when the same image is recovered slowly by the manufacturer or sold with a third (grounding) pin. Use only a trolley or stand recommended by changing the image or turning off the Power Switch and then turn it will protect the monitor...

AL1916v Service Guide
Page 6
... Requirements LCD Monitor General Specification LCD Panel Specification Support Timing Block Diagram Main Board Diagram Software Flow chart Main Board Layout Front Bezel Rear Bezel Chapter 2 Operating Instructions External Controls Front Panel Controls Adjusting the picture Hot-Key Menu OSD Message LOGO Chapter 3 Machine Disassembly 6 7 8 9 10 11 12 13 15 16 17 18 18 19 20 23 23 24 25 Chapter 4 Troubleshooting 32 Chapter 5 Connector Information 37 Chapter 6 FRU (Field Replacement Unit...
... Requirements LCD Monitor General Specification LCD Panel Specification Support Timing Block Diagram Main Board Diagram Software Flow chart Main Board Layout Front Bezel Rear Bezel Chapter 2 Operating Instructions External Controls Front Panel Controls Adjusting the picture Hot-Key Menu OSD Message LOGO Chapter 3 Machine Disassembly 6 7 8 9 10 11 12 13 15 16 17 18 18 19 20 23 23 24 25 Chapter 4 Troubleshooting 32 Chapter 5 Connector Information 37 Chapter 6 FRU (Field Replacement Unit...
AL1916v Service Guide
Page 7
... D-SUB Sync Type Separate / Compatible Color Temp User Adjust Support DDC VESA DDC2B Speaker No Headphone Jack No Microphone Jack No USB Hub Not support Tilt / Swivel Yes / No Height Adjust Option 6 Description The LCD monitor is also a space saving design, allowing more . Chart of speakers. This will alleviate the growing health concerns. Monitor Features Chapter 1 Introduction Scope This specification defines the requirements for the 19" MICROPROCESSOR based Multi-mode supported high resolution color LCD monitor...
... D-SUB Sync Type Separate / Compatible Color Temp User Adjust Support DDC VESA DDC2B Speaker No Headphone Jack No Microphone Jack No USB Hub Not support Tilt / Swivel Yes / No Height Adjust Option 6 Description The LCD monitor is also a space saving design, allowing more . Chart of speakers. This will alleviate the growing health concerns. Monitor Features Chapter 1 Introduction Scope This specification defines the requirements for the 19" MICROPROCESSOR based Multi-mode supported high resolution color LCD monitor...
AL1916v Service Guide
Page 23
Show the resolution, H/V frequency and input port of picture. Main Menu Icon Sub Menu Sub Menu Item Icon Description Auto Config (Analog-Only Model) Information N/A Auto Adjust the H/V Position, Focus and Clock of current N/A input timing. Reset Clear each old status of Auto-configuration and set the color N/A temperature to Cool. Exit N/A Exit OSD 22
Show the resolution, H/V frequency and input port of picture. Main Menu Icon Sub Menu Sub Menu Item Icon Description Auto Config (Analog-Only Model) Information N/A Auto Adjust the H/V Position, Focus and Clock of current N/A input timing. Reset Clear each old status of Auto-configuration and set the color N/A temperature to Cool. Exit N/A Exit OSD 22
AL1916v Service Guide
Page 25
... connection to use a cord set by reducing power consumption when there is no video input signals this monitor to a "Screen Saver" feature except the display is similar to operate properly, there must be 125 volts AC. The display is restored by pressing a key on the level of a minimum No. 18 AWG, type SJT or SVT three conductors flexible cord. Please note that power supply cord needs to power...
... connection to use a cord set by reducing power consumption when there is no video input signals this monitor to a "Screen Saver" feature except the display is similar to operate properly, there must be 125 volts AC. The display is restored by pressing a key on the level of a minimum No. 18 AWG, type SJT or SVT three conductors flexible cord. Please note that power supply cord needs to power...

AL1916W Service Guide
Page 9
... Horizontal Sync. Power consumption Operation Mode Power Saving Mode Tilt angle Upward / Downward Physical Dimension, weight DCC Plug & Play Function Front key Audio & Speaker 52 3 20 / -1 462 x 385 x 180 (W x H x T), 4.0 DDC 2B Compliance 5keys 2.5 W x2 W W Degree mm, kg - - 9 x 900 0.284 (H) x 0.284 (V) RGB Vertical Stripe 16.2M Normally Black Typical 170 / 170 Typical 350 Unit mm - 1.3 LCD panel Specification Technical Specification LCD panel Item Panel Model Active Area Driver Element Pixel Number Pixel Pitch Pixel Arrangement Display Color Tran missive Mode Viewing...
... Horizontal Sync. Power consumption Operation Mode Power Saving Mode Tilt angle Upward / Downward Physical Dimension, weight DCC Plug & Play Function Front key Audio & Speaker 52 3 20 / -1 462 x 385 x 180 (W x H x T), 4.0 DDC 2B Compliance 5keys 2.5 W x2 W W Degree mm, kg - - 9 x 900 0.284 (H) x 0.284 (V) RGB Vertical Stripe 16.2M Normally Black Typical 170 / 170 Typical 350 Unit mm - 1.3 LCD panel Specification Technical Specification LCD panel Item Panel Model Active Area Driver Element Pixel Number Pixel Pitch Pixel Arrangement Display Color Tran missive Mode Viewing...

AL1916W Service Guide
Page 17
...N/A Auto Adjustment automatically (for analog input only) Analog Digital Select the input source you want (for DVI Input only) N/A N/A Message Display resolution, H/V frequency and the input port used for analog input adjustment only) N/A Warm Color Temp. 2.5 OSD Function Definition Primary Secondary Directory Directory Symbol Symbol Secondary Directory Items Description Contrast Adjust the contrast between the foreground and background of an image on the screen (for current input timing function Restore Restore to factory settings N/A Exit Close the OSD window and save...
...N/A Auto Adjustment automatically (for analog input only) Analog Digital Select the input source you want (for DVI Input only) N/A N/A Message Display resolution, H/V frequency and the input port used for analog input adjustment only) N/A Warm Color Temp. 2.5 OSD Function Definition Primary Secondary Directory Directory Symbol Symbol Secondary Directory Items Description Contrast Adjust the contrast between the foreground and background of an image on the screen (for current input timing function Restore Restore to factory settings N/A Exit Close the OSD window and save...
AL1916W Service Guide
Page 18
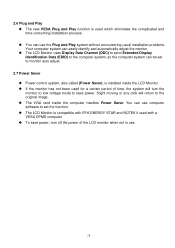
... and time-consuming installation process. You can use the Plug and Play system without encountering usual installation problems. Your computer system can use . 18 The VGA card inside the LCD Monitor. If the monitor has not been used for a certain period of time, the system will return to set to save power, turn the monitor to low voltage mode to monitor auto adjust. 2.7 Power Saver Power control system, also called (Power Saver), is installed inside the...
... and time-consuming installation process. You can use the Plug and Play system without encountering usual installation problems. Your computer system can use . 18 The VGA card inside the LCD Monitor. If the monitor has not been used for a certain period of time, the system will return to set to save power, turn the monitor to low voltage mode to monitor auto adjust. 2.7 Power Saver Power control system, also called (Power Saver), is installed inside the...


