
Owner's Manual
Page 5
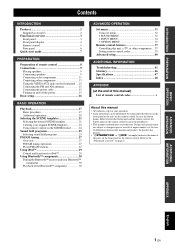
... Connections 9 Placing speakers 9 Connecting speakers 9 Connecting video components 11 Connecting other components .... 37 Setting remote control codes 39 Advanced setup 40 ADDITIONAL INFORMATION Troubleshooting 41 Glossary 46 Specifications 47 Index 48 APPENDIX (at the end of this manual) List of the parts on... i About this manual • y indicates a tip for iPod 29 Using Bluetooth™ components 30 Pairing the Bluetooth™ receiver and your Bluetooth™ component 30 Playback of the Bluetooth™ component 30 ADVANCED OPERATION Set menu 31 Using set menu 32 ...
... Connections 9 Placing speakers 9 Connecting speakers 9 Connecting video components 11 Connecting other components .... 37 Setting remote control codes 39 Advanced setup 40 ADDITIONAL INFORMATION Troubleshooting 41 Glossary 46 Specifications 47 Index 48 APPENDIX (at the end of this manual) List of the parts on... i About this manual • y indicates a tip for iPod 29 Using Bluetooth™ components 30 Pairing the Bluetooth™ receiver and your Bluetooth™ component 30 Playback of the Bluetooth™ component 30 ADVANCED OPERATION Set menu 31 Using set menu 32 ...
Owner's Manual
Page 20
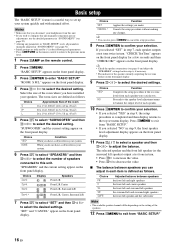
...display. "SPEAKERS" and the current setting appear on the front panel display. Notes • Make sure that you disconnect your headphones from "BASIC SETUP." • If you have a subwoofer in step 6, if necessary. • The indicator of each item is defined as follows: Choice ...Front L/R Front L/R Center Front L/R, Surround L/R Front L/R, Center, Surround L/R 7 Press ln to select "SET" and then ll / h to enter "BASIC SETUP." Choice Function SET Applies the settings you selected "SET" in step 7, each speaker outputs a test tone twice in turn . • Press lh to increase ...
...display. "SPEAKERS" and the current setting appear on the front panel display. Notes • Make sure that you disconnect your headphones from "BASIC SETUP." • If you have a subwoofer in step 6, if necessary. • The indicator of each item is defined as follows: Choice ...Front L/R Front L/R Center Front L/R, Surround L/R Front L/R, Center, Surround L/R 7 Press ln to select "SET" and then ll / h to enter "BASIC SETUP." Choice Function SET Applies the settings you selected "SET" in step 7, each speaker outputs a test tone twice in turn . • Press lh to increase ...
Owner's Manual
Page 24
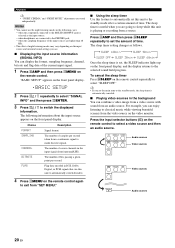
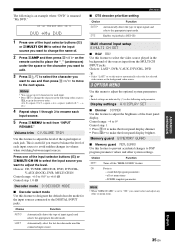
... as follows. when the sampling frequency of the input sources are connected to select a video source and then an audio source. "BASIC SETUP" appears on the front panel display. ;BASIC SETUP 2 Press lk / n repeatedly to select "SIGNAL INFO" and then press lENTER. 3 Press lk / n to make discrete signals. The number of night...
... as follows. when the sampling frequency of the input sources are connected to select a video source and then an audio source. "BASIC SETUP" appears on the front panel display. ;BASIC SETUP 2 Press lk / n repeatedly to select "SIGNAL INFO" and then press lENTER. 3 Press lk / n to make discrete signals. The number of night...
Owner's Manual
Page 35
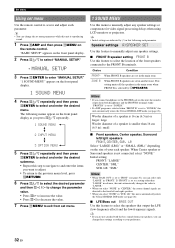
... of this menu to reflect the needs of the front panel display. Parameter A)DISPLAY SET B)MEMORY GUARD C)AUDIO SELECT D)PARAM. Manual setup MANUAL SETUP Use this feature to manually adjust speaker and system parameters. ■ Sound menu 1 SOUND MENU Use this unit. Adjusts the tonal ...quality of Dolby Digital or DTS signals. Adjusts the dynamic range of the center speaker. Pairs the connected Bluetooth Wireless Audio Receiver (such as YBA-...
... of this menu to reflect the needs of the front panel display. Parameter A)DISPLAY SET B)MEMORY GUARD C)AUDIO SELECT D)PARAM. Manual setup MANUAL SETUP Use this feature to manually adjust speaker and system parameters. ■ Sound menu 1 SOUND MENU Use this unit. Adjusts the tonal ...quality of Dolby Digital or DTS signals. Adjusts the dynamic range of the center speaker. Pairs the connected Bluetooth Wireless Audio Receiver (such as YBA-...
Owner's Manual
Page 36
... settings according to your each parameter. "1 SOUND MENU" appears on the front panel display. 2 Press lk / n to select "MANUAL SETUP." .MANUAL SETUP 3 Press lENTER to select and enter the desired menu. y • Initial settings are directed to the front left /right speakers FRONT,...BASS OUT" is automatically enters the Virtual CINEMA DSP mode (see page 26). "BASIC SETUP" appears on the front panel display. 1 SOUND MENU 4 Press lk / n repeatedly and then press lENTER to enter "MANUAL SETUP." ZONE B When FRONT B speakers are set in another zone. Initial setting: FRONT:...
... settings according to your each parameter. "1 SOUND MENU" appears on the front panel display. 2 Press lk / n to select "MANUAL SETUP." .MANUAL SETUP 3 Press lENTER to select and enter the desired menu. y • Initial settings are directed to the front left /right speakers FRONT,...BASS OUT" is automatically enters the Virtual CINEMA DSP mode (see page 26). "BASIC SETUP" appears on the front panel display. 1 SOUND MENU 4 Press lk / n repeatedly and then press lENTER to enter "MANUAL SETUP." ZONE B When FRONT B speakers are set in another zone. Initial setting: FRONT:...
Owner's Manual
Page 39
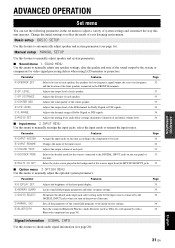
... menu ■ DTS decoder prioritize setting Choice Function AUTO* Automatically detect the type of input signals and selects the appropriate decoder mode. Multi channel input setup E)MULTI CH SET ■ BGV BGV Use this feature to avoid sudden changes in the background of the sources input from "INPUT RENAME." Control range...
... menu ■ DTS decoder prioritize setting Choice Function AUTO* Automatically detect the type of input signals and selects the appropriate decoder mode. Multi channel input setup E)MULTI CH SET ■ BGV BGV Use this feature to avoid sudden changes in the background of the sources input from "INPUT RENAME." Control range...
Owner's Manual
Page 43
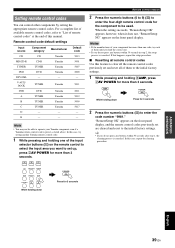
...to clear all the remote control codes previously set are cleared and reset to enter the code number "9981." If this happens, repeat the setup procedure. ■ Resetting all remote control codes Use this case, try each of them to select the input area you do not press... NG" appears on the front panel display, and the remote control codes previously set and reset all of your Yamaha component even if a Yamaha remote control code is canceled. AMP POWER AV While holding down Press for more than one of this case, repeat the clearing procedure. "RemoteSetup OK" appears ...
...to clear all the remote control codes previously set are cleared and reset to enter the code number "9981." If this happens, repeat the setup procedure. ■ Resetting all remote control codes Use this case, try each of them to select the input area you do not press... NG" appears on the front panel display, and the remote control codes previously set and reset all of your Yamaha component even if a Yamaha remote control code is canceled. AMP POWER AV While holding down Press for more than one of this case, repeat the clearing procedure. "RemoteSetup OK" appears ...
Owner's Manual
Page 44
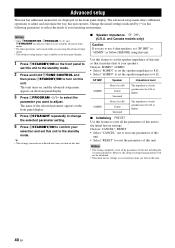
...activated next time you turn on this unit. 40 En Change the initial settings (indicated by (*) in this unit operates. However, the advanced setup menu parameters will not be 6 Ω or higher. ■ Initializing PRESET Use this feature to reset all the parameters of this unit...RESET • Select "CANCEL" not to reset any parameters of this unit. • Select "RESET" to reset the parameters of this unit. Advanced setup This unit has additional menus that of this unit to the standby mode. Notes • Only ASTANDBY/ON, LPROGRAM l / h and MSTRAIGHT are effective ...
...activated next time you turn on this unit. 40 En Change the initial settings (indicated by (*) in this unit operates. However, the advanced setup menu parameters will not be 6 Ω or higher. ■ Initializing PRESET Use this feature to reset all the parameters of this unit...RESET • Select "CANCEL" not to reset any parameters of this unit. • Select "RESET" to reset the parameters of this unit. Advanced setup This unit has additional menus that of this unit to the standby mode. Notes • Only ASTANDBY/ON, LPROGRAM l / h and MSTRAIGHT are effective ...
Owner's Manual
Page 49
... correctly set , there are weak. For details about the procedure of this unit. Replace all the parameters of resetting the system, see "Initializing" in "Advanced setup" on page 40.
... correctly set , there are weak. For details about the procedure of this unit. Replace all the parameters of resetting the system, see "Initializing" in "Advanced setup" on page 40.
Owner's Manual
Page 52
... audio components 13 Connecting speakers 9 Connecting the AM antennas 15 Connecting the Bluetooth Wireless Audio Receiver 14 Connecting the FM antennas 15 Connecting the power cable 15 Connecting the Yamaha iPod universal dock 14 Connecting to CD player 13 Connecting to DVD recorder 13 Connecting to ... CH INPUT jacks 14 Connecting to unprocessed input signals .......... 26 Low-frequency effect level 34 ■M Manual preset tuning 28 MANUAL SETUP 31 Manual setup 31 Manual tuning 27 MAX VOL 34 Maximum volume 34 MEM.GUARD 35 Memory guard 35 MEMORY, front panel 3 MENU, remote ...
... audio components 13 Connecting speakers 9 Connecting the AM antennas 15 Connecting the Bluetooth Wireless Audio Receiver 14 Connecting the FM antennas 15 Connecting the power cable 15 Connecting the Yamaha iPod universal dock 14 Connecting to CD player 13 Connecting to DVD recorder 13 Connecting to ... CH INPUT jacks 14 Connecting to unprocessed input signals .......... 26 Low-frequency effect level 34 ■M Manual preset tuning 28 MANUAL SETUP 31 Manual setup 31 Manual tuning 27 MAX VOL 34 Maximum volume 34 MEM.GUARD 35 Memory guard 35 MEMORY, front panel 3 MENU, remote ...


