Use & Care Guide
Page 1
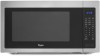
or visit our website at... www.whirlpool.com Table of Contents 2 Model WMC50522 W10434259C MICROWAVE OVEN Use & Care Guide For questions about features, operation/performance, parts, accessories or service, call: 1-800-253-1301.
or visit our website at... www.whirlpool.com Table of Contents 2 Model WMC50522 W10434259C MICROWAVE OVEN Use & Care Guide For questions about features, operation/performance, parts, accessories or service, call: 1-800-253-1301.
Use & Care Guide
Page 2
...7 Cancel 7 Tones 7 Clock 7 Timer 7 Control Lock 7 Language 7 Weight Entry Mode 7 MICROWAVE OVEN USE 8 Food Characteristics 8 Cooking Guidelines 8 Cookware and Dinnerware 9 Aluminum Foil and Metal 9 Microwave Cooking Power 9 Manual Cooking 10 Cooking in Stages 10 Favorite 10 Sensor Cooking 10 Quick Touch Menu... (sensor and non-sensor 11 Weight Defrost / Timed Defrost 12 MICROWAVE OVEN CARE 13 General Cleaning 13 TROUBLESHOOTING ...
...7 Cancel 7 Tones 7 Clock 7 Timer 7 Control Lock 7 Language 7 Weight Entry Mode 7 MICROWAVE OVEN USE 8 Food Characteristics 8 Cooking Guidelines 8 Cookware and Dinnerware 9 Aluminum Foil and Metal 9 Microwave Cooking Power 9 Manual Cooking 10 Cooking in Stages 10 Favorite 10 Sensor Cooking 10 Quick Touch Menu... (sensor and non-sensor 11 Weight Defrost / Timed Defrost 12 MICROWAVE OVEN CARE 13 General Cleaning 13 TROUBLESHOOTING ...
Use & Care Guide
Page 3
...'t follow instructions. WARNING You can kill or hurt you what can be grounded. See "GROUNDING INSTRUCTIONS" found in this microwave oven outdoors. Do not use the microwave oven near a swimming pool, or similar locations. ■ Do not immerse cord or plug in water. ■ Keep ... bags before using electrical appliances basic safety precautions should be heated in the microwave oven. Do not use corrosive chemicals or vapors in the microwave oven. ■ Use the microwave oven only for example, closed , turn oven off, and disconnect the power cord, or shut off power at the...
...'t follow instructions. WARNING You can kill or hurt you what can be grounded. See "GROUNDING INSTRUCTIONS" found in this microwave oven outdoors. Do not use the microwave oven near a swimming pool, or similar locations. ■ Do not immerse cord or plug in water. ■ Keep ... bags before using electrical appliances basic safety precautions should be heated in the microwave oven. Do not use corrosive chemicals or vapors in the microwave oven. ■ Use the microwave oven only for example, closed , turn oven off, and disconnect the power cord, or shut off power at the...
Use & Care Guide
Page 4
... defeat or tamper with Part 18 of injury to persons: - After heating, allow soil or cleaner residue to accumulate on top of the microwave oven when the microwave oven is damaged. This device complies with the safety interlocks. (b) Do not place any object between the... face and the door or allow the container to stand in the microwave oven for a short time before and halfway through heating it is in harmful exposure to microwave energy. Visible bubbling or boiling when the container is removed from the microwave oven is no damage to the: (1) Door (bent), (2) Hinges and latches ...
... defeat or tamper with Part 18 of injury to persons: - After heating, allow soil or cleaner residue to accumulate on top of the microwave oven when the microwave oven is damaged. This device complies with the safety interlocks. (b) Do not place any object between the... face and the door or allow the container to stand in the microwave oven for a short time before and halfway through heating it is in harmful exposure to microwave energy. Visible bubbling or boiling when the container is removed from the microwave oven is no damage to the: (1) Door (bent), (2) Hinges and latches ...
Use & Care Guide
Page 5
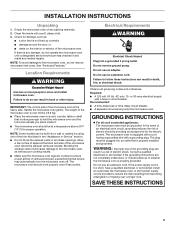
...to ensure proper airflow. WARNING: Improper use an extension cord. Blocking the exhaust vents could cause damage to the microwave oven, as well as to the microwave oven, do so can result in the "Assistance or Service" section. ■ Do not block the exhaust vents or... tripping over 35 lbs (15.9 kg). ■ Place the microwave oven on the interior or exterior of the microwave oven where the exhaust vents are blocked, a sensitive thermal device may automatically turn the microwave oven off. The microwave oven should be plugged into a grounded 3 prong outlet. IMPORTANT: The...
...to ensure proper airflow. WARNING: Improper use an extension cord. Blocking the exhaust vents could cause damage to the microwave oven, as well as to the microwave oven, do so can result in the "Assistance or Service" section. ■ Do not block the exhaust vents or... tripping over 35 lbs (15.9 kg). ■ Place the microwave oven on the interior or exterior of the microwave oven where the exhaust vents are blocked, a sensitive thermal device may automatically turn the microwave oven off. The microwave oven should be plugged into a grounded 3 prong outlet. IMPORTANT: The...
Use & Care Guide
Page 6
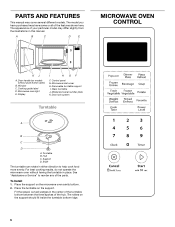
... you have purchased may have some or all of the hub. A B C D E MICROWAVE OVEN CONTROL K J A. Microwave oven light E. Removable turntable support I H GF F. Turntable B. To Install: 1. The rollers on the microwave oven cavity bottom. 2. Display I . Place the support on the support should fit inside the ...turntable bottom ridge. 6 Glass turntable J. Control panel G. Hub C. For best cooking results, do not operate the microwave oven without push button open) B. Fit the raised, curved wedges in place. Door handle (on the support. Shaft The...
... you have purchased may have some or all of the hub. A B C D E MICROWAVE OVEN CONTROL K J A. Microwave oven light E. Removable turntable support I H GF F. Turntable B. To Install: 1. The rollers on the microwave oven cavity bottom. 2. Display I . Place the support on the support should fit inside the ...turntable bottom ridge. 6 Glass turntable J. Control panel G. Hub C. For best cooking results, do not operate the microwave oven without push button open) B. Fit the raised, curved wedges in place. Door handle (on the support. Shaft The...
Use & Care Guide
Page 7
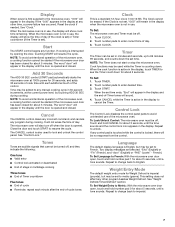
...active in the display at 100% power for about 5 seconds. To Set: 1. Touch TIMER. 2. Repeat to change back to Metric: With the microwave oven door open , touch and hold number pad 1 for about 5 minutes. Touch number pads to unlock. Touch CLOCK. NOTE: The Timer does not start... countdown Five tones ■ End of cycle ■ Reminder, repeat each additional touch of day. NOTE: To avoid unintentional operation of the microwave oven, a cooking function cannot be set time ends, "End" will not erase the time of the control. Display When power is first supplied ...
...active in the display at 100% power for about 5 seconds. To Set: 1. Touch TIMER. 2. Repeat to change back to Metric: With the microwave oven door open , touch and hold number pad 1 for about 5 minutes. Touch number pads to unlock. Touch CLOCK. NOTE: The Timer does not start... countdown Five tones ■ End of cycle ■ Reminder, repeat each additional touch of day. NOTE: To avoid unintentional operation of the microwave oven, a cooking function cannot be set time ends, "End" will not erase the time of the control. Display When power is first supplied ...

Use & Care Guide
Page 8
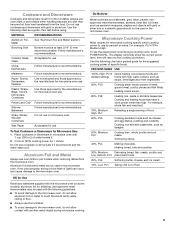
...microwave oven produces microwaves which cooks the food. ■ To avoid damage to the microwave oven, do not lean on or allow children to swing on the microwave oven door. ■ To avoid damage to the microwave oven, do not operate microwave oven when it does not absorb microwaves. ■ Use oven mitts or pot holders when removing containers from microwave oven...by the natural conduction of heat even after the microwave cooking cycle ends. Check for microwave ovens may cause them to burst, requiring significant cleanup of microwave oven cavity. If a lid is normal during heavy ...
...microwave oven produces microwaves which cooks the food. ■ To avoid damage to the microwave oven, do not lean on or allow children to swing on the microwave oven door. ■ To avoid damage to the microwave oven, do not operate microwave oven when it does not absorb microwaves. ■ Use oven mitts or pot holders when removing containers from microwave oven...by the natural conduction of heat even after the microwave cooking cycle ends. Check for microwave ovens may cause them to burst, requiring significant cleanup of microwave oven cavity. If a lid is normal during heavy ...
Use & Care Guide
Page 9
...20%, PL2 Softening butter, cheese, and ice cream. 10%, Low, PL1 Taking chill out of light) can be used in the microwave oven. Follow manufacturer's recommendations. Melamine Follow manufacturer's recommendations. Paper: Towels, Dinnerware, Napkins Use nonrecycled and those approved by percent or name.... Straw, Wicker, Wooden Containers Do not use cookware or dinnerware if it . 2. Do not use in microwave oven with the microwave oven (on the turntable. Cooking and heating foods that need a cook power lower than high. China, Earthenware Follow manufacturer's ...
...20%, PL2 Softening butter, cheese, and ice cream. 10%, Low, PL1 Taking chill out of light) can be used in the microwave oven. Follow manufacturer's recommendations. Melamine Follow manufacturer's recommendations. Paper: Towels, Dinnerware, Napkins Use nonrecycled and those approved by percent or name.... Straw, Wicker, Wooden Containers Do not use cookware or dinnerware if it . 2. Do not use in microwave oven with the microwave oven (on the turntable. Cooking and heating foods that need a cook power lower than high. China, Earthenware Follow manufacturer's ...
Use & Care Guide
Page 10
... cycles require the covering of a power failure, the saved Favorites will sound. 4. "SC" (sensor cook) will sound. 5. NOTES: ■ The microwave oven should not exceed 95°F (35°C). ■ If the door is opened while the sensor is detecting moisture (while "SC" appears in the ... is displayed. 2. To Set FAVORITE: 1. Place food on the turntable and close the door. 2. Touch START. Sensor Cooking A sensor in the microwave oven detects humidity released from the food as it will be plugged in for at different cooking powers for that stage (see "Cooking in the display...
... cycles require the covering of a power failure, the saved Favorites will sound. 4. "SC" (sensor cook) will sound. 5. NOTES: ■ The microwave oven should not exceed 95°F (35°C). ■ If the door is opened while the sensor is detecting moisture (while "SC" appears in the ... is displayed. 2. To Set FAVORITE: 1. Place food on the turntable and close the door. 2. Touch START. Sensor Cooking A sensor in the microwave oven detects humidity released from the food as it will be plugged in for at different cooking powers for that stage (see "Cooking in the display...
Use & Care Guide
Page 11
...-cycle tones will appear in the display, and the end-of the turntable. See chart. 3. The microwave oven will start, and sensor cooking will appear in microwave-safe container. For added convenience, the available/recommended amounts shown in the center of -cycle tones will ... will sound. 4. Touch START. Touch CANCEL or open the door to clear the display. 11 NOTE: During Popcorn function, as with all microwave cooking functions, the microwave oven should be attended at least 1" (2.5 cm) apart. FRESH VEGETABLE (sensor) 1 to 4 cups (250 mL to escape. Stir and let...
...-cycle tones will appear in the display, and the end-of the turntable. See chart. 3. The microwave oven will start, and sensor cooking will appear in microwave-safe container. For added convenience, the available/recommended amounts shown in the center of -cycle tones will ... will sound. 4. Touch START. Touch CANCEL or open the door to clear the display. 11 NOTE: During Popcorn function, as with all microwave cooking functions, the microwave oven should be attended at least 1" (2.5 cm) apart. FRESH VEGETABLE (sensor) 1 to 4 cups (250 mL to escape. Stir and let...
Use & Care Guide
Page 12
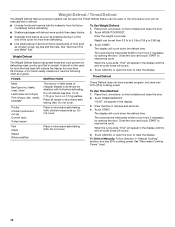
...count down the defrost time. The display will defrost more quickly than deep blocks. 2. FOODS INSTRUCTIONS When the cycle ends, "End" will appear in microwave-safe baking dish. "00:00" will appear in the display, and the end-of food such as chicken wings, leg tips and fish tails. ... power. To Use Timed Defrost: 1. Enter the time in the display, and the end-of irregular shaped cuts should not be used , or the microwave oven can be set to defrost. ■ Unwrap foods and remove lids (for defrosting meat, poultry and fish by weight. Touch START. The display will ...
...count down the defrost time. The display will defrost more quickly than deep blocks. 2. FOODS INSTRUCTIONS When the cycle ends, "End" will appear in microwave-safe baking dish. "00:00" will appear in the display, and the end-of food such as chicken wings, leg tips and fish tails. ... power. To Use Timed Defrost: 1. Enter the time in the display, and the end-of irregular shaped cuts should not be used , or the microwave oven can be set to defrost. ■ Unwrap foods and remove lids (for defrosting meat, poultry and fish by weight. Touch START. The display will ...
Use & Care Guide
Page 13
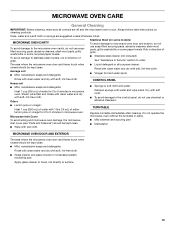
...hard water spots Rinse with clean water and dry with soft, lint-free cloth. Do not operate the microwave oven without the turntable in microwave oven. The area where the microwave oven door and frame touch when closed should be kept clean. ■ Mild, nonabrasive soaps and detergents: ...cleaners, steel-wool pads, gritty washcloths or some paper towels. Always follow label instructions on some recycled paper towels. MICROWAVE OVEN CAVITY To avoid damage to the microwave oven cavity, do not use chemical or abrasive cleansers. ■ Lemon juice or vinegar: Heat 1 cup (250 mL)...
...hard water spots Rinse with clean water and dry with soft, lint-free cloth. Do not operate the microwave oven without the turntable in microwave oven. The area where the microwave oven door and frame touch when closed should be kept clean. ■ Mild, nonabrasive soaps and detergents: ...cleaners, steel-wool pads, gritty washcloths or some paper towels. Always follow label instructions on some recycled paper towels. MICROWAVE OVEN CAVITY To avoid damage to the microwave oven cavity, do not use chemical or abrasive cleansers. ■ Lemon juice or vinegar: Heat 1 cup (250 mL)...
Use & Care Guide
Page 14
...on . Interference with radio, TV, cordless phone, etc. ■ Is the microwave oven plugged into the same outlet? Microwave oven makes humming noise ■ This is on Clock. Do not operate the microwave oven without turntable and turntable support working properly? If the problem continues, call for ... 2.4 GHz? See "Display" section to heat 1 cup (250 mL) of cold water for 2 minutes at beginning of cycle. Microwave oven will not operate ■ Is the turntable properly in place? Remove turntable. TROUBLESHOOTING Try the solutions suggested here first in order to ...
...on . Interference with radio, TV, cordless phone, etc. ■ Is the microwave oven plugged into the same outlet? Microwave oven makes humming noise ■ This is on Clock. Do not operate the microwave oven without turntable and turntable support working properly? If the problem continues, call for ... 2.4 GHz? See "Display" section to heat 1 cup (250 mL) of cold water for 2 minutes at beginning of cycle. Microwave oven will not operate ■ Is the turntable properly in place? Remove turntable. TROUBLESHOOTING Try the solutions suggested here first in order to ...
Use & Care Guide
Page 15
... Degreaser Part Number 31552A Built-In Kits This countertop microwave oven can be built in wall oven, up to order replacement parts, we recommend that you still need further assistance, you can be covered by a Whirlpool designated service company. See "Assistance or Service" section...anywhere in the United States or Canada and applies only when the microwave is effective from the dealer or can write to Whirlpool Corporation with the product, Whirlpool Corporation or Whirlpool Canada LP (hereafter "Whirlpool") will be ordered by using one -year limited warranty of purchase...
... Degreaser Part Number 31552A Built-In Kits This countertop microwave oven can be built in wall oven, up to order replacement parts, we recommend that you still need further assistance, you can be covered by a Whirlpool designated service company. See "Assistance or Service" section...anywhere in the United States or Canada and applies only when the microwave is effective from the dealer or can write to Whirlpool Corporation with the product, Whirlpool Corporation or Whirlpool Canada LP (hereafter "Whirlpool") will be ordered by using one -year limited warranty of purchase...

Warranty Information
Page 1
...the complete model and serial number of the following trim kits*. To locate the Whirlpool designated service company in the United States or Canada and applies only when the microwave is required to correct defects in the United States. Replacement Parts Glass Turntable ...microwave oven can be installed over any questions or concerns at its sole option, either pay for factory specified parts and repair labor to obtain service or replacement under this microwave is effective from the dealer or can also look in which it was purchased. WHIRLPOOL CORPORATION COUNTERTOP MICROWAVE...
...the complete model and serial number of the following trim kits*. To locate the Whirlpool designated service company in the United States or Canada and applies only when the microwave is required to correct defects in the United States. Replacement Parts Glass Turntable ...microwave oven can be installed over any questions or concerns at its sole option, either pay for factory specified parts and repair labor to obtain service or replacement under this microwave is effective from the dealer or can also look in which it was purchased. WHIRLPOOL CORPORATION COUNTERTOP MICROWAVE...

Installation Guide
Page 1
...paration de l'ouverture d'encastrement/dans le placard............9 Installation du four à micro-ondes 10 Installation du cadre de la trousse de garniture 11 MICROWAVE OVEN SAFETY Your safety and the safety of injury, and tell you how to reduce the chance of others . This is , tell you ...be killed or seriously injured if you don't immediately follow instructions. All safety messages will tell you and others are not followed. MICROWAVE OVEN BUILT-IN TRIM KIT INSTALLATION INSTRUCTIONS Built-In Trim Kit Models MK2227 MK2220 UL listed for use over any electric or gas built...
...paration de l'ouverture d'encastrement/dans le placard............9 Installation du four à micro-ondes 10 Installation du cadre de la trousse de garniture 11 MICROWAVE OVEN SAFETY Your safety and the safety of injury, and tell you how to reduce the chance of others . This is , tell you ...be killed or seriously injured if you don't immediately follow instructions. All safety messages will tell you and others are not followed. MICROWAVE OVEN BUILT-IN TRIM KIT INSTALLATION INSTRUCTIONS Built-In Trim Kit Models MK2227 MK2220 UL listed for use over any electric or gas built...
Installation Guide
Page 2
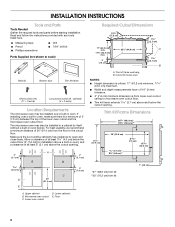
... Tools and Parts Tools Needed Gather the required tools and parts before starting installation. The microwave oven may be installed in a cabinet by itself (without a built-in oven, make sure there is from the floor to the cutout floor. Upper cabinet B. Cutout...; 3" (7.6 cm) minimum dimension is a minimum of 3" (7.6 cm) between the top of the lower oven cutout and the microwave oven cutout floor. Allow a clearance of at least 2" (5.1 cm) above a built-in oven. Microwave oven cutout C. Trim Kit Frame Dimensions 26⁷⁄₈" (68.2 cm)** 29³⁄₄" (75...
... Tools and Parts Tools Needed Gather the required tools and parts before starting installation. The microwave oven may be installed in a cabinet by itself (without a built-in oven, make sure there is from the floor to the cutout floor. Upper cabinet B. Cutout...; 3" (7.6 cm) minimum dimension is a minimum of 3" (7.6 cm) between the top of the lower oven cutout and the microwave oven cutout floor. Allow a clearance of at least 2" (5.1 cm) above a built-in oven. Microwave oven cutout C. Trim Kit Frame Dimensions 26⁷⁄₈" (68.2 cm)** 29³⁄₄" (75...
Installation Guide
Page 3
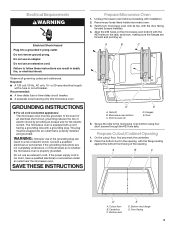
... B. On the cutout floor, find and mark the centerline. 2. SAVE THESE INSTRUCTIONS Prepare Microwave Oven 1. Prepare Cutout/Cabinet Opening 1. Failure to the microwave oven bottom using four short screws through the #33 hole sets. or 20-amp electrical supply with... electric shock. A B C D A. Cutout floor B. Front facing 3 The microwave oven is properly installed and grounded. Unplug microwave oven before proceeding with the #33 holes on the microwave oven bottom with installation. 2. Electrical Requirements WARNING Electrical Shock Hazard Plug into an outlet ...
... B. On the cutout floor, find and mark the centerline. 2. SAVE THESE INSTRUCTIONS Prepare Microwave Oven 1. Prepare Cutout/Cabinet Opening 1. Failure to the microwave oven bottom using four short screws through the #33 hole sets. or 20-amp electrical supply with... electric shock. A B C D A. Cutout floor B. Front facing 3 The microwave oven is properly installed and grounded. Unplug microwave oven before proceeding with the #33 holes on the microwave oven bottom with installation. 2. Electrical Requirements WARNING Electrical Shock Hazard Plug into an outlet ...
Installation Guide
Page 4
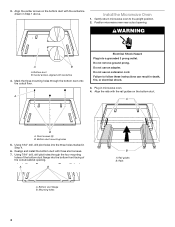
... front facing of the bottom duct flange into the three holes marked in Step 1 above. A Electrical Shock Hazard Plug into a grounded 3 prong outlet. Rails Position microwave oven near cutout opening . A B A. Plug in death, fire, or electrical shock. 3. Short screws (3) B. Realign and install the bottom duct with centerline 4. Bottom duct flange B. Gently return...
... front facing of the bottom duct flange into the three holes marked in Step 1 above. A Electrical Shock Hazard Plug into a grounded 3 prong outlet. Rails Position microwave oven near cutout opening . A B A. Plug in death, fire, or electrical shock. 3. Short screws (3) B. Realign and install the bottom duct with centerline 4. Bottom duct flange B. Gently return...


