Whirlpool WML75011H Support and Manuals
Get Help and Manuals for this Whirlpool item
View All Support Options Below
Free Whirlpool WML75011H manuals!
Problems with Whirlpool WML75011H?
Ask a Question
Free Whirlpool WML75011H manuals!
Problems with Whirlpool WML75011H?
Ask a Question
Popular Whirlpool WML75011H Manual Pages
Installation Instructions - Page 1

The appearance of others . This is , tell you how to Wall 9 Install the Microwave Oven 9 Complete Installation 10 VENTING DESIGN SPECIFICATIONS 11 ASSISTANCE 12 Replacement Parts 12
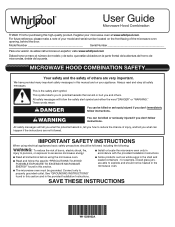
MICROWAVE HOOD COMBINATION SAFETY
Your safety and the safety of your appliance.
MICROWAVE HOOD COMBINATION INSTALLATION INSTRUCTIONS
This product is suitable for use above electric or gas cooking ...
Installation Instructions - Page 2

...Support for wood studs. The location must be combined.
2
Washers (2)
D. 3/16" (4.8 mm) toggle nuts (2)
E. 1/4" x 2" (0.6 cm x 5.1 cm) lag screws (2)
F. Read and follow the instructions...Specifications" section. For Roof Venting Installation Only:
■■ If you are for weight of wall structures, be installed...see the "Replacement Parts" section. See the "Installation Dimensions" ...
Installation Instructions - Page 8

... C. Drill 3/16" (5 mm) hole(s) into the tab cutout. Front edge of the wall. Installation for Wall Stud at the hole(s) marked in Step 3 of the opening. Mark centerline on a ...3" (7.6 cm) round-head bolt with toggle nuts; Refer to the wall at Both End Holes (Figure 4)
1. Set mounting plate aside, cut the venting area out from the bottom of the upper cabinet using a minimum of "Mark ...
Installation Instructions - Page 9

...door or door handle while the microwave oven is level. 7. For fast wall and roof vent installation, see the quick reference guide on each 1/4-20 x 3" (7.6 cm) flat-head bolt
and place inside upper cabinet near ... plate on the wall. 2. Position mounting plate on the wall. 4. Start toggle nuts on support tabs at One End Hole" in the "Drill Holes in place. Check alignment of mounting plate...
Installation Instructions - Page 10

... make sure the bolts thread in properly. Replace the fuse or reset the circuit breaker. Adjust... a cook time of mounting plate and set aside on a covered surface.
8. If...installer to follow these instructions can result in place, insert bolts through 6.
10. Install filters. Plug microwave oven into a grounded 3 prong outlet. WARNING
A. Save Installation Instructions for troubleshooting...
Installation Instructions - Page 12

...parts A through G in "Parts Supplied" in the User Guide.
In addition, a rectangular 3" (7.6 cm) extension vent between the damper assembly and rectangular to be replaced, call , you need the microwave oven model... User Guide.
To calculate the length of the vent system including straight vent, elbow(s), transitions, and wall or roof caps must be installed to ...service center.
Owners Manual - Page 1
... en la parte frontal de la abertura del horno de microondas, detrás de la puerta. These words mean:
DANGER
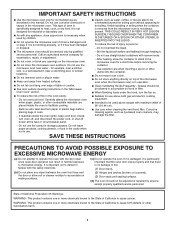
You can kill or hurt you don't immediately follow the specific "PRECAUTIONS TO AVOID POSSIBLE EXPOSURE TO EXCESSIVE MICROWAVE ENERGY" found in this section. IMPORTANT SAFETY INSTRUCTIONS
When using the microwave oven. I Install or...
Owners Manual - Page 2
...cavity for storage purposes.
I The microwave oven should not be adjusted or repaired by qualified service personnel.
I Do not immerse cord or plug in the microwave oven. ...manual. Do not overheat the liquid. I Do not operate the microwave oven if it has a damaged cord or plug, if it is not working properly, or if it is specifically designed to persons:
- IMPORTANT SAFETY INSTRUCTIONS...
Owners Manual - Page 3
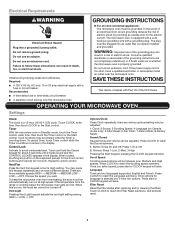
...replacing and/or cleaning the filters. Do not use an extension cord. The microwave oven is equipped with a cord having a grounding wire with Part 18 of electric shock by providing an escape wire for the hood control buttons and Cancel) will save .
Repeat to follow these instructions... all governing codes and ordinances.
Touch and hold the Cancel keypad for High setting. Vent Fan...
Owners Manual - Page 4
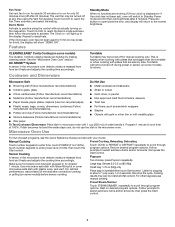
...models) functions. Features
Standby Mode
When no key press for 5min), the display will switch to scroll through program options. If dish becomes hot and the water stays cool, do not use manual...list of preset programs, see the Quick Reference Guide provided with 1 cup (250 mL) of cook... reach the Fan Timer submenu and select the setting. Sensor Cooking
A sensor in the microwave oven...
Owners Manual - Page 5
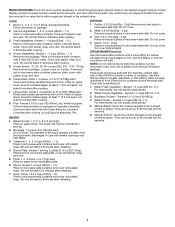
... 1 - 4 cups (250mL - 1 L) Remove from package. Steam Potato - Quick: 1.0 lb - 454g Remove wrap and place in microwave-safe container. Senses 1-4 cups (250 mL-1 L).
3. Manual Steam: Touch the number keypads to set up to steam. Canned Vegetables: 1, 2, 3, 4 cups (250mL - 1 L) Place in microwave-safe dish. Dinner Plate: Senses 1 serving (1 plate), 8-16 oz (227-454g): Place...
Owners Manual - Page 6
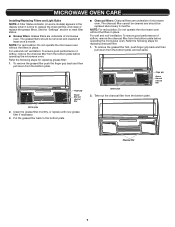
... charcoal filter from the bottom plate, and set aside. Bottom plate
Finger grip
Grease filter and charcoal filter
2. NOTE: For recirculation: Do not operate the microwave oven without the filters in place. MICROWAVE OVEN CARE
Installing/Replacing Filters and Light Bulbs NOTE: A Filter Status indicator (on some models) appears in the display when it...
Owners Manual - Page 8

...LED, and snap it into the hook. Replacement Parts
Cleaning Supplies
■■ Turntable
■■ Heavy-duty degreaser
■■ Turntable support and rollers
■■ Affresh®...left vent top cover Top front of micowave oven
ACCESSORIES
Following is a list of available parts and supplies which may be purchased separately.
Screw Second left top cover.
3. Hook
...
Owners Manual - Page 9
...9632; This is normal. Call for service.
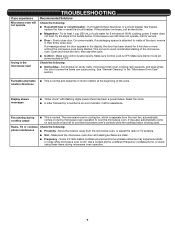
■■ Door - Fan ...TROUBLESHOOTING
Recommended Solutions
Check the following :
■■ Soil buildup - If the problem...supports, and area where the door touches the frame can cause arcing. Reset the clock. ■■ A letter followed by a number is set properly. Make sure control is an error indicator. Soil buildup on some models...
Owners Manual - Page 10
... SHORTEST PERIOD ALLOWED BY LAW. PROOF OF PURCHASE IS REQUIRED TO OBTAIN WARRANTY SERVICE. The cost of original consumer purchase. Pick-up or delivery. In-home instruction on the duration of implied warranties of household electrical or plumbing (i.e. Specified Replacement Parts and repair 4. Please take a few minutes to use of purchase, 1. your product. Some states...
Whirlpool WML75011H Reviews
We have not received any reviews for Whirlpool yet.