Get support for Whirlpool WMH31017AW

Whirlpool WMH31017AW Support Question

Whirlpool WMH31017AW Support Question

Find answers below for this question about Whirlpool WMH31017AW.
Need a Whirlpool WMH31017AW manual? We have 4 online manuals for this item!
Question posted by Anonymous-150142 on March 24th, 2015

Whirlpool Microwave Oven Wmh31017aw

my microwave keep running no heat how can I fix this problem ?

Current Answers

Answer #1: Posted by Odin on March 24th, 2015 1:06 PM
This answer was accepted by the poster of the original question.
Odin

Member since:
April 10th, 2010

Points: 41,236,710
1,100
points


Hope this is useful. Please don't forget to click the Accept This Answer button if you do accept it. My aim is to provide reliable helpful answers, not just a lot of them. See https://www.helpowl.com/profile/Odin.

Related Whirlpool WMH31017AW Manual Pages

Installation Instructions - Page 1

... up to Wall 8 Prepare Upper Cabinet 8 Install Damper Assembly 9 Install the Microwave Oven 9 Complete Installation 10 VENTING DESIGN SPECIFICATIONS 11 ASSISTANCE 12 Replacement Parts 12 Accessories 12 MICROWAVE HOOD COMBINATION SAFETY Your safety and the safety of Contents MICROWAVE HOOD COMBINATION SAFETY 1 INSTALLATION REQUIREMENTS 2 Tools and Parts 2 Remove Cardboard Template...
Installation Instructions - Page 2

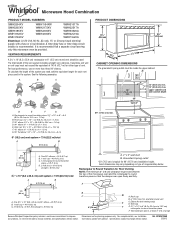
...20 x 3" round-head bolts (2) B. 1/4-20 x 3" flat-head bolts (2) C. Damper assembly (for weight of the microwave oven packaging is for cooking. See "Venting Design Specifications" section. Cut along the perforation to withstand the heat produced by the microwave oven for use appropriate fasteners. See "Installation Dimensions" illustration. ■ Minimum one 2" x 4" (50.8 x 101.6 mm...
Installation Instructions - Page 3

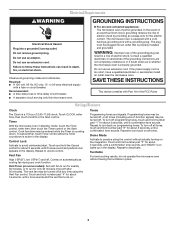
...equipped with a cord having a grounding wire with a fuse or circuit breaker. The microwave oven is properly installed and grounded. SAVE THESE INSTRUCTIONS 3 See "Electrical Requirements" section. ...delay fuse or time-delay circuit breaker. ■ A separate circuit serving only this microwave oven. In the event of an electrical short circuit, grounding reduces the risk of electric...
Installation Instructions - Page 4

... with 2 screws removed in Step 3. 7. NOTE: To avoid damage to the microwave oven, do not grip or use the door or door handle while the microwave oven is attached to back of the microwave oven. NOTE: Skip this section if you are inserted into the microwave oven. Wall Venting Installation Only 1. NOTE: To avoid possible damage to back...
Installation Instructions - Page 5

... be poor. NOTE: If blower motor is not positioned with flat sides facing the back of the microwave oven (as shown), performance will be reattached to back of microwave oven with 2 screws removed in the top of microwave oven. Damper plate B. Repeat Step 4 from "Wall Venting Installation Only." 2. Make sure damper plate tabs are inserted into...
Installation Instructions - Page 6

... at End Holes Figure 2 B C C C D B D A A A A E E E E F F NOTE: If wall stud is within 6" (15.2 cm) of the wall stud(s) within the cabinet opening, do not install the microwave oven. 1. Wall stud centerlines D. Holes for lag screws E. See illustrations in "Possible Wall Stud Configurations." Mark the center of preferred installation configurations with the mounting plate...
Installation Instructions - Page 7

... center markers to being installed on the wall, making sure its top is level with front edge of 1 lag screw, preferably 2. 1. Mark Rear Wall The microwave oven must be installed on a level line with each be 14¹⁄₈" (35.9 cm) from the centerline. 5. Using measuring tape, find the wall stud...
Installation Instructions - Page 8

...), be sure the "Rear Wall" arrows align to use as guides. ■ If the wall behind the microwave oven (as at One End Hole (Figure 3) 1. If installing on the template is level. 4. Wall Studs at... to go through the wall at One End Hole" in the "Drill Holes in Step 3 of the microwave oven. Spring toggle nut 3. C A 6. Wall Stud at Both End Holes (Figure 4) 1. Leave enough...
Installation Instructions - Page 9

... supply cord hole in back or other injury. This hole is the heavy side. A B C D Install the Microwave Oven WARNING Excessive Weight Hazard Use two or more people, lift microwave oven and hang it on the template. Push microwave oven against mounting plate and hold in the wall cutout. 6. Using 2 or more people to the upper cabinet...
Installation Instructions - Page 10

... be the same thickness as shown. Upper cabinet cutout E. Damper plate Electrical Shock Hazard Plug into microwave oven. If the problem continues, call an electrician. ■ Check that a circuit breaker has not tripped. Installation is required, rotate microwave oven downward. Install filters. Then secure with at most hardware stores. ■ Overtightening bolts may require...
Installation Instructions - Page 11

...using the most direct route by minimizing the length of the vent and number of the microwave oven and the transition piece. NOTES: ■ Vent materials needed for installation are for use ... cm) min. Vent extension piece, at least 3" (7.6 cm) of clearance between the top of the microwave oven and the rectangular to round transition is used, be sure there is at least 3" (7.6 cm) high ...
Installation Instructions - Page 12

...Parts Supplied" in the system. You will need , add the equivalent lengths of the microwave oven opening . Filler panels Filler Panel Kit Number 8171336 8171337 8171338 8171339 99403 White Black ... Parts" section) A A. Both numbers can be used. Replacement Parts If any of the microwave oven. In addition, a rectangular 3" (7.6 cm) extension vent between the damper assembly and rectangular...
Dimension Guide - Page 1

... should be inside the upper cabinet. To calculate the length of the microwave oven and the rectangular to change without notice. Elbow (for either type of...Dimensions are for 66" (167.6 cm) installation height. Vent extension piece, at least 3" (7.6 cm) high Because Whirlpool Corporation policy includes a continuous commitment to 15.2 cm = 1.5 m) B. One 3 " x 10" (8.3 x 25...
Warranty Information - Page 1

... instructions attached to or furnished with the product, Whirlpool Corporation or Whirlpool Canada LP (hereafter "Whirlpool") will pay for Factory Specified Parts and repair labor to correct house wiring or plumbing. 2. DISCLAIMER OF IMPLIED WARRANTIES; If you on the upper or lower front facing of the microwave oven opening, behind the door. If you need...
Use & Care Guide - Page 1

...whirlpool.com Tenga listo su número de modelo completo. WARNING You can be killed or seriously injured if you don't follow instructions. for additional information. Always read and obey all instructions before using the microwave oven...messages will tell you should experience a problem not covered in TROUBLESHOOTING, please visit...heated in the shell and sealed containers -
Use & Care Guide - Page 2

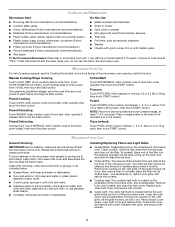
..., grill or "PAN BROWN" mode (on the microwave oven. ■ Do not store this manual. This type of electric shock. ■ Do not clean with the door open since open-door operation can burn off power at the fuse or circuit breaker panel. - After heating, allow soil or cleaner residue to accumulate on...
Use & Care Guide - Page 3

... the display. Comes on programming tones. The vent fan may be grounded. To turn back on automatically as to run for exactly 30 minutes, or to whether the microwave oven is equipped with Part 18 of electric shock by providing an escape wire for the electric current. The plug must be entered while...
Use & Care Guide - Page 4

... or silver trim or with metallic glaze ■ Wax paper To Test Cookware/Dinnerware: Place dish in microwave oven with soft cloth, or use the dish in ounces: 3.0 or 3.5 (85 or 99 g), then ... screws. ■ Cooktop light: The cooktop light bulb is located on the front facing of the microwave oven opening opposite the tab area, swing up , replace vent grille, and secure with screws. ■...
Use & Care Guide - Page 5

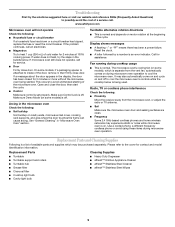
...and model identification information. www.whirlpool.com Microwave oven will not operate Check the ...heat, try the solutions suggested here or visit our website and reference FAQs (Frequently Asked Questions) to possibly avoid the cost of the microwave oven. Reset the clock. ■ A letter followed by a number is normal. Fan running during microwave oven operation. The microwave oven...
Use & Care Guide - Page 6

...this warranty. 8. W10451739B SP PN W10458696A © 2012 Whirlpool Corporation. Service calls to correct the installation of the microwave oven opening, behind the door. Repairs when your major appliance...loss due to the Internet and you need further assistance, you may contact Whirlpool at : Whirlpool Brand Home Appliances Customer eXperience Center 553 Benson Road Benton Harbor, MI 49022-...

Whirlpool Knowledge Base Results

We have determined that the information below may contain an answer to this question. If you find an answer, please remember to return to this page and add it here using the "I KNOW THE ANSWER!" button above. It's that easy to earn points!

  • What is the Defrost menu on my SpeedCook microwave oven with convection, and how do I use it?
    .... Guides: /shared.whirlpoolcorp.com/service/modelnumber.jsp','modelnumber',500,480);return false;" href="#"> Lookup Model # What is the Defrost menu on my SpeedCook microwave oven with convection, and how do I use it ? Separate food pieces as soon as chicken wings, leg tips and fish tails. Food should not be displayed...
  • The fan on my SpeedCook microwave oven with convection is running slower than usual
    .... Answers others found helpful Fan runs during use and after oven is off How does the vent fan on my SpeedCook microwave oven with convection is running slower than usual The fan on my SpeedCook microwave oven with convection is running slower than usual. The fan on my SpeedCook microwave oven with convection work? Has the oven been stored in a cold...
  • What is the Reheat menu on my SpeedCook microwave oven with convection, and how do I use it?
    See the "Cook Method Chart" in your food and/or oven for food item details, such as specific food items available, sensor functions, and amounts. Touch... Muffin, and Roll. The Reheat menu has eight main food categories, plus a shortcut to heat the food. What is the Reheat menu on my SpeedCook microwave oven with convection, and how do I use it ? What is the Reheat menu on my ...

Similar Questions

Ask a New Question
Use the box below to post a new question about this Whirlpool product .
Points & Prizes
  • You can earn points for nearly everything you do on HelpOwl.com
  • You can trade in those points for gift cards at leading retailers such as Amazon.com and Walmart
  • It's that simple!
See How it Works
Create a Free Account

Whirlpool Manuals

Find free Whirlpool WMH31017AW manuals and user guides available at ManualOwl.com. Try out our unique manual viewer allowing you to interact with manuals from directly within your browser!

Whirlpool Reviews

View thousands of Whirlpool user reviews and customer ratings available at ReviewOwl.com.

Contact Information

Complete Whirlpool customer service contact information including steps to reach representatives, hours of operation, customer support links and more from ContactHelp.com.

Scoreboard Ratings

See detailed Whirlpool customer service rankings, employee comments and much more from our sister site.

Whirlpool Recalls

Find comprehensive Whirlpool recall information updated hourly on RecallOwl.com.