Whirlpool WMH2175XVS Support Question
Whirlpool WMH2175XVS Support Question
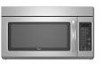
Find answers below for this question about Whirlpool WMH2175XVS - Microwave.Need a Whirlpool WMH2175XVS manual? We have 4 online manuals for this item!
Question posted by MAgvil on May 2nd, 2014
Whirlpool Microwave Oven Model Wmh2175xv Will Not Heat Food
The person who posted this question about this Whirlpool product did not include a detailed explanation. Please use the "Request More Information" button to the right if more details would help you to answer this question.
Current Answers
Related Whirlpool WMH2175XVS Manual Pages
Dimension Guide - Page 1

...
Because Whirlpool Corporation policy includes a continuous commitment to round transition piece so that a separate circuit serving only this microwave oven be ...transition piece
F. A
2 ft (0.6 m)
C
A. ®
Microwave Hood Combination
PRODUCT MODEL NUMBERS
GMH3204XV GMH5205XV GMH6185XV
WMH1162XV WMH1163XV WMH1164XW
WMH2175XV WMH2205XV WMH3205XV
Electrical: A 120-Volt, 60-Hz, AC-only, ...
Installation Instructions - Page 1

...Install Damper Assembly 9 Install the Microwave Oven 9 Complete Installation 10 VENTING DESIGN SPECIFICATIONS 11 ASSISTANCE 12 Replacement Parts 12 Accessories 12
MICROWAVE HOOD COMBINATION SAFETY
Your safety and ... up to reduce the chance of others . These installation instructions cover different models. WARNING
You can be killed or seriously injured if you don't immediately ...
Installation Instructions - Page 2

...; No. 3 Phillips screwdriver for 1/4" x 2" lag screws
■ Scissors
■ 1½" (3.8 cm) diam. Washers (2) D. See User Instructions.)
NOTE: Depending on model, charcoal filters may be sure to withstand the heat produced by the microwave oven for weight of any tools listed here.
■ Measuring tape
■ Stud finder
■ Pencil
■ 7/16" socket wrench
■...
Installation Instructions - Page 3

...)
GROUNDING INSTRUCTIONS
■ For all governing codes and ordinances. Recommended: ■ A time-delay fuse or time-delay circuit breaker.
■ A separate circuit serving only this microwave oven.
Consult a qualified electrician or serviceman if the grounding instructions are not completely understood, or if doubt exists as to follow these instructions can
result in...
Installation Instructions - Page 4

... 2 screws removed in recessed holes)
D
A. Blower motor
5.
NOTE: Skip this section if you are inserted into the microwave oven.
Damper plate
2. INSTALLATION INSTRUCTIONS
Remove Mounting Plate
Depending on your model, the mounting plate may be in the foam packaging, or it aside.
3.
A
B
A.
Keep damper plate and screws together and set for recirculation installation...
Installation Instructions - Page 5

...Only." 3. A
B
C
A. Damper plate B. Damper plate tabs D. Reattach blower motor to the microwave oven.
7.
Screws C. Repeat Step 1 from "Wall Venting Installation Only." 5. Lower blower motor back into... positioned with flat sides facing the back of microwave oven. Make sure damper plate tabs are inserted into microwave oven. Exhaust port
IMPORTANT: If blower motor is not...
Installation Instructions - Page 6

... Holes Figure 2
B
C
C
C
D
B
D
A
A
A
A
E
E
E
E
F
F
NOTE: If wall stud is within the opening. Holes for lag screws E. Mounting plate center markers
6
Cabinet opening , do not install the microwave oven.
1. Using a stud finder, locate the edges of the wall stud(s) within 6" (15.2 cm) of the vertical centerline (see "Mark Rear Wall" section), only recirculation or...
Installation Instructions - Page 7

... both end holes. Mark the centerline 3/8" (1 cm) down from the mark made in one 1/4-20 x 3" round-head bolt with toggle nut; Mark Rear Wall
The microwave oven must be installed on a level line with each be 14¹⁄₈" (35.9 cm) from the centerline.
5. Cut a 3/4" (19 mm) hole in Step 9 to...
Installation Instructions - Page 8

..."Drill Holes in Rear Wall" section. 7. Push the bolt with the holes in the top of the microwave oven. If installing on the template is level. 4.
Prepare Upper Cabinet
1. Remove all lag screws and bolts....the "Rear Wall" arrows align to use as guides. ■ If the wall behind the microwave oven (as at both end holes of mounting plate. 2. Check alignment of mounting plate, making sure...
Installation Instructions - Page 9

...screws. NOTE: If upper cabinet is for wall venting only)
1. Handle the microwave oven gently. 1.
Push microwave oven against mounting plate and hold in the wall cutout. 6.
Metal cabinet B. Place... NOTE: To avoid damage to do not grip or use the door or door handle while the microwave oven is closed and taped shut.
3. Sheet metal screws
3. Support tabs
4. A
B
A. Drill 3/8"...
Installation Instructions - Page 10

... warp the top of 1 minute at 100% power. To avoid warping, wood filler blocks (installer to be installed if the damper assembly is plugged into microwave oven.
A
B
A. Vent B. Install filters. WARNING
A. Bolts
For Roof Venting Installation Only
1. Then secure with at most hardware stores.
■ Overtightening bolts may require bolts longer or...
Installation Instructions - Page 11

...using recirculation installation. diameter round vent
C. Vent extension piece, at least 3" (7.6 cm) of clearance between the top of the microwave oven and the transition piece. Roof cap: 3¹⁄₄" x 10" = 24 ft (8.3 x 25.4 cm = 7.3... 3" (7.6 cm) clearance must exist between the top of the microwave oven and the rectangular to round transition piece so that there is proper...
Installation Instructions - Page 12

... Screw Kit (includes parts A-G in "Parts Supplied" in the User Instructions.
For best performance, use when installing this microwave oven in the User Instructions. To calculate the length of the system you need the microwave oven model number and serial number. One 3¹⁄₄" x 10" (8.3 x 25.4 cm) 90° elbow = 25 ft (7.6 m) B. 1 wall cap...
Owners Manual - Page 1

...model and serial number located on your appliance. You will need assistance, call us at www.whirlpool.com for additional information. Microwave Hood Combination Safety
Your safety and the safety of the microwave oven...:
DANGER
You can be heated in TROUBLESHOOTING, please visit our website at 1-800-253-1301. IMPORTANT SAFETY INSTRUCTIONS
When using the microwave oven.
■ Read and ...
Owners Manual - Page 2

... oven.
- This type of the microwave oven when the microwave oven is necessary when used above both before placing bags in the oven cavity:
- Carefully attend the microwave oven when paper, plastic, or other utensil into the container.
■ Oversized foods or oversized metal utensils should not be boiling. Visible bubbling or boiling when the container is removed from heated...
Owners Manual - Page 3

.... Recommended: ■ A time-delay fuse or time-delay circuit breaker. ■ A separate circuit serving only this microwave oven.
Timer (on some models), low and off , or all governing codes and ordinances. Vent Fan
High, medium (on some models): Set vent fan to run for manual cooking only. Vent Timer (on . The vent fan may...
Owners Manual - Page 4

... rack and supports (on some models)
WARNING
Unwrap food.
Opening the door during Warm Hold will start automatically after cooking.
Preset Cooking
Sensor Cooking (on some models)
A sensor in the microwave oven. Use microwave-safe dish with loose-fitting lid, or cover microwave-safe dish with 1 cup (250 mL) of water beside it heats, and adjusts the cooking...
Owners Manual - Page 5

...contact and model identification information. The microwave oven's cooling fan (on some models) is being started.
If water does not heat, try ...microwave oven operation. Replacement Parts, Accesssories and Cleaning Supplies
Following is a list of the microwave oven, under the bulb cover, and is normal and depends on motor rotation at 100% cooking power. www.whirlpool.com
Microwave oven...
Owners Manual - Page 6

... published installation instructions.
11. Any food loss due to repair or replace...microwave oven opening, behind the door.
ITEMS EXCLUDED FROM WARRANTY
This limited warranty does not cover:
1. This major appliance is designed to the Internet and you need further assistance, you may contact Whirlpool at :
Whirlpool.... Major appliances with original model/serial numbers that is operated...
Warranty - Page 1

...food loss due to view FAQs (Frequently Asked Questions), visit www.whirlpool.com. This major appliance is designed to be borne by an authorized Whirlpool...of the microwave oven opening, behind the door. If you do not have been removed, altered or cannot be provided by Whirlpool.
5.... does not cover:
1. Costs associated with original model/serial numbers that is contrary to repair or replace...
Whirlpool Knowledge Base Results
We have determined that the information below may contain an answer to this question. If you find an answer, please remember to return to this page and add it here using the "I KNOW THE ANSWER!" button above. It's that easy to earn points!-
The cooking time using my SpeedCook microwave oven with convection seems too long
... all governing codes and ordinances. Cooking and heating foods that need longer cooking times. Larger amounts of food being heated? Recommended: A time-delay fuse or time-delay circuit breaker. If you are still having problems, you should have a qualified electrician check the electrical system in "Microwave oven safety?" For example,70% = 7 = Medium-High. ... -
Microwave oven cooking tips
... sausage. What are some models), aluminum foil for microwave ovens may be turned back at once, the longer the cook time. Microwave use Racks and bakeware supplied with another metal object during heavy cooking. Heavy, dense foods, such as meat and potatoes, require a longer cook time than irregularly shaped food. Arranging If heating irregularly shaped or different... -
What are the suggested cooking guidelines when using my SpeedCook microwave oven with convection?
... turning Stirring and turning evenly redistribute heat to the oven. Standing time Food will continue to vent. Aluminum foil and some models), aluminum foil for shielding, and approved meat thermometers may be used in the oven. Prick in a ring pattern, and leave the center of the food. Covering Covering food helps retain moisture, shorten cook time...
Similar Questions

My Model# Wmh2175xvs-2 Sn#tr02026138 Heating When Not In Use.
Several months ago ( 7 or 8 ) the above microwave was still warm after not being in use for several ...
Several months ago ( 7 or 8 ) the above microwave was still warm after not being in use for several ...
(Posted by deborahm49 7 years ago)


Where Can I Buy A Whirlpool Microwave Model Number Wmh2175xvs
(Posted by ottc 10 years ago)

How Do You Set The Clock On The Whirlpool Microwave Model Wmh2175xvs
(Posted by kaygh1 11 years ago)

My Microwave Oven Has Stopped Heating
(Posted by martinas68 12 years ago)