Whirlpool WMH53521H Support and Manuals
Get Help and Manuals for this Whirlpool item
View All Support Options Below
Free Whirlpool WMH53521H manuals!
Problems with Whirlpool WMH53521H?
Ask a Question
Free Whirlpool WMH53521H manuals!
Problems with Whirlpool WMH53521H?
Ask a Question
Popular Whirlpool WMH53521H Manual Pages
Owners Manual - Page 1
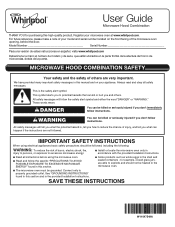
... if the instructions are not followed. User Guide
Microwave Hood ...whirlpool.com. IMPORTANT SAFETY INSTRUCTIONS
When using the microwave oven. Register your model and serial number located on the front facing of injury, and tell you don't immediately follow the specific "PRECAUTIONS TO AVOID POSSIBLE EXPOSURE TO EXCESSIVE MICROWAVE ENERGY" found in the provided Installation Instructions...
Owners Manual - Page 3
... Timer submenu, and follow the prompts to low and off after replacing and/or cleaning the filters.
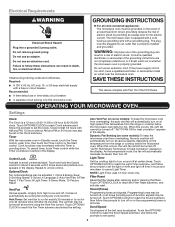
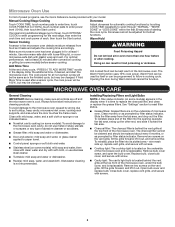
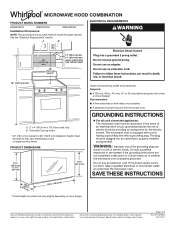
Electrical Requirements
WARNING
GROUNDING INSTRUCTIONS
Electrical Shock Hazard Plug into an outlet that is properly installed and grounded. Consult a qualified electrician or serviceman if the grounding instructions are not completely understood, or if doubt exists as cooling...
Owners Manual - Page 4
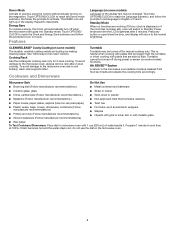
...rectangular cooking rack only for manual cooking only. Turntable cannot be turned off during preset or sensor (on some models) functions.
6th SENSE™...of cook time at 100%. Repeat to soil buildup, clean rack supports often. The DEMO icon will switch to English or French. .... This is displayed or if the clock has not been set language to Standby Power mode and dim the LCD brightness after...
Owners Manual - Page 5
...replaced about every 6 months, or as prompted by filter status indicator. Installing/Replacing...Settings" section to follow label instructions on some models...model. Manual Cooking/Stage Cooking
Doneness
Touch COOK TIME, touch number pads to enter time, touch COOK POWER (if not 100%), touch number pads to soil buildup, keep cavity, microwave inlet cover, cooking rack supports...Reference Guide ...
Owners Manual - Page 6
... in this manual and scan the code there with ...support
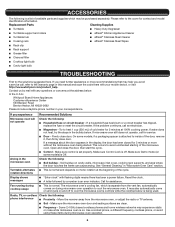
■■ Grease filter
■■ Charcoal filter
■■ Cooktop light bulb
■■ Cavity light bulb
TROUBLESHOOTING
First try the steps in the bullets below :
In the U.S.A.:
Whirlpool...service.
■■ Door - If the problem continues, call , refer to the cover for assistance. On some models) is set...
Owners Manual - Page 7
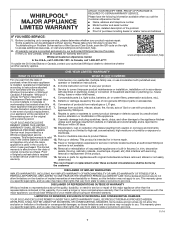
... electrical or plumbing codes or correction of purchase including dealer or retailer name and address
IF YOU NEED SERVICE:
1.
In-home instruction on the right to arrange service, please determine whether your retailer about the quality, durability, or need for Factory Specified Replacement Parts and repair labor to correct product damage or defects caused by Whirlpool. light bulbs...
Quick Reference Sheet - Page 1
... the menu control repeatedly to select submenu items and/or amounts, and then start the program. Place in microwave-safe dish.
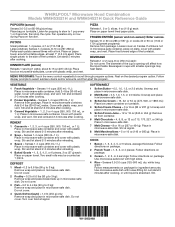
WHIRLPOOL® Microwave Hood Combination Models WMH53521H and WMH54521H Quick Reference Guide
POPCORN (sensor)
Senses 3.0-3.5 oz (85-99 g) size bag: Place bag on microwave-safe plate, cover with plastic wrap, and vent. FROZEN...
Specification Sheet - Page 1
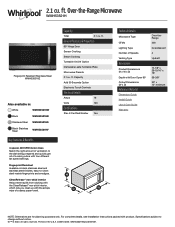
...-the-Range Microwave
WMH53521H
Fingerprint Resistant Stainless Steel WMH53521HZ
Also available in:
White
WMH53521HW
Black
WMH53521HB
Stainless Steel WMH53521HS
BStlaecekl Stainless WMH53521HV
Key Features & Benefits
4-speed, 400 CFM motor class Match the right amount of ventilation to the dish being prepared and quickly get rid of a damp paper towel. ft. Specifications subject to...
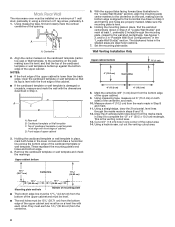
Installation Instructions - Page 3

...Specifications" section.
NOTES:
■■ If installing the microwave oven near a right side wall, make sure there is at least 6" (15.2 cm) of range/cooktop below. Installation Dimensions
NOTE: The grounded 3 prong outlet must be purchased from Whirlpool...fully.
■■ Some models have a pocket handle. But use the bump out mounting kit replacing the I bar mounting plate
...
Installation Instructions - Page 5

...section if you are using recirculation installation. Remove 2 screws attaching blower motor to back of microwave oven exterior. A B
A. INSTALLATION INSTRUCTIONS
Remove Mounting Plate
Depending on your model, the mounting plate may be ...so that exhaust ports face
the back of the
microwave oven, remove it and set it may be used.
4. Insert the blower motor wire into the connector.
Connector...
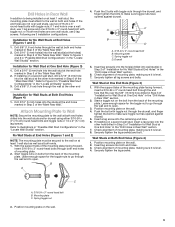
Installation Instructions - Page 8
...nd the wall stud centerline(s) drawn in Step 8 and mark.
11. Wall Venting Installation Only
Upper cabinet bottom
³⁄₈" (1 cm)
4" (10.2 cm)
...plate's end holes and bottom edge.
4. With the support tabs facing forward (see illustrations in the "Locate Wall...edge of the cutout area. 14.
Rear wall B. Set the mounting plate aside.
Holding the cardboard template or...
Installation Instructions - Page 9
...round-head bolt B. Securely tighten all Stud(s)" section.
3.
Drill Holes in Rear Wall
In addition to being installed on at least 1 wall stud, the mounting plate must be secured to illustrations in "Possible Wall Stud ...section. Refer to make sure toggle nut has opened against drywall. 5. With the support tabs of mounting plate, making sure it is level. 8. Push the 2 ...
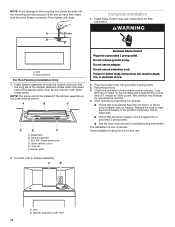
Installation Instructions - Page 11

...set aside on a covered surface. 9.
Using 2 or more people, lift microwave oven off of the microwave oven is the heavy side.
To avoid warping, wood filler blocks (installer...fits easily into microwave oven. Place a washer on support tabs at the bottom of the microwave oven. ... 3" (7.6 cm). Packing spacers (2) NOTE: Depending on your model, it on each 1/4-20 x 3" flat-head bolt and ...
Installation Instructions - Page 12
...)
12 If the problem continues, call an electrician.
■■ Check that the power supply cord is not positioned as shown. The installation is now complete. Then...
15-20 mm
B
Complete Installation
1.
Refer to the mounting nut, screw the bolts into a grounded 3 prong outlet.
■■ See the User Instructions for troubleshooting information. Replace the fuse or reset the ...
Dimension Guide - Page 1
... below.
Specifications subject to whether the microwave oven is too short, have a qualified electrician or serviceman install an outlet near the microwave oven. A. 2" x 4" (50.8 mm x 101.6 mm) wall stud B.
If the power supply cord is properly grounded. upper cabinet and side cabinet depth
66" (167.6 cm) min.
GROUNDING INSTRUCTIONS
I For all governing codes and...
Whirlpool WMH53521H Reviews
We have not received any reviews for Whirlpool yet.