
User Manual
Page 2
... YOU BEGIN 4 ASSEMBLY 5 CABLE DIAGRAMS 19 ADJUSTMENT 21 TROUBLE-SHOOTING AND MAINTENANCE 22 WEIGHT RESISTANCE CHART 23 ORDERING REPLACEMENT PARTS Back Cover Note: A PART LIST/EXPLODED DRAWING and... option, the product at one of its authorized service centers with respect to the terms set forth above is a registered trademark of incidental or consequential damages. No other consequential damages ...ICON OF/DU CANADA, 900 de l'Industrie, St-Jérôme, QC J7Y 4B8 WEIDER is authorized by sufficient proof of purchase. This warranty does not extend to the original purchaser...
... YOU BEGIN 4 ASSEMBLY 5 CABLE DIAGRAMS 19 ADJUSTMENT 21 TROUBLE-SHOOTING AND MAINTENANCE 22 WEIGHT RESISTANCE CHART 23 ORDERING REPLACEMENT PARTS Back Cover Note: A PART LIST/EXPLODED DRAWING and... option, the product at one of its authorized service centers with respect to the terms set forth above is a registered trademark of incidental or consequential damages. No other consequential damages ...ICON OF/DU CANADA, 900 de l'Industrie, St-Jérôme, QC J7Y 4B8 WEIDER is authorized by sufficient proof of purchase. This warranty does not extend to the original purchaser...
User Manual
Page 3
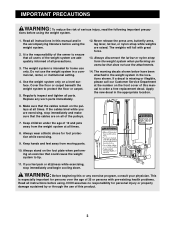
... butterfly arms, leg lever, lat bar, or nylon strap while weights are on a level surface. tions before using the weight system. 2. WARNING: Before beginning this manual and in a commercial, rental, or institutional setting. 4. Make sure that the cables are raised. Always disconnect the ...lat bar or nylon strap from moving parts. 10. The warning decals shown below have been attached to the weight system in the appropriate location. 6. Do...
... butterfly arms, leg lever, lat bar, or nylon strap while weights are on a level surface. tions before using the weight system. 2. WARNING: Before beginning this manual and in a commercial, rental, or institutional setting. 4. Make sure that the cables are raised. Always disconnect the ...lat bar or nylon strap from moving parts. 10. The warning decals shown below have been attached to the weight system in the appropriate location. 6. Do...
User Manual
Page 5
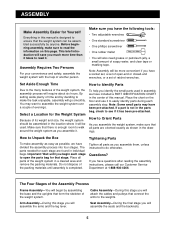
..., make the task enjoyable, assembly will also need grease or petroleum jelly, a small amount of evenings. Set Aside Enough Time How to Identify Parts Due to make sure to assemble the weight system over a couple of soapy water, and clear tape or masking tape. To help of time and..., the assembly process will attach the cables and pulleys that all parts as you much more convenient if you have a socket set, a set of the weight system. Questions? Arm Assembly-During this stage you assemble them, unless instructed to easily identify parts during each stage to read the ...
..., make the task enjoyable, assembly will also need grease or petroleum jelly, a small amount of evenings. Set Aside Enough Time How to Identify Parts Due to make sure to assemble the weight system over a couple of soapy water, and clear tape or masking tape. To help of time and..., the assembly process will attach the cables and pulleys that all parts as you much more convenient if you have a socket set, a set of the weight system. Questions? Arm Assembly-During this stage you assemble them, unless instructed to easily identify parts during each stage to read the ...

User Manual
Page 21
...the Curl Post at the desired height with a Cable Clip (57). CHANGING THE WEIGHT SETTING To change the setting of the weight stack, insert a Weight Pin (87) under the desired Weight (8). The Nylon Strap (56) can be adjusted. Use the WEIGHT RESISTANCE CHART on page 23 to find the approximate amount of resistance at each ...exercise station may vary from the weight setting. Adjust the length of the Chain between the Lat Bar and the Long Cable so the Lat Bar will go. Make sure you insert the Weight Pin as far as an exercise is any slack in the ...
...the Curl Post at the desired height with a Cable Clip (57). CHANGING THE WEIGHT SETTING To change the setting of the weight stack, insert a Weight Pin (87) under the desired Weight (8). The Nylon Strap (56) can be adjusted. Use the WEIGHT RESISTANCE CHART on page 23 to find the approximate amount of resistance at each ...exercise station may vary from the weight setting. Adjust the length of the Chain between the Lat Bar and the Long Cable so the Lat Bar will go. Make sure you insert the Weight Pin as far as an exercise is any slack in the ...
User Manual
Page 22
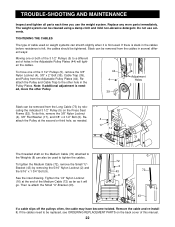
...). Reattach the Pulley at the end of the Medium Cable (72) as far as needed , move one or both of the 3 1/2" Pulleys (5) to a different set of the 3 1/2" Pulleys (5), remove the 3/8" Nylon Locknut (4), 3/8" x 2" Bolt (35), Cable Trap (39), and Pulley from the Adjustable Pulley Plates (44... 3 1/2" Pulley (5) on the Medium Cable (72) attached to tighten the cables. See the inset drawing. Note: If additional adjustment is first used on weight systems can be removed from the Long Cable (73) by removing the 5/16" Nylon Locknut (2) and the 5/16" x 1 3/4" Bolt (9). Then re...
...). Reattach the Pulley at the end of the Medium Cable (72) as far as needed , move one or both of the 3 1/2" Pulleys (5) to a different set of the 3 1/2" Pulleys (5), remove the 3/8" Nylon Locknut (4), 3/8" x 2" Bolt (35), Cable Trap (39), and Pulley from the Adjustable Pulley Plates (44... 3 1/2" Pulley (5) on the Medium Cable (72) attached to tighten the cables. See the inset drawing. Note: If additional adjustment is first used on weight systems can be removed from the Long Cable (73) by removing the 5/16" Nylon Locknut (2) and the 5/16" x 1 3/4" Bolt (9). Then re...


