User Manual
Page 1
All rights reserved. Windows and the Windows logo are the property of Microsoft Corporation. All other trademarks are registered trademarks of their respective companies. DVR 949HD Digital Video Camera User Manual © 2009-2012 Sakar International, Inc.
All rights reserved. Windows and the Windows logo are the property of Microsoft Corporation. All other trademarks are registered trademarks of their respective companies. DVR 949HD Digital Video Camera User Manual © 2009-2012 Sakar International, Inc.
User Manual
Page 2
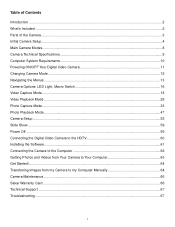
... Camera Options: LED Light, Macro Switch 16 Video Capture Mode ...18 Video Playback Mode ...28 Photo Capture Mode...33 Photo Playback Mode ...47 Camera Setup...53 Slide Show ...59 Power Off ...59 Connecting the Digital Video Camera to the HDTV 60 Installing the Software...61 Connecting the Camera to the Computer 62 Getting Photos and Videos from Your Camera to Your Computer 63 Get Started!...64 Transferring Images from my Camera to my Computer Manually 64 Camera Maintenance...66 Sakar Warranty Card ...66 Technical Support ...67 Troubleshooting...
... Camera Options: LED Light, Macro Switch 16 Video Capture Mode ...18 Video Playback Mode ...28 Photo Capture Mode...33 Photo Playback Mode ...47 Camera Setup...53 Slide Show ...59 Power Off ...59 Connecting the Digital Video Camera to the HDTV 60 Installing the Software...61 Connecting the Camera to the Computer 62 Getting Photos and Videos from Your Camera to Your Computer 63 Get Started!...64 Transferring Images from my Camera to my Computer Manually 64 Camera Maintenance...66 Sakar Warranty Card ...66 Technical Support ...67 Troubleshooting...
User Manual
Page 3
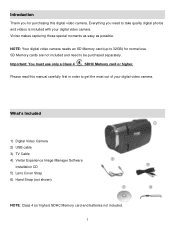
... your digital video camera. Important: You must use . Please read this digital video camera. SD Memory cards are not included and need to take quality digital photos and videos is included with your digital video camera. What's Included 1) Digital Video Camera 2) USB cable 3) TV Cable 4) Vivitar Experience Image Manager Software Installation CD 5) Lens Cover Strap 6) Hand Strap (not shown) NOTE: Class 4 (or higher) SDHC Memory card and batteries not included. 2 Everything you for normal use only a Class 4 SDHC Memory card or higher. Vivitar makes capturing those...
... your digital video camera. Important: You must use . Please read this digital video camera. SD Memory cards are not included and need to take quality digital photos and videos is included with your digital video camera. What's Included 1) Digital Video Camera 2) USB cable 3) TV Cable 4) Vivitar Experience Image Manager Software Installation CD 5) Lens Cover Strap 6) Hand Strap (not shown) NOTE: Class 4 (or higher) SDHC Memory card and batteries not included. 2 Everything you for normal use only a Class 4 SDHC Memory card or higher. Vivitar makes capturing those...
User Manual
Page 7
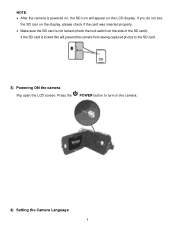
Press the POWER button to the SD card. 3) Powering ON the camera Flip open the LCD screen. If you do not see the SD icon on the display, please check if the card was inserted properly. Make sure the SD card is powered on, the SD icon will prevent the camera from saving captured photos to turn on the camera. 4) Setting the Camera Language 6 NOTE: After the camera is not locked (check the lock switch on the side of the SD card). If the SD card is locked this will appear on the LCD display.
Press the POWER button to the SD card. 3) Powering ON the camera Flip open the LCD screen. If you do not see the SD icon on the display, please check if the card was inserted properly. Make sure the SD card is powered on, the SD icon will prevent the camera from saving captured photos to turn on the camera. 4) Setting the Camera Language 6 NOTE: After the camera is not locked (check the lock switch on the side of the SD card). If the SD card is locked this will appear on the LCD display.
User Manual
Page 8
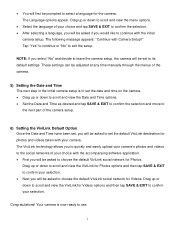
... to confirm your choice and tap SAVE & EXIT to confirm the selection. After selecting a language, you will be adjusted at any time manually through the menus of the camera setup. 6) Setting the ViviLink Default Option Once the Date and Time have been set, you will be set the default ViviLink destination for photos and videos taken with your selection. Next you will...
... to confirm your choice and tap SAVE & EXIT to confirm the selection. After selecting a language, you will be adjusted at any time manually through the menus of the camera setup. 6) Setting the ViviLink Default Option Once the Date and Time have been set, you will be set the default ViviLink destination for photos and videos taken with your selection. Next you will...
User Manual
Page 9
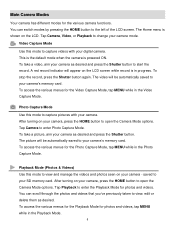
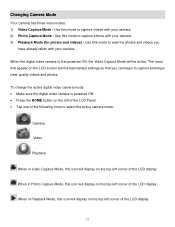
... the LCD screen while record is in the Photo Capture Mode. After turning on your camera, press the HOME button to the left of the LCD screen. You can switch modes by pressing the HOME button to open the Camera Mode options. Tap Camera, Video, or Playback to view and manage the videos and photos seen on the LCD. Photo Capture Mode Use this mode to change your SD memory card. Tap Playback to capture pictures with your camera - To access the various menus for the Photo Capture Mode, tap MENU...
... the LCD screen while record is in the Photo Capture Mode. After turning on your camera, press the HOME button to the left of the LCD screen. You can switch modes by pressing the HOME button to open the Camera Mode options. Tap Camera, Video, or Playback to view and manage the videos and photos seen on the LCD. Photo Capture Mode Use this mode to change your SD memory card. Tap Playback to capture pictures with your camera - To access the various menus for the Photo Capture Mode, tap MENU...
User Manual
Page 12
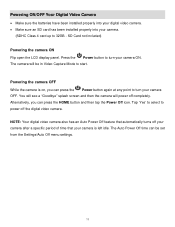
... time can be in Video Capture Mode to turn your camera ON. Powering the camera OFF While the camera is left idle. Press the Power button to turn your camera. (SDHC Class 4 card up to power off completely. You will see a "Goodbye" splash screen and then the camera will be set from the Settings/Auto Off menu settings. 11 Tap 'Yes' to select to 32GB - SD Card not included) Powering the camera ON Flip open the LCD display...
... time can be in Video Capture Mode to turn your camera ON. Powering the camera OFF While the camera is left idle. Press the Power button to turn your camera. (SDHC Class 4 card up to power off completely. You will see a "Goodbye" splash screen and then the camera will be set from the Settings/Auto Off menu settings. 11 Tap 'Yes' to select to 32GB - SD Card not included) Powering the camera ON Flip open the LCD display...
User Manual
Page 13
... videos and photos. To change the active digital video camera mode: Make sure the digital video camera is first powered ON, the Video Capture Mode will display on the top-left corner of the LCD display When in Playback Mode, this icon will display on the LCD screen are the best default settings so that you have already taken with your camera. 2) Photo Capture Mode - Use this mode to view the photos and videos you can begin to capture videos with your camera. 3) Playback Mode (for photos...
... videos and photos. To change the active digital video camera mode: Make sure the digital video camera is first powered ON, the Video Capture Mode will display on the top-left corner of the LCD display When in Playback Mode, this icon will display on the LCD screen are the best default settings so that you have already taken with your camera. 2) Photo Capture Mode - Use this mode to view the photos and videos you can begin to capture videos with your camera. 3) Playback Mode (for photos...
User Manual
Page 15
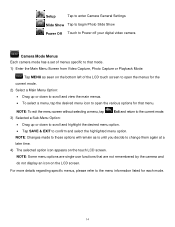
... menu option. Tap SAVE & EXIT to confirm and select the highlighted menu option. Setup Tap to enter Camera General Settings Slide Show Tap to begin Photo Slide Show Power Off Touch to Power off your digital video camera Camera Mode Menus Each camera mode has a set of the LCD touch screen to open the menus for the current mode. 2) Select a Main Menu Option: Drag up or down to scroll and view...
... menu option. Tap SAVE & EXIT to confirm and select the highlighted menu option. Setup Tap to enter Camera General Settings Slide Show Tap to begin Photo Slide Show Power Off Touch to Power off your digital video camera Camera Mode Menus Each camera mode has a set of the LCD touch screen to open the menus for the current mode. 2) Select a Main Menu Option: Drag up or down to scroll and view...

User Manual
Page 16
... SAVE & EXIT to the 'Setup Menu' section of the LCD touch screen to open the Home screen options. 2) Tap the Setup icon to enter the menu options for your digital video camera can easily be changed at a later time. 5) The selected option icon appears on the LCD screen. NOTE: Some menu options are not remembered by the camera and do not display an icon on the touch LCD screen. NOTE: Changes made...
... SAVE & EXIT to the 'Setup Menu' section of the LCD touch screen to open the Home screen options. 2) Tap the Setup icon to enter the menu options for your digital video camera can easily be changed at a later time. 5) The selected option icon appears on the LCD screen. NOTE: Some menu options are not remembered by the camera and do not display an icon on the touch LCD screen. NOTE: Changes made...
User Manual
Page 17
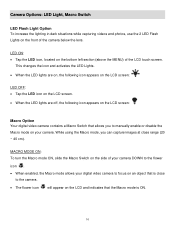
... the flower icon . When enabled, the Macro mode allows your camera. LED ON: Tap the LED icon, located on the bottom left section (above the MENU) of the camera below the lens. Camera Options: LED Light, Macro Switch LED Flash Light Option To increase the lighting in dark situations while capturing videos and photos, use the 2 LED Flash Lights on the front of the LCD touch screen.
... the flower icon . When enabled, the Macro mode allows your camera. LED ON: Tap the LED icon, located on the bottom left section (above the MENU) of the camera below the lens. Camera Options: LED Light, Macro Switch LED Flash Light Option To increase the lighting in dark situations while capturing videos and photos, use the 2 LED Flash Lights on the front of the LCD touch screen.

User Manual
Page 19
... T button, to zoom in progress. When the camera is automatically saved to the camera's SD memory card. 18 Push the Zoom control button up to 4 times using the digital zoom while capturing your photos and recording your digital video camera. Video Capture Mode The Video Capture Mode allows you to capture videos with your videos. On the top right, the recording time appears, indicating the amount of the LCD screen indicating that the record is in on the top of the digital video camera to START the video capture. 4) A red, blinking...
... T button, to zoom in progress. When the camera is automatically saved to the camera's SD memory card. 18 Push the Zoom control button up to 4 times using the digital zoom while capturing your photos and recording your digital video camera. Video Capture Mode The Video Capture Mode allows you to capture videos with your videos. On the top right, the recording time appears, indicating the amount of the LCD screen indicating that the record is in on the top of the digital video camera to START the video capture. 4) A red, blinking...
User Manual
Page 30
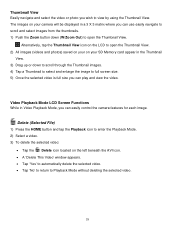
... images. 4) Tap a Thumbnail to select and enlarge the image to open the Thumbnail View. The images on your camera will be displayed in the Thumbnail View. 3) Drag up or down (W/Zoom Out) to full screen size. 5) Once the selected video is full size you can easily control the camera features for each image. Thumbnail View Easily navigate and select the video or photo you wish to Playback Mode without deleting the selected video...
... images. 4) Tap a Thumbnail to select and enlarge the image to open the Thumbnail View. The images on your camera will be displayed in the Thumbnail View. 3) Drag up or down (W/Zoom Out) to full screen size. 5) Once the selected video is full size you can easily control the camera features for each image. Thumbnail View Easily navigate and select the video or photo you wish to Playback Mode without deleting the selected video...

User Manual
Page 32
... the Playback Mode. 2) Tap MENU located at the bottom left corner of the LCD screen to open the Main Menu Screen for the current mode. 3) Tap the Delete All Images menu icon to open the menu options. A 'Delete All Images' window appears. Tap 'YES' to Playback Mode without deleting any videos and photos. 31 Video Playback Mode Menus The following are the menus that appear in your digital video camera's Video Playback Mode: Delete All Images ViviLink Delete All Images Menu While in Thumbnail view.
... the Playback Mode. 2) Tap MENU located at the bottom left corner of the LCD screen to open the Main Menu Screen for the current mode. 3) Tap the Delete All Images menu icon to open the menu options. A 'Delete All Images' window appears. Tap 'YES' to Playback Mode without deleting any videos and photos. 31 Video Playback Mode Menus The following are the menus that appear in your digital video camera's Video Playback Mode: Delete All Images ViviLink Delete All Images Menu While in Thumbnail view.

User Manual
Page 34
... the LCD screen: The zoom indicating bar moves up when you Zoom In (T) and moves down , the W button, to zoom back out. Push the Zoom control button up, the T button, to zoom in Photo Capture Mode, use the LCD display to direct the camera at the scene you Zoom Out (W). 3) Press the Shutter button on the right side of the digital video camera to take the picture. 4) The picture is automatically saved to the SD memory card. 33 Photo Capture Mode The Photo Capture Mode allows...
... the LCD screen: The zoom indicating bar moves up when you Zoom In (T) and moves down , the W button, to zoom back out. Push the Zoom control button up, the T button, to zoom in Photo Capture Mode, use the LCD display to direct the camera at the scene you Zoom Out (W). 3) Press the Shutter button on the right side of the digital video camera to take the picture. 4) The picture is automatically saved to the SD memory card. 33 Photo Capture Mode The Photo Capture Mode allows...
User Manual
Page 40
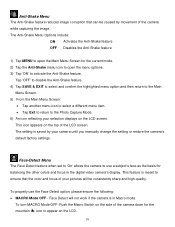
... manually change the setting or restore the camera's default factory settings. The Anti-Shake Menu Options include: ON Activates the Anti-Shake feature OFF Disables the Anti-Shake feature 1) Tap MENU to open the menu options. 3) Tap 'ON' to appear on the LCD. 39 To properly use a subject's face as the basis for balancing the other colors and focus in Macro mode. The setting is in the digital video camera's display. To turn...
... manually change the setting or restore the camera's default factory settings. The Anti-Shake Menu Options include: ON Activates the Anti-Shake feature OFF Disables the Anti-Shake feature 1) Tap MENU to open the menu options. 3) Tap 'ON' to appear on the LCD. 39 To properly use a subject's face as the basis for balancing the other colors and focus in Macro mode. The setting is in the digital video camera's display. To turn...
User Manual
Page 51
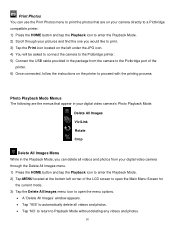
.... 5) Connect the USB cable provided in the Playback Mode, you would like to print. 3) Tap the Print icon located on the left corner of the LCD screen to open the Main Menu Screen for the current mode. 3) Tap the Delete All Images menu icon to open the menu options. A 'Delete All Images' window appears. Tap 'YES' to automatically delete all videos and photos from your digital video camera's Photo Playback Mode: Delete All Images ViviLink Rotate Crop Delete All Images Menu...
.... 5) Connect the USB cable provided in the Playback Mode, you would like to print. 3) Tap the Print icon located on the left corner of the LCD screen to open the Main Menu Screen for the current mode. 3) Tap the Delete All Images menu icon to open the menu options. A 'Delete All Images' window appears. Tap 'YES' to automatically delete all videos and photos from your digital video camera's Photo Playback Mode: Delete All Images ViviLink Rotate Crop Delete All Images Menu...

User Manual
Page 58
... automatically return to the Setup Main Menu Screen without formatting. 4) From the Setup Main Menu Screen: Tap another menu icon to select a different menu item. Tap Exit to return to view your captured images on how to connect your digital video camera to automatically format the SD memory card. TV Out Menu TV Out allows you to the Home Menu screen. 57 The Format SD Menu Options include: YES Formats SD memory card. All videos and photos deleted.
... automatically return to the Setup Main Menu Screen without formatting. 4) From the Setup Main Menu Screen: Tap another menu icon to select a different menu item. Tap Exit to return to view your captured images on how to connect your digital video camera to automatically format the SD memory card. TV Out Menu TV Out allows you to the Home Menu screen. 57 The Format SD Menu Options include: YES Formats SD memory card. All videos and photos deleted.
User Manual
Page 61
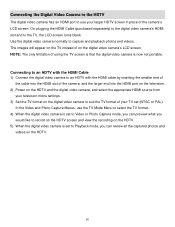
... place of using the TV screen is that the digital video camera is now not portable. The images will appear on the TV instead of your television menu settings. 3) Set the TV format on the digital video camera to record on the HDTV screen and view the recording on the HDTV. 5) When the digital video camera is set to Video or Photo Capture mode, you can preview what you can review all the captured photos and videos on the digital video camera's LCD screen.
... place of using the TV screen is that the digital video camera is now not portable. The images will appear on the TV instead of your television menu settings. 3) Set the TV format on the digital video camera to record on the HDTV screen and view the recording on the HDTV. 5) When the digital video camera is set to Video or Photo Capture mode, you can preview what you can review all the captured photos and videos on the digital video camera's LCD screen.
User Manual
Page 66
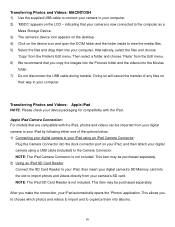
... check your device packaging for compatibility with the iPad, photos and videos can be imported from your digital camera to your iPad by following either one of any files on your iPad, and then attach your digital camera using a USB cable (included) to view the media files. 5) Select the files and drag them into the slot to your iPad automatically opens the 'Photos' application. After you copy the images into the Pictures folder...
... check your device packaging for compatibility with the iPad, photos and videos can be imported from your digital camera to your iPad by following either one of any files on your iPad, and then attach your digital camera using a USB cable (included) to view the media files. 5) Select the files and drag them into the slot to your iPad automatically opens the 'Photos' application. After you copy the images into the Pictures folder...


