v2 Camera Manual
Page 6
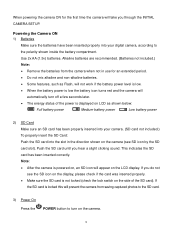
... use for the first time the camera will appear on the camera. 5 Push the SD card until you do not see SD icon by the SD card slot). This indicates the SD card has been inserted correctly. If the SD card is locked this will automatically turn on the LCD display. Alkaline batteries are recommended. (Batteries not included.) Note: Remove the batteries from saving captured photos to the SD card. 3) Power...
... use for the first time the camera will appear on the camera. 5 Push the SD card until you do not see SD icon by the SD card slot). This indicates the SD card has been inserted correctly. If the SD card is locked this will automatically turn on the LCD display. Alkaline batteries are recommended. (Batteries not included.) Note: Remove the batteries from saving captured photos to the SD card. 3) Power...
v2 Camera Manual
Page 7
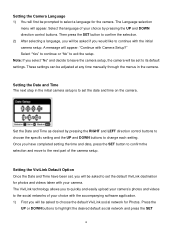
... to select a language for Photos. These settings can be adjusted at any time manually through the menus in the initial camera setup is to set the default ViviLink destination for photos and videos taken with the accompanying software application. 1) First you will be asked to set the date and time on the camera. Setting the ViviLink Default Option Once the Date and Time have completed setting the time and date, press the SET button to confirm...
... to select a language for Photos. These settings can be adjusted at any time manually through the menus in the initial camera setup is to set the default ViviLink destination for photos and videos taken with the accompanying software application. 1) First you will be asked to set the date and time on the camera. Setting the ViviLink Default Option Once the Date and Time have completed setting the time and date, press the SET button to confirm...
v2 Camera Manual
Page 9
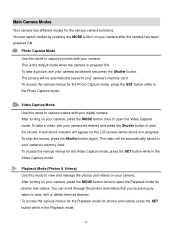
... photos and videos. After turning on the LCD screen while record is powered ON. To stop the record, press the Shutter button again. Main Camera Modes Your camera has different modes for the Video Capture mode, press the SET button while in progress. To take a video, aim your camera‟s memory card. A red record indicator will be automatically saved to open the Playback mode for the Photo Capture mode, press the SET button while in the Playback mode. 8 To access the various menus for the various camera functions...
... photos and videos. After turning on the LCD screen while record is powered ON. To stop the record, press the Shutter button again. Main Camera Modes Your camera has different modes for the Video Capture mode, press the SET button while in progress. To take a video, aim your camera‟s memory card. A red record indicator will be automatically saved to open the Playback mode for the Photo Capture mode, press the SET button while in the Playback mode. 8 To access the various menus for the various camera functions...

v2 Camera Manual
Page 10
Camera Technical Specifications Image Sensor Image Resolution Video Resolution File Format Internal Memory External Memory LCD Display Lens Zoom Exposure White Balance ISO Scene Flash Self-Timer Print Photos Macro Interface System Requirements Battery Working Temperature CMOS Sensor 2592x1944(5M) / 2048x1536(3M) /1920x1080(2M-HD) / 640x480(VGA) 640X480 pixels (30 fps), 320X240 pixels (30 fps) JPEG/AVI 1 Test Photo Use Only SD Card (up to 32GB) 1.5 Inch TFT f=5.1mm F2.8 4X Digital Zoom -3.0EV ~ +3.0EV Auto, Daylight, Cloudy, Fluorescent , Incandescent Auto / 100 / 200 / 400...
Camera Technical Specifications Image Sensor Image Resolution Video Resolution File Format Internal Memory External Memory LCD Display Lens Zoom Exposure White Balance ISO Scene Flash Self-Timer Print Photos Macro Interface System Requirements Battery Working Temperature CMOS Sensor 2592x1944(5M) / 2048x1536(3M) /1920x1080(2M-HD) / 640x480(VGA) 640X480 pixels (30 fps), 320X240 pixels (30 fps) JPEG/AVI 1 Test Photo Use Only SD Card (up to 32GB) 1.5 Inch TFT f=5.1mm F2.8 4X Digital Zoom -3.0EV ~ +3.0EV Auto, Daylight, Cloudy, Fluorescent , Incandescent Auto / 100 / 200 / 400...
v2 Camera Manual
Page 11
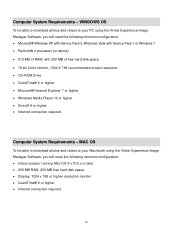
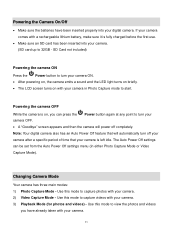
... to download photos and videos to your Macintosh using the Vivitar Experience Image Manager Software, you will need the following minimum configuration: Microsoft® Windows XP with Service Pack 3, Windows Vista with Service Pack 1 or Windows 7 Pentium® 4 processor (or above) 512 MB of RAM, with 250 MB of free hard disk space 16-bit Color monitor, 1024 X 768 recommended screen...
... to download photos and videos to your Macintosh using the Vivitar Experience Image Manager Software, you will need the following minimum configuration: Microsoft® Windows XP with Service Pack 3, Windows Vista with Service Pack 1 or Windows 7 Pentium® 4 processor (or above) 512 MB of RAM, with 250 MB of free hard disk space 16-bit Color monitor, 1024 X 768 recommended screen...
v2 Camera Manual
Page 12
... fully charged before the first use. Make sure an SD card has been inserted into your digital camera. SD Card not included) Powering the camera ON Press the Power button to capture videos with your camera. 3) Playback Mode (for photos and videos) - The Auto Power Off settings can press the Power button again at any point to turn your camera OFF. A "Goodbye" screen appears and then the camera will power off your camera after a specific period of time...
... fully charged before the first use. Make sure an SD card has been inserted into your digital camera. SD Card not included) Powering the camera ON Press the Power button to capture videos with your camera. 3) Playback Mode (for photos and videos) - The Auto Power Off settings can press the Power button again at any point to turn your camera OFF. A "Goodbye" screen appears and then the camera will power off your camera after a specific period of time...
v2 Camera Manual
Page 19
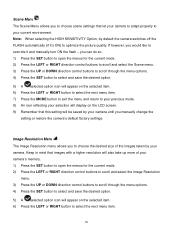
... mode. 2) Press the LEFT or RIGHT direction control buttons to scroll and select the Image Resolution menu. 3) Press the UP or DOWN direction control buttons to scroll through the menu options. 4) Press the SET button to select and save the desired option. 5) A selected option icon will appear on the LCD screen. 9) Remember that let your camera to adapt properly to your camera until you manually change the setting or restore the camera‟s default factory settings. Image...
... mode. 2) Press the LEFT or RIGHT direction control buttons to scroll and select the Image Resolution menu. 3) Press the UP or DOWN direction control buttons to scroll through the menu options. 4) Press the SET button to select and save the desired option. 5) A selected option icon will appear on the LCD screen. 9) Remember that let your camera to adapt properly to your camera until you manually change the setting or restore the camera‟s default factory settings. Image...
v2 Camera Manual
Page 20
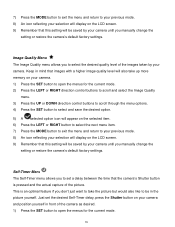
... images taken by your camera until you manually change the setting or restore the camera‟s default factory settings. This is pressed and the actual capture of the picture. 7) Press the MODE button to exit the menu and return to your previous mode. 8) An icon reflecting your selection will display on the LCD screen. 9) Remember that this setting will be saved by your camera until you don‟t just want to take...
... images taken by your camera until you manually change the setting or restore the camera‟s default factory settings. This is pressed and the actual capture of the picture. 7) Press the MODE button to exit the menu and return to your previous mode. 8) An icon reflecting your selection will display on the LCD screen. 9) Remember that this setting will be saved by your camera until you don‟t just want to take...
v2 Camera Manual
Page 21
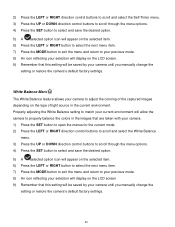
... select the next menu item. 7) Press the MODE button to exit the menu and return to adjust the coloring of the captured images depending on the LCD screen. 9) Remember that this setting will be saved by your camera to your previous mode. 8) An icon reflecting your selection will be saved by your camera until you manually change the setting or restore the camera‟s default factory settings. Properly adjusting the White Balance setting to match your current...
... select the next menu item. 7) Press the MODE button to exit the menu and return to adjust the coloring of the captured images depending on the LCD screen. 9) Remember that this setting will be saved by your camera to your previous mode. 8) An icon reflecting your selection will be saved by your camera until you manually change the setting or restore the camera‟s default factory settings. Properly adjusting the White Balance setting to match your current...
v2 Camera Manual
Page 23
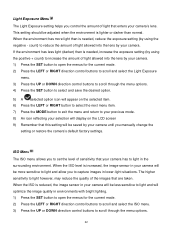
... RIGHT direction control buttons to scroll and select the ISO menu. 3) Press the UP or DOWN direction control buttons to scroll through the menu options. 4) Press the SET button to select and save the desired option. 5) A selected option icon will appear on the LCD screen 9) Remember that are taken. When the environment has more sensitive to light and allow you manually change the setting or restore the camera‟s default factory settings. Light Exposure Menu The Light Exposure setting helps...
... RIGHT direction control buttons to scroll and select the ISO menu. 3) Press the UP or DOWN direction control buttons to scroll through the menu options. 4) Press the SET button to select and save the desired option. 5) A selected option icon will appear on the LCD screen 9) Remember that are taken. When the environment has more sensitive to light and allow you manually change the setting or restore the camera‟s default factory settings. Light Exposure Menu The Light Exposure setting helps...
v2 Camera Manual
Page 24
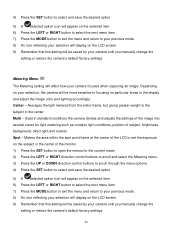
... or RIGHT button to select the next menu item. 7) Press the MODE button to exit the menu and return to your previous mode. 8) An icon reflecting your selection will display on the LCD screen. 9) Remember that this setting will be saved by your camera focuses when capturing an image. Depending on your selection, the camera will be saved by your camera until you manually change the setting or restore the camera‟s default factory settings.
... or RIGHT button to select the next menu item. 7) Press the MODE button to exit the menu and return to your previous mode. 8) An icon reflecting your selection will display on the LCD screen. 9) Remember that this setting will be saved by your camera focuses when capturing an image. Depending on your selection, the camera will be saved by your camera until you manually change the setting or restore the camera‟s default factory settings.
v2 Camera Manual
Page 26
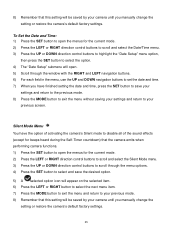
... setting will be saved by your camera until you manually change the setting or restore the camera‟s default factory settings. 25 8) Remember that this setting will be saved by your camera until you manually change the setting or restore the camera‟s default factory settings. Silent Mode Menu You have the option of activating the camera‟s Silent mode to disable all of the sound effects (except for the current mode. 2) Press the LEFT or RIGHT direction control buttons...
... setting will be saved by your camera until you manually change the setting or restore the camera‟s default factory settings. 25 8) Remember that this setting will be saved by your camera until you manually change the setting or restore the camera‟s default factory settings. Silent Mode Menu You have the option of activating the camera‟s Silent mode to disable all of the sound effects (except for the current mode. 2) Press the LEFT or RIGHT direction control buttons...
v2 Camera Manual
Page 27
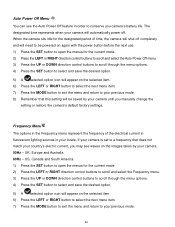
... current, you manually change the setting or restore the camera‟s default factory settings. The designated time represents when your camera will appear on the images taken by your camera until you may see waves on the selected item 6) Press the LEFT or RIGHT button to select the next menu item. 7) Press the MODE button to exit the menu and return to select and save the desired...
... current, you manually change the setting or restore the camera‟s default factory settings. The designated time represents when your camera will appear on the images taken by your camera until you may see waves on the selected item 6) Press the LEFT or RIGHT button to select the next menu item. 7) Press the MODE button to exit the menu and return to select and save the desired...
v2 Camera Manual
Page 28
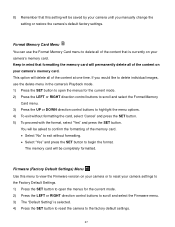
.... Format Memory Card Menu You can use the delete menu in mind that this menu to view the Firmware version on your camera or to reset your camera settings to the Factory Default Settings. 1) Press the SET button to open the menus for the current mode. 2) Press the LEFT or RIGHT direction control buttons to the factory default settings. 27 If you manually change the setting or restore the camera‟s default factory settings. Firmware (Factory Default Settings) Menu Use this setting will be completely formatted. Keep in the camera‟s Playback mode. 1) Press the SET button...
.... Format Memory Card Menu You can use the delete menu in mind that this menu to view the Firmware version on your camera or to reset your camera settings to the Factory Default Settings. 1) Press the SET button to open the menus for the current mode. 2) Press the LEFT or RIGHT direction control buttons to the factory default settings. 27 If you manually change the setting or restore the camera‟s default factory settings. Firmware (Factory Default Settings) Menu Use this setting will be completely formatted. Keep in the camera‟s Playback mode. 1) Press the SET button...
v2 Camera Manual
Page 30
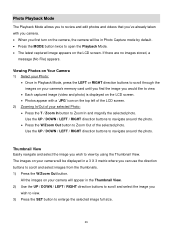
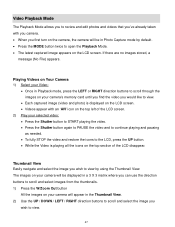
... camera, the camera will be displayed in the Thumbnail View. 2) Use the UP / DOWN / LEFT / RIGHT direction buttons to scroll and select the image you wish to view by default. Press the MODE button twice to open the Playback Mode. The latest captured image appears on the LCD screen. Photo Playback Mode The Playback Mode allows you to review and edit photos and videos that you‟ve already taken with a „JPG‟ icon...
... camera, the camera will be displayed in the Thumbnail View. 2) Use the UP / DOWN / LEFT / RIGHT direction buttons to scroll and select the image you wish to view by default. Press the MODE button twice to open the Playback Mode. The latest captured image appears on the LCD screen. Photo Playback Mode The Playback Mode allows you to review and edit photos and videos that you‟ve already taken with a „JPG‟ icon...
v2 Camera Manual
Page 46
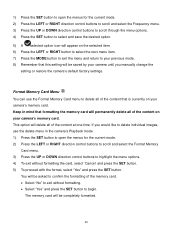
... on your camera's memory card. Format Memory Card Menu You can use the delete menu in mind that is currently on your camera‟s memory card. Keep in the camera‟s Playback mode. 1) Press the SET button to open the menus for the current mode. 2) Press the LEFT or RIGHT direction control buttons to scroll and select the Frequency menu. 3) Press the UP or DOWN direction control buttons to scroll through the menu options. 4) Press the SET button to select...
... on your camera's memory card. Format Memory Card Menu You can use the delete menu in mind that is currently on your camera‟s memory card. Keep in the camera‟s Playback mode. 1) Press the SET button to open the menus for the current mode. 2) Press the LEFT or RIGHT direction control buttons to scroll and select the Frequency menu. 3) Press the UP or DOWN direction control buttons to scroll through the menu options. 4) Press the SET button to select...
v2 Camera Manual
Page 48
... START playing the video. Press the Shutter button again to PAUSE the video and to continue playing and pausing as needed. To fully STOP the video and restore the icons to the LCD, press the UP button. While the Video is displayed on the LCD screen. Videos appear with you camera. When you first turn on the camera, the camera will be in Photo Capture mode by using the Thumbnail View...
... START playing the video. Press the Shutter button again to PAUSE the video and to continue playing and pausing as needed. To fully STOP the video and restore the icons to the LCD, press the UP button. While the Video is displayed on the LCD screen. Videos appear with you camera. When you first turn on the camera, the camera will be in Photo Capture mode by using the Thumbnail View...
v2 Camera Manual
Page 53
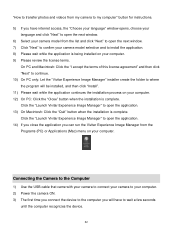
... USB cable that came with your camera to connect your camera to your computer. 2) Power the camera ON. 3) The first time you connect the device to the computer you have to open the application. 13) On Macintosh: Click the "Quit" button when the installation is complete. "How to transfer photos and videos from the Programs (PC) or Applications (Mac) menu on your computer. Click the "Launch Vivitar Experience Image...
... USB cable that came with your camera to connect your camera to your computer. 2) Power the camera ON. 3) The first time you connect the device to the computer you have to open the application. 13) On Macintosh: Click the "Quit" button when the installation is complete. "How to transfer photos and videos from the Programs (PC) or Applications (Mac) menu on your computer. Click the "Launch Vivitar Experience Image...
v2 Camera Manual
Page 54
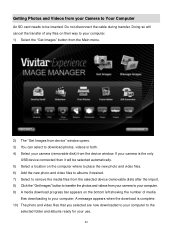
... way to your computer. 1) Select the "Get Images" button from the Main menu. 2) The "Get Images from device" window opens. 3) You can select to download photos, videos or both. 4) Select your camera (removable disk) from the device window. A message appears when the download is the only USB device connected then it will cancel the transfer of any files on the bottom left showing the number of media files downloading to your computer.
... way to your computer. 1) Select the "Get Images" button from the Main menu. 2) The "Get Images from device" window opens. 3) You can select to download photos, videos or both. 4) Select your camera (removable disk) from the device window. A message appears when the download is the only USB device connected then it will cancel the transfer of any files on the bottom left showing the number of media files downloading to your computer.
v2 Camera Manual
Page 58
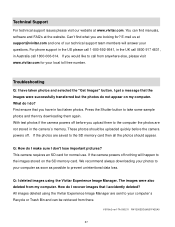
... I don't lose important pictures? If the camera powers off . Can‟t find manuals, software and FAQ‟s at the website. The images were also deleted from there. All images deleted using the Vivitar Experience Image Manager. V5118v2 ver1-TA-030211 FW1200EDGJMJ31F42SA0 57 What do ? This camera requires an SD card for ? Press the Shutter button to take some sample photos and then try downloading them to prevent unintentional data loss. E-mail...
... I don't lose important pictures? If the camera powers off . Can‟t find manuals, software and FAQ‟s at the website. The images were also deleted from there. All images deleted using the Vivitar Experience Image Manager. V5118v2 ver1-TA-030211 FW1200EDGJMJ31F42SA0 57 What do ? This camera requires an SD card for ? Press the Shutter button to take some sample photos and then try downloading them to prevent unintentional data loss. E-mail...


