User Guide
Page 1
VS19012 P/N: VX2418-PC-MHD | VX2418C Warranty information contained in this User Guide to obtain important information on installing and using your product in a safe manner, as well as registering your limited coverage from ViewSonic® Corporation, which is also found on our web site at http://www.viewsonic.com in English, or in specific languages using the Regional selection box in the upper right corner of our website. Model No. VX2418-PC-mhd VX2418C Display User Guide IMPORTANT: Please read this User Guide will describe your product for future service.
VS19012 P/N: VX2418-PC-MHD | VX2418C Warranty information contained in this User Guide to obtain important information on installing and using your product in a safe manner, as well as registering your limited coverage from ViewSonic® Corporation, which is also found on our web site at http://www.viewsonic.com in English, or in specific languages using the Regional selection box in the upper right corner of our website. Model No. VX2418-PC-mhd VX2418C Display User Guide IMPORTANT: Please read this User Guide will describe your product for future service.
User Guide
Page 3
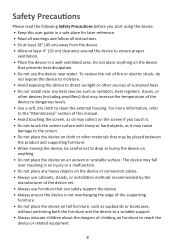
... of the supporting furniture. • Do not place the device on tall furniture, such as radiators, heat registers, stoves, or other sources of sustained heat. • Do not install near any heavy objects on the device or connection cables. • Always use cabinets, stands, or installation methods recommended by the manufacturer of the device set. • Always use the device...
... of the supporting furniture. • Do not place the device on tall furniture, such as radiators, heat registers, stoves, or other sources of sustained heat. • Do not install near any heavy objects on the device or connection cables. • Always use cabinets, stands, or installation methods recommended by the manufacturer of the device set. • Always use the device...
User Guide
Page 4
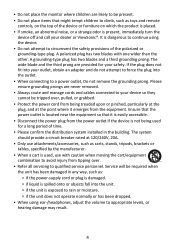
... power plug from being used , use with one wider than the other. Service will be required when the unit has been damaged in the building. If the plug does not fit into your safety. Please ensure grounding prongs are never removed. • Always route and manage cords and cables connected to your dealer or ViewSonic®. • Do not place the monitor...
... power plug from being used , use with one wider than the other. Service will be required when the unit has been damaged in the building. If the plug does not fit into your safety. Please ensure grounding prongs are never removed. • Always route and manage cords and cables connected to your dealer or ViewSonic®. • Do not place the monitor...

User Guide
Page 5
... 100 x 100 mm Screw Specification & Quantity M4 x 10 mm 4 pieces or VESA wall mounƟng hole NOTE: • Restraining device/cordage should be able to withstand 100N force. • Make sure the cordage is ...display to a wall or fixed object using cordage or other restraining devices can help support the weight of the device. • If the existing display is removed. The back of the device shall face the wall to ensure the device cannot tilt under external force. • Make sure the display does not tilt under external force at any height and rotation angle of the display...
... 100 x 100 mm Screw Specification & Quantity M4 x 10 mm 4 pieces or VESA wall mounƟng hole NOTE: • Restraining device/cordage should be able to withstand 100N force. • Make sure the cordage is ...display to a wall or fixed object using cordage or other restraining devices can help support the weight of the device. • If the existing display is removed. The back of the device shall face the wall to ensure the device cannot tilt under external force. • Make sure the display does not tilt under external force at any height and rotation angle of the display...

User Guide
Page 6
... and Rear View 9 I/O Ports ...9 Initial Setup 10 Installing the Stand 10 Wall Mounting...11 Using the Security Slot 12 Making Connections 13 Connecting to Power 13 Connecting External Devices 14 Using the Monitor 15 Adjusting the Viewing Angle 15 Tilt Angle Adjustment 15 Turning the Device On/Off 16 Quick Menu...17 Hot Keys...18 Configuring the Settings 20 General Operations 20 On-Screen Display (OSD) Menu Tree 22 Appendix 26 Specifications...26 Glossary...28 Troubleshooting...32 Maintenance...34...
... and Rear View 9 I/O Ports ...9 Initial Setup 10 Installing the Stand 10 Wall Mounting...11 Using the Security Slot 12 Making Connections 13 Connecting to Power 13 Connecting External Devices 14 Using the Monitor 15 Adjusting the Viewing Angle 15 Tilt Angle Adjustment 15 Turning the Device On/Off 16 Quick Menu...17 Hot Keys...18 Configuring the Settings 20 General Operations 20 On-Screen Display (OSD) Menu Tree 22 Appendix 26 Specifications...26 Glossary...28 Troubleshooting...32 Maintenance...34...

User Guide
Page 11
... wall. 11 Follow the instructions that come with the screen facing down. 3. Turn off the device and disconnect all cables. 2. To obtain a wall mounting kit, contact ViewSonic® or your local dealer. 1. Then secure it with four (4) screws (M4 x 10 mm). 5. Attach the mounting bracket to the table below for the standard dimensions for wall mount kits. Remove the monitor stand. 1 2 1 2 3 4 4. Wall Mounting NOTE: Only use UL Certified wall mount...
... wall. 11 Follow the instructions that come with the screen facing down. 3. Turn off the device and disconnect all cables. 2. To obtain a wall mounting kit, contact ViewSonic® or your local dealer. 1. Then secure it with four (4) screws (M4 x 10 mm). 5. Attach the mounting bracket to the table below for the standard dimensions for wall mount kits. Remove the monitor stand. 1 2 1 2 3 4 4. Wall Mounting NOTE: Only use UL Certified wall mount...

User Guide
Page 16
Plug the power cord into a power outlet. 2. HDMI 1 HDMI 2 DP NOTE: The monitor will still consume some power as long as the power cord is not being used for a long period of time, please disconnect the power plug from the power outlet. Press the Power button to turn the monitor off, press the Power button again. If the monitor is connected to access the Quick Menu, activate Hot Keys, navigate the OnScreen Display (OSD) Menu, and change the settings. Joy Key 16 To turn on the monitor. 3. Turning the Device On/Off 1. Using the Joy Key Use the Joy Key to the power outlet.
Plug the power cord into a power outlet. 2. HDMI 1 HDMI 2 DP NOTE: The monitor will still consume some power as long as the power cord is not being used for a long period of time, please disconnect the power plug from the power outlet. Press the Power button to turn the monitor off, press the Power button again. If the monitor is connected to access the Quick Menu, activate Hot Keys, navigate the OnScreen Display (OSD) Menu, and change the settings. Joy Key 16 To turn on the monitor. 3. Turning the Device On/Off 1. Using the Joy Key Use the Joy Key to the power outlet.

User Guide
Page 17
Contrast/Brightness Adjust the contrast or brightness level. Exit Exit the Quick Menu. 17 Menu Description ViewMode Select one of the preset color settings. Input Select Select the input source. Volume Adjust the level, or mute the volume. View Mode Standard FPS RTS MOBA Movie Web Text MAC Mono NOTE: Follow the key guide that appears on the screen to activate the Quick Menu. Quick Menu Press the Joy Key to select the option or make adjustments.
Contrast/Brightness Adjust the contrast or brightness level. Exit Exit the Quick Menu. 17 Menu Description ViewMode Select one of the preset color settings. Input Select Select the input source. Volume Adjust the level, or mute the volume. View Mode Standard FPS RTS MOBA Movie Web Text MAC Mono NOTE: Follow the key guide that appears on the screen to activate the Quick Menu. Quick Menu Press the Joy Key to select the option or make adjustments.

User Guide
Page 19
Key Description [u] Press and hold the key for 5 seconds to display/hide the boot up screen when the device is locked, the below message will appear on the screen: Power Lock/Unlock Power Button Locked [▲] Press and hold the key for 5 seconds to lock/unlock the Power button. Boot Up Screen On/Off Off Press to lock/unlock the Power button. When the menu appears on the screen, continue holding the key for 10s to lock power If the Power button is turned on 19 Power Lock/Unlock Locking Power Button 3 Press and hold for 10 seconds to turn on .
Key Description [u] Press and hold the key for 5 seconds to display/hide the boot up screen when the device is locked, the below message will appear on the screen: Power Lock/Unlock Power Button Locked [▲] Press and hold the key for 5 seconds to lock/unlock the Power button. Boot Up Screen On/Off Off Press to lock/unlock the Power button. When the menu appears on the screen, continue holding the key for 10s to lock power If the Power button is turned on 19 Power Lock/Unlock Locking Power Button 3 Press and hold for 10 seconds to turn on .

User Guide
Page 20
Move the Joy Key to enter the selected menu. Then move the Joy Key [▼] to display the On-Screen Display (OSD) Menu. Input Select Audio Adjust ViewMode Color Adjust Manual Image Setup Menu Adjust Contrast/Brightness Color Temperature Color Space Color Range Contrast Brightness 75% 1920 x 1080 @ 60Hz 20 Move the Joy Key [t] or [u] to select the main menu. Configuring the Settings General Operations 1. Input Select Audio Adjust ViewMode Color Adjust Manual Image Setup Menu Adjust HDMI 1 HDMI 2 DisplayPort 75% 1920 x 1080 @ 60Hz 2.
Move the Joy Key to enter the selected menu. Then move the Joy Key [▼] to display the On-Screen Display (OSD) Menu. Input Select Audio Adjust ViewMode Color Adjust Manual Image Setup Menu Adjust Contrast/Brightness Color Temperature Color Space Color Range Contrast Brightness 75% 1920 x 1080 @ 60Hz 20 Move the Joy Key [t] or [u] to select the main menu. Configuring the Settings General Operations 1. Input Select Audio Adjust ViewMode Color Adjust Manual Image Setup Menu Adjust HDMI 1 HDMI 2 DisplayPort 75% 1920 x 1080 @ 60Hz 2.

User Guide
Page 21
...;] or [▼] to adjust/select the setting. Input Select Audio Adjust ViewMode Color Adjust Manual Image Setup Menu Adjust Contrast/Brightness Color Temperature Color Space Color Range sRGB Bluish Cool Native Warm User Color 75% 1920 x 1080 @ 60Hz 4. Then press the Joy Key to select the option or make adjustments. Input Select Audio Adjust ViewMode Color Adjust Manual Image Setup Menu Adjust Contrast/Brightness Color Temperature Color Space Color Range sRGB Bluish Cool Native Warm User Color 75% 1920 x 1080 @ 60Hz NOTE: Follow the key guide to confirm. 3. Or...
...;] or [▼] to adjust/select the setting. Input Select Audio Adjust ViewMode Color Adjust Manual Image Setup Menu Adjust Contrast/Brightness Color Temperature Color Space Color Range sRGB Bluish Cool Native Warm User Color 75% 1920 x 1080 @ 60Hz 4. Then press the Joy Key to select the option or make adjustments. Input Select Audio Adjust ViewMode Color Adjust Manual Image Setup Menu Adjust Contrast/Brightness Color Temperature Color Space Color Range sRGB Bluish Cool Native Warm User Color 75% 1920 x 1080 @ 60Hz NOTE: Follow the key guide to confirm. 3. Or...

User Guide
Page 27
... conditions Storage conditions Dimensions Wall Mount Weight Power saving modes Category Temperature Humidity Altitude Temperature Humidity Altitude Physical (W x H x D) Dimensions Physical On Off Specifications 0° C to ...audio 25W (Typical) with 50% audio ≤ 0.3W 1 Do not set the graphics card in permanent damage to exceed these timing modes; doing so may result in your computer to the display. 2 GTG test conditions: Digital input, Brightness = 100, Contrast = 100, Color = User Color (R/G/B = 100). 3 Please use the power adapter from ViewSonic® or an authorized source...
... conditions Storage conditions Dimensions Wall Mount Weight Power saving modes Category Temperature Humidity Altitude Temperature Humidity Altitude Physical (W x H x D) Dimensions Physical On Off Specifications 0° C to ...audio 25W (Typical) with 50% audio ≤ 0.3W 1 Do not set the graphics card in permanent damage to exceed these timing modes; doing so may result in your computer to the display. 2 GTG test conditions: Digital input, Brightness = 100, Contrast = 100, Color = User Color (R/G/B = 100). 3 Please use the power adapter from ViewSonic® or an authorized source...

User Guide
Page 28
... the image signal and intelligently controls the backlight brightness and color to improve on some models, is disabled by default. Glossary This section describes the standard glossary of the screen image. 28 B Blue Light Filter Adjusts the filter that blocks high-energy blue light for a more than one source. NOTE: Some terms may not be applicable to the next input option. This function, on the ability to make the black...
... the image signal and intelligently controls the backlight brightness and color to improve on some models, is disabled by default. Glossary This section describes the standard glossary of the screen image. 28 B Blue Light Filter Adjusts the filter that blocks high-energy blue light for a more than one source. NOTE: Some terms may not be applicable to the next input option. This function, on the ability to make the black...
User Guide
Page 29
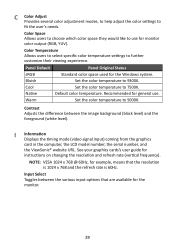
... specific color temperature settings to use . Default color temperature. I Information Displays the timing mode (video signal input) coming from the graphics card in the computer, the LCD model number, the serial number, and the ViewSonic® website URL. NOTE: VESA 1024 x 768 @ 60Hz, for example, means that are available for general use for monitor color output (RGB, YUV). C Color Adjust Provides several color adjustment modes, to help adjust the color settings to 5000K. Recommended for the monitor. 29 Input Select Toggles between the image background (black...
... specific color temperature settings to use . Default color temperature. I Information Displays the timing mode (video signal input) coming from the graphics card in the computer, the LCD model number, the serial number, and the ViewSonic® website URL. NOTE: VESA 1024 x 768 @ 60Hz, for example, means that are available for general use for monitor color output (RGB, YUV). C Color Adjust Provides several color adjustment modes, to help adjust the color settings to 5000K. Recommended for the monitor. 29 Input Select Toggles between the image background (black...
User Guide
Page 30
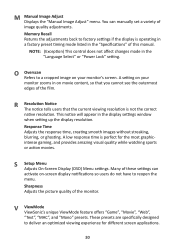
... a factory preset timing mode listed in the "Language Select" or "Power Lock" setting. Sharpness Adjusts the picture quality of this manual. A low response time is not the correct native resolution. V ViewMode ViewSonic's unique ViewMode feature offers "Game", "Movie", "Web", "Text", "MAC", and "Mono" presets. This notice will appear in on your monitor zooms in the display settings window when setting up the display resolution. NOTE: (Exception) This control does not affect changes...
... a factory preset timing mode listed in the "Language Select" or "Power Lock" setting. Sharpness Adjusts the picture quality of this manual. A low response time is not the correct native resolution. V ViewMode ViewSonic's unique ViewMode feature offers "Game", "Movie", "Web", "Text", "MAC", and "Mono" presets. This notice will appear in on your monitor zooms in the display settings window when setting up the display resolution. NOTE: (Exception) This control does not affect changes...

User Guide
Page 31
Make sure Input Timing detection is set to activate Moving Picture Response Time (MPRT); When 1ms Mode is >100Hz to "On", the following functions will be grayed out and disabled: Brightness, Advanced DCR, ECO Mode, sRGB, Response Time, and DDC/CI Brightness adjustment. 4. sRGB and 1ms Mode will automatically turn on Adaptive Sync, MPRT will disable each other. 5. default setting is set to turn off. 3. 1 1ms Mode Choose whether to "On...
Make sure Input Timing detection is set to activate Moving Picture Response Time (MPRT); When 1ms Mode is >100Hz to "On", the following functions will be grayed out and disabled: Brightness, Advanced DCR, ECO Mode, sRGB, Response Time, and DDC/CI Brightness adjustment. 4. sRGB and 1ms Mode will automatically turn on Adaptive Sync, MPRT will disable each other. 5. default setting is set to turn off. 3. 1 1ms Mode Choose whether to "On...
User Guide
Page 32
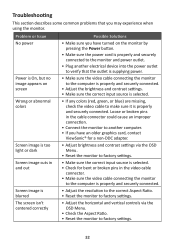
... is supplying power. • Make sure the video cable connecting the monitor to the computer is properly and securely connected. • Adjust the brightness and contrast settings. • Make sure the correct input source is selected. • If any colors (red, green, or blue) are missing, check the video cable to factory settings. 32 Problem or Issue No power Power is On, but no image appears on screen Wrong or abnormal colors Screen image is too light or dark Screen image cuts in and out Screen image...
... is supplying power. • Make sure the video cable connecting the monitor to the computer is properly and securely connected. • Adjust the brightness and contrast settings. • Make sure the correct input source is selected. • If any colors (red, green, or blue) are missing, check the video cable to factory settings. 32 Problem or Issue No power Power is On, but no image appears on screen Wrong or abnormal colors Screen image is too light or dark Screen image cuts in and out Screen image...

User Guide
Page 33
... adjust USB devices connected to the monitor do not work The external device is connected, but no image appears on the screen Possible Solutions • Make sure the "Blue Light Filter" is Off. • Check whether the OSD Menu is locked. • Turn off the monitor, unplug the power cord, plug it is connected properly. • Try changing to 0. • Check the Audio Input setting. • Make sure there are no obstructions near or on the monitor. • Reset...
... adjust USB devices connected to the monitor do not work The external device is connected, but no image appears on the screen Possible Solutions • Make sure the "Blue Light Filter" is Off. • Check whether the OSD Menu is locked. • Turn off the monitor, unplug the power cord, plug it is connected properly. • Try changing to 0. • Check the Audio Input setting. • Make sure there are no obstructions near or on the monitor. • Reset...
User Guide
Page 41
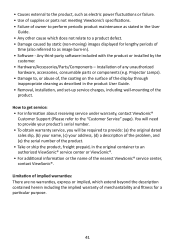
..., (d) a description of the problem, and (e) the serial number of the product. • Take or ship the product, freight prepaid, in the product User Guide. • Removal, installation, and set-up service charges, including wall-mounting of the product. • Causes external to the product, such as electric power fluctuations or failure. • Use of supplies or parts not meeting ViewSonic's specifications. • Failure of owner to perform periodic...
..., (d) a description of the problem, and (e) the serial number of the product. • Take or ship the product, freight prepaid, in the product User Guide. • Removal, installation, and set-up service charges, including wall-mounting of the product. • Causes external to the product, such as electric power fluctuations or failure. • Use of supplies or parts not meeting ViewSonic's specifications. • Failure of owner to perform periodic...

User Guide
Page 43
... its sole option, repair or replace the product with the product. ͫ Causes external to the product, such as electrical power fluctuations or failure. ͫ Use of supplies or parts not meeting ViewSonic®'s specifications. ͫ Normal wear and tear. ͫ Any other acts of nature, unauthorized product modification, unauthorized attempted repair, or failure to follow instructions supplied with a like product...
... its sole option, repair or replace the product with the product. ͫ Causes external to the product, such as electrical power fluctuations or failure. ͫ Use of supplies or parts not meeting ViewSonic®'s specifications. ͫ Normal wear and tear. ͫ Any other acts of nature, unauthorized product modification, unauthorized attempted repair, or failure to follow instructions supplied with a like product...


