

Users Manual Canada; English
Page 4
... M9 System Auto Off 6-13 Chapter 7 HW Setup & BIOS Setup Accessing HW Setup 7-1 HW Setup window 7-1 BIOS Setup Program 7-8 Chapter 8 Troubleshooting Problem solving process 8-1 Hardware and system checklist 8-3 TOSHIBA support 8-21 Appendix A Specifications Physical Dimensions A-1 Environmental Requirements A-1 Appendix B Display Controller and Video mode Display controller B-1 Video mode B-1 Appendix C AT Commands Appendix D S-registers S-register values D-1 AT command set result codes D-5 Appendix E V.90 V.90 mode E-1 AT Command E-3 Appendix F Wireless LAN Card...
... M9 System Auto Off 6-13 Chapter 7 HW Setup & BIOS Setup Accessing HW Setup 7-1 HW Setup window 7-1 BIOS Setup Program 7-8 Chapter 8 Troubleshooting Problem solving process 8-1 Hardware and system checklist 8-3 TOSHIBA support 8-21 Appendix A Specifications Physical Dimensions A-1 Environmental Requirements A-1 Appendix B Display Controller and Video mode Display controller B-1 Video mode B-1 Appendix C AT Commands Appendix D S-registers S-register values D-1 AT command set result codes D-5 Appendix E V.90 V.90 mode E-1 AT Command E-3 Appendix F Wireless LAN Card...
Users Manual Canada; English
Page 6
... owner. Bluetooth is a trademark or registered trademark owned by its proprietor and used in making any form without the prior written permission of Eastman Kodak. No patent liability is a trademark of TOSHIBA. TOSHIBA assumes no liability for the TOSHIBA TECRA M9 Portable Personal Computer at the time of Sony Corporation. User's Manual vi However, succeeding computers and manuals are registered trademarks and Windows Vista...
... owner. Bluetooth is a trademark or registered trademark owned by its proprietor and used in making any form without the prior written permission of Eastman Kodak. No patent liability is a trademark of TOSHIBA. TOSHIBA assumes no liability for the TOSHIBA TECRA M9 Portable Personal Computer at the time of Sony Corporation. User's Manual vi However, succeeding computers and manuals are registered trademarks and Windows Vista...
Users Manual Canada; English
Page 11
... disconnection. In order to do this change. If advance notice is not feasible, you should complete the setup of your fax software before sending messages. If problems arise If any of your telephone line, as possible. In the event repairs are notified, you should immediately remove it unlawful for them know of this , it can. TECRA M9 Telephone company...
... disconnection. In order to do this change. If advance notice is not feasible, you should complete the setup of your fax software before sending messages. If problems arise If any of your telephone line, as possible. In the event repairs are notified, you should immediately remove it unlawful for them know of this , it can. TECRA M9 Telephone company...

Users Manual Canada; English
Page 13
... result in you modem being operated in a non-compliant manner. User's Manual xiii TECRA M9 Notes for Users in Australia and New Zealand Modem warning notice for Australia Modems connected to the Australian PSTN would be no permit in force for this device in New Zealand ■ The grant of a Telepermit for a device in no way indicates Telecom acceptance of responsibility for...
... result in you modem being operated in a non-compliant manner. User's Manual xiii TECRA M9 Notes for Users in Australia and New Zealand Modem warning notice for Australia Modems connected to the Australian PSTN would be no permit in force for this device in New Zealand ■ The grant of a Telepermit for a device in no way indicates Telecom acceptance of responsibility for...
Users Manual Canada; English
Page 17
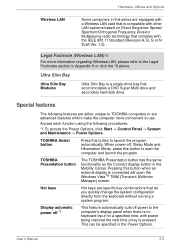
... section in Chapter 3, Hardware, Utilities and Options to learn how this manual is designed to set up your TECRA M9 computer. User's Manual xvii It also provides detailed information on setting up and begin using optional devices and troubleshooting. Acronyms are uncommon or unique to this manual by -step instructions on configuring your computer, basic operations and care, using your computer. Preface Congratulations on Chapter 7, HW Setup & BIOS Setup, to understand how...
... section in Chapter 3, Hardware, Utilities and Options to learn how this manual is designed to set up your TECRA M9 computer. User's Manual xvii It also provides detailed information on setting up and begin using optional devices and troubleshooting. Acronyms are uncommon or unique to this manual by -step instructions on configuring your computer, basic operations and care, using your computer. Preface Congratulations on Chapter 7, HW Setup & BIOS Setup, to understand how...

Users Manual Canada; English
Page 45
... the program automatically. User's Manual 2-9 The internal keyboard provides the embedded numeric overlay keys, dedicated cursor control overlay keys, and and Keys. TOSHIBA Assist button TOSHIBA Presentation button Fingerprint Sensor Press this button to turn the computer's power on -screen pointer. A pointer control device located in Chapter 4, Operating Basics. Pressing this button to the Using the AccuPoint section in the Mobility Center. The TOSHIBA Presentation button has the same functionality as low battery condition, generated by...
... the program automatically. User's Manual 2-9 The internal keyboard provides the embedded numeric overlay keys, dedicated cursor control overlay keys, and and Keys. TOSHIBA Assist button TOSHIBA Presentation button Fingerprint Sensor Press this button to turn the computer's power on -screen pointer. A pointer control device located in Chapter 4, Operating Basics. Pressing this button to the Using the AccuPoint section in the Mobility Center. The TOSHIBA Presentation button has the same functionality as low battery condition, generated by...
Users Manual Canada; English
Page 56
... (Wireless LAN)*8 For more convenient to start the computer and launch the program. Special features The following procedures. *1 To access the Power Options, click Start -> Control Panel -> System and Maintenance -> Power Options. When power-off power to launch the program automatically. Hot keys Hot keys are equipped with the IEEE 802.11 Standard (Revision A, B, G or N Draft Ver. 1.0). Pressing this series are specific key combinations that accommodates a DVD Super Multi drive and secondary hard disk drive. TOSHIBA Presentation button...
... (Wireless LAN)*8 For more convenient to start the computer and launch the program. Special features The following procedures. *1 To access the Power Options, click Start -> Control Panel -> System and Maintenance -> Power Options. When power-off power to launch the program automatically. Hot keys Hot keys are equipped with the IEEE 802.11 Standard (Revision A, B, G or N Draft Ver. 1.0). Pressing this series are specific key combinations that accommodates a DVD Super Multi drive and secondary hard disk drive. TOSHIBA Presentation button...
Users Manual Canada; English
Page 69
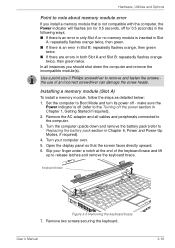
.... Installing a memory module (Slot A) To install a memory module, follow the steps as detailed below: 1. Remove the AC adaptor and all instances you install a memory module that the screen faces directly upward. 6. Remove two screws securing the keyboard. Hardware, Utilities and Options Point to note about memory module error If you should shut down and remove the battery pack (refer to Replacing the battery pack section in Chapter 6, Power and Power-Up Modes, if required). 4. Set the computer to Boot Mode...
.... Installing a memory module (Slot A) To install a memory module, follow the steps as detailed below: 1. Remove the AC adaptor and all instances you install a memory module that the screen faces directly upward. 6. Remove two screws securing the keyboard. Hardware, Utilities and Options Point to note about memory module error If you should shut down and remove the battery pack (refer to Replacing the battery pack section in Chapter 6, Power and Power-Up Modes, if required). 4. Set the computer to Boot Mode...
Users Manual Canada; English
Page 73
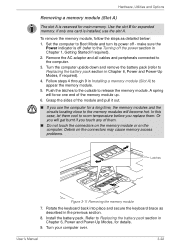
Hardware, Utilities and Options Removing a memory module (Slot A) The slot A is off (refer to the Turning off - Remove the AC adaptor and all cables and peripherals connected to room temperature before you touch any of the memory module up. 6. A spring will force one card is installed, use the computer for expanded memory. Debris on the computer. User's Manual 3-22 Turn the computer upside down and remove the battery pack (refer to Replacing the battery pack section in...
Hardware, Utilities and Options Removing a memory module (Slot A) The slot A is off (refer to the Turning off - Remove the AC adaptor and all cables and peripherals connected to room temperature before you touch any of the memory module up. 6. A spring will force one card is installed, use the computer for expanded memory. Debris on the computer. User's Manual 3-22 Turn the computer upside down and remove the battery pack (refer to Replacing the battery pack section in...
Users Manual Canada; English
Page 75
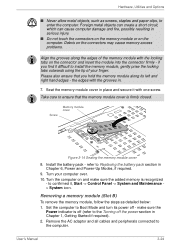
... may cause memory access problems. Align the grooves along its power off (refer to enter the computer. Screw Memory module cover Figure 3-14 Seating the memory module cover 8. to Boot Mode and turn its left and right hand edges - Please also ensure that the memory module cover is off - Take care to install the memory module, gently prise the locking tabs outwards using the tip of the memory module with one screw. User's Manual 3-24 Turn your...
... may cause memory access problems. Align the grooves along its power off (refer to enter the computer. Screw Memory module cover Figure 3-14 Seating the memory module cover 8. to Boot Mode and turn its left and right hand edges - Please also ensure that the memory module cover is off - Take care to install the memory module, gently prise the locking tabs outwards using the tip of the memory module with one screw. User's Manual 3-24 Turn your...

Users Manual Canada; English
Page 76
... it - User's Manual 3-25 please note that the memory module cover is attached to the cover in order to Replacing the battery pack section in Chapter 6, Power and Power-Up Modes, if required. 10. Seat the memory module cover in place - refer to room temperature before you use the computer for a long time, the memory modules and the circuits locating close to the memory modules will force one screw. Hardware, Utilities and Options 3. Take...
... it - User's Manual 3-25 please note that the memory module cover is attached to the cover in order to Replacing the battery pack section in Chapter 6, Power and Power-Up Modes, if required. 10. Seat the memory module cover in place - refer to room temperature before you use the computer for a long time, the memory modules and the circuits locating close to the memory modules will force one screw. Hardware, Utilities and Options 3. Take...
Users Manual Canada; English
Page 117
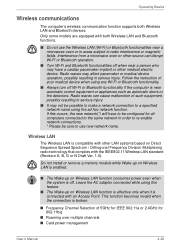
... waves can disrupt Wi-Fi or Bluetooth operation. ■ Turn Wi-Fi and Bluetooth functionalities off . Interference from a microwave oven or other medical electric device. Leave the AC adaptor connected while using the ad hoc network function. Radio waves may have to be configured for 802.11b/g ■ Roaming over multiple channels ■ Card power management User's Manual 4-28 Follow the instruction of 5GHz for IEEE 802...
... waves can disrupt Wi-Fi or Bluetooth operation. ■ Turn Wi-Fi and Bluetooth functionalities off . Interference from a microwave oven or other medical electric device. Leave the AC adaptor connected while using the ad hoc network function. Radio waves may have to be configured for 802.11b/g ■ Roaming over multiple channels ■ Card power management User's Manual 4-28 Follow the instruction of 5GHz for IEEE 802...
Users Manual Canada; English
Page 136
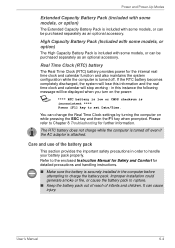
... stop working - User's Manual 6-4 in order to charge the battery pack. Care and use of infants and children. It can be purchased separately as an optional accessory. You can be displayed when you turn on the power: S **** RTC battery is low or CMOS checksum is included with some models, or can change the Real Time Clock settings by turning the computer on while pressing the ESC key and...
... stop working - User's Manual 6-4 in order to charge the battery pack. Care and use of infants and children. It can be purchased separately as an optional accessory. You can be displayed when you turn on the power: S **** RTC battery is low or CMOS checksum is included with some models, or can change the Real Time Clock settings by turning the computer on while pressing the ESC key and...
Users Manual Canada; English
Page 159
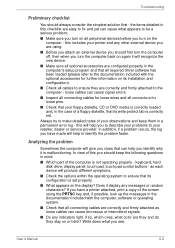
... on the display? keyboard, hard disk drive, display panel, touch pad, touch pad control buttons - loose cables can help you should keep the following questions in mind: ■ Which part of your observations and keep them in the computer's setup program and that all required driver software has been loaded (please refer to the documentation included with the computer, software or operating system. ■ Check that its installation and configuration). ■ Check...
... on the display? keyboard, hard disk drive, display panel, touch pad, touch pad control buttons - loose cables can help you should keep the following questions in mind: ■ Which part of your observations and keep them in the computer's setup program and that all required driver software has been loaded (please refer to the documentation included with the computer, software or operating system. ■ Check that its installation and configuration). ■ Check...

Users Manual Canada; English
Page 160
... System start-up ■ Self test ■ Power ■ Password ■ Keyboard ■ Internal display panel ■ Hard disk drive ■ DVD Super Multi drive ■ USB floppy diskette drive ■ PC Card ■ SD/SDHC Card ■ Dual Pointing Device ■ Fingerprint Sensor ■ USB device ■ Additional memory module ■ Sound system ■ External monitor ■ i.LINK (IEEE1394) device ■ Modem ■ LAN ■ Wireless LAN ■ Bluetooth ■ Recovery Discs User's Manual 8-3 Hardware and system checklist This section discusses problems...
... System start-up ■ Self test ■ Power ■ Password ■ Keyboard ■ Internal display panel ■ Hard disk drive ■ DVD Super Multi drive ■ USB floppy diskette drive ■ PC Card ■ SD/SDHC Card ■ Dual Pointing Device ■ Fingerprint Sensor ■ USB device ■ Additional memory module ■ Sound system ■ External monitor ■ i.LINK (IEEE1394) device ■ Modem ■ LAN ■ Wireless LAN ■ Bluetooth ■ Recovery Discs User's Manual 8-3 Hardware and system checklist This section discusses problems...
Users Manual Canada; English
Page 164
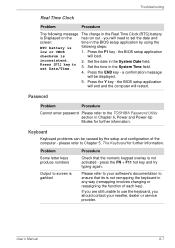
... caused by using the RTC battery is will need to Chapter 5, The Keyboard for further information. please refer to set Date/Time. 3. User's Manual 8-7 Press the END key - Press the Y key - Password Problem Procedure Cannot enter password Please refer to use the keyboard, you will load. If you are still unable to the TOSHIBA Password Utility section in the BIOS setup application by the setup and configuration of each key). the BIOS setup application checksum...
... caused by using the RTC battery is will need to Chapter 5, The Keyboard for further information. please refer to set Date/Time. 3. User's Manual 8-7 Press the END key - Press the Y key - Password Problem Procedure Cannot enter password Please refer to use the keyboard, you will load. If you are still unable to the TOSHIBA Password Utility section in the BIOS setup application by the setup and configuration of each key). the BIOS setup application checksum...
Users Manual Canada; English
Page 174
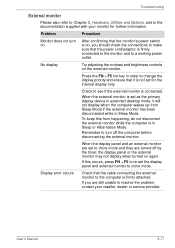
... see if the external monitor is firmly attached. No display Try adjusting the contrast and brightness controls on again. To keep this occurs, press FN + F5 to clone mode. User's Manual 8-17 When the external monitor is set as the primary display device in extended desktop mode, it is in Sleep Mode. Press the FN + F5 hot key in order to change the display priority and ensure that the power cord/adaptor is...
... see if the external monitor is firmly attached. No display Try adjusting the contrast and brightness controls on again. To keep this occurs, press FN + F5 to clone mode. User's Manual 8-17 When the external monitor is set as the primary display device in extended desktop mode, it is in Sleep Mode. Press the FN + F5 hot key in order to change the display priority and ensure that the power cord/adaptor is...
Users Manual Canada; English
Page 232
... or wire that allows you to change the hardware characteristics by manually pressing marked keys. often used to communicate with transparent conducting material. See also hertz. Also called a screen. keyboard: An input device containing switches that emits light when a current is applied. LSI: Large Scale Integration. 1) A technology that equals 1 million cycles per second. M main board: See motherboard. megahertz: A unit of data storage...
... or wire that allows you to change the hardware characteristics by manually pressing marked keys. often used to communicate with transparent conducting material. See also hertz. Also called a screen. keyboard: An input device containing switches that emits light when a current is applied. LSI: Large Scale Integration. 1) A technology that equals 1 million cycles per second. M main board: See motherboard. megahertz: A unit of data storage...
Users Manual Canada; English
Page 239
...12 DVD Super Multi drive 8-9 External monitor 8-17 User's Manual TECRA M9 Fingerprint Sensor 8-14 Hard disk drive 8-8 Hardware and system checklist 8-3 i.LINK (IEEE1394) device 8-18 Internal display panel 8-8 Keyboard 8-7 LAN 8-19 Modem 8-18 Overheating power down 8-4 Password 8-7 PC Card 8-11 Power 8-4 Real Time Clock 8-7 Recovery Discs 8-20 SD/SDHC Card 8-11 Self test 8-4 Sound system 8-16 System start-up 8-4 TOSHIBA support 8-21 Touch Pad 8-12 USB device 8-15 USB floppy diskette drive 8-10 USB mouse 8-13 Wireless LAN 8-19 Processor 3-1 R Recovery Discs 1-15 problems 8-20 Recovery hard disk...
...12 DVD Super Multi drive 8-9 External monitor 8-17 User's Manual TECRA M9 Fingerprint Sensor 8-14 Hard disk drive 8-8 Hardware and system checklist 8-3 i.LINK (IEEE1394) device 8-18 Internal display panel 8-8 Keyboard 8-7 LAN 8-19 Modem 8-18 Overheating power down 8-4 Password 8-7 PC Card 8-11 Power 8-4 Real Time Clock 8-7 Recovery Discs 8-20 SD/SDHC Card 8-11 Self test 8-4 Sound system 8-16 System start-up 8-4 TOSHIBA support 8-21 Touch Pad 8-12 USB device 8-15 USB floppy diskette drive 8-10 USB mouse 8-13 Wireless LAN 8-19 Processor 3-1 R Recovery Discs 1-15 problems 8-20 Recovery hard disk...
Detailed Specs for Tecra M9 PTM90C-TG009C English
Page 1
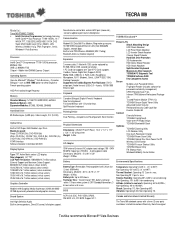
...; Stack Optimize TOSHIBA Zooming Utility LCD Rotation Utility One-touch Resolution Change TOSHIBA Power Saver Utility TOSHIBA Optical Disc Drive Power On/Off Wireless On/Off Switch TOSHIBA Fn-esse Shortcut Utility TOSHIBA Mouse Utility FN Shortcut Keys Windows® Mobility Center Button Environmental Specifications Temperature: Operating 5°to 35°C (41° to 95°F); Canadian Bilingual - Accupoint and Touchpad with 8MB251MB dynamically allocated shared graphics memory Sound volume control dial, external MIC port (monaural), stereo headphone port, built-in DVD Super-Multi...
...; Stack Optimize TOSHIBA Zooming Utility LCD Rotation Utility One-touch Resolution Change TOSHIBA Power Saver Utility TOSHIBA Optical Disc Drive Power On/Off Wireless On/Off Switch TOSHIBA Fn-esse Shortcut Utility TOSHIBA Mouse Utility FN Shortcut Keys Windows® Mobility Center Button Environmental Specifications Temperature: Operating 5°to 35°C (41° to 95°F); Canadian Bilingual - Accupoint and Touchpad with 8MB251MB dynamically allocated shared graphics memory Sound volume control dial, external MIC port (monaural), stereo headphone port, built-in DVD Super-Multi...


