
User Manual
Page 27
... display devices 78 Directing the display output when you turn on the computer 78 Adjusting the quality of the external display......80 Using an external keyboard 80 Using a mouse 80 Connecting a printer 81 Setting up a printer 82 Connecting an optional external diskette drive........83 Turning off the computer 84 Options for...
... display devices 78 Directing the display output when you turn on the computer 78 Adjusting the quality of the external display......80 Using an external keyboard 80 Using a mouse 80 Connecting a printer 81 Setting up a printer 82 Connecting an optional external diskette drive........83 Turning off the computer 84 Options for...
User Manual
Page 28
... computer 93 Moving the computer 93 Using a computer lock 94 Chapter 2: Learning the Basics 95 Computing tips 95 Using the keyboard 97 Character keys 97 Making your keyboard emulate a full-size keyboard 97 Ctrl, Fn, and Alt keys 98 Function keys 98 Windows special keys 99 Overlay keys 99 Using the overlay to... 112 Creating a CD 113 Removing a disc with the computer on...........114 Removing a disc with the computer off ..........114 Caring for CD or DVD Discs 115 Toshiba's online resources 115
... computer 93 Moving the computer 93 Using a computer lock 94 Chapter 2: Learning the Basics 95 Computing tips 95 Using the keyboard 97 Character keys 97 Making your keyboard emulate a full-size keyboard 97 Ctrl, Fn, and Alt keys 98 Function keys 98 Windows special keys 99 Overlay keys 99 Using the overlay to... 112 Creating a CD 113 Removing a disc with the computer on...........114 Removing a disc with the computer off ..........114 Caring for CD or DVD Discs 115 Toshiba's online resources 115

User Manual
Page 31
... supervisor password 165 Deleting a supervisor password 166 Toshiba Password Utility 167 PC Diagnostic Tool Utility 168 HDD Protection Utility 170 Fn-esse 171 Starting Fn-esse 171 Using drag-and-drop to assign a key 172 Using the keyboard or pointing device to assign a key 173... Viewing existing key assignments 174 Changing or removing existing key assignments 175 Toshiba Hotkey Utility 175 Toshiba SD™ Memory Card Format Utility............176 Toshiba SD™ Memory Boot Utility 177 Booting ...
... supervisor password 165 Deleting a supervisor password 166 Toshiba Password Utility 167 PC Diagnostic Tool Utility 168 HDD Protection Utility 170 Fn-esse 171 Starting Fn-esse 171 Using drag-and-drop to assign a key 172 Using the keyboard or pointing device to assign a key 173... Viewing existing key assignments 174 Changing or removing existing key assignments 175 Toshiba Hotkey Utility 175 Toshiba SD™ Memory Card Format Utility............176 Toshiba SD™ Memory Boot Utility 177 Booting ...
User Manual
Page 32
... A plan of action 212 Resolving hardware conflicts on your own .....213 Fixing a problem with Device Manager ...........214 Memory problems 216 Power and the batteries 217 Keyboard problems 219 Display problems 220 Disk drive problems 222 Optical drive problems 225 Sound system problems 226 PC Card problems 226 Printer problems 230 Modem...
... A plan of action 212 Resolving hardware conflicts on your own .....213 Fixing a problem with Device Manager ...........214 Memory problems 216 Power and the batteries 217 Keyboard problems 219 Display problems 220 Disk drive problems 222 Optical drive problems 225 Sound system problems 226 PC Card problems 226 Printer problems 230 Modem...
User Manual
Page 33
...habits 238 Data and system configuration backup in Windows XP 239 If you need further assistance 245 Before you contact Toshiba 245 Contacting Toshiba 246 Other Toshiba Internet Web sites 247 Toshiba's worldwide offices 248 Appendix A: Hot Keys 250 Volume Mute 250 Password security 251 Without a password 251 With a... brightness 257 Disabling or enabling wireless devices 257 Disabling or enabling the TouchPad 258 Zooming applications in/out 258 Keyboard hot keys 259 Appendix B: Power Cord/Cable Connectors 260 USA and Canada 260 United Kingdom 260 Australia 260 Europe 260
...habits 238 Data and system configuration backup in Windows XP 239 If you need further assistance 245 Before you contact Toshiba 245 Contacting Toshiba 246 Other Toshiba Internet Web sites 247 Toshiba's worldwide offices 248 Appendix A: Hot Keys 250 Volume Mute 250 Password security 251 Without a password 251 With a... brightness 257 Disabling or enabling wireless devices 257 Disabling or enabling the TouchPad 258 Zooming applications in/out 258 Keyboard hot keys 259 Appendix B: Power Cord/Cable Connectors 260 USA and Canada 260 United Kingdom 260 Australia 260 Europe 260

User Manual
Page 44
... surface. 44 Getting Started Setting up your computer Always make sure your PC and AC adaptor have adequate ventilation and are not limited to, a mouse, keyboard, printer, memory, and PC Cards. Using your PC on or when an AC adaptor is connected to a power outlet (even if your software" on the...
... surface. 44 Getting Started Setting up your computer Always make sure your PC and AC adaptor have adequate ventilation and are not limited to, a mouse, keyboard, printer, memory, and PC Cards. Using your PC on or when an AC adaptor is connected to a power outlet (even if your software" on the...
User Manual
Page 47
...Add more memory (see "Adding memory (optional)" on page 55) ❖ Connect a mouse (see "Using a mouse" on page 80) ❖ Connect a full-size keyboard (see "Using an external keyboard" on page 80) ❖ Connect an external monitor (see "Using external display devices" on page 78) ❖ Connect a local printer (see "Connecting a printer... "Using PC Cards" on page 45. Getting Started Adding optional external devices 47 Adding optional external devices NOTE Before adding external devices or memory, Toshiba recommends setting up your software. Always grasp the plug directly.
...Add more memory (see "Adding memory (optional)" on page 55) ❖ Connect a mouse (see "Using a mouse" on page 80) ❖ Connect a full-size keyboard (see "Using an external keyboard" on page 80) ❖ Connect an external monitor (see "Using external display devices" on page 78) ❖ Connect a local printer (see "Connecting a printer... "Using PC Cards" on page 45. Getting Started Adding optional external devices 47 Adding optional external devices NOTE Before adding external devices or memory, Toshiba recommends setting up your software. Always grasp the plug directly.
User Manual
Page 66
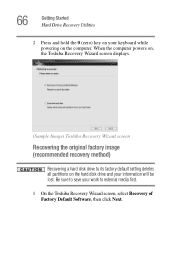
When the computer powers on, the Toshiba Recovery Wizard screen displays. (Sample Image) Toshiba Recovery Wizard screen Recovering the original factory image (recommended recovery method) Recovering a hard disk drive to external media first. 1 On the Toshiba Recovery Wizard screen, select Recovery of Factory Default ...Software, then click Next. 66 Getting Started Hard Drive Recovery Utilities 2 Press and hold the 0 (zero) key on your keyboard while powering on the hard disk drive and...
When the computer powers on, the Toshiba Recovery Wizard screen displays. (Sample Image) Toshiba Recovery Wizard screen Recovering the original factory image (recommended recovery method) Recovering a hard disk drive to external media first. 1 On the Toshiba Recovery Wizard screen, select Recovery of Factory Default ...Software, then click Next. 66 Getting Started Hard Drive Recovery Utilities 2 Press and hold the 0 (zero) key on your keyboard while powering on the hard disk drive and...
User Manual
Page 67
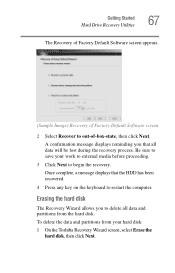
Erasing the hard disk The Recovery Wizard allows you that the HDD has been recovered. 4 Press any key on the keyboard to out-of-box-state, then click Next. To delete the data and partitions from the hard disk. Getting Started Hard Drive Recovery Utilities 67 ... complete, a message displays that all data and partitions from your work to external media before proceeding. 3 Click Next to save your hard disk: 1 On the Toshiba Recovery Wizard screen, select Erase the hard disk, then click Next. Be sure to begin the recovery.
Erasing the hard disk The Recovery Wizard allows you that the HDD has been recovered. 4 Press any key on the keyboard to out-of-box-state, then click Next. To delete the data and partitions from the hard disk. Getting Started Hard Drive Recovery Utilities 67 ... complete, a message displays that all data and partitions from your work to external media before proceeding. 3 Click Next to save your hard disk: 1 On the Toshiba Recovery Wizard screen, select Erase the hard disk, then click Next. Be sure to begin the recovery.

User Manual
Page 68
..., depending on the size of the data on the hard disk without overwriting the HDD. ❖ Delete all partitions and overwrite all sectors on the keyboard to begin deleting the HDD. When the process is completed, a message displays informing you that all data will be lost. Be sure you that the...
..., depending on the size of the data on the hard disk without overwriting the HDD. ❖ Delete all partitions and overwrite all sectors on the keyboard to begin deleting the HDD. When the process is completed, a message displays informing you that all data will be lost. Be sure you that the...
User Manual
Page 69
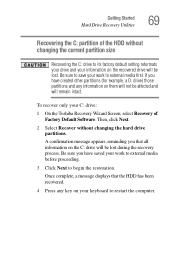
To recover only your C: drive: 1 On the Toshiba Recovery Wizard Screen, select Recovery of the HDD without changing the hard drive partitions. Then, click Next. 2 Select Recover without changing the current partition size Recovering the C: drive to its factory default setting reformats your drive and your keyboard to restart the computer. A confirmation message...
To recover only your C: drive: 1 On the Toshiba Recovery Wizard Screen, select Recovery of the HDD without changing the hard drive partitions. Then, click Next. 2 Select Recover without changing the current partition size Recovering the C: drive to its factory default setting reformats your drive and your keyboard to restart the computer. A confirmation message...
User Manual
Page 70
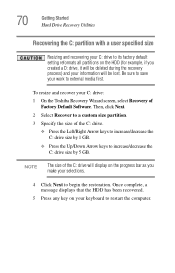
...created a D: drive, it will be lost. To resize and recover your information will be deleted during the recovery process) and your C: drive: 1 On the Toshiba Recovery Wizard screen, select Recovery of the C: drive. ❖ Press the Left/Right Arrow keys to increase/decrease the C: drive size by 1 GB. ❖... your C: drive to external media first. Be sure to save your work to its factory default setting reformats all partitions on your keyboard to begin the restoration. Then, click Next. 2 Select Recover to a custom size partition. 3 Specify the size of Factory Default Software.
...created a D: drive, it will be lost. To resize and recover your information will be deleted during the recovery process) and your C: drive: 1 On the Toshiba Recovery Wizard screen, select Recovery of the C: drive. ❖ Press the Left/Right Arrow keys to increase/decrease the C: drive size by 1 GB. ❖... your C: drive to external media first. Be sure to save your work to its factory default setting reformats all partitions on your keyboard to begin the restoration. Then, click Next. 2 Select Recover to a custom size partition. 3 Specify the size of Factory Default Software.
User Manual
Page 72
... (recommended recovery method) Recovering a hard disk drive to external media first. 1 Select Recovery of Factory Default Software. Be sure to save your information on the keyboard to restart the computer. Once complete, a message displays that all partitions on them will remain intact.
... (recommended recovery method) Recovering a hard disk drive to external media first. 1 Select Recovery of Factory Default Software. Be sure to save your information on the keyboard to restart the computer. Once complete, a message displays that all partitions on them will remain intact.

User Manual
Page 73
... the hard drive partitions. Click Next. 2 Select Recover using all partitions on your work to external media before proceeding. Be sure you have saved your keyboard to begin the restoration. Once complete, a message displays that all data will increase the size of Factory Default Software. Click Next. Be sure to save...
... the hard drive partitions. Click Next. 2 Select Recover using all partitions on your work to external media before proceeding. Be sure you have saved your keyboard to begin the restoration. Once complete, a message displays that all data will increase the size of Factory Default Software. Click Next. Be sure to save...

User Manual
Page 74
...reinstall the drivers and applications that the HDD has been recovered. 4 Press any key on your keyboard to begin the restoration. Checking the HDD operating status After restoring your computer. Installing drivers and applications The Toshiba Application Installer allows you want to install. 4 Click Install. 5 Follow the on the Windows desktop... Click Disk Management. 5 Highlight the hard disk drive in the lower portion of the screen. To reinstall drivers and applications: 1 Double-click the Toshiba Application Installer icon on -screen prompts to complete the installation process.
...reinstall the drivers and applications that the HDD has been recovered. 4 Press any key on your keyboard to begin the restoration. Checking the HDD operating status After restoring your computer. Installing drivers and applications The Toshiba Application Installer allows you want to install. 4 Click Install. 5 Follow the on the Windows desktop... Click Disk Management. 5 Highlight the hard disk drive in the lower portion of the screen. To reinstall drivers and applications: 1 Double-click the Toshiba Application Installer icon on -screen prompts to complete the installation process.
User Manual
Page 75
... direction. Getting Started Using the TouchPad™ 75 Using the TouchPad™ The TouchPad™, the small, smooth square cutout located in front of the keyboard, is much smaller than the display screen, moving your cursor across the screen often means having to move your finger several times across the TouchPad...
... direction. Getting Started Using the TouchPad™ 75 Using the TouchPad™ The TouchPad™, the small, smooth square cutout located in front of the keyboard, is much smaller than the display screen, moving your cursor across the screen often means having to move your finger several times across the TouchPad...
User Manual
Page 80
... the internal display panel to its original position. Using a mouse You may want to your computer. Using an external keyboard If you prefer to use a full-size keyboard, you can use a mouse instead of the computer's builtin TouchPad. You can attach one of the simultaneous modes, ...the resolution of the external display device. The computer's USB ports support any USBcompatible keyboard. TECHNICAL NOTE: To use one to use a USB-compatible mouse. 80 Getting Started Using an external keyboard Adjusting the quality of the external display To obtain the best picture quality from your ...
... the internal display panel to its original position. Using a mouse You may want to your computer. Using an external keyboard If you prefer to use a full-size keyboard, you can use a mouse instead of the computer's builtin TouchPad. You can attach one of the simultaneous modes, ...the resolution of the external display device. The computer's USB ports support any USBcompatible keyboard. TECHNICAL NOTE: To use one to use a USB-compatible mouse. 80 Getting Started Using an external keyboard Adjusting the quality of the external display To obtain the best picture quality from your ...
User Manual
Page 93
... all external peripheral cables are located). Never spray cleaner directly onto the computer. Cleaning the computer Keep liquids, including cleaning fluid, out of the computer's keyboard, speaker, and other openings. Moving the computer Before moving your computer.
... all external peripheral cables are located). Never spray cleaner directly onto the computer. Cleaning the computer Keep liquids, including cleaning fluid, out of the computer's keyboard, speaker, and other openings. Moving the computer Before moving your computer.
User Manual
Page 97
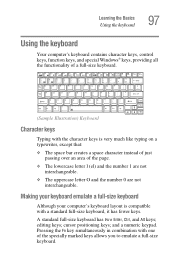
...space character instead of just passing over an area of the specially marked keys allows you to emulate a full-size keyboard. A standard full-size keyboard has two Enter, Ctrl, and Alt keys; cursor positioning keys; Pressing the Fn key simultaneously in combination with a ...standard full-size keyboard, it has fewer keys. and a numeric keypad. editing keys; Learning the Basics Using the keyboard 97 Using the keyboard Your computer's keyboard contains character keys, control keys, function keys, and special Windows®...
...space character instead of just passing over an area of the specially marked keys allows you to emulate a full-size keyboard. A standard full-size keyboard has two Enter, Ctrl, and Alt keys; cursor positioning keys; Pressing the Fn key simultaneously in combination with a ...standard full-size keyboard, it has fewer keys. and a numeric keypad. editing keys; Learning the Basics Using the keyboard 97 Using the keyboard Your computer's keyboard contains character keys, control keys, function keys, and special Windows®...

User Manual
Page 98
... can simulate these separate keys, as follows: ❖ Press Fn and Ctrl simultaneously to simulate the Ctrl key on the right side of the enhanced keyboard. Using the Fn key, you are called function keys because they execute programmed functions when pressed. Function keys The function keys (not to be confused... to the right and left Ctrl and Alt keys, or to simulate the Enter key on the computer. 98 Learning the Basics Using the keyboard Your computer's keyboard has only one Enter and one Ctrl key. For more information, see "Fn-esse®" on page 171, or "Hot Keys" on the full...
... can simulate these separate keys, as follows: ❖ Press Fn and Ctrl simultaneously to simulate the Ctrl key on the right side of the enhanced keyboard. Using the Fn key, you are called function keys because they execute programmed functions when pressed. Function keys The function keys (not to be confused... to the right and left Ctrl and Alt keys, or to simulate the Enter key on the computer. 98 Learning the Basics Using the keyboard Your computer's keyboard has only one Enter and one Ctrl key. For more information, see "Fn-esse®" on page 171, or "Hot Keys" on the full...


