User Guide
Page 9
...be used indoors for frequency range 5.15 GHz to 5.25 GHz to reduce the potential for harmful interference to co-channel Mobile Satellite systems. High power radars are allocated as per standards: EN 60950 Safety of Information Technology equipment. Pour empecher que cet appareil ...85 GHz bands. ETS 300 826 General EMC requirements for radio equipment. Industry Canada requires this product to be operated indoors and away from windows to provide maximum shielding. L'utilisation de ce dispositif est autorisée seulement aux conditions suivantes: (1) il ne doit pas produire de ...
...be used indoors for frequency range 5.15 GHz to 5.25 GHz to reduce the potential for harmful interference to co-channel Mobile Satellite systems. High power radars are allocated as per standards: EN 60950 Safety of Information Technology equipment. Pour empecher que cet appareil ...85 GHz bands. ETS 300 826 General EMC requirements for radio equipment. Industry Canada requires this product to be operated indoors and away from windows to provide maximum shielding. L'utilisation de ce dispositif est autorisée seulement aux conditions suivantes: (1) il ne doit pas produire de ...
User Guide
Page 26
... ANY PARTICULAR PURPOSE WITH REGARD TO ANY OF THE FOREGOING. Trademarks Satellite is a registered trademark, and SmartMedia is a trademark, of Microsoft Corporation. Microsoft and Windows are registered trademarks of Synaptics, Inc. Manufactured by the Bluetooth SIG, Inc. TouchPad is a registered trademark of Toshiba Corporation. All other countries. 26 Notice The information contained in...
... ANY PARTICULAR PURPOSE WITH REGARD TO ANY OF THE FOREGOING. Trademarks Satellite is a registered trademark, and SmartMedia is a trademark, of Microsoft Corporation. Microsoft and Windows are registered trademarks of Synaptics, Inc. Manufactured by the Bluetooth SIG, Inc. TouchPad is a registered trademark of Toshiba Corporation. All other countries. 26 Notice The information contained in...
User Guide
Page 30
... keys 81 Overlay keys 81 Starting a program 83 Starting a program from the Start menu...........84 Starting a program from Windows Explorer .....84 Starting a program from the Run dialog box ....85 Saving your work 86 Printing your work 87 Using the DVD-ROM or multi-function ... Restart command 98 Hibernation command 98 Stand By command 99 Using Turn Off or Shut down 100 Using Hibernation mode 103 Using Standby mode 106 Toshiba's online resources 109 Chapter 3: Mobile Computing 110 Toshiba's energy-saver design 110 Running the computer on battery power 110
... keys 81 Overlay keys 81 Starting a program 83 Starting a program from the Start menu...........84 Starting a program from Windows Explorer .....84 Starting a program from the Run dialog box ....85 Saving your work 86 Printing your work 87 Using the DVD-ROM or multi-function ... Restart command 98 Hibernation command 98 Stand By command 99 Using Turn Off or Shut down 100 Using Hibernation mode 103 Using Standby mode 106 Toshiba's online resources 109 Chapter 3: Mobile Computing 110 Toshiba's energy-saver design 110 Running the computer on battery power 110
User Guide
Page 31
... of your battery 124 Safety precautions 124 Maximizing battery life 125 Disposing of used batteries 127 Traveling tips 128 Chapter 4: Exploring Your Computer's Features 129 Windows XP special features 129 Personalizing your desktop 130 Customizing the taskbar 130 Bringing the world to your desktop 130 Changing desktop and browsing style 132...
... of your battery 124 Safety precautions 124 Maximizing battery life 125 Disposing of used batteries 127 Traveling tips 128 Chapter 4: Exploring Your Computer's Features 129 Windows XP special features 129 Personalizing your desktop 130 Customizing the taskbar 130 Bringing the world to your desktop 130 Changing desktop and browsing style 132...
User Guide
Page 34
34 Contents Chapter 6: Keeping Your Files Safe 186 Using passwords in the Windows operating system 186 User-level passwords 187 Setting a user-level password 188 Disabling the user-level password 188 Using the power-on (user-level) password ........ 196 Problems that are easy to fix 196 Problems when you turn on the computer............198 The Windows operating system is not working....200 Using Startup options to fix problems 201 Internet problems 202 The Windows XP operating system can help you 202 Resolving a hardware conflict 203 A plan of action 203 Resolving...
34 Contents Chapter 6: Keeping Your Files Safe 186 Using passwords in the Windows operating system 186 User-level passwords 187 Setting a user-level password 188 Disabling the user-level password 188 Using the power-on (user-level) password ........ 196 Problems that are easy to fix 196 Problems when you turn on the computer............198 The Windows operating system is not working....200 Using Startup options to fix problems 201 Internet problems 202 The Windows XP operating system can help you 202 Resolving a hardware conflict 203 A plan of action 203 Resolving...
User Guide
Page 35
... 223 DVD operating problems 226 Develop good computing habits 229 Data and system configuration backup in Windows XP 230 If you need further assistance 236 Before you contact Toshiba 236 Contacting Toshiba 237 Other Toshiba Internet Web sites 238 Toshiba's worldwide offices 238 Appendix A: Hot Keys 240 Volume Mute 240 Password security 241 Without a password...
... 223 DVD operating problems 226 Develop good computing habits 229 Data and system configuration backup in Windows XP 230 If you need further assistance 236 Before you contact Toshiba 236 Contacting Toshiba 237 Other Toshiba Internet Web sites 238 Toshiba's worldwide offices 238 Appendix A: Hot Keys 240 Volume Mute 240 Password security 241 Without a password...
User Guide
Page 37
... offers exciting features, multimedia enjoyment, and easy Internet access. Product activation procedures and Microsoft's privacy policy will find your operating system, Microsoft® Windows® XP Tablet PC Edition, already installed on your work and entertainment can accompany you wherever you go. IN SUCH EVENT, YOU WILL NOT.... 37 Some software may differ from its retail version (if available), and may use technological measures for copy protection. With your new Toshiba notebook computer, your computer. You will be completed by Internet or telephone (toll charges may apply).
... offers exciting features, multimedia enjoyment, and easy Internet access. Product activation procedures and Microsoft's privacy policy will find your operating system, Microsoft® Windows® XP Tablet PC Edition, already installed on your work and entertainment can accompany you wherever you go. IN SUCH EVENT, YOU WILL NOT.... 37 Some software may differ from its retail version (if available), and may use technological measures for copy protection. With your new Toshiba notebook computer, your computer. You will be completed by Internet or telephone (toll charges may apply).
User Guide
Page 47
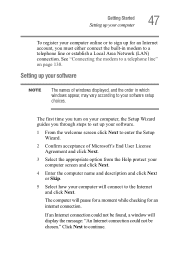
... you through steps to set up your software. 1 From the welcome screen click Next to enter the Setup Wizard. 2 Confirm acceptance of windows displayed, and the order in which windows appear, may vary according to your computer will pause for a moment while checking for an Internet account, you must either connect the... how your software setup choices. Setting up for an internet connection. See "Connecting the modem to continue. If an Internet connection could not be found, a window will display the message: "An Internet connection could not be chosen."
... you through steps to set up your software. 1 From the welcome screen click Next to enter the Setup Wizard. 2 Confirm acceptance of windows displayed, and the order in which windows appear, may vary according to your computer will pause for a moment while checking for an Internet account, you must either connect the... how your software setup choices. Setting up for an internet connection. See "Connecting the modem to continue. If an Internet connection could not be found, a window will display the message: "An Internet connection could not be chosen."
User Guide
Page 51
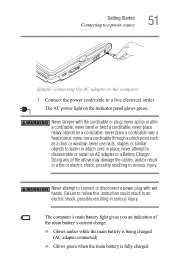
never splice or alter a cord/cable; never run a cord/cable through a pinch point such as a door or window; Never attempt to connect or disconnect a power plug with the cord/cable or plug; Failure to a live electrical outlet. Getting Started Connecting to a power source ...
never splice or alter a cord/cable; never run a cord/cable through a pinch point such as a door or window; Never attempt to connect or disconnect a power plug with the cord/cable or plug; Failure to a live electrical outlet. Getting Started Connecting to a power source ...
User Guide
Page 56
... a program or file or to get information about an icon. To change the current enable/disable TouchPad setting: 1 Click Start, Control Panel. The Control Panel window appears. NOTE Because the TouchPad is positioned, you are adjacent to the left . To double-tap, press the primary button twice in the desired direction...
... a program or file or to get information about an icon. To change the current enable/disable TouchPad setting: 1 Click Start, Control Panel. The Control Panel window appears. NOTE Because the TouchPad is positioned, you are adjacent to the left . To double-tap, press the primary button twice in the desired direction...
User Guide
Page 57
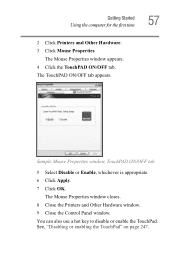
The TouchPAD ON/OFF tab appears. The Mouse Properties window appears. 4 Click the TouchPAD ON/OFF tab. The Mouse Properties window closes. 8 Close the Printers and Other Hardware window. 9 Close the Control Panel window. See, "Disabling or enabling the TouchPad" on page 247. Sample Mouse Properties window, TouchPAD ON/OFF tab 5 Select Disable or Enable, whichever...
The TouchPAD ON/OFF tab appears. The Mouse Properties window appears. 4 Click the TouchPAD ON/OFF tab. The Mouse Properties window closes. 8 Close the Printers and Other Hardware window. 9 Close the Control Panel window. See, "Disabling or enabling the TouchPad" on page 247. Sample Mouse Properties window, TouchPAD ON/OFF tab 5 Select Disable or Enable, whichever...
User Guide
Page 59
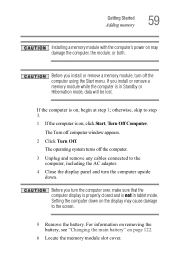
... cables connected to step 3. 1 If the computer is in tablet mode. The Turn off the computer using the Start menu. If you turn off computer window appears. 2 Click Turn Off. Before you install or remove a memory module while the computer is on, click Start, Turn Off Computer. Getting Started Adding memory...
... cables connected to step 3. 1 If the computer is in tablet mode. The Turn off the computer using the Start menu. If you turn off computer window appears. 2 Click Turn Off. Before you install or remove a memory module while the computer is on, click Start, Turn Off Computer. Getting Started Adding memory...
User Guide
Page 67
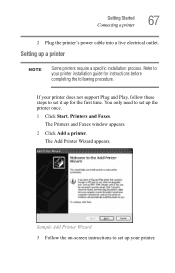
... it up for instructions before completing the following procedure. Refer to set up a printer NOTE Some printers require a specific installation process. The Printers and Faxes window appears. 2 Click Add a printer. If your printer. Sample Add Printer Wizard 3 Follow the on-screen instructions to set up your printer does not support Plug...
... it up for instructions before completing the following procedure. Refer to set up a printer NOTE Some printers require a specific installation process. The Printers and Faxes window appears. 2 Click Add a printer. If your printer. Sample Add Printer Wizard 3 Follow the on-screen instructions to set up your printer does not support Plug...
User Guide
Page 73
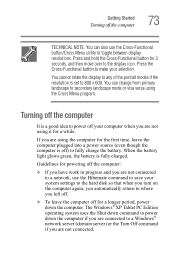
... good idea to power off your computer when you are using it for a longer period, power down the computer if you are connected to a Windows® network server (domain server) or the Turn Off command if you are not connected to a network, use the Cross-Functional button/Cross Menu...to toggle between display resolutions. Getting Started Turning off the computer 73 TECHNICAL NOTE: You can change from primary landscape to 800 x 600. The Windows® XP Tablet PC Edition operating system uses the Shut down command to power down the computer. Guidelines for 3 seconds, and then move ...
... good idea to power off your computer when you are using it for a longer period, power down the computer if you are connected to a Windows® network server (domain server) or the Turn Off command if you are not connected to a network, use the Cross-Functional button/Cross Menu...to toggle between display resolutions. Getting Started Turning off the computer 73 TECHNICAL NOTE: You can change from primary landscape to 800 x 600. The Windows® XP Tablet PC Edition operating system uses the Shut down command to power down the computer. Guidelines for 3 seconds, and then move ...
User Guide
Page 74
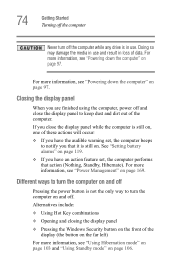
..., see "Powering down the computer" on and off. Alternatives include: ❖ Using Hot Key combinations ❖ Opening and closing the display panel ❖ Pressing the Windows Security button on the front of the display (the button on the far left) For more information, see "Using Hibernation mode" on page 103 and...
..., see "Powering down the computer" on and off. Alternatives include: ❖ Using Hot Key combinations ❖ Opening and closing the display panel ❖ Pressing the Windows Security button on the front of the display (the button on the far left) For more information, see "Using Hibernation mode" on page 103 and...
User Guide
Page 79
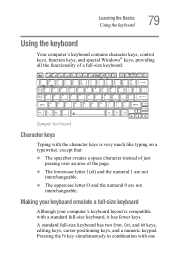
... compatible with one Learning the Basics Using the keyboard 79 Using the keyboard Your computer's keyboard contains character keys, control keys, function keys, and special Windows® keys, providing all the functionality of the page. ❖ The lowercase letter l (el) and the numeral 1 are not interchangeable. ❖ The uppercase letter O and...
... compatible with one Learning the Basics Using the keyboard 79 Using the keyboard Your computer's keyboard contains character keys, control keys, function keys, and special Windows® keys, providing all the functionality of the page. ❖ The lowercase letter l (el) and the numeral 1 are not interchangeable. ❖ The uppercase letter O and...
User Guide
Page 81
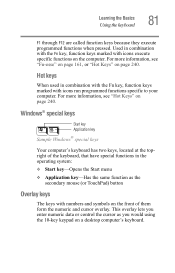
.... Learning the Basics Using the keyboard 81 F1 through F12 are called function keys because they execute programmed functions when pressed. Windows® special keys Start key Application key Sample Windows® special keys Your computer's keyboard has two keys, located at the topright of them form the numeric and cursor overlay...
.... Learning the Basics Using the keyboard 81 F1 through F12 are called function keys because they execute programmed functions when pressed. Windows® special keys Start key Application key Sample Windows® special keys Your computer's keyboard has two keys, located at the topright of them form the numeric and cursor overlay...
User Guide
Page 83
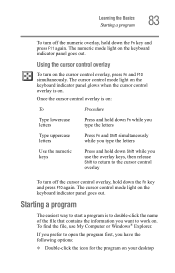
... panel glows when the cursor control overlay is to double-click the name of the file that contains the information you use My Computer or Windows® Explorer. Learning the Basics Starting a program 83 To turn off the cursor control overlay, hold down the Fn key and press F10 again. The...
... panel glows when the cursor control overlay is to double-click the name of the file that contains the information you use My Computer or Windows® Explorer. Learning the Basics Starting a program 83 To turn off the cursor control overlay, hold down the Fn key and press F10 again. The...
User Guide
Page 84
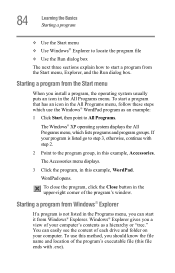
... system usually puts an icon in this example, Accessories. If your program is not listed in this example, WordPad. To use the Windows® WordPad program as a hierarchy or "tree." Starting a program from the Start menu, Explorer, and the Run dialog box... your computer's contents as an example: 1 Click Start, then point to All Programs. The Windows® XP operating system displays the All Programs menu, which lists programs and program groups. Starting a program from Windows® Explorer. WordPad opens. The Accessories menu displays. 3 Click the program, in the Programs...
... system usually puts an icon in this example, Accessories. If your program is not listed in this example, WordPad. To use the Windows® WordPad program as a hierarchy or "tree." Starting a program from the Start menu, Explorer, and the Run dialog box... your computer's contents as an example: 1 Click Start, then point to All Programs. The Windows® XP operating system displays the All Programs menu, which lists programs and program groups. Starting a program from Windows® Explorer. WordPad opens. The Accessories menu displays. 3 Click the program, in the Programs...
User Guide
Page 85
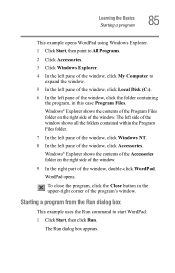
...a program 85 This example opens WordPad using Windows Explorer. 1 Click Start, then point to All Programs. 2 Click Accessories. 3 Click Windows Explorer. 4 In the left pane of the window, click My Computer to start WordPad: 1 Click Start, then click Run. Windows® Explorer shows the contents of the ... example uses the Run command to expand the window. 5 In the left pane of the window, click Local Disk (C:). 6 In the left pane of the program's window. WordPad opens. The Run dialog box appears. The left side of the window shows all the folders contained within the Program ...
...a program 85 This example opens WordPad using Windows Explorer. 1 Click Start, then point to All Programs. 2 Click Accessories. 3 Click Windows Explorer. 4 In the left pane of the window, click My Computer to start WordPad: 1 Click Start, then click Run. Windows® Explorer shows the contents of the ... example uses the Run command to expand the window. 5 In the left pane of the window, click Local Disk (C:). 6 In the left pane of the program's window. WordPad opens. The Run dialog box appears. The left side of the window shows all the folders contained within the Program ...


