
User Guide
Page 34
...; Liquids and corrosive chemicals. Keeping yourself comfortable This section provides information for setting up your wrists are straight when typing. If your wrists on the screen is above your elbow height you may need to slope the notebook to keep your wrists straight. ❖ Work with relaxed shoulders. ❖ When typing...
...; Liquids and corrosive chemicals. Keeping yourself comfortable This section provides information for setting up your wrists are straight when typing. If your wrists on the screen is above your elbow height you may need to slope the notebook to keep your wrists straight. ❖ Work with relaxed shoulders. ❖ When typing...
User Guide
Page 35
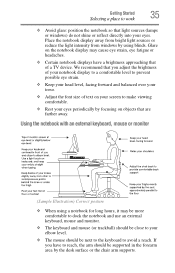
... that you have a brightness approaching that light sources (lamps or windows) do not shine or reflect directly into your eyes periodically by focusing on your screen to make viewing comfortable. ❖ Rest your eyes. Using the notebook with an external keyboard, mouse or monitor (Sample Illustration) Correct posture ❖ When using...
... that you have a brightness approaching that light sources (lamps or windows) do not shine or reflect directly into your eyes periodically by focusing on your screen to make viewing comfortable. ❖ Rest your eyes. Using the notebook with an external keyboard, mouse or monitor (Sample Illustration) Correct posture ❖ When using...

User Guide
Page 44
...glows white. When the computer is now ready for the first time The computer is operated on battery power, the screen will dim and you may appear on your screen display when you to turn on battery power. 44 Getting Started Charging the main battery Charging the main battery Before... using the battery to increase the brightness of the screen while on your computer. Your display contains an extremely large number of thin-film transistors (TFT) and is also an intrinsic characteristic of ...
...glows white. When the computer is now ready for the first time The computer is operated on battery power, the screen will dim and you may appear on your screen display when you to turn on battery power. 44 Getting Started Charging the main battery Charging the main battery Before... using the battery to increase the brightness of the screen while on your computer. Your display contains an extremely large number of thin-film transistors (TFT) and is also an intrinsic characteristic of ...
User Guide
Page 45
... button and, in which windows appear, may want to your product. NOTE To register online, an Internet connection is strongly recommended, and allows Toshiba to send you periodic updates, announcements, and special offers applicable to : ❖ Add more memory (see "Adding memory (optional)" on page...external devices (see "Connecting an external device" on page 76) ❖ Connect an external monitor (see "Using external display devices" on -screen instructions. The first time you turn on page 45. See "Setting up your selection. NOTE The names of windows displayed, and the order ...
... button and, in which windows appear, may want to your product. NOTE To register online, an Internet connection is strongly recommended, and allows Toshiba to send you periodic updates, announcements, and special offers applicable to : ❖ Add more memory (see "Adding memory (optional)" on page...external devices (see "Connecting an external device" on page 76) ❖ Connect an external monitor (see "Using external display devices" on -screen instructions. The first time you turn on page 45. See "Setting up your selection. NOTE The names of windows displayed, and the order ...
User Guide
Page 52
... can damage the computer and the memory module. Do not remove the memory module while the computer is highlighted, then press Enter. NOTE The following screen may need to scan your system has the memory modules stacked on top of one of the above cases, the Sleep configuration will be saved.
... can damage the computer and the memory module. Do not remove the memory module while the computer is highlighted, then press Enter. NOTE The following screen may need to scan your system has the memory modules stacked on top of one of the above cases, the Sleep configuration will be saved.
User Guide
Page 56
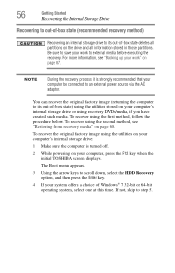
NOTE During the recovery process it is turned off. 2 While powering on your computer, press the F12 key when the initial TOSHIBA screen displays. To recover using the first method, follow the procedure below. The Boot menu appears. 3 Using the arrow keys to an external power source via ...
NOTE During the recovery process it is turned off. 2 While powering on your computer, press the F12 key when the initial TOSHIBA screen displays. To recover using the first method, follow the procedure below. The Boot menu appears. 3 Using the arrow keys to an external power source via ...
User Guide
Page 57
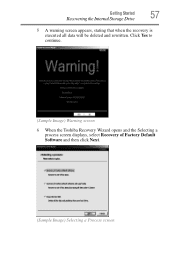
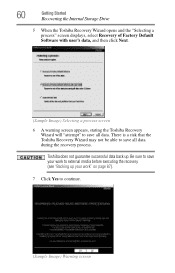
Click Yes to continue. (Sample Image) Warning screen 6 When the Toshiba Recovery Wizard opens and the Selecting a process screen displays, select Recovery of Factory Default Software and then click Next. (Sample Image) Selecting a Process screen Getting Started 57 Recovering the Internal Storage Drive 5 A warning screen appears, stating that when the recovery is executed all data will be deleted and rewritten.
Click Yes to continue. (Sample Image) Warning screen 6 When the Toshiba Recovery Wizard opens and the Selecting a process screen displays, select Recovery of Factory Default Software and then click Next. (Sample Image) Selecting a Process screen Getting Started 57 Recovering the Internal Storage Drive 5 A warning screen appears, stating that when the recovery is executed all data will be deleted and rewritten.
User Guide
Page 58
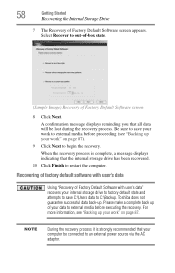
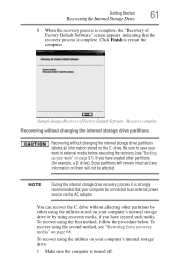
...to an external power source via the AC adaptor. Recovering of factory default software with user's data Using "Recovery of Factory Default Software screen 8 Click Next. NOTE During the recovery process it is complete, a message displays indicating that your computer be lost during the recovery ... Recovery of Factory Default Software with user's data" recovers your work" on page 87. Select Recover to restart the computer. Toshiba does not guarantee successful data back-up your data to begin the recovery. For more information, see "Backing up of Factory Default Software...
...to an external power source via the AC adaptor. Recovering of factory default software with user's data Using "Recovery of Factory Default Software screen 8 Click Next. NOTE During the recovery process it is complete, a message displays indicating that your computer be lost during the recovery ... Recovery of Factory Default Software with user's data" recovers your work" on page 87. Select Recover to restart the computer. Toshiba does not guarantee successful data back-up your data to begin the recovery. For more information, see "Backing up of Factory Default Software...
User Guide
Page 59
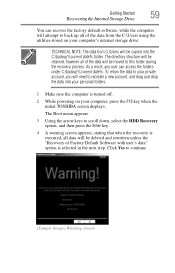
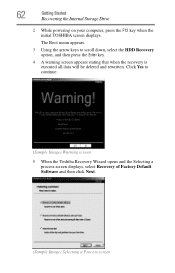
... factory default software, while the computer will be copied into your computer, press the F12 key when the initial TOSHIBA screen displays. The Boot menu appears. 3 Using the arrow keys to continue. (Sample Image) Warning screen Click Yes to scroll down, select the HDD Recovery option, and then press the Enter key. 4 A warning... screen appears, stating that when the recovery is executed, all of the data will be moved to this folder during the recovery process. The directory structure ...
... factory default software, while the computer will be copied into your computer, press the F12 key when the initial TOSHIBA screen displays. The Boot menu appears. 3 Using the arrow keys to continue. (Sample Image) Warning screen Click Yes to scroll down, select the HDD Recovery option, and then press the Enter key. 4 A warning... screen appears, stating that when the recovery is executed, all of the data will be moved to this folder during the recovery process. The directory structure ...
User Guide
Page 60
... the Internal Storage Drive 5 When the Toshiba Recovery Wizard opens and the "Selecting a process" screen displays, select Recovery of Factory Default Software with user's data, and then click Next. (Sample Image) Selecting a process screen 6 A warning screen appears, stating the Toshiba Recovery Wizard will "attempt" to save ... recovery process. Be sure to save all data. There is a risk that the Toshiba Recovery Wizard may not be able to save your work to continue. (Sample Image) Warning screen Toshiba does not guarantee successful data back up your work " on page 87). 7 Click...
... the Internal Storage Drive 5 When the Toshiba Recovery Wizard opens and the "Selecting a process" screen displays, select Recovery of Factory Default Software with user's data, and then click Next. (Sample Image) Selecting a process screen 6 A warning screen appears, stating the Toshiba Recovery Wizard will "attempt" to save ... recovery process. Be sure to save all data. There is a risk that the Toshiba Recovery Wizard may not be able to save your work to continue. (Sample Image) Warning screen Toshiba does not guarantee successful data back up your work " on page 87). 7 Click...
User Guide
Page 61
... Recovering without affecting other partitions (for example, a D: drive), those partitions will not be connected to restart the computer. (Sample Image) Recovery of Factory Default Software" screen appears, indicating that your computer's internal storage drive or by either using the utilities stored on your computer be affected. To recover using the first...
... Recovering without affecting other partitions (for example, a D: drive), those partitions will not be connected to restart the computer. (Sample Image) Recovery of Factory Default Software" screen appears, indicating that your computer's internal storage drive or by either using the utilities stored on your computer be affected. To recover using the first...
User Guide
Page 62
...Using the arrow keys to continue. (Sample Image) Warning screen 5 When the Toshiba Recovery Wizard opens and the Selecting a process screen displays, select Recovery of Factory Default Software and then click Next. (Sample Image) Selecting a Process screen 62 Getting Started Recovering the Internal Storage Drive 2 While powering... on your computer, press the F12 key when the initial TOSHIBA screen displays. Click Yes to scroll down, select the HDD Recovery option, and then press the Enter key. 4 A warning screen appears stating that when the recovery is executed all data will be...
...Using the arrow keys to continue. (Sample Image) Warning screen 5 When the Toshiba Recovery Wizard opens and the Selecting a process screen displays, select Recovery of Factory Default Software and then click Next. (Sample Image) Selecting a Process screen 62 Getting Started Recovering the Internal Storage Drive 2 While powering... on your computer, press the F12 key when the initial TOSHIBA screen displays. Click Yes to scroll down, select the HDD Recovery option, and then press the Enter key. 4 A warning screen appears stating that when the recovery is executed all data will be...
User Guide
Page 63
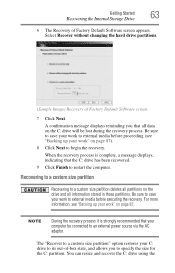
... recover the C: drive using the Select Recover without changing the hard drive partitions. (Sample Image) Recovery of Factory Default Software screen appears. A confirmation message displays reminding you to restart the computer. NOTE During the recovery process it is complete, a message ...indicating that your work " on page 87. Getting Started 63 Recovering the Internal Storage Drive 6 The Recovery of Factory Default Software screen 7 Click Next. Recovering to a custom size partition Recovering to a custom size partition deletes all partitions on the drive and all ...
... recover the C: drive using the Select Recover without changing the hard drive partitions. (Sample Image) Recovery of Factory Default Software screen appears. A confirmation message displays reminding you to restart the computer. NOTE During the recovery process it is complete, a message ...indicating that your work " on page 87. Getting Started 63 Recovering the Internal Storage Drive 6 The Recovery of Factory Default Software screen 7 Click Next. Recovering to a custom size partition Recovering to a custom size partition deletes all partitions on the drive and all ...
User Guide
Page 64
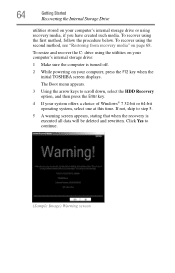
...the second method, see "Restoring from recovery media" on page 68. If not, skip to continue. (Sample Image) Warning screen Click Yes to step 5. 5 A warning screen appears, stating that when the recovery is turned off. 2 While powering on your computer's internal storage drive or using recovery ... and rewritten. 64 Getting Started Recovering the Internal Storage Drive utilities stored on your computer, press the F12 key when the initial TOSHIBA screen displays. To recover using the first method, follow the procedure below. The Boot menu appears. 3 Using the arrow keys to scroll...
...the second method, see "Restoring from recovery media" on page 68. If not, skip to continue. (Sample Image) Warning screen Click Yes to step 5. 5 A warning screen appears, stating that when the recovery is turned off. 2 While powering on your computer's internal storage drive or using recovery ... and rewritten. 64 Getting Started Recovering the Internal Storage Drive utilities stored on your computer, press the F12 key when the initial TOSHIBA screen displays. To recover using the first method, follow the procedure below. The Boot menu appears. 3 Using the arrow keys to scroll...
User Guide
Page 65
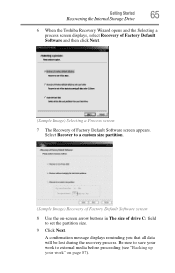
... process. Getting Started 65 Recovering the Internal Storage Drive 6 When the Toshiba Recovery Wizard opens and the Selecting a process screen displays, select Recovery of Factory Default Software and then click Next. (Sample Image) Selecting a Process screen 7 The Recovery of Factory Default Software screen 8 Use the on page 87). Select Recover to a custom size partition...
... process. Getting Started 65 Recovering the Internal Storage Drive 6 When the Toshiba Recovery Wizard opens and the Selecting a process screen displays, select Recovery of Factory Default Software and then click Next. (Sample Image) Selecting a Process screen 7 The Recovery of Factory Default Software screen 8 Use the on page 87). Select Recover to a custom size partition...
User Guide
Page 68
..."1 of 3," "2 of 3," etc.), so that your external media to another storage device before executing the recovery (see "Creating recovery media" on -screen prompts to an external power source via the AC adaptor. Restoring from recovery media" on page 68. For instructions on creating recovery media, see "Backing...files to DVDs, be erased during recovery. Be sure to save your system, you will be sure to label each DVD in the TOSHIBA Recovery Media Creator utility dialog box. 6 Follow the on page 66. NOTE During the internal storage drive recovery process it is strongly ...
..."1 of 3," "2 of 3," etc.), so that your external media to another storage device before executing the recovery (see "Creating recovery media" on -screen prompts to an external power source via the AC adaptor. Restoring from recovery media" on page 68. For instructions on creating recovery media, see "Backing...files to DVDs, be erased during recovery. Be sure to save your system, you will be sure to label each DVD in the TOSHIBA Recovery Media Creator utility dialog box. 6 Follow the on page 66. NOTE During the internal storage drive recovery process it is strongly ...
User Guide
Page 69
NOTE When you have created intact When the initial TOSHIBA screen displays, press the F12 key on page 87. Getting Started 69 Recovering the Internal Storage Drive For more information, see "Recovering the Internal Storage Drive" ... during this process. Any files that you are using Windows® Backup or another backup program. Click Yes to continue. 6 When the Toshiba Recovery Wizard opens and the Selecting a Process screen displays, select Recovery of Factory Default Software and then click Next. 7 Select one of the following options: ❖ Recover to out...
NOTE When you have created intact When the initial TOSHIBA screen displays, press the F12 key on page 87. Getting Started 69 Recovering the Internal Storage Drive For more information, see "Recovering the Internal Storage Drive" ... during this process. Any files that you are using Windows® Backup or another backup program. Click Yes to continue. 6 When the Toshiba Recovery Wizard opens and the Selecting a Process screen displays, select Recovery of Factory Default Software and then click Next. 7 Select one of the following options: ❖ Recover to out...
User Guide
Page 70
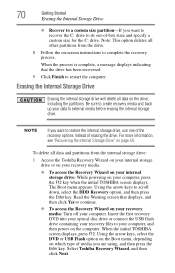
...To access the Recovery Wizard on the drive, including the partitions. Select Toshiba Recovery Wizard, and then click Next. Be sure to create recovery media and back up your computer, and then power on -screen instructions to complete the recovery process. 70 Getting Started Erasing the Internal ... connect the USB flash drive containing your recovery files to your data to restart the computer. When the initial TOSHIBA screen displays, press F12. Read the Warning screen that the drive has been recovered. 9 Click Finish to external media before erasing the internal storage drive. When...
...To access the Recovery Wizard on the drive, including the partitions. Select Toshiba Recovery Wizard, and then click Next. Be sure to create recovery media and back up your computer, and then power on -screen instructions to complete the recovery process. 70 Getting Started Erasing the Internal ... connect the USB flash drive containing your recovery files to your data to restart the computer. When the initial TOSHIBA screen displays, press F12. Read the Warning screen that the drive has been recovered. 9 Click Finish to external media before erasing the internal storage drive. When...
User Guide
Page 71
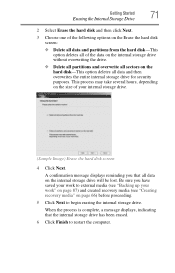
... Internal Storage Drive 2 Select Erase the hard disk and then click Next. 3 Choose one of the following options on the Erase the hard disk screen: ❖ Delete all data and partitions from the hard disk-This option deletes all of your work to external media (see "Creating recovery media"...have saved your work " on page 87) and created recovery media (see "Backing up your internal storage drive. (Sample Image) Erase the hard disk screen 4 Click Next. Be sure you that the internal storage drive has been erased. 6 Click Finish to begin erasing the internal storage drive. When the ...
... Internal Storage Drive 2 Select Erase the hard disk and then click Next. 3 Choose one of the following options on the Erase the hard disk screen: ❖ Delete all data and partitions from the hard disk-This option deletes all of your work to external media (see "Creating recovery media"...have saved your work " on page 87) and created recovery media (see "Backing up your internal storage drive. (Sample Image) Erase the hard disk screen 4 Click Next. Be sure you that the internal storage drive has been erased. 6 Click Finish to begin erasing the internal storage drive. When the ...
User Guide
Page 72
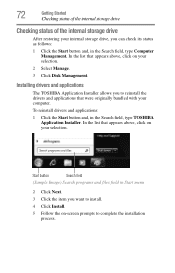
... drive, you to complete the installation process. In the list that appears above , click on -screen prompts to reinstall the drivers and applications that were originally bundled with your computer. Installing drivers and applications The TOSHIBA Application Installer allows you can check its status as follows: 1 Click the Start button and, in...
... drive, you to complete the installation process. In the list that appears above , click on -screen prompts to reinstall the drivers and applications that were originally bundled with your computer. Installing drivers and applications The TOSHIBA Application Installer allows you can check its status as follows: 1 Click the Start button and, in...


