User Guide
Page 22
Contents Introduction 28 This guide 30 Safety icons 31 Other icons used 31 Your computer's features and specifications........32 Other documentation 32 Service options 32 Chapter 1: Getting Started 33 Selecting a place to work 33 Setting up a work environment 33 Keeping yourself comfortable 34 Computer user comfort recommendations .......34 Good Working Posture 34 Using the notebook with an external keyboard, mouse or monitor 35 Typing style 36 Taking breaks and varying tasks 36 Mobile computing tips 37 Transporting the notebook 37 22
Contents Introduction 28 This guide 30 Safety icons 31 Other icons used 31 Your computer's features and specifications........32 Other documentation 32 Service options 32 Chapter 1: Getting Started 33 Selecting a place to work 33 Setting up a work environment 33 Keeping yourself comfortable 34 Computer user comfort recommendations .......34 Good Working Posture 34 Using the notebook with an external keyboard, mouse or monitor 35 Typing style 36 Taking breaks and varying tasks 36 Mobile computing tips 37 Transporting the notebook 37 22
User Guide
Page 24
... Computing tips 82 Using the keyboard 83 Character keys 84 Function keys 84 Special Windows® keys 85 Starting a program 85 Starting a program using the Search programs and files field 85 Starting a program from the Start menu...........86 Saving your work 86 Backing up your work 87 Restoring your work 87 Using the optical... optical disc 90 Playing optical media 90 Recording optical media 91 Removing a disc with the computer on 91 Removing a disc with the computer off 92 Toshiba's online resources 92
... Computing tips 82 Using the keyboard 83 Character keys 84 Function keys 84 Special Windows® keys 85 Starting a program 85 Starting a program using the Search programs and files field 85 Starting a program from the Start menu...........86 Saving your work 86 Backing up your work 87 Restoring your work 87 Using the optical... optical disc 90 Playing optical media 90 Recording optical media 91 Removing a disc with the computer on 91 Removing a disc with the computer off 92 Toshiba's online resources 92
User Guide
Page 26
... Setting passwords 125 Using a supervisor password 126 Using a user password 127 Deleting a user password 128 TOSHIBA Face Recognition Utility 129 TOSHIBA PC Diagnostic Tool Utility 130 Mouse Utility 131 TOSHIBA Hardware Setup 132 TOSHIBA Sleep Utility 133 Starting the TOSHIBA Sleep Utility 133 USB Sleep and Charge 133 Enabling/Disabling USB Sleep and Charge ........135 Power...
... Setting passwords 125 Using a supervisor password 126 Using a user password 127 Deleting a user password 128 TOSHIBA Face Recognition Utility 129 TOSHIBA PC Diagnostic Tool Utility 130 Mouse Utility 131 TOSHIBA Hardware Setup 132 TOSHIBA Sleep Utility 133 Starting the TOSHIBA Sleep Utility 133 USB Sleep and Charge 133 Enabling/Disabling USB Sleep and Charge ........135 Power...
User Guide
Page 32
... and conditions are available at accessories.toshiba.com. 32 Introduction Other documentation Your computer's features and specifications Certain computer chassis are designed to accommodate all the features and icons described in this document) ❖ A Quick Start document ❖ It may also contain... guides for other product information, be sure to regularly check the Toshiba Web site at support.toshiba.com. Service options Toshiba offers a full line of the User's Guide (this ...
... and conditions are available at accessories.toshiba.com. 32 Introduction Other documentation Your computer's features and specifications Certain computer chassis are designed to accommodate all the features and icons described in this document) ❖ A Quick Start document ❖ It may also contain... guides for other product information, be sure to regularly check the Toshiba Web site at support.toshiba.com. Service options Toshiba offers a full line of the User's Guide (this ...
User Guide
Page 33
...items you are using your computer effectively, summarizes how to connect components, and explains what to provide adequate ventilation. Chapter 1 Getting Started This chapter provides tips for the computer and any other equipment to do the first time you attempt to use your computer. To...your work Your computer is large enough for using , such as a printer. Setting up a work environment Place the computer on the Quick Start document (that could cause bodily injury, property damage, or damage the computer. Please read the safety instruction information on a hard flat surface ...
...items you are using your computer effectively, summarizes how to connect components, and explains what to provide adequate ventilation. Chapter 1 Getting Started This chapter provides tips for the computer and any other equipment to do the first time you attempt to use your computer. To...your work Your computer is large enough for using , such as a printer. Setting up a work environment Place the computer on the Quick Start document (that could cause bodily injury, property damage, or damage the computer. Please read the safety instruction information on a hard flat surface ...

User Guide
Page 34
34 Getting Started Selecting a place to work ❖ Equipment that generates a strong electromagnetic field, such as stereo speakers (other items that you use a foot rest. The keyboard should ...
34 Getting Started Selecting a place to work ❖ Equipment that generates a strong electromagnetic field, such as stereo speakers (other items that you use a foot rest. The keyboard should ...
User Guide
Page 35
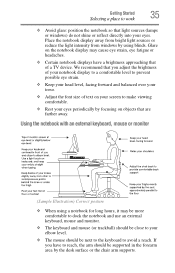
... dock the notebook and use an external keyboard, mouse and monitor. ❖ The keyboard and mouse (or trackball) should be close to your eyes. Getting Started 35 Selecting a place to work ❖ Avoid glare: position the notebook so that light sources (lamps or windows) do not shine or reflect directly into...
... dock the notebook and use an external keyboard, mouse and monitor. ❖ The keyboard and mouse (or trackball) should be close to your eyes. Getting Started 35 Selecting a place to work ❖ Avoid glare: position the notebook so that light sources (lamps or windows) do not shine or reflect directly into...
User Guide
Page 36
... Working Posture points mentioned above while working in the neck muscles. ❖ If you use bifocals you might consider customized prescription computer glasses. 36 Getting Started Selecting a place to work ❖ Alternative keyboards, such as the split curved keyboard, may improve shoulder and arm comfort. ❖ Select a mouse that is comfortable...
... Working Posture points mentioned above while working in the neck muscles. ❖ If you use bifocals you might consider customized prescription computer glasses. 36 Getting Started Selecting a place to work ❖ Alternative keyboards, such as the split curved keyboard, may improve shoulder and arm comfort. ❖ Select a mouse that is comfortable...
User Guide
Page 37
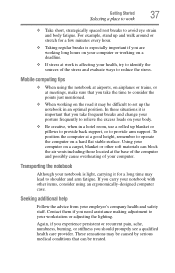
... a hard flat stable surface. Mobile computing tips ❖ When using an ergonomically-designed computer case. Seeking additional help Follow the advice from your computer. Getting Started 37 Selecting a place to work is especially important if you need assistance making adjustment to your health, try to identify the sources of your employer...
... a hard flat stable surface. Mobile computing tips ❖ When using an ergonomically-designed computer case. Seeking additional help Follow the advice from your computer. Getting Started 37 Selecting a place to work is especially important if you need assistance making adjustment to your health, try to identify the sources of your employer...

User Guide
Page 38
..., Occupational Safety & Health Administration Web site at least once an hour? You should observe certain precautions to further reduce the risk of travel. 38 Getting Started Selecting a place to work For more specific recommendations on the monitor? ❏ Is the monitor tilted so that it support your back and arms well...
..., Occupational Safety & Health Administration Web site at least once an hour? You should observe certain precautions to further reduce the risk of travel. 38 Getting Started Selecting a place to work For more specific recommendations on the monitor? ❏ Is the monitor tilted so that it support your back and arms well...
User Guide
Page 39
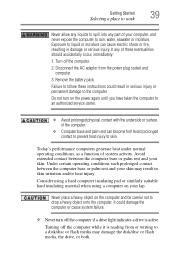
...: 1. Do not turn off the computer if a drive light indicates a drive is reading from the power plug socket and computer. 3. Turning off the computer. 2. Getting Started 39 Selecting a place to work Never allow any liquids to spill into any of these instructions could damage the computer or cause system failure. ❖...
...: 1. Do not turn off the computer if a drive light indicates a drive is reading from the power plug socket and computer. 3. Turning off the computer. 2. Getting Started 39 Selecting a place to work Never allow any liquids to spill into any of these instructions could damage the computer or cause system failure. ❖...
User Guide
Page 40
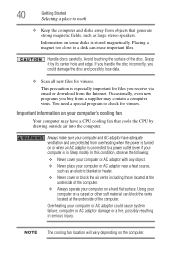
... condition, observe the following: ❖ Never cover your computer or AC adaptor with any object. ❖ Never place your computer on the computer. 40 Getting Started Selecting a place to work ❖ Keep the computer and disks away from objects that cools the CPU by its center hole and edge.
... condition, observe the following: ❖ Never cover your computer or AC adaptor with any object. ❖ Never place your computer on the computer. 40 Getting Started Selecting a place to work ❖ Keep the computer and disks away from objects that cools the CPU by its center hole and edge.

User Guide
Page 41
... battery you must complete all setup steps up to follow this instruction may result in a fire or electric shock, possibly resulting in serious injury. Getting Started 41 Setting up your computer Setting up your software" on page 45 before you can use it.
... battery you must complete all setup steps up to follow this instruction may result in a fire or electric shock, possibly resulting in serious injury. Getting Started 41 Setting up your computer Setting up your software" on page 45 before you can use it.

User Guide
Page 42
...to lead, a chemical known to the State of California to cause birth defects or other damage to the computer. Wash hands after handling. 42 Getting Started Connecting to a power source Always use the TOSHIBA AC adaptor that was provided with your computer, or use AC adaptors specified by... TOSHIBA to avoid any damage caused by use of an incompatible adaptor. TOSHIBA assumes no liability for any risk of an incompatible AC adaptor could cause fire or damage to the computer possibly resulting in serious injury. ...
...to lead, a chemical known to the State of California to cause birth defects or other damage to the computer. Wash hands after handling. 42 Getting Started Connecting to a power source Always use the TOSHIBA AC adaptor that was provided with your computer, or use AC adaptors specified by... TOSHIBA to avoid any damage caused by use of an incompatible adaptor. TOSHIBA assumes no liability for any risk of an incompatible AC adaptor could cause fire or damage to the computer possibly resulting in serious injury. ...
User Guide
Page 43
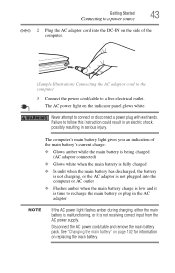
... the power cord/cable to a live electrical outlet. See "Changing the main battery" on page 102 for information on the indicator panel glows white. Getting Started 43 Connecting to a power source _ + 2 Plug the AC adaptor cord into the computer or AC outlet ❖ Flashes amber when the main battery charge is...
... the power cord/cable to a live electrical outlet. See "Changing the main battery" on page 102 for information on the indicator panel glows white. Getting Started 43 Connecting to a power source _ + 2 Plug the AC adaptor cord into the computer or AC outlet ❖ Flashes amber when the main battery charge is...

User Guide
Page 44
... the palm rest to hold the computer in place and use the other objects from the keyboard area before closing the display panel. 44 Getting Started Charging the main battery Charging the main battery Before using the battery to power the computer, you turn it on and begin using high-precision...
... the palm rest to hold the computer in place and use the other objects from the keyboard area before closing the display panel. 44 Getting Started Charging the main battery Charging the main battery Before using the battery to power the computer, you turn it on and begin using high-precision...
User Guide
Page 45
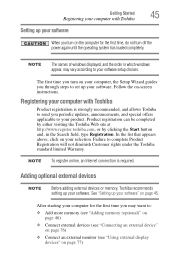
...the operating system has loaded completely. Product registration can be completed by either visiting the Toshiba Web site at http://www.register.toshiba.com, or by clicking the Start button and, in which windows appear, may want to complete Product Registration will not diminish... To register online, an Internet connection is strongly recommended, and allows Toshiba to send you through steps to your computer with Toshiba Setting up your software. Getting Started 45 Registering your computer with Toshiba Product registration is required. NOTE The names of windows displayed, and...
...the operating system has loaded completely. Product registration can be completed by either visiting the Toshiba Web site at http://www.register.toshiba.com, or by clicking the Start button and, in which windows appear, may want to complete Product Registration will not diminish... To register online, an Internet connection is strongly recommended, and allows Toshiba to send you through steps to your computer with Toshiba Setting up your software. Getting Started 45 Registering your computer with Toshiba Product registration is required. NOTE The names of windows displayed, and...
User Guide
Page 46
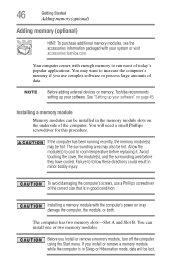
...Toshiba recommends setting up your software" on page 45. If the computer has been running recently, the memory module(s) may damage the computer, the module, or both. The computer has two memory slots-Slot A and Slot B. Allow the module(s) to cool to run most of the computer. 46 Getting Started... comes with the computer's power on the underside of today's popular applications. See "Setting up your system or visit accessories.toshiba.com. Avoid touching the cover, the module(s), and the surrounding area before replacing it. Before you install or remove a memory...
...Toshiba recommends setting up your software" on page 45. If the computer has been running recently, the memory module(s) may damage the computer, the module, or both. The computer has two memory slots-Slot A and Slot B. Allow the module(s) to cool to run most of the computer. 46 Getting Started... comes with the computer's power on the underside of today's popular applications. See "Setting up your system or visit accessories.toshiba.com. Avoid touching the cover, the module(s), and the surrounding area before replacing it. Before you install or remove a memory...
User Guide
Page 47
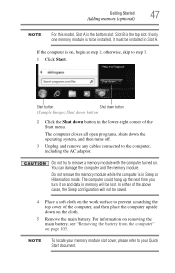
... damage the computer and the memory module. otherwise, skip to remove a memory module with the computer turned on the cloth. 5 Remove the main battery. Start button Shut down button (Sample Image) Shut down button 2 Click the Shut down the operating system, and then turns off. 3 Unplug and remove any ...time you turn it must be installed in memory will not be installed, it on , begin at step 1; Slot B is the bottom slot. Getting Started 47 Adding memory (optional) NOTE For this model, Slot A is the top slot. NOTE To locate your memory module slot cover, please refer to be...
... damage the computer and the memory module. otherwise, skip to remove a memory module with the computer turned on the cloth. 5 Remove the main battery. Start button Shut down button (Sample Image) Shut down button 2 Click the Shut down the operating system, and then turns off. 3 Unplug and remove any ...time you turn it must be installed in memory will not be installed, it on , begin at step 1; Slot B is the bottom slot. Getting Started 47 Adding memory (optional) NOTE For this model, Slot A is the top slot. NOTE To locate your memory module slot cover, please refer to be...
User Guide
Page 48
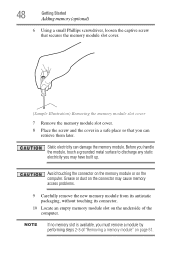
Grease or dust on the connector may have built up. NOTE If no memory slot is available, you can damage the memory module. 48 Getting Started Adding memory (optional) 6 Using a small Phillips screwdriver, loosen the captive screw that secures the memory module slot cover. (Sample Illustration) Removing the memory module slot ...
Grease or dust on the connector may have built up. NOTE If no memory slot is available, you can damage the memory module. 48 Getting Started Adding memory (optional) 6 Using a small Phillips screwdriver, loosen the captive screw that secures the memory module slot cover. (Sample Illustration) Removing the memory module slot ...


