User Manual
Page 40
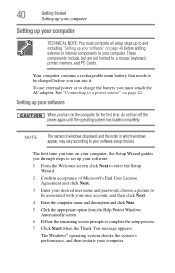
...to a power source" on your computer, the Setup Wizard guides you through steps to set up your software. 1 From the Welcome screen click Next to enter the Setup Wizard. 2 Confirm acceptance of windows displayed, and the order in which windows appear, may vary according ...Next. 4 Enter the computer name and description and click Next. 5 Click the appropriate option from the Help Protect Windows Automatically screen. 6 Follow the remaining screen prompts to your computer. The Windows® operating system checks the system's performance, and then restarts your software setup choices. ...
...to a power source" on your computer, the Setup Wizard guides you through steps to set up your software. 1 From the Welcome screen click Next to enter the Setup Wizard. 2 Confirm acceptance of windows displayed, and the order in which windows appear, may vary according ...Next. 4 Enter the computer name and description and click Next. 5 Click the appropriate option from the Help Protect Windows Automatically screen. 6 Follow the remaining screen prompts to your computer. The Windows® operating system checks the system's performance, and then restarts your software setup choices. ...
User Manual
Page 46
... on your display are examples of some of the icons or switches shown on your computer. Below are an intrinsic characteristic of the screen technology. Your computer's features and specifications Certain notebook chassis are empty. When the computer is operated on battery power, the...To turn on the notebook chassis, unless you have all the features and specifications corresponding to all of the many possible icons used on your screen display when you turn on battery power. Your display contains an extremely large number of thin-film transistors (TFT) and is also an ...
... on your display are examples of some of the icons or switches shown on your computer. Below are an intrinsic characteristic of the screen technology. Your computer's features and specifications Certain notebook chassis are empty. When the computer is operated on battery power, the...To turn on the notebook chassis, unless you have all the features and specifications corresponding to all of the many possible icons used on your screen display when you turn on battery power. Your display contains an extremely large number of thin-film transistors (TFT) and is also an ...
User Manual
Page 53
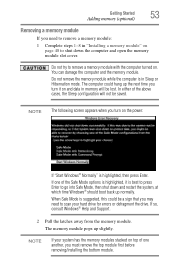
... first before removing/installing the bottom module. The computer could be a sign that you turn it is in Sleep or Hibernation mode. NOTE The following screen appears when you may need to remove a memory module: 1 Complete steps 1-8 in memory will not be lost. NOTE If your hard drive for errors or...
... first before removing/installing the bottom module. The computer could be a sign that you turn it is in Sleep or Hibernation mode. NOTE The following screen appears when you may need to remove a memory module: 1 Complete steps 1-8 in memory will not be lost. NOTE If your hard drive for errors or...
User Manual
Page 56
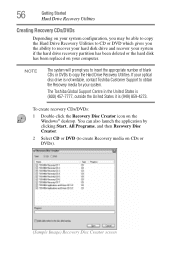
... Disc Creator icon on your optical disc drive is (949) 859-4273. The Toshiba Global Support Centre in the United States is (800) 457-7777, outside the United States it is not writable, contact Toshiba Customer Support to create Recovery media on CDs or DVDs). (Sample Image) Recovery... Disc Creator screen You can also launch the application by clicking Start, All Programs, and then Recovery Disc Creator. ...
... Disc Creator icon on your optical disc drive is (949) 859-4273. The Toshiba Global Support Centre in the United States is (800) 457-7777, outside the United States it is not writable, contact Toshiba Customer Support to create Recovery media on CDs or DVDs). (Sample Image) Recovery... Disc Creator screen You can also launch the application by clicking Start, All Programs, and then Recovery Disc Creator. ...
User Manual
Page 57
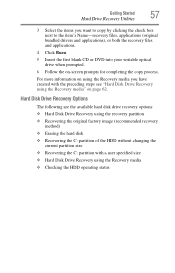
... HDD without changing the current partition size ❖ Recovering the C: partition with the preceding steps see "Hard Disk Drive Recovery using the Recovery media" on -screen prompts for completing the copy process. For more information on using the Recovery media you want to copy by clicking the check box next to...
... HDD without changing the current partition size ❖ Recovering the C: partition with the preceding steps see "Hard Disk Drive Recovery using the Recovery media" on -screen prompts for completing the copy process. For more information on using the Recovery media you want to copy by clicking the check box next to...
User Manual
Page 58
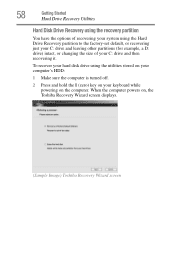
... your system using the utilities stored on your computer's HDD: 1 Make sure the computer is turned off. 2 Press and hold the 0 (zero) key on , the Toshiba Recovery Wizard screen displays. (Sample Image) Toshiba Recovery Wizard screen When the computer powers on your C: drive and then recovering it.
... your system using the utilities stored on your computer's HDD: 1 Make sure the computer is turned off. 2 Press and hold the 0 (zero) key on , the Toshiba Recovery Wizard screen displays. (Sample Image) Toshiba Recovery Wizard screen When the computer powers on your C: drive and then recovering it.
User Manual
Page 59
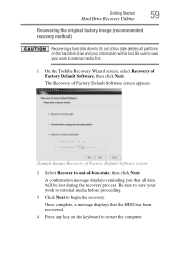
...Next to begin the recovery. Once complete, a message displays that all partitions on the keyboard to external media first. 1 On the Toshiba Recovery Wizard screen, select Recovery of -box-state, then click Next. A confirmation message displays reminding you that the HDD has been recovered. 4 Press...on the hard disk drive and your work to restart the computer. The Recovery of Factory Default Software screen appears. (Sample Image) Recovery of Factory Default Software screen 2 Select Recover to save your information will be lost during the recovery process. Be sure to out...
...Next to begin the recovery. Once complete, a message displays that all partitions on the keyboard to external media first. 1 On the Toshiba Recovery Wizard screen, select Recovery of -box-state, then click Next. A confirmation message displays reminding you that the HDD has been recovered. 4 Press...on the hard disk drive and your work to restart the computer. The Recovery of Factory Default Software screen appears. (Sample Image) Recovery of Factory Default Software screen 2 Select Recover to save your information will be lost during the recovery process. Be sure to out...
User Manual
Page 60
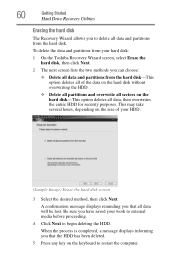
To delete the data and partitions from your hard disk: 1 On the Toshiba Recovery Wizard screen, select Erase the hard disk, then click Next. 2 The next screen lists the two methods you that the HDD has been deleted. 5 Press any key on the size of the data on the hard disk... to restart the computer. When the process is completed, a message displays informing you have saved your HDD. (Sample Image) Erase the hard disk screen 3 Select the desired method, then click Next. 60 Getting Started Hard Drive Recovery Utilities Erasing the hard disk The Recovery Wizard allows you to delete...
To delete the data and partitions from your hard disk: 1 On the Toshiba Recovery Wizard screen, select Erase the hard disk, then click Next. 2 The next screen lists the two methods you that the HDD has been deleted. 5 Press any key on the size of the data on the hard disk... to restart the computer. When the process is completed, a message displays informing you have saved your HDD. (Sample Image) Erase the hard disk screen 3 Select the desired method, then click Next. 60 Getting Started Hard Drive Recovery Utilities Erasing the hard disk The Recovery Wizard allows you to delete...
User Manual
Page 61
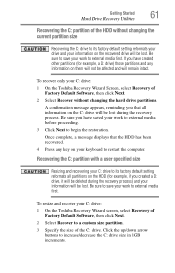
... hard drive partitions. Click the up/down arrow buttons to external media first. To recover only your C: drive: 1 On the Toshiba Recovery Wizard screen, select Recovery of Factory Default Software, then click Next. 2 Select Recover to a custom size partition. 3 Specify the size of... drive) those partitions and any key on the recovered drive will be lost . To resize and recover your C: drive: 1 On the Toshiba Recovery Wizard Screen, select Recovery of the C: drive. Recovering the C: partition with a user specified size Resizing and recovering your C: drive to restart the ...
... hard drive partitions. Click the up/down arrow buttons to external media first. To recover only your C: drive: 1 On the Toshiba Recovery Wizard screen, select Recovery of Factory Default Software, then click Next. 2 Select Recover to a custom size partition. 3 Specify the size of... drive) those partitions and any key on the recovered drive will be lost . To resize and recover your C: drive: 1 On the Toshiba Recovery Wizard Screen, select Recovery of the C: drive. Recovering the C: partition with a user specified size Resizing and recovering your C: drive to restart the ...
User Manual
Page 62
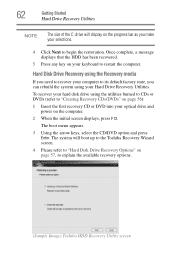
... refer to "Hard Disk Drive Recovery Options" on page 57, to explain the available recovery options. (Sample Image) Toshiba HDD Recovery Utility screen The boot menu appears. 3 Using the arrow keys, select the CD/DVD option and press Enter. Hard Disk Drive Recovery using the Recovery media If ...you need to recover your computer to "Creating Recovery CDs/DVDs" on the computer. 2 When the initial screen displays, press F12. The system will display on the progress bar as you can rebuild the system using the utilities burned to CDs or DVDs...
... refer to "Hard Disk Drive Recovery Options" on page 57, to explain the available recovery options. (Sample Image) Toshiba HDD Recovery Utility screen The boot menu appears. 3 Using the arrow keys, select the CD/DVD option and press Enter. Hard Disk Drive Recovery using the Recovery media If ...you need to recover your computer to "Creating Recovery CDs/DVDs" on the computer. 2 When the initial screen displays, press F12. The system will display on the progress bar as you can rebuild the system using the utilities burned to CDs or DVDs...
User Manual
Page 63
Installing drivers and applications (Available on certain models) The Toshiba Application Installer (available on -screen prompts to move the cursor with your hard disk drive, you would like to move the cursor: ❖ To move the cursor to the top ..., square cutout located in the direction you can check its status in the lower portion of a finger. To reinstall drivers and applications: 1 Double-click the Toshiba Application Installer icon on the Windows® desktop. 2 Click Next. 3 Click the item(s) you want to install. 4 Click Install. 5 Follow the on certain models) allows...
Installing drivers and applications (Available on certain models) The Toshiba Application Installer (available on -screen prompts to move the cursor with your hard disk drive, you would like to move the cursor: ❖ To move the cursor to the top ..., square cutout located in the direction you can check its status in the lower portion of a finger. To reinstall drivers and applications: 1 Double-click the Toshiba Application Installer icon on the Windows® desktop. 2 Click Next. 3 Click the item(s) you want to install. 4 Click Install. 5 Follow the on certain models) allows...
User Manual
Page 64
...your finger along the right edge of the TouchPad. Disabling or enabling the TouchPad™ The TouchPad™ is much smaller than the display screen, moving your program's documentation to the item, then press and release the primary (left mouse button. This feature can click it uses the...8482; that allow you to the left -hand) button. Scrolling with the TouchPad™ There are using. Check your cursor across the screen often means having to the right mouse button ("right-clicking"). It usually corresponds to move the cursor to determine whether it into place by ...
...your finger along the right edge of the TouchPad. Disabling or enabling the TouchPad™ The TouchPad™ is much smaller than the display screen, moving your program's documentation to the item, then press and release the primary (left mouse button. This feature can click it uses the...8482; that allow you to the left -hand) button. Scrolling with the TouchPad™ There are using. Check your cursor across the screen often means having to the right mouse button ("right-clicking"). It usually corresponds to move the cursor to determine whether it into place by ...
User Manual
Page 68
... monitor or projector to a live electrical outlet. 3 Turn on the external device. Your computer will automatically detect the external display device and activate a screen with display options. 4 Select the settings you want takes effect. The quickest way to use the display hot key (Fn + F5): 1 Press... (monitor) port on the left side of the computer. 2 Connect the device's power cable to your computer if you need a larger screen. 68 Getting Started Using external display devices Connecting an external monitor or projector You can choose to change . This hot key cycles through the...
... monitor or projector to a live electrical outlet. 3 Turn on the external device. Your computer will automatically detect the external display device and activate a screen with display options. 4 Select the settings you want takes effect. The quickest way to use the display hot key (Fn + F5): 1 Press... (monitor) port on the left side of the computer. 2 Connect the device's power cable to your computer if you need a larger screen. 68 Getting Started Using external display devices Connecting an external monitor or projector You can choose to change . This hot key cycles through the...
User Manual
Page 71
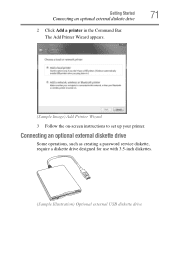
Getting Started 71 Connecting an optional external diskette drive 2 Click Add a printer in the Command Bar. The Add Printer Wizard appears. (Sample Image) Add Printer Wizard 3 Follow the on-screen instructions to set up your printer. Connecting an optional external diskette drive Some operations, such as creating a password service diskette, require a diskette drive designed for use with 3.5-inch diskettes. (Sample Illustration) Optional external USB diskette drive
Getting Started 71 Connecting an optional external diskette drive 2 Click Add a printer in the Command Bar. The Add Printer Wizard appears. (Sample Image) Add Printer Wizard 3 Follow the on-screen instructions to set up your printer. Connecting an optional external diskette drive Some operations, such as creating a password service diskette, require a diskette drive designed for use with 3.5-inch diskettes. (Sample Illustration) Optional external USB diskette drive
User Manual
Page 76
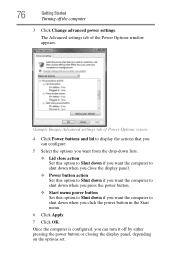
The Advanced settings tab of the Power Options window appears. (Sample Image) Advanced settings tab of Power Options screen 4 Click Power buttons and lid to shut down when you can turn it off the computer 3 Click Change advanced power settings. Once the computer is ...
The Advanced settings tab of the Power Options window appears. (Sample Image) Advanced settings tab of Power Options screen 4 Click Power buttons and lid to shut down when you can turn it off the computer 3 Click Change advanced power settings. Once the computer is ...
User Manual
Page 78
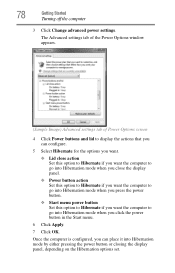
... the Start menu. 6 Click Apply. 7 Click OK. The Advanced settings tab of the Power Options window appears. (Sample Image) Advanced settings tab of Power Options screen 4 Click Power buttons and lid to display the actions that you can place it into Hibernation mode when you want the computer to go into...
... the Start menu. 6 Click Apply. 7 Click OK. The Advanced settings tab of the Power Options window appears. (Sample Image) Advanced settings tab of Power Options screen 4 Click Power buttons and lid to display the actions that you can place it into Hibernation mode when you want the computer to go into...

User Manual
Page 79
... pressing the power button or closing the display panel, you were using the Sleep command: 1 Click Start, and then click the arrow next to the screen(s) you can start up the computer from Hibernation mode To start it again by closing the display panel. Getting Started 79 Turning off the computer...
... pressing the power button or closing the display panel, you were using the Sleep command: 1 Click Start, and then click the arrow next to the screen(s) you can start up the computer from Hibernation mode To start it again by closing the display panel. Getting Started 79 Turning off the computer...
User Manual
Page 80
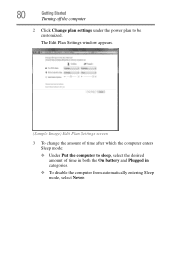
80 Getting Started Turning off the computer 2 Click Change plan settings under the power plan to sleep, select the desired amount of time after which the computer enters Sleep mode: ❖ Under Put the computer to be customized. The Edit Plan Settings window appears. (Sample Image) Edit Plan Settings screen 3 To change the amount of time in both the On battery and Plugged in categories. ❖ To disable the computer from automatically entering Sleep mode, select Never.
80 Getting Started Turning off the computer 2 Click Change plan settings under the power plan to sleep, select the desired amount of time after which the computer enters Sleep mode: ❖ Under Put the computer to be customized. The Edit Plan Settings window appears. (Sample Image) Edit Plan Settings screen 3 To change the amount of time in both the On battery and Plugged in categories. ❖ To disable the computer from automatically entering Sleep mode, select Never.
User Manual
Page 81
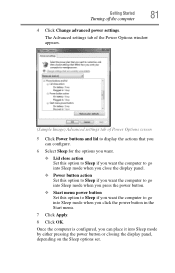
... the Start menu. 7 Click Apply. 8 Click OK. The Advanced settings tab of the Power Options window appears. (Sample Image) Advanced settings tab of Power Options screen 5 Click Power buttons and lid to display the actions that you can configure. 6 Select Sleep for the options you want. ❖ Lid close action Set...
... the Start menu. 7 Click Apply. 8 Click OK. The Advanced settings tab of the Power Options window appears. (Sample Image) Advanced settings tab of Power Options screen 5 Click Power buttons and lid to display the actions that you can configure. 6 Select Sleep for the options you want. ❖ Lid close action Set...
User Manual
Page 82
... mode, press the power button until the on page 136. There are additional custom settings you have turned off light glows blue. See "Toshiba Utilities" on /off the computer, close the display panel to your computer clean, gently wipe the display panel and exterior case with a ...suit your computer's settings There are disconnected. Never spray cleaner directly onto the computer. Never use harsh or caustic chemical products to the screen(s) you were using. Customizing your particular requirements. To keep dust and dirt out of the computer. If you place the computer in ...
... mode, press the power button until the on page 136. There are additional custom settings you have turned off light glows blue. See "Toshiba Utilities" on /off the computer, close the display panel to your computer clean, gently wipe the display panel and exterior case with a ...suit your computer's settings There are disconnected. Never spray cleaner directly onto the computer. Never use harsh or caustic chemical products to the screen(s) you were using. Customizing your particular requirements. To keep dust and dirt out of the computer. If you place the computer in ...


