
User Manual
Page 3
...transportation, nuclear facilities or systems or any "critical applications." IF YOU USE THE COMPUTER PRODUCTS IN A CRITICAL APPLICATION, YOU, AND NOT TOSHIBA, ASSUME FULL RESPONSIBILITY FOR SUCH USE. Operation with the limits for a Class B digital device, pursuant to operate the equipment. If ...this equipment. Shielded cables must be determined by turning the equipment off and on a circuit different from that interference will not occur in a particular installation. These limits are designed to...
...transportation, nuclear facilities or systems or any "critical applications." IF YOU USE THE COMPUTER PRODUCTS IN A CRITICAL APPLICATION, YOU, AND NOT TOSHIBA, ASSUME FULL RESPONSIBILITY FOR SUCH USE. Operation with the limits for a Class B digital device, pursuant to operate the equipment. If ...this equipment. Shielded cables must be determined by turning the equipment off and on a circuit different from that interference will not occur in a particular installation. These limits are designed to...
User Manual
Page 7
...LANs (Revision A/B/G), as defined and approved by the Wi-Fi Alliance. Wireless Interoperability The TOSHIBA Wireless LAN Mini PCI Card products are allocated as defined by the Institute of Electrical and ... to its operation in the United States for harmful interference to co-channel Mobile Satellite systems. High power radars are designed to be used indoors for frequency range 5.15... applies to 5.85 GHz bands. If you may interfere with any such problem, immediately turn off your network connection. Radio Frequency Interference Requirements This device is a certification mark of ...
...LANs (Revision A/B/G), as defined and approved by the Wi-Fi Alliance. Wireless Interoperability The TOSHIBA Wireless LAN Mini PCI Card products are allocated as defined by the Institute of Electrical and ... to its operation in the United States for harmful interference to co-channel Mobile Satellite systems. High power radars are designed to be used indoors for frequency range 5.15... applies to 5.85 GHz bands. If you may interfere with any such problem, immediately turn off your network connection. Radio Frequency Interference Requirements This device is a certification mark of ...
User Manual
Page 8
...Radio Frequency Radiation The radiated output power of scientists who continually review and interpret the extensive research literature. airports), you are encouraged to turning on the equipment. The antenna(s) used in such a manner that applies on board airplanes, or ❖ In any other antenna... These standards and recommendations reflect the consensus of the scientific community and result from deliberations of panels and committees of the TOSHIBA Wireless LAN Mini PCI Card is perceived or identified as described in the user documentation that comes with the following radio ...
...Radio Frequency Radiation The radiated output power of scientists who continually review and interpret the extensive research literature. airports), you are encouraged to turning on the equipment. The antenna(s) used in such a manner that applies on board airplanes, or ❖ In any other antenna... These standards and recommendations reflect the consensus of the scientific community and result from deliberations of panels and committees of the TOSHIBA Wireless LAN Mini PCI Card is perceived or identified as described in the user documentation that comes with the following radio ...

User Manual
Page 12
...systems. Before using this equipment, ensure that of mobile object identification systems (premises radio station and specified low-power radio station). 1. Contact TOSHIBA Direct PC if you have problems with any of the equipment listed above. 2. Sticker Please put the following sticker on this equipment. (1) ... from 2,400 MHz to 2,483.5 MHz for mobile object identification systems (RFID) used , change the location of use, or turn off the source of emissions. 3. Indication The indication shown below appears on devices incorporating this equipment overlaps that it does not interfere...
...systems. Before using this equipment, ensure that of mobile object identification systems (premises radio station and specified low-power radio station). 1. Contact TOSHIBA Direct PC if you have problems with any of the equipment listed above. 2. Sticker Please put the following sticker on this equipment. (1) ... from 2,400 MHz to 2,483.5 MHz for mobile object identification systems (RFID) used , change the location of use, or turn off the source of emissions. 3. Indication The indication shown below appears on devices incorporating this equipment overlaps that it does not interfere...
User Manual
Page 22
...Uruguay Vietnam Bluetooth® Wireless Technology Interoperability Bluetooth® Cards from TOSHIBA are designed to be interoperable with any such problem, immediately turn off either one another. Please contact TOSHIBA computer product support on Frequency Hopping Spread Spectrum (FHSS) radio ...technology, and is a new innovative technology, and TOSHIBA has not confirmed compatibility of 2.4 GHz ...
...Uruguay Vietnam Bluetooth® Wireless Technology Interoperability Bluetooth® Cards from TOSHIBA are designed to be interoperable with any such problem, immediately turn off either one another. Please contact TOSHIBA computer product support on Frequency Hopping Spread Spectrum (FHSS) radio ...technology, and is a new innovative technology, and TOSHIBA has not confirmed compatibility of 2.4 GHz ...
User Manual
Page 24
... phones. Because products with Bluetooth wireless technology operate within the guidelines found in radio frequency safety standards and recommendations, TOSHIBA believes Bluetooth wireless technology is far below the FCC radio frequency exposure limits. In some situations or environments, the ...Your Health The products with Bluetooth wireless technology prior to turning on the equipment. Nevertheless, the Bluetooth Card from deliberations of panels and committees of the scientific community and result from TOSHIBA shall be restricted by wireless devices such as harmful. ...
... phones. Because products with Bluetooth wireless technology operate within the guidelines found in radio frequency safety standards and recommendations, TOSHIBA believes Bluetooth wireless technology is far below the FCC radio frequency exposure limits. In some situations or environments, the ...Your Health The products with Bluetooth wireless technology prior to turning on the equipment. Nevertheless, the Bluetooth Card from deliberations of panels and committees of the scientific community and result from TOSHIBA shall be restricted by wireless devices such as harmful. ...
User Manual
Page 30
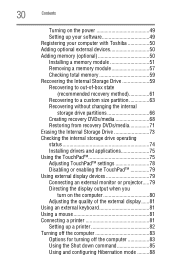
30 Contents Turning on the power 49 Setting up your software 49 Registering your computer with Toshiba 50 Adding optional external devices 50 Adding memory (optional 50 Installing a memory module 51 Removing a memory module 57 Checking total memory 59 Recovering the ... 78 Disabling or enabling the TouchPad 79 Using external display devices 79 Connecting an external monitor or projector.....79 Directing the display output when you turn on the computer 80 Adjusting the quality of the external display......81 Using an external keyboard 81 Using a mouse 81 Connecting a printer 81 ...
30 Contents Turning on the power 49 Setting up your software 49 Registering your computer with Toshiba 50 Adding optional external devices 50 Adding memory (optional 50 Installing a memory module 51 Removing a memory module 57 Checking total memory 59 Recovering the ... 78 Disabling or enabling the TouchPad 79 Using external display devices 79 Connecting an external monitor or projector.....79 Directing the display output when you turn on the computer 80 Adjusting the quality of the external display......81 Using an external keyboard 81 Using a mouse 81 Connecting a printer 81 ...
User Manual
Page 33
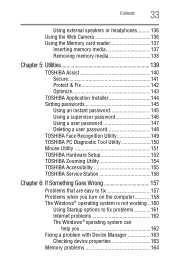
...146 Using a user password 147 Deleting a user password 148 TOSHIBA Face Recognition Utility 149 TOSHIBA PC Diagnostic Tool Utility 150 Mouse Utility 151 TOSHIBA Hardware Setup 152 TOSHIBA Zooming Utility 154 TOSHIBA Accessibility 155 TOSHIBA Service Station 156 Chapter 6: If Something Goes Wrong 157 ...Problems that are easy to fix 157 Problems when you turn on the computer............158 The ...
...146 Using a user password 147 Deleting a user password 148 TOSHIBA Face Recognition Utility 149 TOSHIBA PC Diagnostic Tool Utility 150 Mouse Utility 151 TOSHIBA Hardware Setup 152 TOSHIBA Zooming Utility 154 TOSHIBA Accessibility 155 TOSHIBA Service Station 156 Chapter 6: If Something Goes Wrong 157 ...Problems that are easy to fix 157 Problems when you turn on the computer............158 The ...
User Manual
Page 42
... from the power plug socket and computer. 3. Remove the battery pack. You should accidentally occur, immediately: 1. Turn off the computer. 2. Do not turn on the power again until you have taken the computer to the computer. Failure to follow these eventualities should observe...temperature change such as stereo speakers (other than speakers that are connected to rain, water, seawater or moisture. Keeping yourself comfortable The Toshiba Instruction Manual for Safety and Comfort, included with the underside or surface of travel. Disconnect the AC adaptor from : ❖ Dust...
... from the power plug socket and computer. 3. Remove the battery pack. You should accidentally occur, immediately: 1. Turn off the computer. 2. Do not turn on the power again until you have taken the computer to the computer. Failure to follow these eventualities should observe...temperature change such as stereo speakers (other than speakers that are connected to rain, water, seawater or moisture. Keeping yourself comfortable The Toshiba Instruction Manual for Safety and Comfort, included with the underside or surface of travel. Disconnect the AC adaptor from : ❖ Dust...
User Manual
Page 43
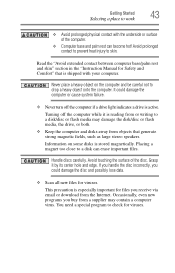
... and palm rest can erase important files. Occasionally, even new programs you could damage the computer or cause system failure. ❖ Never turn off the computer while it by its center hole and edge. Read the "Avoid extended contact between computer base/palm rest and skin" section...media may contain a computer virus. Information on the computer and be careful not to skin. You need a special program to check for viruses. Turning off the computer if a drive light indicates a drive is stored magnetically. Avoid prolonged contact to prevent heat injury to drop a heavy object ...
... and palm rest can erase important files. Occasionally, even new programs you could damage the computer or cause system failure. ❖ Never turn off the computer while it by its center hole and edge. Read the "Avoid extended contact between computer base/palm rest and skin" section...media may contain a computer virus. Information on the computer and be careful not to skin. You need a special program to check for viruses. Turning off the computer if a drive light indicates a drive is stored magnetically. Avoid prolonged contact to prevent heat injury to drop a heavy object ...
User Manual
Page 44
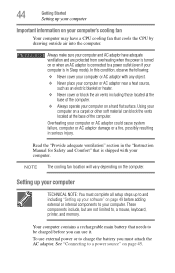
... battery you can block the vents located at the base of the computer. These components include, but are protected from overheating when the power is turned on or when an AC adaptor is connected to a power outlet (even if your computer's cooling fan Your computer may have adequate ventilation and are...
... battery you can block the vents located at the base of the computer. These components include, but are protected from overheating when the power is turned on or when an AC adaptor is connected to a power outlet (even if your computer's cooling fan Your computer may have adequate ventilation and are...
User Manual
Page 47
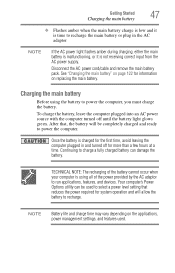
... correct input from the AC power supply. To charge the battery, leave the computer plugged into an AC power source with the computer turned off for information on replacing the main battery. See "Changing the main battery" on the applications, power management settings, and features used... during charging, either the main battery is malfunctioning, or it is charged for the first time, avoid leaving the computer plugged in and turned off until the battery light glows green. Continuing to charge a fully charged battery can be completely charged and ready to select a power ...
... correct input from the AC power supply. To charge the battery, leave the computer plugged into an AC power source with the computer turned off for information on replacing the main battery. See "Changing the main battery" on the applications, power management settings, and features used... during charging, either the main battery is malfunctioning, or it is charged for the first time, avoid leaving the computer plugged in and turned off until the battery light glows green. Continuing to charge a fully charged battery can be completely charged and ready to select a power ...
User Manual
Page 48
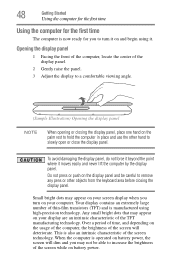
..., and depending on your display are an intrinsic characteristic of the screen will dim and you may appear on your screen display when you to turn on the palm rest to hold the computer in place and use the other objects from the keyboard area before closing the display panel, place... computer. 48 Getting Started Using the computer for the first time Using the computer for the first time The computer is now ready for you turn it on and begin using high-precision technology. Your display contains an extremely large number of the screen while on the display panel and be...
..., and depending on your display are an intrinsic characteristic of the screen will dim and you may appear on your screen display when you to turn on the palm rest to hold the computer in place and use the other objects from the keyboard area before closing the display panel, place... computer. 48 Getting Started Using the computer for the first time Using the computer for the first time The computer is now ready for you turn it on and begin using high-precision technology. Your display contains an extremely large number of the screen while on the display panel and be...
User Manual
Page 49
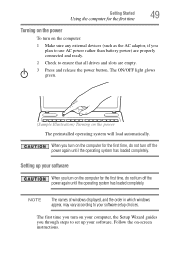
...according to set up your software setup choices. Follow the on your software. The first time you turn on the computer: 1 Make sure any external devices (such as the AC adaptor, if you turn off the power again until the operating system has loaded completely. The ON/OFF light glows green.... (Sample Illustration) Turning on the computer for the first time, do not turn off the power again until the operating system has loaded...
...according to set up your software setup choices. Follow the on your software. The first time you turn on the computer: 1 Make sure any external devices (such as the AC adaptor, if you turn off the power again until the operating system has loaded completely. The ON/OFF light glows green.... (Sample Illustration) Turning on the computer for the first time, do not turn off the power again until the operating system has loaded...
User Manual
Page 51
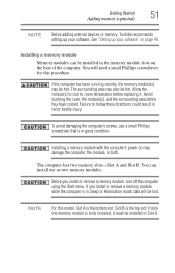
... or Hibernation mode, data will need a small Phillips screwdriver for this model, Slot A is to be installed, it . If you install or remove a memory module, turn off the computer using the Start menu. Before you install or remove a memory module while the computer is in minor bodily injury. If only one... the computer's screws, use a small Phillips screwdriver that is the top slot. Getting Started Adding memory (optional) 51 NOTE Before adding external devices or memory, Toshiba recommends setting up your software. NOTE For this procedure.
... or Hibernation mode, data will need a small Phillips screwdriver for this model, Slot A is to be installed, it . If you install or remove a memory module, turn off the computer using the Start menu. Before you install or remove a memory module while the computer is in minor bodily injury. If only one... the computer's screws, use a small Phillips screwdriver that is the top slot. Getting Started Adding memory (optional) 51 NOTE Before adding external devices or memory, Toshiba recommends setting up your software. NOTE For this procedure.
User Manual
Page 52
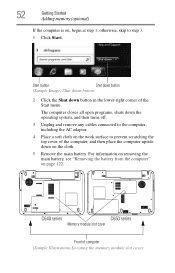
... Getting Started Adding memory (optional) If the computer is on page 122. The computer closes all open programs, shuts down the operating system, and then turns off. 3 Unplug and remove any cables connected to the computer, including the AC adaptor. 4 Place a soft cloth on the work surface to step 3. 1 Click Start...
... Getting Started Adding memory (optional) If the computer is on page 122. The computer closes all open programs, shuts down the operating system, and then turns off. 3 Unplug and remove any cables connected to the computer, including the AC adaptor. 4 Place a soft cloth on the work surface to step 3. 1 Click Start...
User Manual
Page 56
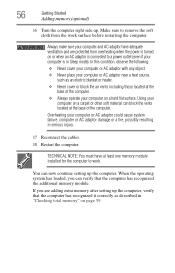
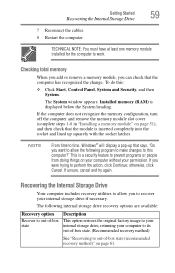
.... 18 Restart the computer. When the operating system has loaded, you are protected from the work . 56 Getting Started Adding memory (optional) 16 Turn the computer right side up the computer. Always make sure your computer is in Sleep mode). If you can block the vents located at least... one memory module installed for the computer to remove the soft cloth from overheating when the power is turned on page 59. Using your computer or AC adaptor could cause system failure, computer or AC adaptor damage or a fire, possibly resulting in "...
.... 18 Restart the computer. When the operating system has loaded, you are protected from the work . 56 Getting Started Adding memory (optional) 16 Turn the computer right side up the computer. Always make sure your computer is in Sleep mode). If you can block the vents located at least... one memory module installed for the computer to remove the soft cloth from overheating when the power is turned on page 59. Using your computer or AC adaptor could cause system failure, computer or AC adaptor damage or a fire, possibly resulting in "...
User Manual
Page 57
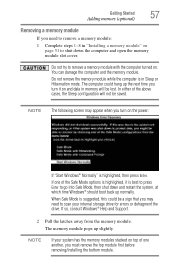
... saved. If so, consult Windows® Help and Support. 2 Pull the latches away from the memory module. NOTE The following screen may appear when you turn it is highlighted, it on and data in memory will not be a sign that you may need to remove a memory module: 1 Complete steps 1-8 in ... shut down and restart the system, at which time Windows® should boot back up normally. The memory module pops up the next time you turn on the power: If "Start Windows® Normally" is in Sleep or Hibernation mode. Getting Started Adding memory (optional) 57 Removing a memory module If...
... saved. If so, consult Windows® Help and Support. 2 Pull the latches away from the memory module. NOTE The following screen may appear when you turn it is highlighted, it on and data in memory will not be a sign that you may need to remove a memory module: 1 Complete steps 1-8 in ... shut down and restart the system, at which time Windows® should boot back up normally. The memory module pops up the next time you turn on the power: If "Start Windows® Normally" is in Sleep or Hibernation mode. Getting Started Adding memory (optional) 57 Removing a memory module If...
User Manual
Page 58
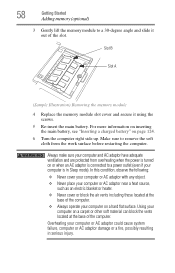
..., computer or AC adaptor damage or a fire, possibly resulting in Sleep mode). Make sure to remove the soft cloth from overheating when the power is turned on a hard flat surface. Overheating your computer on or when an AC adaptor is connected to a 30-degree angle and slide it using the screws... Adding memory (optional) 3 Gently lift the memory module to a power outlet (even if your computer is in serious injury. Using your computer on page 124. 6 Turn the computer right side up.
..., computer or AC adaptor damage or a fire, possibly resulting in Sleep mode). Make sure to remove the soft cloth from overheating when the power is turned on a hard flat surface. Overheating your computer on or when an AC adaptor is connected to a 30-degree angle and slide it using the screws... Adding memory (optional) 3 Gently lift the memory module to a power outlet (even if your computer is in serious injury. Using your computer on page 124. 6 Turn the computer right side up.
User Manual
Page 59
... a memory module, you were trying to your internal storage drive, returning your permission. otherwise, click Cancel. If the computer does not recognize the memory configuration, turn off the computer and remove the memory module slot cover (complete steps 1-8 in "Installing a memory module" on your computer without your computer to its out...
... a memory module, you were trying to your internal storage drive, returning your permission. otherwise, click Cancel. If the computer does not recognize the memory configuration, turn off the computer and remove the memory module slot cover (complete steps 1-8 in "Installing a memory module" on your computer without your computer to its out...


