
User Guide
Page 5
Connection to party line service is experienced with this , it may be required. or an authorized representative of Toshiba, or the Toshiba Support Centre within the United States at (800) 457-7777 or Outside the United States at the top or bottom of each transmitted page or on the label. In order to use... equipment until the problem is necessary. 5 US:AAAEQ##TXXXX. If trouble is subject to make any message unless such message clearly contains in writing, to the telephone network, the telephone company may request that temporary discontinuance of service may occasionally be...
Connection to party line service is experienced with this , it may be required. or an authorized representative of Toshiba, or the Toshiba Support Centre within the United States at (800) 457-7777 or Outside the United States at the top or bottom of each transmitted page or on the label. In order to use... equipment until the problem is necessary. 5 US:AAAEQ##TXXXX. If trouble is subject to make any message unless such message clearly contains in writing, to the telephone network, the telephone company may request that temporary discontinuance of service may occasionally be...

User Guide
Page 31
... computer on battery power 122 Battery Notice 122 Charging the main battery 123 Charging the RTC battery 124 Monitoring battery power 125 What to do when the battery alarm sounds 128 Changing batteries 129 Taking care of your battery 131 Safety precautions 131 Maximizing battery life 132 Disposing of used batteries safely 133 Conserving power 134 Power usage profiles in Windows XP Professional .... 134 Using a hot key to set the power usage mode 135 Additional options for power 136 Chapter...
... computer on battery power 122 Battery Notice 122 Charging the main battery 123 Charging the RTC battery 124 Monitoring battery power 125 What to do when the battery alarm sounds 128 Changing batteries 129 Taking care of your battery 131 Safety precautions 131 Maximizing battery life 132 Disposing of used batteries safely 133 Conserving power 134 Power usage profiles in Windows XP Professional .... 134 Using a hot key to set the power usage mode 135 Additional options for power 136 Chapter...

User Guide
Page 66
... Toshiba's support center at (800) 457-7777. A message may display. the secondary slot located on the bottom of your computer, and the primary slot located under your computer. There are two memory expansion slots; 66 Connecting Other External Devices Adding memory Adding memory HINT: To purchase additional memory modules, see the accessories information packaged with invalid memory, the system will beep and will install or replace a memory module in the secondary slot...
... Toshiba's support center at (800) 457-7777. A message may display. the secondary slot located on the bottom of your computer, and the primary slot located under your computer. There are two memory expansion slots; 66 Connecting Other External Devices Adding memory Adding memory HINT: To purchase additional memory modules, see the accessories information packaged with invalid memory, the system will beep and will install or replace a memory module in the secondary slot...

User Guide
Page 69
... the slot, fit the module into position. To avoid damaging the memory module, be level when secured in place. Grease or dust on the connectors may have built up. Before you handle the module, touch a grounded metal surface to touch its pin connector on the side you may cause memory access problems. 12 Replace the cover slot and the screw. Connecting Other External Devices Adding memory 69...
... the slot, fit the module into position. To avoid damaging the memory module, be level when secured in place. Grease or dust on the connectors may have built up. Before you handle the module, touch a grounded metal surface to touch its pin connector on the side you may cause memory access problems. 12 Replace the cover slot and the screw. Connecting Other External Devices Adding memory 69...

User Guide
Page 89
The caps lock light next to upper case-the number and symbol keys are not interchangeable. ❖ The Caps Lock key changes only the alphabet keys to the caps lock key glows when you to emulate a full-size keyboard. Learning the Basics Using the keyboard 89 Sample keyboard Character keys Typing with one of the page. ❖ The lowercase letter l (el) and the number 1 are not interchangeable. ❖...
The caps lock light next to upper case-the number and symbol keys are not interchangeable. ❖ The Caps Lock key changes only the alphabet keys to the caps lock key glows when you to emulate a full-size keyboard. Learning the Basics Using the keyboard 89 Sample keyboard Character keys Typing with one of the page. ❖ The lowercase letter l (el) and the number 1 are not interchangeable. ❖...

User Guide
Page 110
... external monitor, external full-size keyboard, and a mouse, you may want to secure your desk. For more information on connecting these and other components, see "Connecting Other External Devices" on page 57. Sample PORT-Noteworthy® Computer Lock Cable To secure the computer: 1 Loop the cable through the loop. An external USB keyboard or a USB mouse connects to purchase an optional PORT-Noteworthy® Computer Lock Cable. A serial mouse connects to the serial port of a heavy object. Using a computer lock...
... external monitor, external full-size keyboard, and a mouse, you may want to secure your desk. For more information on connecting these and other components, see "Connecting Other External Devices" on page 57. Sample PORT-Noteworthy® Computer Lock Cable To secure the computer: 1 Loop the cable through the loop. An external USB keyboard or a USB mouse connects to purchase an optional PORT-Noteworthy® Computer Lock Cable. A serial mouse connects to the serial port of a heavy object. Using a computer lock...

User Guide
Page 128
... settings: 1 Click Start, then Control Panel, and then Performance and Maintenance. 2 Click the TOSHIBA Power Saver icon. 3 Click the Setup Action tab. 4 Configure the Alarm settings to warn you are working in the Control Panel. Before your computer runs out of battery power, save your work. Check your remaining charge frequently if you of the following actions: ❖ Suspend or shut down your needs. The Windows operating system has additional power management options...
... settings: 1 Click Start, then Control Panel, and then Performance and Maintenance. 2 Click the TOSHIBA Power Saver icon. 3 Click the Setup Action tab. 4 Configure the Alarm settings to warn you are working in the Control Panel. Before your computer runs out of battery power, save your work. Check your remaining charge frequently if you of the following actions: ❖ Suspend or shut down your needs. The Windows operating system has additional power management options...

User Guide
Page 150
... Hardware tab, and then click the Device Manager button. 3 Select the network adapter in Network Adapters. 4 Click the Properties icon on the toolbar. 5 Select the Do not use this delay, you can reach may vary depending on how to set up a wireless connection, refer to any type of 802.11 network. With an integrated Wi-Fi module, you can reconfigure Windows to disable the LAN port. To avoid this device (disable) option...
... Hardware tab, and then click the Device Manager button. 3 Select the network adapter in Network Adapters. 4 Click the Properties icon on the toolbar. 5 Select the Do not use this delay, you can reach may vary depending on how to set up a wireless connection, refer to any type of 802.11 network. With an integrated Wi-Fi module, you can reconfigure Windows to disable the LAN port. To avoid this device (disable) option...
User Guide
Page 161
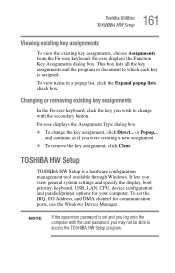
... Type dialog box. ❖ To change with the user password, you were creating a new assignment. ❖ To remove the key assignment, click Clear. Changing or removing existing key assignments In the Fn-esse keyboard, click the key you view general system settings and specify the display, boot priority, keyboard, USB, LAN, CPU, device configuration and parallel/printer options for communication ports, use the Windows Device Manager. This box lists all the key assignments and the program or document to access the TOSHIBA HW Setup...
... Type dialog box. ❖ To change with the user password, you were creating a new assignment. ❖ To remove the key assignment, click Clear. Changing or removing existing key assignments In the Fn-esse keyboard, click the key you view general system settings and specify the display, boot priority, keyboard, USB, LAN, CPU, device configuration and parallel/printer options for communication ports, use the Windows Device Manager. This box lists all the key assignments and the program or document to access the TOSHIBA HW Setup...
User Guide
Page 168
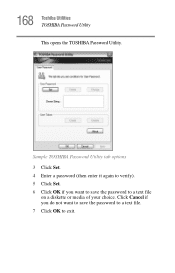
Click Cancel if you want to save the password to exit. Sample TOSHIBA Password Utility tab options 3 Click Set. 4 Enter a password (then enter it again to verify). 5 Click Set. 6 Click OK if you do not want to save the password to a text file. 7 Click OK to a text file on a diskette or media of your choice. 168 Toshiba Utilities TOSHIBA Password Utility This opens the TOSHIBA Password Utility.
Click Cancel if you want to save the password to exit. Sample TOSHIBA Password Utility tab options 3 Click Set. 4 Enter a password (then enter it again to verify). 5 Click Set. 6 Click OK if you do not want to save the password to a text file. 7 Click OK to a text file on a diskette or media of your choice. 168 Toshiba Utilities TOSHIBA Password Utility This opens the TOSHIBA Password Utility.
User Guide
Page 179
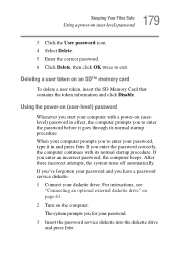
... press Enter. For instructions, see "Connecting an optional external diskette drive" on page 63. 2 Turn on (user-level) password 3 Click the User password icon. 4 Select Delete. 5 Enter the correct password. 6 Click Delete, then click OK twice to exit. Using the power-on an SD™ memory card To delete a user token, insert the SD Memory Card that contains the token information and click Disable. When your computer prompts you have a password service diskette: 1 Connect...
... press Enter. For instructions, see "Connecting an optional external diskette drive" on page 63. 2 Turn on (user-level) password 3 Click the User password icon. 4 Select Delete. 5 Enter the correct password. 6 Click Delete, then click OK twice to exit. Using the power-on an SD™ memory card To delete a user token, insert the SD Memory Card that contains the token information and click Disable. When your computer prompts you have a password service diskette: 1 Connect...
User Guide
Page 194
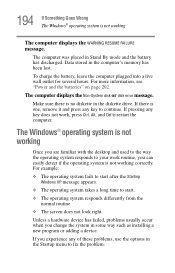
To charge the battery, leave the computer plugged into a live wall outlet for several hours. For more information, see "Power and the batteries" on page 202. The Windows® operating system is not working Once you experience any of these problems, use the options in some way such as installing a new program or adding a device. The computer displays the Non-System disk or disk error message. If you...
To charge the battery, leave the computer plugged into a live wall outlet for several hours. For more information, see "Power and the batteries" on page 202. The Windows® operating system is not working Once you experience any of these problems, use the options in some way such as installing a new program or adding a device. The computer displays the Non-System disk or disk error message. If you...

User Guide
Page 196
... display different versions of period ("dot"), or other mistake makes it impossible for your access can help you If the operating system has started properly, but you still have a problem using your Windows® documentation for temporary repair. Internet problems My Internet connection is very slow, try later. Make sure you can surf the Internet. To access Windows® XP Help and Support: 1 Click Start, then click Help and Support...
... display different versions of period ("dot"), or other mistake makes it impossible for your access can help you If the operating system has started properly, but you still have a problem using your Windows® documentation for temporary repair. Internet problems My Internet connection is very slow, try later. Make sure you can surf the Internet. To access Windows® XP Help and Support: 1 Click Start, then click Help and Support...

User Guide
Page 204
... using an external monitor: ❖ Check that the monitor is turned on. ❖ Check that the cable connecting the external monitor to the computer is firmly attached. ❖ Try adjusting the contrast and brightness controls on the external monitor. ❖ Press Fn and F5 simultaneously to continue working power outlet. ❖ Check that the monitor's power cable is blank. If you have connected an external keyboard and the operating system displays one or more keyboard error...
... using an external monitor: ❖ Check that the monitor is turned on. ❖ Check that the cable connecting the external monitor to the computer is firmly attached. ❖ Try adjusting the contrast and brightness controls on the external monitor. ❖ Press Fn and F5 simultaneously to continue working power outlet. ❖ Check that the monitor's power cable is blank. If you have connected an external keyboard and the operating system displays one or more keyboard error...

User Guide
Page 229
... system) to start and setup ConfigFree. Starting ConfigFree To start a search for wireless devices, ConfigFree Launcher displays on the taskbar. ❖ Press the Toshiba Console button (if applicable to your computer desktop. 229 Using ConfigFree™ with an "X." When you start ConfigFree, be sure the computer has a wired or wireless connection. You can then click the appropriate icon on setting up and using ConfigFree, see...
... system) to start and setup ConfigFree. Starting ConfigFree To start a search for wireless devices, ConfigFree Launcher displays on the taskbar. ❖ Press the Toshiba Console button (if applicable to your computer desktop. 229 Using ConfigFree™ with an "X." When you start ConfigFree, be sure the computer has a wired or wireless connection. You can then click the appropriate icon on setting up and using ConfigFree, see...
User Guide
Page 235
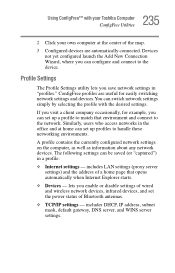
..., for easily switching network settings and devices.You can switch network settings simply by selecting the profile with your Toshiba Computer ConfigFree Utilities 2 Click your own computer at home can configure and connect to match that opens automatically when Internet Explorer starts. ❖ Devices - Similarly, users who access networks in a profile: ❖ Internet settings - includes LAN settings (proxy server settings) and the address of Bluetooth antennas. ❖ TCP/IP settings - The following settings can be saved...
..., for easily switching network settings and devices.You can switch network settings simply by selecting the profile with your Toshiba Computer ConfigFree Utilities 2 Click your own computer at home can configure and connect to match that opens automatically when Internet Explorer starts. ❖ Devices - Similarly, users who access networks in a profile: ❖ Internet settings - includes LAN settings (proxy server settings) and the address of Bluetooth antennas. ❖ TCP/IP settings - The following settings can be saved...

User Guide
Page 250
... have the operating system automatically recognize the change. I icon-A small image displayed on the motherboard to help improve processing speed. L2 (level two) cache-Memory cache installed on the screen that activates a memory resident program. When you use to create a complete screen image. Compare non-interlaced. K keyboard shortcut-A key or combination of keys that holds 1.44 MB of using a pointing device such as the battery save mode. (2) A key or combination...
... have the operating system automatically recognize the change. I icon-A small image displayed on the motherboard to help improve processing speed. L2 (level two) cache-Memory cache installed on the screen that activates a memory resident program. When you use to create a complete screen image. Compare non-interlaced. K keyboard shortcut-A key or combination of keys that holds 1.44 MB of using a pointing device such as the battery save mode. (2) A key or combination...

User Guide
Page 256
... devices 76 docking solutions 65 memory 66 Advanced Port Replicator keyboard connecting 60 mouse connecting 61 alarms 128 assign keys Fn-esse 159 audio, .wav files 142 B basics backing up files 87 keyboard 89 battery alarms 128 caring for 131 changing 129 charge does not last 203 charging 50, 55, 123 charging before use 46 conserving power 134 disposal 133 light 49 monitoring power 125 not charging 202 power usage hot key 135 power usage mode...
... devices 76 docking solutions 65 memory 66 Advanced Port Replicator keyboard connecting 60 mouse connecting 61 alarms 128 assign keys Fn-esse 159 audio, .wav files 142 B basics backing up files 87 keyboard 89 battery alarms 128 caring for 131 changing 129 charge does not last 203 charging 50, 55, 123 charging before use 46 conserving power 134 disposal 133 light 49 monitoring power 125 not charging 202 power usage hot key 135 power usage mode...
User Guide
Page 257
... setting up 67, 71 turning off 54 warning resume failure message 194 configuring hard drive passwords 184 password 173 PC Cards 84 connecting headphones 64 memory module 66 modem to telephone line 85 monitor 57 PC Cards 82 speakers 64 connection set up 149 conserving power 134 control buttons 94 critical applications 3 D desktop major features 138 desktop icons 138 Device Manager 199 checking properties 200 disabling a device 200 disc, positioning 106 Disk Defragmenter 207 disk drive...
... setting up 67, 71 turning off 54 warning resume failure message 194 configuring hard drive passwords 184 password 173 PC Cards 84 connecting headphones 64 memory module 66 modem to telephone line 85 monitor 57 PC Cards 82 speakers 64 connection set up 149 conserving power 134 control buttons 94 critical applications 3 D desktop major features 138 desktop icons 138 Device Manager 199 checking properties 200 disabling a device 200 disc, positioning 106 Disk Defragmenter 207 disk drive...
User Guide
Page 260
... port 147 problem solving 214 resetting port to default settings 147 sending or receiving a fax 85 upgrading 147 warning 86 monitor connecting 57 not working 204 mouse connecting to Advanced Port Replicator 61 MP3 143 playing 143 recording 143 N network accessing 149 Dial-Up Networking Wizard 149 networking wireless 148 O optional devices LapLink cable 146 P password 173 creating 174 deleting a supervisor 184 hard disk drive 174 power-on 173, 174 supervisor set up 176, 180 supervisor-level 174 types...
... port 147 problem solving 214 resetting port to default settings 147 sending or receiving a fax 85 upgrading 147 warning 86 monitor connecting 57 not working 204 mouse connecting to Advanced Port Replicator 61 MP3 143 playing 143 recording 143 N network accessing 149 Dial-Up Networking Wizard 149 networking wireless 148 O optional devices LapLink cable 146 P password 173 creating 174 deleting a supervisor 184 hard disk drive 174 power-on 173, 174 supervisor set up 176, 180 supervisor-level 174 types...


