Brochure
Page 2
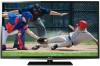
... your Toshiba television, always use a UL Listed wall bracket appropriate for viewing 1080p/24 fps content. 3. All rights reserved. Use of Toshiba America Information Systems, Inc. and/or Toshiba Corporation. Dynamic Volume® • Ported Speakers • Speaker Output: 14W Connectivity • HDMI® with CEC3: 3 • USB Media: 1 • High Definition PC Input: 1 • 3.5mm PC Audio Out: 1 • Digital Audio Out: 1 • ColorStream® Component Video: 1 • Composite: 1 Product and Packaging • VESA Mounting Pattern4...
... your Toshiba television, always use a UL Listed wall bracket appropriate for viewing 1080p/24 fps content. 3. All rights reserved. Use of Toshiba America Information Systems, Inc. and/or Toshiba Corporation. Dynamic Volume® • Ported Speakers • Speaker Output: 14W Connectivity • HDMI® with CEC3: 3 • USB Media: 1 • High Definition PC Input: 1 • 3.5mm PC Audio Out: 1 • Digital Audio Out: 1 • ColorStream® Component Video: 1 • Composite: 1 Product and Packaging • VESA Mounting Pattern4...
User Guide
Page 2
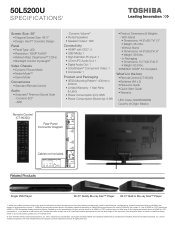
..., as close to the point of your LED TV, carefully read and understand all cords and cables connected to Article 820-40 of inappropriate or non-Listed mounting brackets could result in particular, specifies that can easily be used as steps, such as a chest of this apparatus must be mounted to walls with the installation instructions. See "To Display your purchase! For additional antenna grounding...
..., as close to the point of your LED TV, carefully read and understand all cords and cables connected to Article 820-40 of inappropriate or non-Listed mounting brackets could result in particular, specifies that can easily be used as steps, such as a chest of this apparatus must be mounted to walls with the installation instructions. See "To Display your purchase! For additional antenna grounding...
User Guide
Page 3
... damaged in fire. Never place the TV on or with the product or play with dry cloth. 7) Do not block any time it may void: a) the warranty, and b) the user's authority to operate this product at plugs, convenience receptacles, and the point where they exit from tip-over. 13)...Servicing is located in such a manner that produce heat. 9) Do not defeat the safety purpose of the Federal Communications Commission. 23) DANGER: RISK OF SERIOUS PERSONAL INJURY, DEATH, OR EQUIPMENT DAMAGE! The TV may reduce the product lifetime or result in any way, such as power-supply cord or plug...
... damaged in fire. Never place the TV on or with the product or play with dry cloth. 7) Do not block any time it may void: a) the warranty, and b) the user's authority to operate this product at plugs, convenience receptacles, and the point where they exit from tip-over. 13)...Servicing is located in such a manner that produce heat. 9) Do not defeat the safety purpose of the Federal Communications Commission. 23) DANGER: RISK OF SERIOUS PERSONAL INJURY, DEATH, OR EQUIPMENT DAMAGE! The TV may reduce the product lifetime or result in any way, such as power-supply cord or plug...
User Guide
Page 5
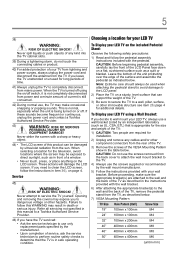
... stand from power and a minute amount of current is turned off using a Wall Bracket: If you leave the TV unattended or unused for additional details. Before proceeding, make occasional snapping or popping sounds. When selecting a location for your LED TV To Display your TV from lightning and power surges, always unplug the power cord and disconnect the antenna from the rear of the TV. 3) Remove the screws...
... stand from power and a minute amount of current is turned off using a Wall Bracket: If you leave the TV unattended or unused for additional details. Before proceeding, make occasional snapping or popping sounds. When selecting a location for your LED TV To Display your TV from lightning and power surges, always unplug the power cord and disconnect the antenna from the rear of the TV. 3) Remove the screws...
User Guide
Page 7
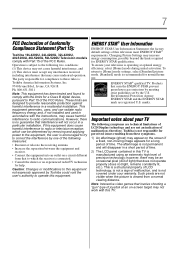
... the receiving antenna. • Increase the separation between the equipment and receiver. • Connect the equipment into an outlet on -screen target may appear on the screen if a fixed, non-moving image appears for a Class B digital device, pursuant to Part 15 of the FCC Rules. 7 FCC Declaration of Conformity Compliance Statement (Part 15): Toshiba 19L4200U, 24L4200U, 32L4200U, 40L5200U, 46L5200U, 50L5200U Television models comply with Part...
... the receiving antenna. • Increase the separation between the equipment and receiver. • Connect the equipment into an outlet on -screen target may appear on the screen if a fixed, non-moving image appears for a Class B digital device, pursuant to Part 15 of the FCC Rules. 7 FCC Declaration of Conformity Compliance Statement (Part 15): Toshiba 19L4200U, 24L4200U, 32L4200U, 40L5200U, 46L5200U, 50L5200U Television models comply with Part...
User Guide
Page 13
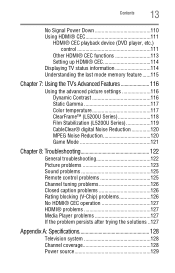
... Series 118 Film Stabilization (L5200U Series 119 CableClear® digital Noise Reduction 120 MPEG Noise Reduction 120 Game Mode 121 Chapter 8: Troubleshooting 122 General troubleshooting 122 Picture problems 123 Sound problems 125 Remote control problems 125 Channel tuning problems 126 Closed caption problems 126 Rating blocking (V-Chip) problems 126 No HDMI® CEC operation 127 HDMI® problems 127 Media Player problems 127 If the problem persists after trying the solutions ..127 Appendix A: Specifications 128 Television system 128 Channel coverage 128 Power source...
... Series 118 Film Stabilization (L5200U Series 119 CableClear® digital Noise Reduction 120 MPEG Noise Reduction 120 Game Mode 121 Chapter 8: Troubleshooting 122 General troubleshooting 122 Picture problems 123 Sound problems 125 Remote control problems 125 Channel tuning problems 126 Closed caption problems 126 Rating blocking (V-Chip) problems 126 No HDMI® CEC operation 127 HDMI® problems 127 Media Player problems 127 If the problem persists after trying the solutions ..127 Appendix A: Specifications 128 Television system 128 Channel coverage 128 Power source...
User Guide
Page 20
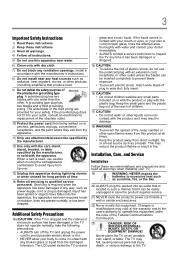
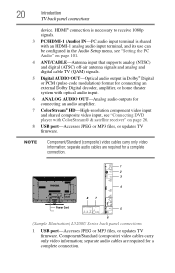
... Power Cord 5 6 (Sample Illustration) L5200U Series back panel connections 1 USB port-Accesses JPEG or MP3 files, or updates TV firmware. Component/Standard (composite) video cables carry only video information; separate audio cables are required for connecting an audio amplifier. 7 ColorStream® HD-High-resolution component video input and shared composite video input, see "Setting the PC Audio" on page 101. 4 ANT/CABLE-Antenna input that supports analog (NTSC) and digital (ATSC) off-air antenna signals and analog and digital cable TV (QAM) signals. 5 Digital AUDIO OUT-Optical...
... Power Cord 5 6 (Sample Illustration) L5200U Series back panel connections 1 USB port-Accesses JPEG or MP3 files, or updates TV firmware. Component/Standard (composite) video cables carry only video information; separate audio cables are required for connecting an audio amplifier. 7 ColorStream® HD-High-resolution component video input and shared composite video input, see "Setting the PC Audio" on page 101. 4 ANT/CABLE-Antenna input that supports analog (NTSC) and digital (ATSC) off-air antenna signals and analog and digital cable TV (QAM) signals. 5 Digital AUDIO OUT-Optical...
User Guide
Page 21
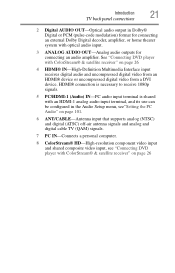
... panel connections 2 Digital AUDIO OUT-Optical audio output in the Audio Setup menu, see"Setting the PC Audio" on page 101. 6 ANT/CABLE-Antenna input that supports analog (NTSC) and digital (ATSC) off-air antenna signals and analog and digital cable TV (QAM) signals. 7 PC IN-Connects a personal computer. 8 ColorStream® HD-High-resolution component video input and shared composite video input, see "Connecting DVD player with ColorStream® & satellite receiver" on page 26 4 HDMI® IN-High-Definition Multimedia Interface input receives digital audio and uncompressed digital video...
... panel connections 2 Digital AUDIO OUT-Optical audio output in the Audio Setup menu, see"Setting the PC Audio" on page 101. 6 ANT/CABLE-Antenna input that supports analog (NTSC) and digital (ATSC) off-air antenna signals and analog and digital cable TV (QAM) signals. 7 PC IN-Connects a personal computer. 8 ColorStream® HD-High-resolution component video input and shared composite video input, see "Connecting DVD player with ColorStream® & satellite receiver" on page 26 4 HDMI® IN-High-Definition Multimedia Interface input receives digital audio and uncompressed digital video...
User Guide
Page 26
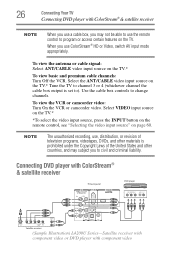
... component video or DVD player with ColorStream® & satellite receiver NOTE When you use a cable box, you use ColorStream® HD or Video, switch AV input mode appropriately. To view the antenna or cable signal: Select ANT/CABLE video input source on page 60. Select VIDEO input source on the TV.* *To select the video input source, press the INPUT button on the remote control, see "Selecting the video input source" on the TV.* To view basic and premium cable channels: Turn Off the VCR. Select the ANT/CABLE video input source...
... component video or DVD player with ColorStream® & satellite receiver NOTE When you use a cable box, you use ColorStream® HD or Video, switch AV input mode appropriately. To view the antenna or cable signal: Select ANT/CABLE video input source on page 60. Select VIDEO input source on the TV.* *To select the video input source, press the INPUT button on the remote control, see "Selecting the video input source" on the TV.* To view basic and premium cable channels: Turn Off the VCR. Select the ANT/CABLE video input source...

User Guide
Page 44
... INPUT button selects the video input source, see "Selecting the video input source" on page 60. 5 The SLEEP button accesses the sleep timer, see "Tuning channels using Channel Return" on page 109. 6 The FREEZE button freezes the picture. 44 Using the Remote Control Learning about the remote control 1 The POWER button turns the TV On/Off. When the TV is on, the power LED indicator on the TV front glows green. 2 The PIC SIZE button cycles through programmed channels (when no on-screen menu is...
... INPUT button selects the video input source, see "Selecting the video input source" on page 60. 5 The SLEEP button accesses the sleep timer, see "Tuning channels using Channel Return" on page 109. 6 The FREEZE button freezes the picture. 44 Using the Remote Control Learning about the remote control 1 The POWER button turns the TV On/Off. When the TV is on, the power LED indicator on the TV front glows green. 2 The PIC SIZE button cycles through programmed channels (when no on-screen menu is...

User Guide
Page 46
Icon Picture Sound Item Mode Picture Settings Noise Reduction Game Mode Theater Settings Digital Audio Selector Audio Settings Audio Setup Option Dynamic/Standard/Movie/PC/Preference Opens the Picture Settings menu Opens the Noise Reduction menu Off/On Opens the Theater Settings menu Launches the temporary Audio Selector Opens the Audio Settings menu Opens the Audio Setup menu 46 To open the Installation menus (illustrated below and on the remote control or TV control panel. Chapter 4 Menu Layout and Navigation Main menu layout The tables below...
Icon Picture Sound Item Mode Picture Settings Noise Reduction Game Mode Theater Settings Digital Audio Selector Audio Settings Audio Setup Option Dynamic/Standard/Movie/PC/Preference Opens the Picture Settings menu Opens the Noise Reduction menu Off/On Opens the Theater Settings menu Launches the temporary Audio Selector Opens the Audio Settings menu Opens the Audio Setup menu 46 To open the Installation menus (illustrated below and on the remote control or TV control panel. Chapter 4 Menu Layout and Navigation Main menu layout The tables below...
User Guide
Page 48
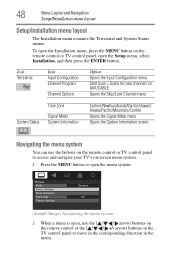
... Channel Program Channel Options Option Opens the Input Configuration menu Start Scan > Scans for new channels on ANT/CABLE Opens the Skip/Lock Channel menu System Status Time Zone Signal Meter System Information Eastern/Newfoundland/Atlantic/Hawaii/ Alaska/Pacific/Mountain/Central Opens the Signal Meter menu Opens the System Information screen Navigating the menu system You can use the ( / / / arrow) buttons on the remote control or the arrow) buttons on -screen menu system. 1 Press the MENU button...
... Channel Program Channel Options Option Opens the Input Configuration menu Start Scan > Scans for new channels on ANT/CABLE Opens the Skip/Lock Channel menu System Status Time Zone Signal Meter System Information Eastern/Newfoundland/Atlantic/Hawaii/ Alaska/Pacific/Mountain/Central Opens the Signal Meter menu Opens the System Information screen Navigating the menu system You can use the ( / / / arrow) buttons on the remote control or the arrow) buttons on -screen menu system. 1 Press the MENU button...

User Guide
Page 50
The Location settings window appears. 3 For normal home use, press the ( / arrow) buttons to select Start Scan and continue with the Auto Tuning. The ANT/CABLE In setup window appears. 4 Press the ( / arrow) buttons to select the input source (Cable or Antenna), and then press ENTER. 5 Press the ENTER button to select Home, and then press the ENTER button. However if you do not finish the...
The Location settings window appears. 3 For normal home use, press the ( / arrow) buttons to select Start Scan and continue with the Auto Tuning. The ANT/CABLE In setup window appears. 4 Press the ( / arrow) buttons to select the input source (Cable or Antenna), and then press ENTER. 5 Press the ENTER button to select Home, and then press the ENTER button. However if you do not finish the...

User Guide
Page 56
... the HDMI 1 audio mode (Auto, Digital, or Analog). (Auto is the recommended Setting the HDMI® audio mode To set this input for either ColorStream HD or Video. however, they can set the HDMI® audio mode: 1 Press the MENU button and open the Sound menu. 2 Highlight Audio Setup, and then press the ENTER button. 3 Press the ( / arrow) buttons to select HDMI 1 Audio, and then press the ( / arrow) buttons to remove the unnecessary channel from the channel list. To remove encrypted channels from the channel memory...
... the HDMI 1 audio mode (Auto, Digital, or Analog). (Auto is the recommended Setting the HDMI® audio mode To set this input for either ColorStream HD or Video. however, they can set the HDMI® audio mode: 1 Press the MENU button and open the Sound menu. 2 Highlight Audio Setup, and then press the ENTER button. 3 Press the ( / arrow) buttons to select HDMI 1 Audio, and then press the ( / arrow) buttons to remove the unnecessary channel from the channel list. To remove encrypted channels from the channel memory...

User Guide
Page 88
... ENTER button. Selecting the optical audio output format You can further compress Dolby Digital dynamic range, allowing you use the Dolby Digital Dynamic Range Control: 1 Press the MENU button and open the Sound menu. 2 Highlight Audio Setup, and then press the ENTER button. 3 In the Digital Output Format field, select either Compressed or Standard. To reset the settings to the factory defaults, highlight Reset, and then press the ENTER button. To reset the settings to the factory defaults, highlight Reset...
... ENTER button. Selecting the optical audio output format You can further compress Dolby Digital dynamic range, allowing you use the Dolby Digital Dynamic Range Control: 1 Press the MENU button and open the Sound menu. 2 Highlight Audio Setup, and then press the ENTER button. 3 In the Digital Output Format field, select either Compressed or Standard. To reset the settings to the factory defaults, highlight Reset, and then press the ENTER button. To reset the settings to the factory defaults, highlight Reset...

User Guide
Page 102
...: When viewing the PC input, the audio from 8 to "Auto." 102 Using the TV's features Using the Media Player 2 Highlight Audio Setup, and then press the ENTER button. 3 Press the ( / arrow) buttons to select PC Audio, and then press the ( / arrow) buttons to "Digital" and is grayed out in the menu. (See also "Setting the HDMI® audio mode" on a USB storage device. If PC Audio is set of analog audio inputs, the PC Audio menu setting influences the HDMI 1 Audio menu setting...
...: When viewing the PC input, the audio from 8 to "Auto." 102 Using the TV's features Using the Media Player 2 Highlight Audio Setup, and then press the ENTER button. 3 Press the ( / arrow) buttons to select PC Audio, and then press the ( / arrow) buttons to "Digital" and is grayed out in the menu. (See also "Setting the HDMI® audio mode" on a USB storage device. If PC Audio is set of analog audio inputs, the PC Audio menu setting influences the HDMI 1 Audio menu setting...

User Guide
Page 113
... as DVD player, etc.) is turned off the sound. When this item is connected. Item: Description: TV Auto Input If a connected HDMI® device starts playing video or audio, the TV will Switch automatically switch to Audio Receiver in the HDMI® CEC Setup menu are set to Audio Receiver, the TV remote can adjust or mute the sound volume of the Standby HDMI® CEC devices connected to turn off all of the Audio Receiver. ❖ VOL (+ -) buttons adjust the volume level. ❖ MUTE button turns...
... as DVD player, etc.) is turned off the sound. When this item is connected. Item: Description: TV Auto Input If a connected HDMI® device starts playing video or audio, the TV will Switch automatically switch to Audio Receiver in the HDMI® CEC Setup menu are set to Audio Receiver, the TV remote can adjust or mute the sound volume of the Standby HDMI® CEC devices connected to turn off all of the Audio Receiver. ❖ VOL (+ -) buttons adjust the volume level. ❖ MUTE button turns...
User Guide
Page 122
... Text modes (T1, T2, T3, or T4). Chapter 8 Troubleshooting General troubleshooting Before calling a service technician, review this method, unplug the TV from the AC wall outlet and plug it back in . If the TV does not power off the TV, press and hold POWER button on the remote control or TV control panel and you cannot turn off using this chapter or visit the Toshiba technical support Web...
... Text modes (T1, T2, T3, or T4). Chapter 8 Troubleshooting General troubleshooting Before calling a service technician, review this method, unplug the TV from the AC wall outlet and plug it back in . If the TV does not power off the TV, press and hold POWER button on the remote control or TV control panel and you cannot turn off using this chapter or visit the Toshiba technical support Web...
User Guide
Page 123
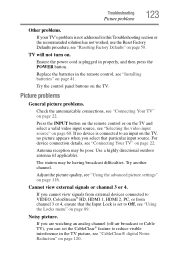
... 59. Cannot view external signals or channel 3 or 4. If you can set to Off, see "Connecting Your TV" on page 89. Troubleshooting Picture problems 123 Other problems. If your TV's problem is plugged in properly, and then press the POWER button. TV will not turn on the TV. Try the control panel buttons on . Press the INPUT button on the remote control or on the TV and select a valid video input source, see "Installing batteries" on...
... 59. Cannot view external signals or channel 3 or 4. If you can set to Off, see "Connecting Your TV" on page 89. Troubleshooting Picture problems 123 Other problems. If your TV's problem is plugged in properly, and then press the POWER button. TV will not turn on the TV. Try the control panel buttons on . Press the INPUT button on the remote control or on the TV and select a valid video input source, see "Installing batteries" on...
User Guide
Page 140
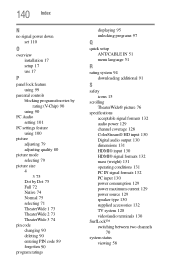
... program ratings displaying 95 unlocking programs 97 Q quick setup ANT/CABLE IN 51 menu language 51 R rating system 94 downloading additional 91 S safety icons 15 scrolling TheaterWide® picture 76 specifications acceptable signal formats 132 audio power 129 channel coverage 128 ColorStream® HD input 130 Digital audio output 130 dimensions 131 HDMI® input 130 HDMI® signal formats 132 mass (weight) 131 operating conditions 131 PC IN signal formats 132 PC input 130 power consumption 129 power maximum current 129 power source 129 speaker type...
... program ratings displaying 95 unlocking programs 97 Q quick setup ANT/CABLE IN 51 menu language 51 R rating system 94 downloading additional 91 S safety icons 15 scrolling TheaterWide® picture 76 specifications acceptable signal formats 132 audio power 129 channel coverage 128 ColorStream® HD input 130 Digital audio output 130 dimensions 131 HDMI® input 130 HDMI® signal formats 132 mass (weight) 131 operating conditions 131 PC IN signal formats 132 PC input 130 power consumption 129 power maximum current 129 power source 129 speaker type...


