User Guide
Page 5
... 3 2.3 Uninstall Software 8 2.3.1 Uninstall the driver software from your PC 8 2.3.2 Uninstall the utility software from your PC 9 Chapter 3 Configuration 10 3.1 Configuration of Utility 10 3.1.1 Profile ...10 3.1.2 Network ...13 3.1.3 Advanced ...14 3.1.4 Statistics...15 3.1.5 QSS...15 3.1.6 Radio On/Off ...17 3.1.7 About...18 3.1.8 An example for application 18 3.2 Configure with Windows XP Wireless Zero Configuration 19 Chapter...
... 3 2.3 Uninstall Software 8 2.3.1 Uninstall the driver software from your PC 8 2.3.2 Uninstall the utility software from your PC 9 Chapter 3 Configuration 10 3.1 Configuration of Utility 10 3.1.1 Profile ...10 3.1.2 Network ...13 3.1.3 Advanced ...14 3.1.4 Statistics...15 3.1.5 QSS...15 3.1.6 Radio On/Off ...17 3.1.7 About...18 3.1.8 An example for application 18 3.2 Configure with Windows XP Wireless Zero Configuration 19 Chapter...
User Guide
Page 8
...of the Utility and drivers for example. 2.2.2 Installation Guide 1. Connect the other end of the USB cable to start the installation, then following installation guide takes Windows XP for Windows 2000, XP and Vista. Insert the Resource CD into your CD-ROM drive, and open the folder named TL-WN727N. Select English and ...click the NEXT button to the USB port on the CD-ROM. The Setup steps for Windows 2000, XP and Vista are very similar, so the following screen will guide you install ...
...of the Utility and drivers for example. 2.2.2 Installation Guide 1. Connect the other end of the USB cable to start the installation, then following installation guide takes Windows XP for Windows 2000, XP and Vista. Insert the Resource CD into your CD-ROM drive, and open the folder named TL-WN727N. Select English and ...click the NEXT button to the USB port on the CD-ROM. The Setup steps for Windows 2000, XP and Vista are very similar, so the following screen will guide you install ...
User Guide
Page 12
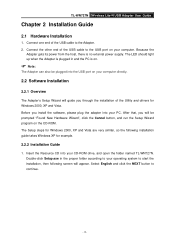
Figure 2-8 Windows XP Warning Box 8. After the files have been tested thoroughly and are able to work with the operating system. TL-WN727N Wireless Lite-N USB Adapter User Guide ) Note: Figure 2-7 Setup Status While files are copying, a warning box about Windows Logo testing (shown in Figure 2-8) may pop up, please click Continue Anyway to continue the installation for our drivers have been successfully copied, the screen in Figure 2-9 will appear. Click the Finish button to finish the wizard. - 7 -
Figure 2-8 Windows XP Warning Box 8. After the files have been tested thoroughly and are able to work with the operating system. TL-WN727N Wireless Lite-N USB Adapter User Guide ) Note: Figure 2-7 Setup Status While files are copying, a warning box about Windows Logo testing (shown in Figure 2-8) may pop up, please click Continue Anyway to continue the installation for our drivers have been successfully copied, the screen in Figure 2-9 will appear. Click the Finish button to finish the wizard. - 7 -
User Guide
Page 15
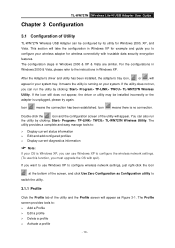
... the Profile screen will take the configuration in Windows XP. The Profile screen provides tools to configure your system tray. You can run the utility by clicking: Start> Program> TP-LINK> TWCU> TL-WN727N Wireless Utility. If the icon still does not appear, the driver or utility may be configured by clicking: Start> Program> TP-LINK> TWCU> TL-WN727N Wireless Utility.
... the Profile screen will take the configuration in Windows XP. The Profile screen provides tools to configure your system tray. You can run the utility by clicking: Start> Program> TP-LINK> TWCU> TL-WN727N Wireless Utility. If the icon still does not appear, the driver or utility may be configured by clicking: Start> Program> TP-LINK> TWCU> TL-WN727N Wireless Utility.


