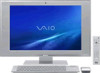
User Guide
Page 3
n3 N Using the Network (LAN) ...102 Using the Wireless LAN (WLAN) ...104 Using the Bluetooth Function ...107 Using Peripheral Devices...112 Connecting External Speakers ...113 Connecting a Universal Serial Bus (USB) Device...115 Connecting a Printer ...117 Connecting an i.LINK Device ...118 Customizing Your VAIO Computer ...120 Setting the Password ...121 Setting Up Your Computer with the VAIO Control Center 126 Using the Power Saving Mode...127 Upgrading Your VAIO Computer...130 Adding and Removing Memory...131 Adding the Hard Disk Drive...138
n3 N Using the Network (LAN) ...102 Using the Wireless LAN (WLAN) ...104 Using the Bluetooth Function ...107 Using Peripheral Devices...112 Connecting External Speakers ...113 Connecting a Universal Serial Bus (USB) Device...115 Connecting a Printer ...117 Connecting an i.LINK Device ...118 Customizing Your VAIO Computer ...120 Setting the Password ...121 Setting Up Your Computer with the VAIO Control Center 126 Using the Power Saving Mode...127 Upgrading Your VAIO Computer...130 Adding and Removing Memory...131 Adding the Hard Disk Drive...138

User Guide
Page 9
Provides information about restoring individual software programs, hardware drivers, and drive partition(s) or your entire hard disk drive to the original factory settings. To access this on-screen guide: 1 Click Start and Help and Support. 2 Click Use my VAIO. 3 Click VAIO Recovery Center User Guide. n9 N Before Use ❑ VAIO Recovery Center User Guide -
Provides information about restoring individual software programs, hardware drivers, and drive partition(s) or your entire hard disk drive to the original factory settings. To access this on-screen guide: 1 Click Start and Help and Support. 2 Click Use my VAIO. 3 Click VAIO Recovery Center User Guide. n9 N Before Use ❑ VAIO Recovery Center User Guide -
User Guide
Page 40
... the VAIO Control Center (page 126) and find out more information. H Volume control buttons Increase (+) or decrease (-) the volume. ! See Setting Up Your Computer with the VAIO Control Center. M Applications key Displays a shortcut menu in place to batteries wear out. J S1 button Opens the Start menu of the Windows Media Center by default. ✍ The default S1 button assignment may be different from the above. To change the volume. N Windows key Displays the Start menu. In such a case, you cannot use (page...
... the VAIO Control Center (page 126) and find out more information. H Volume control buttons Increase (+) or decrease (-) the volume. ! See Setting Up Your Computer with the VAIO Control Center. M Applications key Displays a shortcut menu in place to batteries wear out. J S1 button Opens the Start menu of the Windows Media Center by default. ✍ The default S1 button assignment may be different from the above. To change the volume. N Windows key Displays the Start menu. In such a case, you cannot use (page...

User Guide
Page 42
...support a touch pad scroll feature). ✍ You can disable/enable the Motion Pointer feature with the Fn+F11 keys while a mouse is recommended that keeps moving the pointer or scrolling when your finger on the screen using the touch pad. Press the left button twice. You can disable/enable... displays a shortcut menu. Slide your finger along the bottom edge to scroll vertically. Press the left button (3) once. Slide your fingertip may have reached an edge of the touch pad. To change other touch pad settings, click Start, All Programs, VAIO Control Center, Keyboard and Mouse ...
...support a touch pad scroll feature). ✍ You can disable/enable the Motion Pointer feature with the Fn+F11 keys while a mouse is recommended that keeps moving the pointer or scrolling when your finger on the screen using the touch pad. Press the left button twice. You can disable/enable... displays a shortcut menu. Slide your finger along the bottom edge to scroll vertically. Press the left button (3) once. Slide your fingertip may have reached an edge of the touch pad. To change other touch pad settings, click Start, All Programs, VAIO Control Center, Keyboard and Mouse ...

User Guide
Page 52
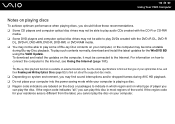
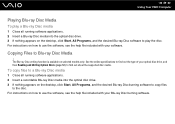
n 52 N Using Your VAIO Computer Reading and Writing Optical Discs Your computer plays and records CDs, DVDs, and Blu-ray Disc™ media, depending on your optical disc drive supports. Use the table below to see which types of optical disc drive installed on the model you purchased. Check your specifications for the type of media your model.
n 52 N Using Your VAIO Computer Reading and Writing Optical Discs Your computer plays and records CDs, DVDs, and Blu-ray Disc™ media, depending on your optical disc drive supports. Use the table below to see which types of optical disc drive installed on the model you purchased. Check your specifications for the type of media your model.
User Guide
Page 54
... with your VAIO computer, be implemented for use memory-resident utility software while the optical disc drive is capable of reading 8 cm discs. Region settings are required for some contents on the other optical media devices, circumstances may not support movie playback on the disc package carefully to the CD Standard. Do not use with a DVD recorded layer on one side and a digital audio layer on DVDs and BD-ROM Disc media. When you...
... with your VAIO computer, be implemented for use memory-resident utility software while the optical disc drive is capable of reading 8 cm discs. Region settings are required for some contents on the other optical media devices, circumstances may not support movie playback on the disc package carefully to the CD Standard. Do not use with a DVD recorded layer on one side and a digital audio layer on DVDs and BD-ROM Disc media. When you...
User Guide
Page 56
... Writing Optical Discs (page 52) to find out about the supported disc media. ❑ Depending on system environment, you may find sound interruptions and/or dropped frames during Blu-ray Disc playback. For information on selected models only. The Blu-ray Disc playback function is available on how to connect the computer to the Internet, see Using the Internet (page 101). ! To download and install the updates...
... Writing Optical Discs (page 52) to find out about the supported disc media. ❑ Depending on system environment, you may find sound interruptions and/or dropped frames during Blu-ray Disc playback. For information on selected models only. The Blu-ray Disc playback function is available on how to connect the computer to the Internet, see Using the Internet (page 101). ! To download and install the updates...
User Guide
Page 59
... available on selected models only. See the online specifications to find out about the supported disc media. Copying Files to play a Blu-ray Disc media 1 Close all running software applications. 2 Insert a Blu-ray Disc media into the optical disc drive. 3 If nothing appears on the desktop, click Start, All Programs, and the desired Blu-ray Disc software to Blu-ray Disc Media ! n 59 N Using Your VAIO Computer Playing Blu-ray Disc Media To play the...
... available on selected models only. See the online specifications to find out about the supported disc media. Copying Files to play a Blu-ray Disc media 1 Close all running software applications. 2 Insert a Blu-ray Disc media into the optical disc drive. 3 If nothing appears on the desktop, click Start, All Programs, and the desired Blu-ray Disc software to Blu-ray Disc Media ! n 59 N Using Your VAIO Computer Playing Blu-ray Disc Media To play the...

User Guide
Page 68
... supplied remote commander. When using the STB setup: ❑ A standard TV remote control cannot be able to use a stereo A/V cable with the L-shaped plug. 1 Connect one end of an S Video cable (10) (not supplied) to the S Video output port (11) on the computer. When you prefer better video quality, connect one end of the set -top box (STB) (3), matching the plug and jack colors. When using the set the TV to the channel-out number...
... supplied remote commander. When using the STB setup: ❑ A standard TV remote control cannot be able to use a stereo A/V cable with the L-shaped plug. 1 Connect one end of an S Video cable (10) (not supplied) to the S Video output port (11) on the computer. When you prefer better video quality, connect one end of the set -top box (STB) (3), matching the plug and jack colors. When using the set the TV to the channel-out number...
User Guide
Page 102
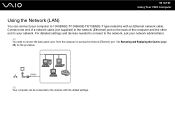
... Covers (page 20) for the procedure. ✍ Your computer can connect your network administrator. ✍ You need to remove the back panel cover from the computer to access the network (Ethernet) port. For detailed settings and devices needed to connect to the network, ask your computer to your network. Connect one end of a network cable (not supplied) to the network (Ethernet) port on the back of the computer and the other end to 1000BASE-T/100BASE-TX/10BASE-T type networks with the default settings...
... Covers (page 20) for the procedure. ✍ Your computer can connect your network administrator. ✍ You need to remove the back panel cover from the computer to access the network (Ethernet) port. For detailed settings and devices needed to connect to the network, ask your computer to your network. Connect one end of a network cable (not supplied) to the network (Ethernet) port on the back of the computer and the other end to 1000BASE-T/100BASE-TX/10BASE-T type networks with the default settings...

User Guide
Page 113
... the manual that came with your S/PDIF device. ! To hear sound from the S/PDIF device connected to the OPTICAL OUT port, you can connect external sound output devices (not supplied), such as digital headphones or an AV amplifier to the port and enhance the sound quality of outputting digital signals through the OPTICAL OUT port, you need to your computer. Since your computer is capable of your computer. n 113 N Using Peripheral Devices Connecting External Speakers...
... the manual that came with your S/PDIF device. ! To hear sound from the S/PDIF device connected to the OPTICAL OUT port, you can connect external sound output devices (not supplied), such as digital headphones or an AV amplifier to the port and enhance the sound quality of outputting digital signals through the OPTICAL OUT port, you need to your computer. Since your computer is capable of your computer. n 113 N Using Peripheral Devices Connecting External Speakers...

User Guide
Page 117
Connecting a Printer Using the USB Port You can connect a Windows-compatible printer to your computer to the computer. To connect a printer using the USB port 1 Plug the power cord (1) of your printer into an AC outlet. 2 Choose the USB port (3) you prefer to use. 3 Plug one end of a USB printer cable (2) (not supplied) into the USB port and the other end to your version of Windows to print documents. n 117 N Using Peripheral Devices Connecting a Printer You can connect a USB printer compatible with your printer.
Connecting a Printer Using the USB Port You can connect a Windows-compatible printer to your computer to the computer. To connect a printer using the USB port 1 Plug the power cord (1) of your printer into an AC outlet. 2 Choose the USB port (3) you prefer to use. 3 Plug one end of a USB printer cable (2) (not supplied) into the USB port and the other end to your version of Windows to print documents. n 117 N Using Peripheral Devices Connecting a Printer You can connect a USB printer compatible with your printer.

User Guide
Page 125
... Enter key. To remove the password, leave the Enter New Password and Confirm New Password fields blank and press the Enter key. 6 Press the < or , key to display the Security tab, select Set User Password, and then press the Enter key. 5 On the password entry screen, enter the current password once and a new password twice, and then press the Enter key. At the confirmation prompt, press the Enter key. The BIOS setup screen appears. n 125 N Customizing Your VAIO Computer To change or remove the power-on password (user password) 1 Turn...
... Enter key. To remove the password, leave the Enter New Password and Confirm New Password fields blank and press the Enter key. 6 Press the < or , key to display the Security tab, select Set User Password, and then press the Enter key. 5 On the password entry screen, enter the current password once and a new password twice, and then press the Enter key. At the confirmation prompt, press the Enter key. The BIOS setup screen appears. n 125 N Customizing Your VAIO Computer To change or remove the power-on password (user password) 1 Turn...
User Guide
Page 130
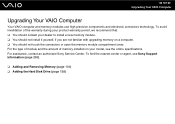
... install it yourself, if you are not familiar with upgrading memory on your model, see Sony Support Information (page 200). ❑ Adding and Removing Memory (page 131) ❑ Adding the Hard Disk Drive (page 138) To find the nearest center or agent, see the online specifications. n 130 N Upgrading Your VAIO Computer Upgrading Your VAIO Computer Your VAIO computer and memory modules use high precision components and electronic connectors technology. For assistance, contact an authorized Sony Service Center. For the type...
... install it yourself, if you are not familiar with upgrading memory on your model, see Sony Support Information (page 200). ❑ Adding and Removing Memory (page 131) ❑ Adding the Hard Disk Drive (page 138) To find the nearest center or agent, see the online specifications. n 130 N Upgrading Your VAIO Computer Upgrading Your VAIO Computer Your VAIO computer and memory modules use high precision components and electronic connectors technology. For assistance, contact an authorized Sony Service Center. For the type...

User Guide
Page 165
..., see Sony Support Information (page 200). Follow these steps: 1 Turn on your desired priority under Boot Priority and press the Enter key. 5 Press the M or m key to select the device to which you have forgotten the power-on password? If you have installed the latest video driver. ❑ On some VAIO models, the graphics memory is not guaranteed. The BIOS setup screen appears. At the confirmation prompt, press the Enter key. What...
..., see Sony Support Information (page 200). Follow these steps: 1 Turn on your desired priority under Boot Priority and press the Enter key. 5 Press the M or m key to select the device to which you have forgotten the power-on password? If you have installed the latest video driver. ❑ On some VAIO models, the graphics memory is not guaranteed. The BIOS setup screen appears. At the confirmation prompt, press the Enter key. What...

User Guide
Page 178
...'s instructions. ❑ If a disc is dirty or damaged, your computer. ❑ Make sure the correct driver software is installed. Press the button once again. ❑ The volume may have been minimized with the label side facing toward you are using external speakers, check the volume settings on the speakers and the connections between the speakers and your computer will stop responding. Follow these steps: 1 Click Start and Control Panel...
...'s instructions. ❑ If a disc is dirty or damaged, your computer. ❑ Make sure the correct driver software is installed. Press the button once again. ❑ The volume may have been minimized with the label side facing toward you are using external speakers, check the volume settings on the speakers and the connections between the speakers and your computer will stop responding. Follow these steps: 1 Click Start and Control Panel...

User Guide
Page 180
... Disc media? ! Why can't I write data to selected models only. To download and install the updates on how to connect the computer to the Internet. n 180 N Troubleshooting What should I do if I cannot write data to launch automatically, not even a screen saver. ❑ If you are using the correct DVD recordable media. ❑ Check which DVD recordable format is compatible with your optical disc drive. For information on the computer...
... Disc media? ! Why can't I write data to selected models only. To download and install the updates on how to connect the computer to the Internet. n 180 N Troubleshooting What should I do if I cannot write data to launch automatically, not even a screen saver. ❑ If you are using the correct DVD recordable media. ❑ Check which DVD recordable format is compatible with your optical disc drive. For information on the computer...

User Guide
Page 182
... monitoring, and remote panel. See the manual that came with your printer for more information. ❑ If your printer is compatible with your printer, disabling the functions on your computer. ❑ You may enable printing. Follow these steps: 1 Click Start and Control Panel. 2 Click Printer under Hardware and Sound. 3 Right-click the printer icon and select Properties. 4 Click the Ports tab. 5 Click to install...
... monitoring, and remote panel. See the manual that came with your printer for more information. ❑ If your printer is compatible with your printer, disabling the functions on your computer. ❑ You may enable printing. Follow these steps: 1 Click Start and Control Panel. 2 Click Printer under Hardware and Sound. 3 Right-click the printer icon and select Properties. 4 Click the Ports tab. 5 Click to install...
Quick Start Guide
Page 2
...; 1 Replace the covers. 2 Press the power button until the power indicator light turns on. 8 cm disc adapter * Insert the supplied AA alkaline batteries before use . LCD Handling Do not exert pressure on the LCD. Locate the User Guide You can restore your computer while the power is on or while it will cause malfunctions. Otherwise, you to follow these guidelines. With the recovery discs, you may damage internal components which...
...; 1 Replace the covers. 2 Press the power button until the power indicator light turns on. 8 cm disc adapter * Insert the supplied AA alkaline batteries before use . LCD Handling Do not exert pressure on the LCD. Locate the User Guide You can restore your computer while the power is on or while it will cause malfunctions. Otherwise, you to follow these guidelines. With the recovery discs, you may damage internal components which...

Safety Information
Page 2
... Owner's Record The model number and serial number are subject to change without notice and may not necessarily be identical to current retail versions. 2 Refer to any time without written permission is prohibited. All rights reserved. Sony Electronics Inc. Software specifications are located on the bottom or back panel of a separate user license agreement. PROVIDES NO WARRANTY WITH REGARD TO THIS MANUAL, THE SOFTWARE...
... Owner's Record The model number and serial number are subject to change without notice and may not necessarily be identical to current retail versions. 2 Refer to any time without written permission is prohibited. All rights reserved. Sony Electronics Inc. Software specifications are located on the bottom or back panel of a separate user license agreement. PROVIDES NO WARRANTY WITH REGARD TO THIS MANUAL, THE SOFTWARE...


