User Guide
Page 2
n2 N Contents Before Use ...5 Documentation ...5 Ergonomic Considerations ...8 Getting Started ...10 Locating Controls and Ports...11 About the Indicator Lights ...16 Connecting a Power Source ...17 Shutting Down Your Computer Safely ...20 Using Your VAIO Computer ...21 Using the Keyboard ...22 Using the Mouse ...29 Using the Built-in MOTION EYE Camera...34 Using the Optical Disc Drive ...36 Using the TV Function ...46 Using PC Cards ...65 Using the ExpressCard Module ...68 Using the Memory Stick Media ...72 Using Other Memory Cards ...78 Using the Internet...81 Using Wireless LAN (WLAN) ...82
n2 N Contents Before Use ...5 Documentation ...5 Ergonomic Considerations ...8 Getting Started ...10 Locating Controls and Ports...11 About the Indicator Lights ...16 Connecting a Power Source ...17 Shutting Down Your Computer Safely ...20 Using Your VAIO Computer ...21 Using the Keyboard ...22 Using the Mouse ...29 Using the Built-in MOTION EYE Camera...34 Using the Optical Disc Drive ...36 Using the TV Function ...46 Using PC Cards ...65 Using the ExpressCard Module ...68 Using the Memory Stick Media ...72 Using Other Memory Cards ...78 Using the Internet...81 Using Wireless LAN (WLAN) ...82
User Guide
Page 6
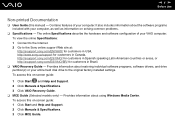
... on -screen guide: 1 Click Start and Help and Support. 2 Click Manuals & Specifications. 3 Click VAIO Recovery Guide. ❑ MCE Guide (Selected models only) - To view the online Specifications: 1 Connect to the Internet. 2 Go to the original factory installed settings. To access this manual) - It also includes information about using Windows Media Center. Provides information about restoring individual software programs, software drivers, and drive partition(s) or your computer. The online Specifications describe the hardware and software configuration of your entire hard disk...
... on -screen guide: 1 Click Start and Help and Support. 2 Click Manuals & Specifications. 3 Click VAIO Recovery Guide. ❑ MCE Guide (Selected models only) - To view the online Specifications: 1 Connect to the Internet. 2 Go to the original factory installed settings. To access this manual) - It also includes information about using Windows Media Center. Provides information about restoring individual software programs, software drivers, and drive partition(s) or your computer. The online Specifications describe the hardware and software configuration of your entire hard disk...

User Guide
Page 11
...) I WLAN (Wireless LAN) indicator (page 16) See Setting Up Your Computer with VAIO Central (page 99) and find out more in MOTION EYE camera (page 34) D Power indicator (page 16) E Power button F MONITOR OFF button / MONITOR OFF indicator (page 16) Press this button to turn off the LCD backlight and the speaker volume. ✍ You can change the MONITOR OFF button setting to identify the controls and ports shown...
...) I WLAN (Wireless LAN) indicator (page 16) See Setting Up Your Computer with VAIO Central (page 99) and find out more in MOTION EYE camera (page 34) D Power indicator (page 16) E Power button F MONITOR OFF button / MONITOR OFF indicator (page 16) Press this button to turn off the LCD backlight and the speaker volume. ✍ You can change the MONITOR OFF button setting to identify the controls and ports shown...
User Guide
Page 16
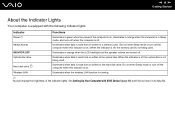
... optical disc is not being used . Do not enter Sleep mode or turn off . n 16 N Getting Started About the Indicator Lights Your computer is equipped with VAIO Central (page 99) and find out more in its help file. When the indicator is off , the memory card is not being used . See Setting Up Your Computer with the following indicator lights. Hard disk drive Illuminates when data is on . Media Access...
... optical disc is not being used . Do not enter Sleep mode or turn off . n 16 N Getting Started About the Indicator Lights Your computer is equipped with VAIO Central (page 99) and find out more in its help file. When the indicator is off , the memory card is not being used . See Setting Up Your Computer with the following indicator lights. Hard disk drive Illuminates when data is on . Media Access...
User Guide
Page 39
Check your specifications for the type of media your model. Use the table below to see which types of optical disc drive installed on the model you purchased. n 39 N Using Your VAIO Computer Reading and Writing Optical Discs Your computer plays and records CDs, DVDs, or Blu-ray Discs, depending on your optical disc drive supports.
Check your specifications for the type of media your model. Use the table below to see which types of optical disc drive installed on the model you purchased. n 39 N Using Your VAIO Computer Reading and Writing Optical Discs Your computer plays and records CDs, DVDs, or Blu-ray Discs, depending on your optical disc drive supports.

User Guide
Page 40
...;R DL/RAM CD-RW/ P P P P PR P P - DVD-RAM Version 2.2/12X-SPEED DVD-RAM Revision 5.0 disc is not supported. *5 Writing data to DVD+R DL (Double Layer) discs is available only on discs supporting DVD+R DL (Double Layer) recording. *6 Writing data to DVD-R DL (Dual Layer) discs is available only on discs supporting DVD-R DL (Dual Layer) recording. *7 Supports writing data to Ultra Speed CD-RW discs is not supported. CD CD Extra RW ROM DVD- n 40 N Using Your VAIO Computer...
...;R DL/RAM CD-RW/ P P P P PR P P - DVD-RAM Version 2.2/12X-SPEED DVD-RAM Revision 5.0 disc is not supported. *5 Writing data to DVD+R DL (Double Layer) discs is available only on discs supporting DVD+R DL (Double Layer) recording. *6 Writing data to DVD-R DL (Dual Layer) discs is available only on discs supporting DVD-R DL (Dual Layer) recording. *7 Supports writing data to Ultra Speed CD-RW discs is not supported. CD CD Extra RW ROM DVD- n 40 N Using Your VAIO Computer...

User Guide
Page 41
... with your external display is compliant with a VAIO computer, be implemented for Movies and BD-ROM contents. Unless your computer's optical disc drives. USING NON-COMPLIANT DISCS CAN CAUSE FATAL DAMAGE TO YOUR VAIO PC OR CREATE SOFTWARE CONFLICTS AND CAUSE SYSTEM HANGING. With the supplied 8cm disc adapter, the Blu-ray Disc drive is not supported. VAIO computers may not support movie playback on the other optical media devices, circumstances may...
... with your external display is compliant with a VAIO computer, be implemented for Movies and BD-ROM contents. Unless your computer's optical disc drives. USING NON-COMPLIANT DISCS CAN CAUSE FATAL DAMAGE TO YOUR VAIO PC OR CREATE SOFTWARE CONFLICTS AND CAUSE SYSTEM HANGING. With the supplied 8cm disc adapter, the Blu-ray Disc drive is not supported. VAIO computers may not support movie playback on the other optical media devices, circumstances may...

User Guide
Page 55
n 55 N Using Your VAIO Computer To connect in STB mode (Option 2) 1 Connect one end of an S Video cable (11) (not supplied) to the S Video Out port (12) on the back panel of a TV coaxial cable (1) (supplied) to your cable service access (wall outlet) (2). Connect the other RCA plugs of the stereo A/V dubbing cable (6) into the AUDIO INPUT (L / R) jacks (9) and the VIDEO INPUT (VIDEO) jack (10) on the computer, matching the plug and jack colors. 5 If...
n 55 N Using Your VAIO Computer To connect in STB mode (Option 2) 1 Connect one end of an S Video cable (11) (not supplied) to the S Video Out port (12) on the back panel of a TV coaxial cable (1) (supplied) to your cable service access (wall outlet) (2). Connect the other RCA plugs of the stereo A/V dubbing cable (6) into the AUDIO INPUT (L / R) jacks (9) and the VIDEO INPUT (VIDEO) jack (10) on the computer, matching the plug and jack colors. 5 If...

User Guide
Page 91
n 91 N Using Peripheral Devices Connecting a Printer You can connect a USB printer compatible with your version of a USB printer cable (2) (not supplied) into an AC outlet. 2 Choose the USB port (3) you prefer to use. 3 Plug one end of Windows to the computer. To connect a printer using the USB port 1 Plug the power cord (1) of your printer. Connecting a Printer Using the USB Port You can connect a Windows-compatible printer to your computer to your printer into the USB port and the other end to print documents.
n 91 N Using Peripheral Devices Connecting a Printer You can connect a USB printer compatible with your version of a USB printer cable (2) (not supplied) into an AC outlet. 2 Choose the USB port (3) you prefer to use. 3 Plug one end of Windows to the computer. To connect a printer using the USB port 1 Plug the power cord (1) of your printer. Connecting a Printer Using the USB Port You can connect a Windows-compatible printer to your computer to your printer into the USB port and the other end to print documents.

User Guide
Page 94
... a network cable (not supplied) to the network (Ethernet) port on your computer. Telephone lines cannot be connected to the network with an Ethernet network cable. PBX (private branch exchange) Do not plug a telephone cable into the network port. For detailed settings and devices needed to connect to the network, ask your network administrator. ✍ Your computer can connect your computer to 100BASE-TX/10BASE-T-type networks with the default settings. ! n 94 N Using Peripheral Devices Connecting to a Network (LAN) You can be connected...
... a network cable (not supplied) to the network (Ethernet) port on your computer. Telephone lines cannot be connected to the network with an Ethernet network cable. PBX (private branch exchange) Do not plug a telephone cable into the network port. For detailed settings and devices needed to connect to the network, ask your network administrator. ✍ Your computer can connect your computer to 100BASE-TX/10BASE-T-type networks with the default settings. ! n 94 N Using Peripheral Devices Connecting to a Network (LAN) You can be connected...

User Guide
Page 97
... space bar to change the setting from Disabled to Enabled. 7 Press the < or , key to display the Security tab, select Set Machine Password, and then press the Enter key. 4 On the password entry screen, enter the password twice and press the Enter key. n 97 N Customizing Your VAIO Computer To add the power-on password 1 Turn on or display the BIOS setup screen. 6 Select Password when Power On under Security. At the confirmation prompt, press the Enter key. The BIOS setup screen appears. If...
... space bar to change the setting from Disabled to Enabled. 7 Press the < or , key to display the Security tab, select Set Machine Password, and then press the Enter key. 4 On the password entry screen, enter the password twice and press the Enter key. n 97 N Customizing Your VAIO Computer To add the power-on password 1 Turn on or display the BIOS setup screen. 6 Select Password when Power On under Security. At the confirmation prompt, press the Enter key. The BIOS setup screen appears. If...

User Guide
Page 98
... Enter New Password and Confirm New Password fields blank and press the Enter key. n 98 N Customizing Your VAIO Computer Changing/Removing the Power-on Password To change or remove the power-on password 1 Turn on the computer. 2 Press the F2 key when the VAIO logo appears. At the confirmation prompt, press the Enter key. When confirmation to save the changes is prompted, press the Enter key. 6 Press the < or , key to display the Security tab, select Set Machine Password...
... Enter New Password and Confirm New Password fields blank and press the Enter key. n 98 N Customizing Your VAIO Computer Changing/Removing the Power-on Password To change or remove the power-on password 1 Turn on the computer. 2 Press the F2 key when the VAIO logo appears. At the confirmation prompt, press the Enter key. When confirmation to save the changes is prompted, press the Enter key. 6 Press the < or , key to display the Security tab, select Set Machine Password...

User Guide
Page 128
... the BIOS password? A reset fee will be charged. To find the nearest center or agent, see Sony Support Information (page 155) or visit the Sony online support Web site. Why does it take some VAIO models, the graphics memory is not guaranteed. The optimal graphic performance in this case is shared with the system. The VAIO Original Screen Saver disables the timer setting, which you can select using the Windows power options...
... the BIOS password? A reset fee will be charged. To find the nearest center or agent, see Sony Support Information (page 155) or visit the Sony online support Web site. Why does it take some VAIO models, the graphics memory is not guaranteed. The optimal graphic performance in this case is shared with the system. The VAIO Original Screen Saver disables the timer setting, which you can select using the Windows power options...
User Guide
Page 130
... N Troubleshooting System Security How can receive updates. 1 Connect to the Internet. 2 Double-click the Windows Security Alerts icon on the taskbar. 3 Follow the on-screen instructions to set up automatic or scheduled updates. You can get important Windows updates by doing the following: ! To download and install the latest security update 1 Click Start, All Programs, Norton Internet Security, and Norton Internet Security. 2 Click the item to update the software...
... N Troubleshooting System Security How can receive updates. 1 Connect to the Internet. 2 Double-click the Windows Security Alerts icon on the taskbar. 3 Follow the on-screen instructions to set up automatic or scheduled updates. You can get important Windows updates by doing the following: ! To download and install the latest security update 1 Click Start, All Programs, Norton Internet Security, and Norton Internet Security. 2 Click the item to update the software...
User Guide
Page 133
... the problem persists, you are using the built-in MOTION EYE camera. ❑ If your camera and click Update Driver Software. If another software application is in use the built-in MOTION EYE camera? ❑ The built-in MOTION EYE camera cannot be shared by more than one software application. Follow these steps: 1 Click Start, Control Panel, Hardware and Sound, and Device Manager. 2 Double-click Imaging devices...
... the problem persists, you are using the built-in MOTION EYE camera. ❑ If your camera and click Update Driver Software. If another software application is in use the built-in MOTION EYE camera? ❑ The built-in MOTION EYE camera cannot be shared by more than one software application. Follow these steps: 1 Click Start, Control Panel, Hardware and Sound, and Device Manager. 2 Double-click Imaging devices...
User Guide
Page 140
... volume setting in the audio mixer. ❑ If you are using external speakers, check the volume settings on the speakers and the connections between the speakers and your computer. ❑ Make sure the correct driver software is installed. If you . ❑ Make sure the necessary program(s) is installed according to enable the device or reinstall the drivers. Follow these steps: 1 Click Start and Control Panel. 2 Click System and Maintenance. 3 Click System. 4 Click Device Manager...
... volume setting in the audio mixer. ❑ If you are using external speakers, check the volume settings on the speakers and the connections between the speakers and your computer. ❑ Make sure the correct driver software is installed. If you . ❑ Make sure the necessary program(s) is installed according to enable the device or reinstall the drivers. Follow these steps: 1 Click Start and Control Panel. 2 Click System and Maintenance. 3 Click System. 4 Click Device Manager...
User Guide
Page 144
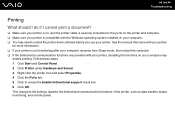
... you use your computer may enable printing. This change to cancel the Enable bidirectional support check box. 6 Click OK. Follow these steps: 1 Click Start and Control Panel. 2 Click Printer under Hardware and Sound. 3 Right-click the printer icon and select Properties. 4 Click the Ports tab. 5 Click to the settings disables the bidirectional communication functions of the printer, such as data transfer, status monitoring, and remote panel.
... you use your computer may enable printing. This change to cancel the Enable bidirectional support check box. 6 Click OK. Follow these steps: 1 Click Start and Control Panel. 2 Click Printer under Hardware and Sound. 3 Right-click the printer icon and select Properties. 4 Click the Ports tab. 5 Click to the settings disables the bidirectional communication functions of the printer, such as data transfer, status monitoring, and remote panel.

User Guide
Page 148
... cannot use the numeric keypad, the Num Lk key may not be mismatched. The language layout of the wireless keyboard is in the ON position. ❑ Make sure the supplied AA batteries are properly installed. ❑ Press the CONNECT button on your computer or wireless keyboard, as desired. What should I do if I cannot enter certain characters with the keyboard? ❑ If you complete the Windows setup, the key configuration...
... cannot use the numeric keypad, the Num Lk key may not be mismatched. The language layout of the wireless keyboard is in the ON position. ❑ Make sure the supplied AA batteries are properly installed. ❑ Press the CONNECT button on your computer or wireless keyboard, as desired. What should I do if I cannot enter certain characters with the keyboard? ❑ If you complete the Windows setup, the key configuration...
User Guide
Page 150
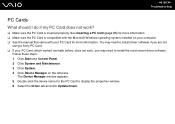
... work ? ❑ Make sure the PC Card is inserted properly. Follow these steps: 1 Click Start and Control Panel. 2 Click System and Maintenance. 3 Click System. 4 Click Device Manager on your computer. ❑ See the manual that came with the Microsoft Windows operating system installed on the left pane. See Inserting a PC Card (page 65) for more information. You may need to install driver software if you are not using a Sony PC Card...
... work ? ❑ Make sure the PC Card is inserted properly. Follow these steps: 1 Click Start and Control Panel. 2 Click System and Maintenance. 3 Click System. 4 Click Device Manager on your computer. ❑ See the manual that came with the Microsoft Windows operating system installed on the left pane. See Inserting a PC Card (page 65) for more information. You may need to install driver software if you are not using a Sony PC Card...
User Guide
Page 167
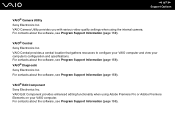
... enhanced editing functionality when using the internal camera. VAIO® Diagnostic Sony Electronics Inc. For contacts about the software, see Program Support Information (page 159). n 167 N Support Options VAIO® Camera Utility Sony Electronics Inc. VAIO Camera Utility provides you with various video quality settings when using Adobe Premiere Pro or Adobe Premiere Elements on your computer's configuration and specifications. For contacts about the software, see Program Support Information (page 159).
... enhanced editing functionality when using the internal camera. VAIO® Diagnostic Sony Electronics Inc. For contacts about the software, see Program Support Information (page 159). n 167 N Support Options VAIO® Camera Utility Sony Electronics Inc. VAIO Camera Utility provides you with various video quality settings when using Adobe Premiere Pro or Adobe Premiere Elements on your computer's configuration and specifications. For contacts about the software, see Program Support Information (page 159).


