Operating Instructions
Page 2
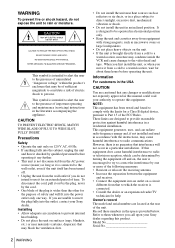
... mechanical vibration or shock. • Do not install the unit in this manual could void your Sony dealer. Record these numbers in a particular installation. Installing • Allow adequate air circulation ...and receiver. • Connect the equipment into the outlet, contact your authority to the video head and tape. Model No Serial No 2 WARNING If you move it out by the plug...reasonable protection against harmful interference in a horizontal position only. • Keep the unit and cassettes away from the AC power source (mains) as long as microwave ovens or large loudspeakers....
... mechanical vibration or shock. • Do not install the unit in this manual could void your Sony dealer. Record these numbers in a particular installation. Installing • Allow adequate air circulation ...and receiver. • Connect the equipment into the outlet, contact your authority to the video head and tape. Model No Serial No 2 WARNING If you move it out by the plug...reasonable protection against harmful interference in a horizontal position only. • Keep the unit and cassettes away from the AC power source (mains) as long as microwave ovens or large loudspeakers....
Operating Instructions
Page 3
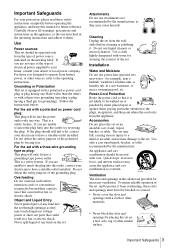
... or other sources, refer to have a suitable outlet installed. Overloading Do not overload wall outlets, extension cords or convenience receptacles beyond their capacity, since this manual for example, near a bathtub, washbowl, kitchen sink, or laundry tub, in a fire or electric shock. Power-Cord Protection Route the power cord so that could...
... or other sources, refer to have a suitable outlet installed. Overloading Do not overload wall outlets, extension cords or convenience receptacles beyond their capacity, since this manual for example, near a bathtub, washbowl, kitchen sink, or laundry tub, in a fire or electric shock. Power-Cord Protection Route the power cord so that could...
Operating Instructions
Page 5
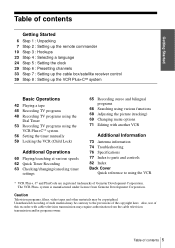
... programs, films, video tapes and other materials may be contrary to using various functions 68 Adjusting the picture (tracking) 69 Changing menu options 71 Editing with cable television transmission may require authorization from Gemstar Development Corporation. Unauthorized recording of such material ... Plus+C3® system 56 Setting the timer manually 59 Locking the VCR (Child Lock) Additional Operations 60 Playing/searching at various speeds 62 Quick Timer Recording 63 Checking/changing/canceling timer settings 65 Recording stereo and bilingual programs 66 Searching using the VCR ...
... programs, films, video tapes and other materials may be contrary to using various functions 68 Adjusting the picture (tracking) 69 Changing menu options 71 Editing with cable television transmission may require authorization from Gemstar Development Corporation. Unauthorized recording of such material ... Plus+C3® system 56 Setting the timer manually 59 Locking the VCR (Child Lock) Additional Operations 60 Playing/searching at various speeds 62 Quick Timer Recording 63 Checking/changing/canceling timer settings 65 Recording stereo and bilingual programs 66 Searching using the VCR ...
Operating Instructions
Page 15
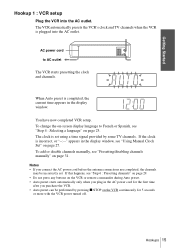
...the antenna connections are completed, the channels may be performed by some TV channels. You have now completed VCR setup. If this happens, see "Using Manual Clock Set" on the VCR continuously for 5 seconds or more with the VCR power turned off. Notes • If you purchase the VCR. &#... Auto preset is plugged into the AC outlet. If the clock is set . AC power cord to French or Spanish, see "Presetting/disabling channels manually" on -screen display language to AC outlet The VCR starts presetting the clock and channels. Getting Started Hookup 1 : VCR setup Plug the VCR into...
...the antenna connections are completed, the channels may be performed by some TV channels. You have now completed VCR setup. If this happens, see "Using Manual Clock Set" on the VCR continuously for 5 seconds or more with the VCR power turned off. Notes • If you purchase the VCR. &#... Auto preset is plugged into the AC outlet. If the clock is set . AC power cord to French or Spanish, see "Presetting/disabling channels manually" on -screen display language to AC outlet The VCR starts presetting the clock and channels. Getting Started Hookup 1 : VCR setup Plug the VCR into...
Operating Instructions
Page 17
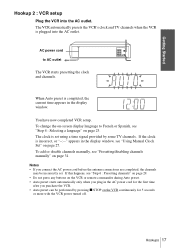
... The VCR starts presetting the clock and channels. When Auto preset is incorrect, or "--:--" appears in the display window. To add or disable channels manually, see "Step 6 : Presetting channels" on page 29. • Do not press any buttons on the VCR or remote commander during Auto preset... the antenna connections are completed, the channels may be performed by some TV channels. Hookups 17 If this happens, see "Presetting/disabling channels manually" on page 23. Getting Started Hookup 2 : VCR setup Plug the VCR into the AC outlet. The VCR automatically presets the VCR's ...
... The VCR starts presetting the clock and channels. When Auto preset is incorrect, or "--:--" appears in the display window. To add or disable channels manually, see "Step 6 : Presetting channels" on page 29. • Do not press any buttons on the VCR or remote commander during Auto preset... the antenna connections are completed, the channels may be performed by some TV channels. Hookups 17 If this happens, see "Presetting/disabling channels manually" on page 23. Getting Started Hookup 2 : VCR setup Plug the VCR into the AC outlet. The VCR automatically presets the VCR's ...
Operating Instructions
Page 24
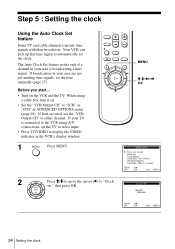
... and cable channels transmit time signals with their broadcasts. When using A/V connections, set the time manually (page 27). If both are not yet sending time signals, set the TV to video input. • Press TV/VIDEO to display the VIDEO indicator in the VCR's display window. 1 MENU Press MENU. 2 Press M/m to move the cursor...
... and cable channels transmit time signals with their broadcasts. When using A/V connections, set the time manually (page 27). If both are not yet sending time signals, set the TV to video input. • Press TV/VIDEO to display the VIDEO indicator in the VCR's display window. 1 MENU Press MENU. 2 Press M/m to move the cursor...
Operating Instructions
Page 26
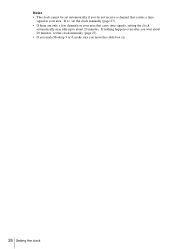
If nothing happens even after you wait about 20 minutes. Notes • The clock cannot be set automatically if you do not receive a channel that carries a time signal in your area that carry time signals, setting the clock automatically may take up to about 20 minutes, set the clock manually (page 27). • If there are only a few channels in your area. If so, set the clock manually (page 27). • If you made Hookup 3 or 4, make sure you leave the cable box on. 26 Setting the clock
If nothing happens even after you wait about 20 minutes. Notes • The clock cannot be set automatically if you do not receive a channel that carries a time signal in your area that carry time signals, setting the clock automatically may take up to about 20 minutes, set the clock manually (page 27). • If there are only a few channels in your area. If so, set the clock manually (page 27). • If you made Hookup 3 or 4, make sure you leave the cable box on. 26 Setting the clock
Operating Instructions
Page 27
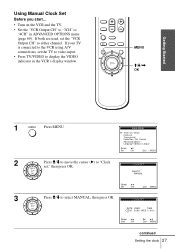
... to the VCR using A/V connections, set the "VCR Output CH" to either channel. PLAY OK CLOCK SET AUTO MANUAL Select : Vv Set : OK Quit : MENU 3 Press M/m to display the VIDEO indicator in ADVANCED OPTIONS menu (page 69). MENU M/m/, OK 1 MENU Press MENU. Getting Started Using... Manual Clock Set Before you start... • Turn on the VCR and the TV. • Set the "VCR Output CH" to...
... to the VCR using A/V connections, set the "VCR Output CH" to either channel. PLAY OK CLOCK SET AUTO MANUAL Select : Vv Set : OK Quit : MENU 3 Press M/m to display the VIDEO indicator in ADVANCED OPTIONS menu (page 69). MENU M/m/, OK 1 MENU Press MENU. Getting Started Using... Manual Clock Set Before you start... • Turn on the VCR and the TV. • Set the "VCR Output CH" to...
Operating Instructions
Page 29
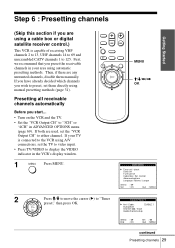
...VIDEO to display the VIDEO indicator in ADVANCED OPTIONS menu (page 69). If you have already decided which channels you are using a cable box or digital satellite receiver control.) This VCR is connected to "Tuner preset," then press OK. Step 6 : Presetting channels (Skip this section if you wish to preset, set them manually...to 13, UHF channels 14 to 69 and unscrambled CATV channels 1 to 125. If both are any unwanted channels, disable them directly using manual presetting methods (page 31). First, we recommend that you start... • Turn on the VCR and the TV. • Set ...
...VIDEO to display the VIDEO indicator in ADVANCED OPTIONS menu (page 69). If you have already decided which channels you are using a cable box or digital satellite receiver control.) This VCR is connected to "Tuner preset," then press OK. Step 6 : Presetting channels (Skip this section if you wish to preset, set them manually...to 13, UHF channels 14 to 69 and unscrambled CATV channels 1 to 125. If both are any unwanted channels, disable them directly using manual presetting methods (page 31). First, we recommend that you start... • Turn on the VCR and the TV. • Set ...
Operating Instructions
Page 31
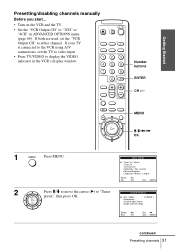
If your TV is connected to the VCR using A/V connections, set the "VCR Output CH" to either channel. MENU M/m/ Getting Started Presetting/disabling channels manually Before you start... • Turn on the VCR and the TV. • Set the "VCR Output CH" to display the VIDEO indicator in ADVANCED OPTIONS menu (page 69). If both are used, set the TV to video input. • Press TV/VIDEO to "3CH" or "4CH" in the VCR's display window. 123 456 789 0 Number buttons ENTER CH +/-
If your TV is connected to the VCR using A/V connections, set the "VCR Output CH" to either channel. MENU M/m/ Getting Started Presetting/disabling channels manually Before you start... • Turn on the VCR and the TV. • Set the "VCR Output CH" to display the VIDEO indicator in ADVANCED OPTIONS menu (page 69). If both are used, set the TV to video input. • Press TV/VIDEO to "3CH" or "4CH" in the VCR's display window. 123 456 789 0 Number buttons ENTER CH +/-
Operating Instructions
Page 51
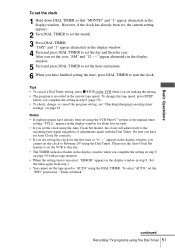
.... 5 Turn and press DIAL TIMER to set the hour and minute. 6 When you have already been set using the VCR Plus+C3 system or the manual timer setting, "FULL" appears in the display window for the first time or "0:- -" appears in step 9. Please use the Auto Clock Set feature to set... setting the time, press DIAL TIMER to February 29th using the DIAL TIMER. To select "AUTO," set the "SPD" position in the display window. continued Recording TV programs using the Auto Clock Set feature, the clock will adjust itself to the incoming time signal regardless of adjustments made with no tape...
.... 5 Turn and press DIAL TIMER to set the hour and minute. 6 When you have already been set using the VCR Plus+C3 system or the manual timer setting, "FULL" appears in the display window for the first time or "0:- -" appears in step 9. Please use the Auto Clock Set feature to set... setting the time, press DIAL TIMER to February 29th using the DIAL TIMER. To select "AUTO," set the "SPD" position in the display window. continued Recording TV programs using the Auto Clock Set feature, the clock will adjust itself to the incoming time signal regardless of adjustments made with no tape...
Operating Instructions
Page 52
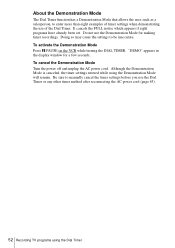
... method after reconnecting the AC power cord (page 63). 52 Recording TV programs using the Demonstration Mode will remain. To cancel the Demonstration Mode Turn the power off and unplug the AC power cord. Be sure to manually cancel the timer settings before you use the Demonstration Mode for ...eight examples of timer settings when demonstrating the use of the Dial Timer. "DEMO" appears in the display window for making timer recordings. About the Demonstration Mode The Dial Timer function has a Demonstration Mode that allows the user, such as a salesperson, to be inaccurate.
... method after reconnecting the AC power cord (page 63). 52 Recording TV programs using the Demonstration Mode will remain. To cancel the Demonstration Mode Turn the power off and unplug the AC power cord. Be sure to manually cancel the timer settings before you use the Demonstration Mode for ...eight examples of timer settings when demonstrating the use of the Dial Timer. "DEMO" appears in the display window for making timer recordings. About the Demonstration Mode The Dial Timer function has a Demonstration Mode that allows the user, such as a salesperson, to be inaccurate.
Operating Instructions
Page 53
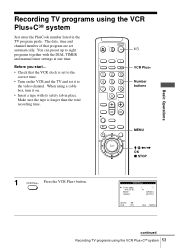
...; Turn on . • Insert a tape with the DIAL TIMER and manual timer settings at one time. You can preset up to the video channel. When using the VCR Plus+C3® system Just enter the PlusCode number listed in place. Basic Operations Recording TV programs using a cable box, turn it to eight programs... on the VCR and the TV and set automatically. The date, time and channel number of that the VCR clock is longer than the total recording time. ?/1 123 456 789 0 VCR Plus+ Number buttons MENU M/m/
...; Turn on . • Insert a tape with the DIAL TIMER and manual timer settings at one time. You can preset up to the video channel. When using the VCR Plus+C3® system Just enter the PlusCode number listed in place. Basic Operations Recording TV programs using a cable box, turn it to eight programs... on the VCR and the TV and set automatically. The date, time and channel number of that the VCR clock is longer than the total recording time. ?/1 123 456 789 0 VCR Plus+ Number buttons MENU M/m/
Operating Instructions
Page 56
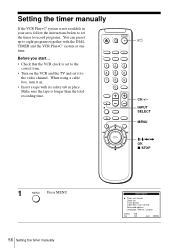
... together with its safety tab in place. Before you start... • Check that the VCR clock is longer than the total recording time. 123 456 789 0 ?/1 CH +/- Setting the timer manually If the VCR Plus+C3 system is not available in your area, follow the instructions below to set it on. •...; Insert a tape with the DIAL TIMER and the VCR Plus+C3 system at one time. When using a cable box, turn it to the video channel.
... together with its safety tab in place. Before you start... • Check that the VCR clock is longer than the total recording time. 123 456 789 0 ?/1 CH +/- Setting the timer manually If the VCR Plus+C3 system is not available in your area, follow the instructions below to set it on. •...; Insert a tape with the DIAL TIMER and the VCR Plus+C3 system at one time. When using a cable box, turn it to the video channel.

Operating Instructions
Page 57
...6 MENU Press MENU to exit the menu. 7 Press ?/1 to that is flashing. The TIMER indicator appears in the "CH" position. continued Setting the timer manually 57 Select : Bb Set : Vv End : OK Quit : MENU To correct a setting, press < to return to turn . 2 Press M/m to select ... m while the date is to display "AUTO" in turn off the VCR. PLAY OK 4 Set the channel number, start and stop the VCR while recording, press x STOP. PLAY To enter another setting, press M/m to set /check," then press OK. Basic Operations 2 Press M/m to move the cursor ...
...6 MENU Press MENU to exit the menu. 7 Press ?/1 to that is flashing. The TIMER indicator appears in the "CH" position. continued Setting the timer manually 57 Select : Bb Set : Vv End : OK Quit : MENU To correct a setting, press < to return to turn . 2 Press M/m to select ... m while the date is to display "AUTO" in turn off the VCR. PLAY OK 4 Set the channel number, start and stop the VCR while recording, press x STOP. PLAY To enter another setting, press M/m to set /check," then press OK. Basic Operations 2 Press M/m to move the cursor ...
Operating Instructions
Page 58
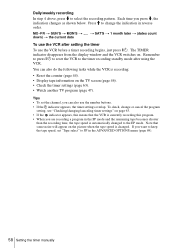
... t SAT'S t 1 month later t (dates count down) t the current date To use the VCR after using the VCR. Note that the VCR is currently recording this means that some noise will appear on the TV screen (page 46). • Check the timer settings (page 63). • Watch another TV program... (page 47). To check, change the indication in the ADVANCED OPTIONS menu (page 69). 58 Setting the timer manually MO~FR t SUN'S t MON'S t ..... The TIMER indicator disappears from the display window and the VCR switches on page 63. • If the ...
... t SAT'S t 1 month later t (dates count down) t the current date To use the VCR after using the VCR. Note that the VCR is currently recording this means that some noise will appear on the TV screen (page 46). • Check the timer settings (page 63). • Watch another TV program... (page 47). To check, change the indication in the ADVANCED OPTIONS menu (page 69). 58 Setting the timer manually MO~FR t SUN'S t MON'S t ..... The TIMER indicator disappears from the display window and the VCR switches on page 63. • If the ...
Operating Instructions
Page 68
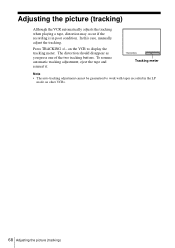
... 68 Adjusting the picture (tracking) To resume automatic tracking adjustment, eject the tape and reinsert it. In this case, manually adjust the tracking. Adjusting the picture (tracking) Although the VCR automatically adjusts the tracking when playing a tape, distortion may occur if the... recording is in the LP mode on the VCR to work with tapes recorded in poor condition. TRACKING Tracking meter Note • The auto tracking adjustment cannot be guaranteed to ...
... 68 Adjusting the picture (tracking) To resume automatic tracking adjustment, eject the tape and reinsert it. In this case, manually adjust the tracking. Adjusting the picture (tracking) Although the VCR automatically adjusts the tracking when playing a tape, distortion may occur if the... recording is in the LP mode on the VCR to work with tapes recorded in poor condition. TRACKING Tracking meter Note • The auto tracking adjustment cannot be guaranteed to ...
Marketing Specifications
Page 2
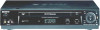
Nonmetric weights and measures are subject to change without notice. SLV-N900 4 Head Hi-Fi Stereo VHS Video Cassette Recorder Features Video Heads: Yes (Four heads, 19 Micron) Tuner: Yes (VHF Channels: 2 through 13) Recording Timer: Yes (1 month/8 event) VCRPlus™ Function: Yes SVCD Playback: Yes ... Yes Supplied Accessories Instruction Manual Cinema Illumination Multi-Brand Remote Control (RM-T402C) Size AA (R6) Batteries (2) 75-Ohm Coaxial Video Cable w/ F Type Connector RF Cable Color: Silver UPC Code: 027242621220 ©2009 Sony Electronics Inc. Sony Electronics Inc. •...
Nonmetric weights and measures are subject to change without notice. SLV-N900 4 Head Hi-Fi Stereo VHS Video Cassette Recorder Features Video Heads: Yes (Four heads, 19 Micron) Tuner: Yes (VHF Channels: 2 through 13) Recording Timer: Yes (1 month/8 event) VCRPlus™ Function: Yes SVCD Playback: Yes ... Yes Supplied Accessories Instruction Manual Cinema Illumination Multi-Brand Remote Control (RM-T402C) Size AA (R6) Batteries (2) 75-Ohm Coaxial Video Cable w/ F Type Connector RF Cable Color: Silver UPC Code: 027242621220 ©2009 Sony Electronics Inc. Sony Electronics Inc. •...