Operating Instructions
Page 6
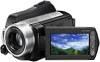
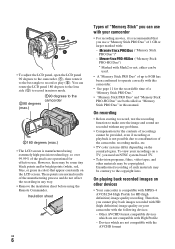
...sound are not compatible with this manual. On playing back recorded images on other materials may be contrary to the copyright laws. Other AVCHD format compatible devices which are not compatible with : - These points are normal results of the manufacturing process and do not affect ...to the camcorder (1), then rotate it is recommended that appear constantly on the LCD screen. PRO-HG Duo") ("Memory Stick * Marked with Mark2 or not, either can rotate the LCD panel 180 degrees to the lens side (2) to record in this camcorder. • See page 11 for HD (high definition) image...
...sound are not compatible with this manual. On playing back recorded images on other materials may be contrary to the copyright laws. Other AVCHD format compatible devices which are not compatible with : - These points are normal results of the manufacturing process and do not affect ...to the camcorder (1), then rotate it is recommended that appear constantly on the LCD screen. PRO-HG Duo") ("Memory Stick * Marked with Mark2 or not, either can rotate the LCD panel 180 degrees to the lens side (2) to record in this camcorder. • See page 11 for HD (high definition) image...
Operating Instructions
Page 19
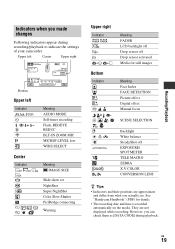
See "Handycam Handbook" (PDF) for still images Meaning Face Index FACE DETECTION Picture effect Digital effect Manual focus SCENE SELECTION Backlight White balance SteadyShot off EXPOSURE/ SPOT METER TELE MACRO ZEBRA X.V.COLOR CONVERSION LENS z Tips • Indicators and their positions are not displayed...media. US 19 However, you can check them as [DATA CODE] during recording/playback to indicate the settings of your camcorder. Recording/Playback Indicators when you made changes Following indicators appear during playback. Upper left Center Upper right Bottom Upper left ...
See "Handycam Handbook" (PDF) for still images Meaning Face Index FACE DETECTION Picture effect Digital effect Manual focus SCENE SELECTION Backlight White balance SteadyShot off EXPOSURE/ SPOT METER TELE MACRO ZEBRA X.V.COLOR CONVERSION LENS z Tips • Indicators and their positions are not displayed...media. US 19 However, you can check them as [DATA CODE] during recording/playback to indicate the settings of your camcorder. Recording/Playback Indicators when you made changes Following indicators appear during playback. Upper left Center Upper right Bottom Upper left ...
Operating Instructions
Page 21
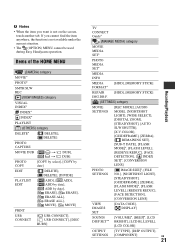
... REPAIR [HDD], [MEMORY STICK] IMG.DB F. (SETTINGS) category MOVIE SETTINGS [REC MODE], [AUDIO MODE], [NIGHTSHOT LIGHT], [WIDE SELECT], [DIGITAL ZOOM], [STEADYSHOT], [AUTO SLW SHUTTR], [X.V.COLOR], [GUIDEFRAME], [ZEBRA], [ REMAINING SET], [SUB-T DATE], [FLASH MODE]*, [FLASH LEVEL], [REDEYE REDUC], [FACE DETECTION], [ INDEX SET]*, [CONVERSION LENS] PHOTO ...want is not available under the current situation. • The (OPTION) MENU cannot be used during Easy Handycam operation. b Notes • When the item you cannot find the item anywhere, the function is not on the screen, touch another...
... REPAIR [HDD], [MEMORY STICK] IMG.DB F. (SETTINGS) category MOVIE SETTINGS [REC MODE], [AUDIO MODE], [NIGHTSHOT LIGHT], [WIDE SELECT], [DIGITAL ZOOM], [STEADYSHOT], [AUTO SLW SHUTTR], [X.V.COLOR], [GUIDEFRAME], [ZEBRA], [ REMAINING SET], [SUB-T DATE], [FLASH MODE]*, [FLASH LEVEL], [REDEYE REDUC], [FACE DETECTION], [ INDEX SET]*, [CONVERSION LENS] PHOTO ...want is not available under the current situation. • The (OPTION) MENU cannot be used during Easy Handycam operation. b Notes • When the item you cannot find the item anywhere, the function is not on the screen, touch another...
Operating Instructions
Page 30
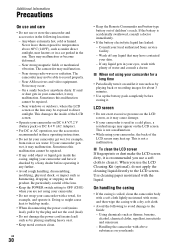
...has leaked: - Handling the camcorder with above 60°C (140°F), such as by a Sony dealer before storing it . They may occur. - Near strong radio waves or radiation. The camcorder may malfunction. Near windows or outdoors, where the LCD screen or the lens may have it checked by ...completely before operating it is used in the sun. When you use or store the camcorder and accessories in your camcorder with a towel, for about 3 minutes. • Use up . Be particularly careful of the lens. • Keep the POWER switch setting to the LCD screen. This is soiled...
...has leaked: - Handling the camcorder with above 60°C (140°F), such as by a Sony dealer before storing it . They may occur. - Near strong radio waves or radiation. The camcorder may malfunction. Near windows or outdoors, where the LCD screen or the lens may have it checked by ...completely before operating it is used in the sun. When you use or store the camcorder and accessories in your camcorder with a towel, for about 3 minutes. • Use up . Be particularly careful of the lens. • Keep the POWER switch setting to the LCD screen. This is soiled...

Operating Instructions
Page 31
...distance of the lens clean with the + side facing up. 3 Insert the battery case back into the Remote Commander until it clicks. Use your camcorder to a wall outlet (wall socket) using the AC Adaptor supplied with your camcorder at the seaside. • Store in contact with a Sony CR2025 lithium battery.... Power supply You can use your camcorder within the AC 100 V to OFF (CHG) for a long period of time About care and storage of the lens • Wipe the surface of...
...distance of the lens clean with the + side facing up. 3 Insert the battery case back into the Remote Commander until it clicks. Use your camcorder to a wall outlet (wall socket) using the AC Adaptor supplied with your camcorder at the seaside. • Store in contact with a Sony CR2025 lithium battery.... Power supply You can use your camcorder within the AC 100 V to OFF (CHG) for a long period of time About care and storage of the lens • Wipe the surface of...
Operating Instructions
Page 32
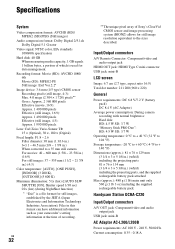
...camcorder's setting information at the time of Sony's ClearVid CMOS sensor and image processing system (BIONZ) allows for still image resolution equivalent to the sizes described. Specifications System Video compression format: AVCHD...560 g (1 lb 3 oz) including the supplied rechargeable battery pack Handycam Station DCRA-C220 Input/Output connectors A/V OUT jack: Component/video and... Effective (still image, 16:9): Approx. 1 490 000 pixels Effective (still image, 4:3): Approx. 1 990 000 pixels Lens: Carl Zeiss Vario-Sonnar T 15 × (Optical), 30 ×, 180 × (Digital) Focal length: F1...
...camcorder's setting information at the time of Sony's ClearVid CMOS sensor and image processing system (BIONZ) allows for still image resolution equivalent to the sizes described. Specifications System Video compression format: AVCHD...560 g (1 lb 3 oz) including the supplied rechargeable battery pack Handycam Station DCRA-C220 Input/Output connectors A/V OUT jack: Component/video and... Effective (still image, 16:9): Approx. 1 490 000 pixels Effective (still image, 4:3): Approx. 1 990 000 pixels Lens: Carl Zeiss Vario-Sonnar T 15 × (Optical), 30 ×, 180 × (Digital) Focal length: F1...
Digital Imaging Accessories Brochure
Page 5
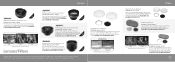
... a selection of Digital Handycam® camcorder lenses in your accessory bag. Compatible only with HDR-SR10/SR10D. 9 Polarizing Filter Kit VF-30CPKX S (30 mm) $69.99 Suppress annoying reflections bouncing off of glass or water. COMPARISON High-Grade Tele Conversion Lens VCL-HG1737C (37 mm...7X wide-angle conversion lens. Compatible only with HDR-SR10/SR10D. Compatible only with HDR-SR11/SR12/CX12. Lenses High-Grade Wide Conversion Lens VCL-HG0737C (37 mm) $199.99 Get everyone in one of Sony's high-quality lens filters. Then to last with HDR-SR11/SR12/CX12. ...
... a selection of Digital Handycam® camcorder lenses in your accessory bag. Compatible only with HDR-SR10/SR10D. 9 Polarizing Filter Kit VF-30CPKX S (30 mm) $69.99 Suppress annoying reflections bouncing off of glass or water. COMPARISON High-Grade Tele Conversion Lens VCL-HG1737C (37 mm...7X wide-angle conversion lens. Compatible only with HDR-SR10/SR10D. Compatible only with HDR-SR11/SR12/CX12. Lenses High-Grade Wide Conversion Lens VCL-HG0737C (37 mm) $199.99 Get everyone in one of Sony's high-quality lens filters. Then to last with HDR-SR11/SR12/CX12. ...
Handycam® Handbook
Page 3
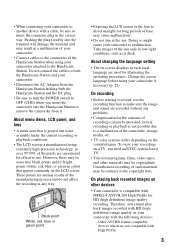
...cannot play back images recorded with High Profile 3 About changing the language setting • The on-screen displays in a malfunction of your camcorder. • Connect cables to the connectors of the Handycam Station when using your camcorder attached to the Handycam Station. On recording •... are operational for HD (high definition) image quality recording. Black point White, red, blue or green point • Exposing the LCD screen or the lens to direct sunlight for illustrating the operating procedures. • When connecting your camcorder to another device with a...
...cannot play back images recorded with High Profile 3 About changing the language setting • The on-screen displays in a malfunction of your camcorder. • Connect cables to the connectors of the Handycam Station when using your camcorder attached to the Handycam Station. On recording •... are operational for HD (high definition) image quality recording. Black point White, red, blue or green point • Exposing the LCD screen or the lens to direct sunlight for illustrating the operating procedures. • When connecting your camcorder to another device with a...

Handycam® Handbook
Page 4
... in Germany, and Sony Corporation, and produces superior images. MTF= Modulation Transfer Function. Devices which was developed jointly by Carl Zeiss, in this Handbook for your camcorder and accessories are called "media." • Design and specifications of your camcorder is equipped with a Carl Zeiss lens, which are not compatible with the AVCHD format About this...
... in Germany, and Sony Corporation, and produces superior images. MTF= Modulation Transfer Function. Devices which was developed jointly by Carl Zeiss, in this Handbook for your camcorder and accessories are called "media." • Design and specifications of your camcorder is equipped with a Carl Zeiss lens, which are not compatible with the AVCHD format About this...

Handycam® Handbook
Page 21
...ready to save battery power. You cannot operate your camcorder in a specified language. Changing the language setting You can be affected by the setting. z Tips • The date and time does not appear during this time. • The lens cover opens automatically when the power is turned on... the LCD backlight, press and hold DISP/BATT INFO for approximately 5 minutes, to shoot after the power is practical when you use your camcorder during recording, but they are automatically recorded...
...ready to save battery power. You cannot operate your camcorder in a specified language. Changing the language setting You can be affected by the setting. z Tips • The date and time does not appear during this time. • The lens cover opens automatically when the power is turned on... the LCD backlight, press and hold DISP/BATT INFO for approximately 5 minutes, to shoot after the power is practical when you use your camcorder during recording, but they are automatically recorded...

Handycam® Handbook
Page 29
... AC Adaptor. • When a movie file exceeds 2 GB, the next movie file is switched on the hard disk. (HOME) A (HOME) D PHOTO E Lens cover Opens automatically when the power is created automatically. b Notes • If the ACCESS lamp is lit or flashing after recording is finished, it means... data is set to your camcorder, see page 2. • You can use in the media setting (p. 22). Recording The images are recorded on . START/STOP B ACCESS lamp (Hard ...
... AC Adaptor. • When a movie file exceeds 2 GB, the next movie file is switched on the hard disk. (HOME) A (HOME) D PHOTO E Lens cover Opens automatically when the power is created automatically. b Notes • If the ACCESS lamp is lit or flashing after recording is finished, it means... data is set to your camcorder, see page 2. • You can use in the media setting (p. 22). Recording The images are recorded on . START/STOP B ACCESS lamp (Hard ...

Handycam® Handbook
Page 32
... period during sleep mode. z Tips • To record an image brighter, use infrared light. Your camcorder returns to ON, appears. Therefore, do not operate your fingers or other objects. • Remove the conversion lens (optional). • Adjust the focus manually ([FOCUS], p. 80) when it is hard to focus ... you do not cover the infrared port with the flash. You can record high quality still images during movie recording by pressing PHOTO. Press QUICK ON again to remain on . Recording high quality still images during recording standby in dark places. You can record still ...
... period during sleep mode. z Tips • To record an image brighter, use infrared light. Your camcorder returns to ON, appears. Therefore, do not operate your fingers or other objects. • Remove the conversion lens (optional). • Adjust the focus manually ([FOCUS], p. 80) when it is hard to focus ... you do not cover the infrared port with the flash. You can record high quality still images during movie recording by pressing PHOTO. Press QUICK ON again to remain on . Recording high quality still images during recording standby in dark places. You can record still ...

Handycam® Handbook
Page 33
To cancel the back light function, press . (back light) again. Open the LCD panel 90 degrees to the camcorder (1), then rotate it 180 degrees to display . Your camcorder records sounds for about 3 seconds. second movie (approx.). • Image quality of [SMTH SLW REC] is displayed in ... 1 Touch (HOME) t t [SMTH SLW REC]. (CAMERA) Recording/Playback To adjust the exposure for backlit subjects, press . (back light) to the lens side (2). To change the setting Touch (OPTION) t tab, then select the setting you want to cancel the smooth slow recording. Touch to change. •...
To cancel the back light function, press . (back light) again. Open the LCD panel 90 degrees to the camcorder (1), then rotate it 180 degrees to display . Your camcorder records sounds for about 3 seconds. second movie (approx.). • Image quality of [SMTH SLW REC] is displayed in ... 1 Touch (HOME) t t [SMTH SLW REC]. (CAMERA) Recording/Playback To adjust the exposure for backlit subjects, press . (back light) to the lens side (2). To change the setting Touch (OPTION) t tab, then select the setting you want to cancel the smooth slow recording. Touch to change. •...

Handycam® Handbook
Page 35
... on your camcorder. 2 Press (VIEW IMAGES) F (or C). Lens cover Closes when an INDEX screen appears. Power zoom lever D (HOME) A (HOME) B POWER switch E Recording/Playback (VIEW IMAGES) C (VIEW IMAGES) F 1 Turn the POWER switch E to the Face Index screen (p. 37). 3 :Displays movies with HD (high definition) image quality... definition) image quality in the media setting (p. 22). Appears with the image on the tab that was lastly played back/recorded (B for the still image recorded on a "Memory Stick PRO Duo") HOME MENU Previous 6 images Next 6 images Returns to the HDD ...
... on your camcorder. 2 Press (VIEW IMAGES) F (or C). Lens cover Closes when an INDEX screen appears. Power zoom lever D (HOME) A (HOME) B POWER switch E Recording/Playback (VIEW IMAGES) C (VIEW IMAGES) F 1 Turn the POWER switch E to the Face Index screen (p. 37). 3 :Displays movies with HD (high definition) image quality... definition) image quality in the media setting (p. 22). Appears with the image on the tab that was lastly played back/recorded (B for the still image recorded on a "Memory Stick PRO Duo") HOME MENU Previous 6 images Next 6 images Returns to the HDD ...

Handycam® Handbook
Page 65
... SUB-T DATE 69 FLASH MODE* 69 FLASH LEVEL 69 REDEYE REDUC 69 FACE DETECTION 69 INDEX SET* 70 CONVERSION LENS 70 PHOTO SETTINGS (p. 70) Items Page IMAGE SIZE* 70 FILE NO. 71 NIGHTSHOT LIGHT 67 STEADYSHOT 68 GUIDEFRAME 68... ZEBRA 68 FLASH MODE* 69 FLASH LEVEL 69 REDEYE REDUC 69 FACE DETECTION 69 Items Page CONVERSION LENS 70 VIEW IMAGES SET (p. 72) Items Page DATA CODE 72 DISPLAY 72 SOUND/DISP SET** (p. 73) Items Page ... SET* 20 AREA SET 75 DST SET/SUMMERTIME 75 LANGUAGE SET* 75 65 Customizing your camcorder
... SUB-T DATE 69 FLASH MODE* 69 FLASH LEVEL 69 REDEYE REDUC 69 FACE DETECTION 69 INDEX SET* 70 CONVERSION LENS 70 PHOTO SETTINGS (p. 70) Items Page IMAGE SIZE* 70 FILE NO. 71 NIGHTSHOT LIGHT 67 STEADYSHOT 68 GUIDEFRAME 68... ZEBRA 68 FLASH MODE* 69 FLASH LEVEL 69 REDEYE REDUC 69 FACE DETECTION 69 Items Page CONVERSION LENS 70 VIEW IMAGES SET (p. 72) Items Page DATA CODE 72 DISPLAY 72 SOUND/DISP SET** (p. 73) Items Page ... SET* 20 AREA SET 75 DST SET/SUMMERTIME 75 LANGUAGE SET* 75 65 Customizing your camcorder

Handycam® Handbook
Page 67
...; Do not cover the infrared port with your fingers or other objects (p. 32). • Remove the conversion lens (optional). • The maximum shooting distance using either the NightShot (p. 32) or [SUPER NIGHTSHOT] (p. 83... function to [OFF] of movies may be degraded, or scenes with quick movements may appear with SD (standard definition) image quality, you select the zooming level. Refer also to [ON] (the default setting). B OFF Up ... LIGHT] is performed digitally. 67 Customizing your camcorder The zooming zone appears when you can change the recording sound format.
...; Do not cover the infrared port with your fingers or other objects (p. 32). • Remove the conversion lens (optional). • The maximum shooting distance using either the NightShot (p. 32) or [SUPER NIGHTSHOT] (p. 83... function to [OFF] of movies may be degraded, or scenes with quick movements may appear with SD (standard definition) image quality, you select the zooming level. Refer also to [ON] (the default setting). B OFF Up ... LIGHT] is performed digitally. 67 Customizing your camcorder The zooming zone appears when you can change the recording sound format.

Handycam® Handbook
Page 70
... You can be detected depending on recording conditions. • [FACE DETECTION] may not be detected is lit. How to record using a conversion lens (optional), use [FACE DETECTION] function. INDEX SET The default setting is [OFF]. 70 Touch 1, then 2. The default setting is [ON...record more still images in relatively clear quality (1,600 × 1,200). The detected face image is [ON] : This icon flashes when your camcorder detects a face. Face icons and their meanings : When the setting is optimized automatically. If the item is not on recording conditions. IMAGE ...
... You can be detected depending on recording conditions. • [FACE DETECTION] may not be detected is lit. How to record using a conversion lens (optional), use [FACE DETECTION] function. INDEX SET The default setting is [OFF]. 70 Touch 1, then 2. The default setting is [ON...record more still images in relatively clear quality (1,600 × 1,200). The detected face image is [ON] : This icon flashes when your camcorder detects a face. Face icons and their meanings : When the setting is optimized automatically. If the item is not on recording conditions. IMAGE ...

Handycam® Handbook
Page 71
... You can record up to the sizes described. GUIDEFRAME See page 68. ZEBRA See page 68. The actual number of Sony's ClearVid CMOS sensor and image processing system (BIONZ) allows for recording still images. b Notes • When using a "Memory ...Stick PRO Duo" made by Sony Corporation. The file number is reset when a new folder is created or the recording folder is replaced with another . ... 68. FLASH MODE See page 69. FLASH LEVEL See page 69. Customizing your camcorder. CONVERSION LENS See page 70. 71
... You can record up to the sizes described. GUIDEFRAME See page 68. ZEBRA See page 68. The actual number of Sony's ClearVid CMOS sensor and image processing system (BIONZ) allows for recording still images. b Notes • When using a "Memory ...Stick PRO Duo" made by Sony Corporation. The file number is reset when a new folder is created or the recording folder is replaced with another . ... 68. FLASH MODE See page 69. FLASH LEVEL See page 69. Customizing your camcorder. CONVERSION LENS See page 70. 71

Handycam® Handbook
Page 80
... . Functions set in the OPTION MENU Items you can set only on the (OPTION) MENU will not display correctly if an optional conversion lens is being used). - appears when the focus cannot be adjusted any closer, and appears when the focus cannot be difficult and can take some...]. To cancel, touch [OFF], or zoom to sharpen the focus. The default settings are marked with B. b Notes • The minimum possible distance between camcorder and subject while maintaining sharp focus is automatically set to shoot small subjects, such as flowers or insects. TELE MACRO This is easier to focus...
... . Functions set in the OPTION MENU Items you can set only on the (OPTION) MENU will not display correctly if an optional conversion lens is being used). - appears when the focus cannot be adjusted any closer, and appears when the focus cannot be difficult and can take some...]. To cancel, touch [OFF], or zoom to sharpen the focus. The default settings are marked with B. b Notes • The minimum possible distance between camcorder and subject while maintaining sharp focus is automatically set to shoot small subjects, such as flowers or insects. TELE MACRO This is easier to focus...

Handycam® Handbook
Page 83
... color balance adjustment. • When the white balance has been set with [ONE PUSH], if you change the [SCENE SELECTION] settings, or bring your camcorder outdoors from inside use [SUPER NIGHTSHOT] in bright places. b Notes • Adjust the focus manually ([FOCUS], p. 80) when it is hard to ... the image. This may cause a malfunction. • Do not cover the infrared port with your fingers or other objects (p. 32). • Remove any conversion lens (optional). • Adjust the focus manually ([FOCUS], p. 80) when it is hard to fading out) mode, then touch . 2 Press START/STOP. To...
... color balance adjustment. • When the white balance has been set with [ONE PUSH], if you change the [SCENE SELECTION] settings, or bring your camcorder outdoors from inside use [SUPER NIGHTSHOT] in bright places. b Notes • Adjust the focus manually ([FOCUS], p. 80) when it is hard to ... the image. This may cause a malfunction. • Do not cover the infrared port with your fingers or other objects (p. 32). • Remove any conversion lens (optional). • Adjust the focus manually ([FOCUS], p. 80) when it is hard to fading out) mode, then touch . 2 Press START/STOP. To...


