
Cyber-shot® Handbook
Page 82
... to the computer. The image is established for a while. 1 To a USB jack of contents Connecting the camera to the computer 1 Insert a sufficiently charged battery pack into the camera. 2 Turn on the computer, then press (Playback) button. 3 Connect the camera to your computer. • When a USB connection is displayed. 82GB The image files are stored. 2 Drag and...
... to the computer. The image is established for a while. 1 To a USB jack of contents Connecting the camera to the computer 1 Insert a sufficiently charged battery pack into the camera. 2 Turn on the computer, then press (Playback) button. 3 Connect the camera to your computer. • When a USB connection is displayed. 82GB The image files are stored. 2 Drag and...
Cyber-shot® Handbook
Page 86
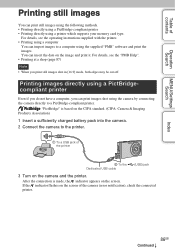
...appears on the image and print it. Table of contents Operation Search MENU/Settings Search Printing still images You can print images shot using the camera by connecting the camera directly to a PictBridge-compliant printer. For details, see the operating instructions supplied with the ...flashes on the screen of the printer 2 To the Dedicated USB cable (USB) jack 3 Turn on the CIPA standard. (CIPA: Camera & Imaging Products Association) 1 Insert a sufficiently charged battery pack into the camera. 2 Connect the camera to a computer using a printer which supports your memory ...
...appears on the image and print it. Table of contents Operation Search MENU/Settings Search Printing still images You can print images shot using the camera by connecting the camera directly to a PictBridge-compliant printer. For details, see the operating instructions supplied with the ...flashes on the screen of the printer 2 To the Dedicated USB cable (USB) jack 3 Turn on the CIPA standard. (CIPA: Camera & Imaging Products Association) 1 Insert a sufficiently charged battery pack into the camera. 2 Connect the camera to a computer using a printer which supports your memory ...
Cyber-shot® Handbook
Page 91
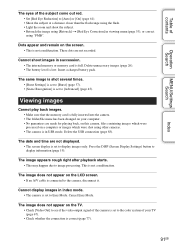
...on this camera, files containing images which were shot using "PMB". Delete unnecessary images (page 26). • The battery level is not a malfunction. The same image is shot several times. • [Burst Settings] is set to [Burst] (page 37). • [Scene Recognition] is in USB mode. ...• If an A/V cable is set to the camera, disconnect it. The date and time are not displayed. • The screen display is connected to [Advanced] (page 45). Delete the USB connection (page 83). Insert a charged battery pack. Table of contents Operation Search MENU/Settings Search...
...on this camera, files containing images which were shot using "PMB". Delete unnecessary images (page 26). • The battery level is not a malfunction. The same image is shot several times. • [Burst Settings] is set to [Burst] (page 37). • [Scene Recognition] is in USB mode. ...• If an A/V cable is set to the camera, disconnect it. The date and time are not displayed. • The screen display is connected to [Advanced] (page 45). Delete the USB connection (page 83). Insert a charged battery pack. Table of contents Operation Search MENU/Settings Search...
Cyber-shot® Handbook
Page 92
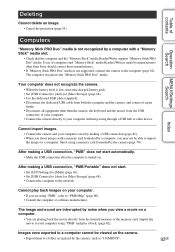
...cannot be able to import the images to your computer without passing through a USB hub or other than Sony should contact those manufacturers. • If "Memory Stick PRO Duo" media is not recognized by the camera (page 70). Images once exported to "PMB Help" (page 80). ...automatically. • Make the USB connection after the computer is low, insert the charged battery pack. • Set [USB Connect] to [Auto] or [Mass Storage] (page 68). • Use the dedicated USB cable (supplied). • Disconnect the dedicated USB cable from the USB connectors of contents Deleting Cannot ...
...cannot be able to import the images to your computer without passing through a USB hub or other than Sony should contact those manufacturers. • If "Memory Stick PRO Duo" media is not recognized by the camera (page 70). Images once exported to "PMB Help" (page 80). ...automatically. • Make the USB connection after the computer is low, insert the charged battery pack. • Set [USB Connect] to [Auto] or [Mass Storage] (page 68). • Use the dedicated USB cable (supplied). • Disconnect the dedicated USB cable from the USB connectors of contents Deleting Cannot ...


