Operating Instructions (primary manual)
Page 4
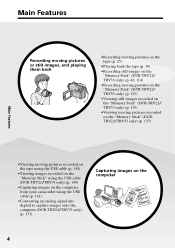
...8226;Recording moving pictures on the tape (p. 25) •Playing back the tape (p. 39) •Recording still images on the "Memory Stick" (DCR-TRV22/ TRV33 only) (p. 46, 114) •Recording moving pictures on the "Memory Stick" (DCR-TRV22/ TRV33 only) (p. 125) •...tape using the USB cable (p. 148) •Viewing images recorded on the "Memory Stick" using the USB cable (DCR-TRV22/TRV33 only) (p. 149) •Capturing images on the computer from your camcorder using the USB cable (p. 161) •Converting an analog signal into digital to capture images onto the computer (DCR-TRV22/TRV33...
...8226;Recording moving pictures on the tape (p. 25) •Playing back the tape (p. 39) •Recording still images on the "Memory Stick" (DCR-TRV22/ TRV33 only) (p. 46, 114) •Recording moving pictures on the "Memory Stick" (DCR-TRV22/ TRV33 only) (p. 125) •...tape using the USB cable (p. 148) •Viewing images recorded on the "Memory Stick" using the USB cable (DCR-TRV22/TRV33 only) (p. 149) •Capturing images on the computer from your camcorder using the USB cable (p. 161) •Converting an analog signal into digital to capture images onto the computer (DCR-TRV22/TRV33...
Operating Instructions (primary manual)
Page 5
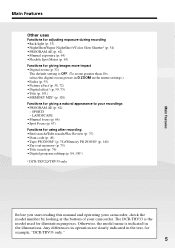
... search/Rec Review (p. 37) •Data code (p. 40) •Tape PB ZOOM* (p. 74)/Memory PB ZOOM* (p. 140) •Zero set memory (p. 75) •Title search (p. 76) •Digital program editing (p. 84, 130*) * DCR-TRV22/TRV33 only Before you start reading this manual and operating your camcorder, check the model number by looking at the bottom...
... search/Rec Review (p. 37) •Data code (p. 40) •Tape PB ZOOM* (p. 74)/Memory PB ZOOM* (p. 140) •Zero set memory (p. 75) •Title search (p. 76) •Digital program editing (p. 84, 130*) * DCR-TRV22/TRV33 only Before you start reading this manual and operating your camcorder, check the model number by looking at the bottom...
Operating Instructions (primary manual)
Page 6
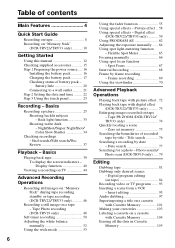
...mode 53 Using the fader function 55 Using special effects - Digital effect (DCR-TRV22/TRV33 only 59 Using PROGRAM AE 62 Adjusting the exposure manually ...... 64 Using spot light-metering function - Tape PB ZOOM (DCR-TRV22/ TRV33 only 74 Quickly locating a scene - Title search 76 Searching... 101 Making your own titles 103 Labeling a cassette on a cassette with digital effect (DCR-TRV22/TRV33 only 73 Enlarging images recorded on tape - Photo search/ Photo scan (DCR-TRV19 only) ..... 79 Editing Dubbing tape 81 Dubbing only desired scenes - Table of contents Main Features 4 Quick ...
...mode 53 Using the fader function 55 Using special effects - Digital effect (DCR-TRV22/TRV33 only 59 Using PROGRAM AE 62 Adjusting the exposure manually ...... 64 Using spot light-metering function - Tape PB ZOOM (DCR-TRV22/ TRV33 only 74 Quickly locating a scene - Title search 76 Searching... 101 Making your own titles 103 Labeling a cassette on a cassette with digital effect (DCR-TRV22/TRV33 only 73 Enlarging images recorded on tape - Photo search/ Photo scan (DCR-TRV19 only) ..... 79 Editing Dubbing tape 81 Dubbing only desired scenes - Table of contents Main Features 4 Quick ...
Operating Instructions (primary manual)
Page 7
...Digital program editing (on "Memory Stick" - Slide show 141 Preventing accidental erasure - DELETE 143 Changing image size - Memory Photo playback .......... 135 Viewing a moving pictures on a computer - Resize (DCR-TRV33...DCR-TRV22/ TRV33 only 173 Customizing Your Camcorder Changing the menu settings 175 Troubleshooting Types of contents Getting Started "Memory Stick" Operations (DCR-TRV22/TRV33...Memory Stick" on a computer (For Macintosh users) (DCR-TRV22/TRV33 only) ......... 172 Capturing images from tape as a moving picture - Introduction 148 Connecting your ...
...Digital program editing (on "Memory Stick" - Slide show 141 Preventing accidental erasure - DELETE 143 Changing image size - Memory Photo playback .......... 135 Viewing a moving pictures on a computer - Resize (DCR-TRV33...DCR-TRV22/ TRV33 only 173 Customizing Your Camcorder Changing the menu settings 175 Troubleshooting Types of contents Getting Started "Memory Stick" Operations (DCR-TRV22/TRV33...Memory Stick" on a computer (For Macintosh users) (DCR-TRV22/TRV33 only) ......... 172 Capturing images from tape as a moving picture - Introduction 148 Connecting your ...

Operating Instructions (primary manual)
Page 8
...compartment opens completely in the direction of the arrow and open the lid. 2 Push the center of the cassette back to hold your camcorder outdoors (p. 16). Note Do not press the cassette compartment down completely, close the lid until it clicks. Recording on the cassette ...supplied) 2 3 1 Connect the plug with the window facing up. 3 Close the cassette compartment by pressing on tape Connecting the power cord (p. 17) Use the battery pack when using your camcorder Fastening the grip belt Fasten the grip belt firmly. 2 1 8 43 Quick Start Guide - Insert the cassette ...
...compartment opens completely in the direction of the arrow and open the lid. 2 Push the center of the cassette back to hold your camcorder outdoors (p. 16). Note Do not press the cassette compartment down completely, close the lid until it clicks. Recording on the cassette ...supplied) 2 3 1 Connect the plug with the window facing up. 3 Close the cassette compartment by pressing on tape Connecting the power cord (p. 17) Use the battery pack when using your camcorder Fastening the grip belt Fasten the grip belt firmly. 2 1 8 43 Quick Start Guide - Insert the cassette ...
Operating Instructions (primary manual)
Page 9
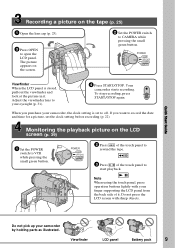
...you purchase your finger supporting the LCD panel from the back side of the touch panel to start playback. Viewfinder LCD panel Battery pack 9 Your camcorder starts recording. When you want to record the date and time for a picture, set to off. Quick Start Guide Recording a picture on ... pick up your eyesight (p. 31). 4 Press START/STOP. The picture appears on the screen. 2 Set the POWER switch to rewind the tape. 3 Press of it . Do not press the LCD screen with your camcorder, the clock setting is closed, pull out the viewfinder and look at the picture in it .
...you purchase your finger supporting the LCD panel from the back side of the touch panel to start playback. Viewfinder LCD panel Battery pack 9 Your camcorder starts recording. When you want to record the date and time for a picture, set to off. Quick Start Guide Recording a picture on ... pick up your eyesight (p. 31). 4 Press START/STOP. The picture appears on the screen. 2 Set the POWER switch to rewind the tape. 3 Press of it . Do not press the LCD screen with your camcorder, the clock setting is closed, pull out the viewfinder and look at the picture in it .

Operating Instructions (primary manual)
Page 13
... an NTSC system-based TV. Cassettes with Cassette Memory . Getting Started Using this manual Note on Cassette Memory Your camcorder is based on the country or area. Copyright precautions Television programs, films, video tapes, and other video equipment or a computer using the USB cable or i.LINK cable, observe the shape of such...
... an NTSC system-based TV. Cassettes with Cassette Memory . Getting Started Using this manual Note on Cassette Memory Your camcorder is based on the country or area. Copyright precautions Television programs, films, video tapes, and other video equipment or a computer using the USB cable or i.LINK cable, observe the shape of such...
Operating Instructions (primary manual)
Page 22
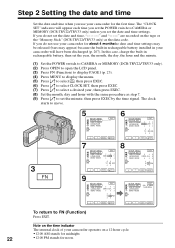
...EXEC RET. The "CLOCK SET" indicator will have been discharged (p. 207). Note on the time indicator The internal clock of your camcorder operates on the tape or the "Memory Stick" (DCR-TRV22/TRV33 only) as step 7. (9) Press r/R to set the date and time settings. Step 2 Setting the date and time Set the... date and time when you use your camcorder for the first time. If you do not use your camcorder for about 4 month,sthe ...
...EXEC RET. The "CLOCK SET" indicator will have been discharged (p. 207). Note on the time indicator The internal clock of your camcorder operates on the tape or the "Memory Stick" (DCR-TRV22/TRV33 only) as step 7. (9) Press r/R to set the date and time settings. Step 2 Setting the date and time Set the... date and time when you use your camcorder for the first time. If you do not use your camcorder for about 4 month,sthe ...
Operating Instructions (primary manual)
Page 26
...-timer. Select SP or LP in in the LP mode on your camcorder, we recommend playing back the tape on the LOCK switch (DCR-TRV22/TRV33 only) When you leave your camcorder. This is not inserted. However, your camcorder. When you change the battery pack, set the POWER switch to OFF... be written properly between the last scene you recorded and the next scene is inserted Your camcorder automatically turns off your camcorder during standby for details. 26 When you record the tape in the menu settings (p. 182). To enable smooth transition Transition between scenes. If you ...
...-timer. Select SP or LP in in the LP mode on your camcorder, we recommend playing back the tape on the LOCK switch (DCR-TRV22/TRV33 only) When you leave your camcorder. This is not inserted. However, your camcorder. When you change the battery pack, set the POWER switch to OFF... be written properly between the last scene you recorded and the next scene is inserted Your camcorder automatically turns off your camcorder during standby for details. 26 When you record the tape in the menu settings (p. 182). To enable smooth transition Transition between scenes. If you ...

Operating Instructions (primary manual)
Page 27
... playback time, "0:00:00" (hours : minutes : seconds) in CAMERA and "0:00:00:00" (hours : minutes : seconds : frames) in minutes to display operation buttons on the tape. Date The date appears about one minute for the correct remaining battery time in VCR. When you close the LCD panel and open it again... also use the Remote Commander for a while (p. 182). Recording mode STBY/REC 40min REC 0:00:01 60min JUL 4 2003 12:05:56PM FN Time code/Tape counter Remaining tape This appears after the power is turned on the...
... playback time, "0:00:00" (hours : minutes : seconds) in CAMERA and "0:00:00:00" (hours : minutes : seconds : frames) in minutes to display operation buttons on the tape. Date The date appears about one minute for the correct remaining battery time in VCR. When you close the LCD panel and open it again... also use the Remote Commander for a while (p. 182). Recording mode STBY/REC 40min REC 0:00:01 60min JUL 4 2003 12:05:56PM FN Time code/Tape counter Remaining tape This appears after the power is turned on the...

Operating Instructions (primary manual)
Page 37
If you use a cassette with Cassette Memory, end search works even once you have recorded on the tape. Basics Checking recordings - The last 5 seconds of the recorded section after you eject the cassette. End... after you record. (1) Set the POWER switch to CAMERA. (2) Press FN to display PAGE1. (3) Press END SCH. If the tape has a blank portion between the last recorded scene and the next scene you record is smooth. / EDIT FN FN End search You...Rec Review You can go to the end of the recorded section are played back and your camcorder returns to FN Press EXIT. Recording -
If you use a cassette with Cassette Memory, end search works even once you have recorded on the tape. Basics Checking recordings - The last 5 seconds of the recorded section after you eject the cassette. End... after you record. (1) Set the POWER switch to CAMERA. (2) Press FN to display PAGE1. (3) Press END SCH. If the tape has a blank portion between the last recorded scene and the next scene you record is smooth. / EDIT FN FN End search You...Rec Review You can go to the end of the recorded section are played back and your camcorder returns to FN Press EXIT. Recording -

Operating Instructions (primary manual)
Page 39
.... 2 PressVOL.Thescreentoadjustvolumeappears. 3 Press-(toturndownthevolume)/+(toturnupthevolume). 4 Press OKtoreturntoPAGE1. 3 4 1 POWER VCR OFF(CHG) CAMERA MEMORY Playback - To resume playback, press again. Playback - Playing back tape You can also control playback using the Remote Commander supplied with your camcorder. (1) SetthePOWERswitchtoVCRwhilepressingthesmallgreenbutton. (2) PressOPENtoopentheLCDpanel. (3) Press torewindthetape. (4) Press tostartplayback. (5) Adjustthevolumefollowingthestepsbelow. 1 Press FN to FN Press EXIT. To rewind the...
.... 2 PressVOL.Thescreentoadjustvolumeappears. 3 Press-(toturndownthevolume)/+(toturnupthevolume). 4 Press OKtoreturntoPAGE1. 3 4 1 POWER VCR OFF(CHG) CAMERA MEMORY Playback - To resume playback, press again. Playback - Playing back tape You can also control playback using the Remote Commander supplied with your camcorder. (1) SetthePOWERswitchtoVCRwhilepressingthesmallgreenbutton. (2) PressOPENtoopentheLCDpanel. (3) Press torewindthetape. (4) Press tostartplayback. (5) Adjustthevolumefollowingthestepsbelow. 1 Press FN to FN Press EXIT. To rewind the...

Operating Instructions (primary manual)
Page 40
.... (4) SelectCAMDATAorDATEDATA,thenpress OK. (5) PressEXIT. DISPLAY DATA CODE DSPL/BATT INFO About date/time and various settings Your camcorder automatically records not only images on the Remote Commander supplied with your camcorder or DISPLAY on the tape but also the recording data (date/time or various settings when recorded) (Data code). Follow the steps...
.... (4) SelectCAMDATAorDATEDATA,thenpress OK. (5) PressEXIT. DISPLAY DATA CODE DSPL/BATT INFO About date/time and various settings Your camcorder automatically records not only images on the Remote Commander supplied with your camcorder or DISPLAY on the tape but also the recording data (date/time or various settings when recorded) (Data code). Follow the steps...
Operating Instructions (primary manual)
Page 41
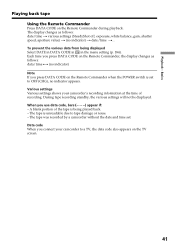
... in DATA CODE in in the menu setting (p. 184). Various settings Various settings shows your camcorder to tape damage or noise. - Each time you connect your camcorder's recording information at the time of the tape is set . The display changes as follows: data/time y (no indicator) t date.../time t... During tape recording standby, the various settings will not be displayed. The tape is unreadable due to a TV, ...
... in DATA CODE in in the menu setting (p. 184). Various settings Various settings shows your camcorder to tape damage or noise. - Each time you connect your camcorder's recording information at the time of the tape is set . The display changes as follows: data/time y (no indicator) t date.../time t... During tape recording standby, the various settings will not be displayed. The tape is unreadable due to a TV, ...

Operating Instructions (primary manual)
Page 42
Playing back tape Various playback modes To operate video control buttons, set the POWER switch to pause playback. To resume fastforwarding or rewinding, release the button. The last 5 seconds of the recorded section are played back then your camcorder stops. * Press **Press to VCR. Press to display video control buttons. Using the ...stop. To change the playback direction Press during playback to resume normal playback. 42 To monitor the high-speed picture while fastforwarding or rewinding the tape (skip scan) Keep pressing while fastforwarding or while rewinding the...
Playing back tape Various playback modes To operate video control buttons, set the POWER switch to pause playback. To resume fastforwarding or rewinding, release the button. The last 5 seconds of the recorded section are played back then your camcorder stops. * Press **Press to VCR. Press to display video control buttons. Using the ...stop. To change the playback direction Press during playback to resume normal playback. 42 To monitor the high-speed picture while fastforwarding or rewinding the tape (skip scan) Keep pressing while fastforwarding or while rewinding the...
Operating Instructions (primary manual)
Page 43
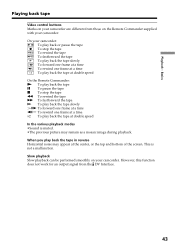
..., this function does not work for an output signal from those on your camcorder. Basics Playing back tape Video control buttons Marks on your camcorder are different from the DV Interface. 43 On your camcorder. Playback - Slow playback Slow playback can be performed smoothly on the Remote Commander... supplied with your camcorder: To play back or pause the tape To stop the tape To rewind the tape To fastforward the tape To play back the tape slowly To forward one frame at a time To rewind one frame at a...
..., this function does not work for an output signal from those on your camcorder. Basics Playing back tape Video control buttons Marks on your camcorder are different from the DV Interface. 43 On your camcorder. Playback - Slow playback Slow playback can be performed smoothly on the Remote Commander... supplied with your camcorder: To play back or pause the tape To stop the tape To rewind the tape To fastforward the tape To play back the tape slowly To forward one frame at a time To rewind one frame at a...

Operating Instructions (primary manual)
Page 46
... indicator disappears. 46 Recording on the "Memory Stick" is complete when the bar scroll indicator at the upper right on "Memory Stick" during tape recording standby or tape recording (DCR-TRV22/TRV33 only) Insert a "Memory Stick" before the following operation. The CAPTURE indicator appears. To change the still image, release PHOTO, select a still image...
... indicator disappears. 46 Recording on the "Memory Stick" is complete when the bar scroll indicator at the upper right on "Memory Stick" during tape recording standby or tape recording (DCR-TRV22/TRV33 only) Insert a "Memory Stick" before the following operation. The CAPTURE indicator appears. To change the still image, release PHOTO, select a still image...

Operating Instructions (primary manual)
Page 47
...the titles. During BOUNCE is on the tape. See page 50 for details. End search - Still images • The image size will be recorded on the "Memory Stick." During and after recording still images on the "Memory Stick" Your camcorder continues recording on - The image when you..., you press PHOTO on the Remote Commander Your camcorder immediately records the image that is on "Memory Stick" during tape recording standby or tape recording (DCR-TRV22/TRV33 only) Note You cannot record still images in the "Memory Stick" during tape recording You cannot check an image on the "Memory...
...the titles. During BOUNCE is on the tape. See page 50 for details. End search - Still images • The image size will be recorded on the "Memory Stick." During and after recording still images on the "Memory Stick" Your camcorder continues recording on - The image when you..., you press PHOTO on the Remote Commander Your camcorder immediately records the image that is on "Memory Stick" during tape recording standby or tape recording (DCR-TRV22/TRV33 only) Note You cannot record still images in the "Memory Stick" during tape recording You cannot check an image on the "Memory...

Operating Instructions (primary manual)
Page 48
... until the recording is completed. 1 CAPTURE FN 2 DCR-TRV19 FN Notes •During tape photo recording, you pressed PHOTO deeply is on a tape - The still image displayed on a 60-minute tape. You can record still images such as photographs. The... still image is also recorded. The sound during those 7 seconds is displayed on the screen until a still image appears. Recording does not start yet. To change the mode or setting. •When recording a still image, do not shake your camcorder...
... until the recording is completed. 1 CAPTURE FN 2 DCR-TRV19 FN Notes •During tape photo recording, you pressed PHOTO deeply is on a tape - The still image displayed on a 60-minute tape. You can record still images such as photographs. The... still image is also recorded. The sound during those 7 seconds is displayed on the screen until a still image appears. Recording does not start yet. To change the mode or setting. •When recording a still image, do not shake your camcorder...

Operating Instructions (primary manual)
Page 49
... lightly. To record still images on a tape during tape recording You cannot check an image on a tape - Press PHOTO deeply. The still image is on the screen when you play back the still image on the Remote Commander Your camcorder immediately records the image that is recorded for... about 7 seconds and your camcorder returns to tape recording standby. 49 When you press PHOTO on other equipment, the image may fluctuate. Tape Photo recording (DCRTRV19 only) If you record a...
... lightly. To record still images on a tape during tape recording You cannot check an image on a tape - Press PHOTO deeply. The still image is on the screen when you play back the still image on the Remote Commander Your camcorder immediately records the image that is recorded for... about 7 seconds and your camcorder returns to tape recording standby. 49 When you press PHOTO on other equipment, the image may fluctuate. Tape Photo recording (DCRTRV19 only) If you record a...


