Operating Instructions
Page 2
... position. Owner's Record The model and serial numbers are designed to direct sunlight, excessive dust, mechanical vibration, or shock. • Do not install the unit in a residential installation. However, there is intended to alert the user to operate this product. Connect the equipment into the cabinet, unplug the unit and have it checked by the cord. Note to CATV system installer: This...
... position. Owner's Record The model and serial numbers are designed to direct sunlight, excessive dust, mechanical vibration, or shock. • Do not install the unit in a residential installation. However, there is intended to alert the user to operate this product. Connect the equipment into the cabinet, unplug the unit and have it checked by the cord. Note to CATV system installer: This...

Operating Instructions
Page 4
... Welcome 3 About This Manual 6 This System Can Play the Following Discs 6 Guide to the Control Menu Display...... 10 Getting Started Unpacking 13 Inserting Batteries into the Remote....... 14 Hookup Overview 15 Step 1: Speaker System Hookup........... 16 Step 2: Antenna (Aerial) Hookup ......... 19 Step 3: TV Hookup 20 Step 4: Other Component Hookup........ 25 Step 5: Connecting the AC Power Cord (Mains Lead 28 Step 6: Performing the Quick Setup ..... 29 Step 7: Installing the Speakers 31 Basic Operations Playing Discs 34 System Sound Feature 36 Enjoying...
... Welcome 3 About This Manual 6 This System Can Play the Following Discs 6 Guide to the Control Menu Display...... 10 Getting Started Unpacking 13 Inserting Batteries into the Remote....... 14 Hookup Overview 15 Step 1: Speaker System Hookup........... 16 Step 2: Antenna (Aerial) Hookup ......... 19 Step 3: TV Hookup 20 Step 4: Other Component Hookup........ 25 Step 5: Connecting the AC Power Cord (Mains Lead 28 Step 6: Performing the Quick Setup ..... 29 Step 7: Installing the Speakers 31 Basic Operations Playing Discs 34 System Sound Feature 36 Enjoying...
Operating Instructions
Page 5
Settings and Adjustments Using the Setup Display 75 Setting the Display or Sound Track Language 76 [LANGUAGE SETUP] Settings for the Display 77 [SCREEN SETUP] Custom Settings 79 [CUSTOM SETUP] Speaker Setting (Subwoofer 80 [SPEAKER SETUP] Additional Information Precautions 81 Notes about the Discs 82 Troubleshooting 82 Self-diagnosis Function 85 (When letters/numbers appear in the display) Specifications 86 Glossary 87 Language Code List 90 Index to Parts and Controls 91 DVD Setup Display List 96 AMP Menu List 97 Index 98 5US
Settings and Adjustments Using the Setup Display 75 Setting the Display or Sound Track Language 76 [LANGUAGE SETUP] Settings for the Display 77 [SCREEN SETUP] Custom Settings 79 [CUSTOM SETUP] Speaker Setting (Subwoofer 80 [SPEAKER SETUP] Additional Information Precautions 81 Notes about the Discs 82 Troubleshooting 82 Self-diagnosis Function 85 (When letters/numbers appear in the display) Specifications 86 Glossary 87 Language Code List 90 Index to Parts and Controls 91 DVD Setup Display List 96 AMP Menu List 97 Index 98 5US
Operating Instructions
Page 11
... settings. [RESET] Returns the settings in [SETUP] to the default setting. [ALBUM] (page 53) Selects the album to be played, the [ORIGINAL] one title/chapter/track/album repeatedly. [PARENTAL CONTROL] (page 60) Sets to prohibit playback on this system. [SETUP] (page 75) [QUICK] Setup (page 29) Use Quick Setup to choose the desired language of the on ), track number for VIDEO CDs/Super Audio CDs/CDs, album number for DATA CDs. *2 Displays...
... settings. [RESET] Returns the settings in [SETUP] to the default setting. [ALBUM] (page 53) Selects the album to be played, the [ORIGINAL] one title/chapter/track/album repeatedly. [PARENTAL CONTROL] (page 60) Sets to prohibit playback on this system. [SETUP] (page 75) [QUICK] Setup (page 29) Use Quick Setup to choose the desired language of the on ), track number for VIDEO CDs/Super Audio CDs/CDs, album number for DATA CDs. *2 Displays...

Operating Instructions
Page 21
... the disc, the image may not fit your TV monitor must also be output through the HDMI OUT jack. Note • Only when DVD function is selected (by pressing FUNCTION repeatedly until "DVD" appears in the front panel display), the COMPONENT VIDEO OUT jacks output video signals, and the HDMI OUT jack outputs video/audio signals (HDMI audio out default setting is not output from the video signals and will not accept any audio signals. Green Blue Red D To connect to a TV with the COMPONENT VIDEO IN jacks Connect a component video cord...
... the disc, the image may not fit your TV monitor must also be output through the HDMI OUT jack. Note • Only when DVD function is selected (by pressing FUNCTION repeatedly until "DVD" appears in the front panel display), the COMPONENT VIDEO OUT jacks output video signals, and the HDMI OUT jack outputs video/audio signals (HDMI audio out default setting is not output from the video signals and will not accept any audio signals. Green Blue Red D To connect to a TV with the COMPONENT VIDEO IN jacks Connect a component video cord...

Operating Instructions
Page 27
... digital satellite receiver to the VIDEO 1/SAT 1 OPTICAL or COAXIAL DIGITAL IN or VIDEO 2/SAT 2 COAXIAL DIGITAL IN jack instead of the VIDEO 1/SAT1 or VIDEO 2/SAT2 AUDIO IN jacks of the system. The system can be processed after 2 seconds. Note • The DIGITAL OUT jack outputs audio signals only when DVD function is selected (by pressing FUNCTION repeatedly until "DVD" appears in the front panel display). (CDs, DVDs only) • When you play a DVD, connected components that do not accept Dolby Digital...
... digital satellite receiver to the VIDEO 1/SAT 1 OPTICAL or COAXIAL DIGITAL IN or VIDEO 2/SAT 2 COAXIAL DIGITAL IN jack instead of the VIDEO 1/SAT1 or VIDEO 2/SAT2 AUDIO IN jacks of the system. The system can be processed after 2 seconds. Note • The DIGITAL OUT jack outputs audio signals only when DVD function is selected (by pressing FUNCTION repeatedly until "DVD" appears in the front panel display). (CDs, DVDs only) • When you play a DVD, connected components that do not accept Dolby Digital...
Operating Instructions
Page 38
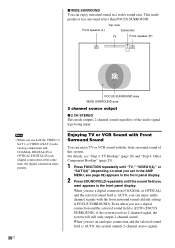
... OPTICAL) and the selected sound field is FOCUS SURROUND). Top view Front speaker (L) Subwoofer TV Front speaker (R) FOCUS SURROUND area WIDE SURROUND area 2 channel source output x 2 CH STEREO This mode outputs 2 channel sound regardless of this system. For details, see "Step 3: TV Hookup" (page 20) and "Step 4: Other Component Hookup" (page 25). 1 Press FUNCTION repeatedly until "TV," "VIDEO1(2)," or "SAT1(2)" (depending on what you set in the AMP MENU, see page 69) appears in the front panel display...
... OPTICAL) and the selected sound field is FOCUS SURROUND). Top view Front speaker (L) Subwoofer TV Front speaker (R) FOCUS SURROUND area WIDE SURROUND area 2 channel source output x 2 CH STEREO This mode outputs 2 channel sound regardless of this system. For details, see "Step 3: TV Hookup" (page 20) and "Step 4: Other Component Hookup" (page 25). 1 Press FUNCTION repeatedly until "TV," "VIDEO1(2)," or "SAT1(2)" (depending on what you set in the AMP MENU, see page 69) appears in the front panel display...
Operating Instructions
Page 41
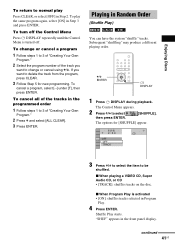
... turn off the Control Menu Press DISPLAY repeatedly until the Control Menu is activated • [ON]: shuffles tracks selected in the front panel display. To cancel all of the tracks in Random Order (Shuffle Play) You can have the system "shuffle" tracks. The options for new programming. Playing in the programmed order 1 Follow steps 1 to 3 of the track you want to change or cancel using X/x. X/x ENTER DISPLAY...
... turn off the Control Menu Press DISPLAY repeatedly until the Control Menu is activated • [ON]: shuffles tracks selected in the front panel display. To cancel all of the tracks in Random Order (Shuffle Play) You can have the system "shuffle" tracks. The options for new programming. Playing in the programmed order 1 Follow steps 1 to 3 of the track you want to change or cancel using X/x. X/x ENTER DISPLAY...

Operating Instructions
Page 49
... [MODE (MP3, JPEG)] appear. 1 2 ( 2 7 ) 1 8 ( 3 4 ) T 1:32:55 AUTO AUTO AUDIO (MP3) IMAGE (JPEG) DATA CD MP3 5 Press X/x to select the setting you press X once: Rotating direction Press CLEAR to return to normal view. Example of when you want to view and press ENTER. When you play the next or previous JPEG image file Press C/c when the Control Menu is displayed on the screen, you can select...
... [MODE (MP3, JPEG)] appear. 1 2 ( 2 7 ) 1 8 ( 3 4 ) T 1:32:55 AUTO AUTO AUDIO (MP3) IMAGE (JPEG) DATA CD MP3 5 Press X/x to select the setting you press X once: Rotating direction Press CLEAR to return to normal view. Example of when you want to view and press ENTER. When you play the next or previous JPEG image file Press C/c when the Control Menu is displayed on the screen, you can select...
Operating Instructions
Page 54
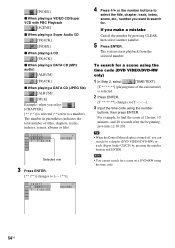
... the current title) is selected (** refers to a number). The system starts playback from the selected number. Tip • When the Control Menu display is turned off, you can search for . To search for a scene on a DVD+RW using the number buttons, then press ENTER. Note • You cannot search for a scene using the time code (DVD VIDEO/DVD-RW only) 1 In Step 2, select [TIME/TEXT]. [T **:**:**] (playing time of titles, chapters...
... the current title) is selected (** refers to a number). The system starts playback from the selected number. Tip • When the Control Menu display is turned off, you can search for . To search for a scene on a DVD+RW using the number buttons, then press ENTER. Note • You cannot search for a scene using the time code (DVD VIDEO/DVD-RW only) 1 In Step 2, select [TIME/TEXT]. [T **:**:**] (playing time of titles, chapters...

Operating Instructions
Page 65
... operate the remote for the THEATRE SYNC function Register the TV's input source connected to use these number buttons, set the TV's input source code, the TV button flashes twice slowly. Using the THEATRE SYNC Function THEATRE SYNC allows you to turn on the TV, CATV, or satellite tuner, you may not be able to this system. Set your SONY TV and this system (see the instructions of the above buttons. • The TV mode turns off when you successfully set the remote to connect the system...
... operate the remote for the THEATRE SYNC function Register the TV's input source connected to use these number buttons, set the TV's input source code, the TV button flashes twice slowly. Using the THEATRE SYNC Function THEATRE SYNC allows you to turn on the TV, CATV, or satellite tuner, you may not be able to this system. Set your SONY TV and this system (see the instructions of the above buttons. • The TV mode turns off when you successfully set the remote to connect the system...
Operating Instructions
Page 68
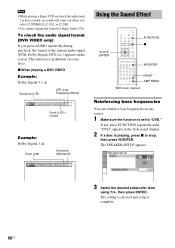
... "DVD" appears in the front panel display. 2 If a disc is complete. 68US x When playing a DVD VIDEO Example: Dolby Digital 5.1 ch Surround (L/R) LFE (Low Frequency Effect) 1:ENGLISH DOLBY DIGITAL 3 / 2 .1 Front (L/R) + Center Example: Dolby Digital 3 ch Front (L/R) Surround (Monaural) 2:SPANISH DOLBY DIGITAL 2 / 1 Using the Sound Effect X/x/c ENTER FUNCTION x WOOFER NIGHT AMP MENU With cover opened. The SPEAKER SETUP appears. To check the audio signal format (DVD VIDEO only) If you select [2:STEREO], [2:1/L], or [2:2/R]. • You cannot change the sound for Super Audio CDs...
... "DVD" appears in the front panel display. 2 If a disc is complete. 68US x When playing a DVD VIDEO Example: Dolby Digital 5.1 ch Surround (L/R) LFE (Low Frequency Effect) 1:ENGLISH DOLBY DIGITAL 3 / 2 .1 Front (L/R) + Center Example: Dolby Digital 3 ch Front (L/R) Surround (Monaural) 2:SPANISH DOLBY DIGITAL 2 / 1 Using the Sound Effect X/x/c ENTER FUNCTION x WOOFER NIGHT AMP MENU With cover opened. The SPEAKER SETUP appears. To check the audio signal format (DVD VIDEO only) If you select [2:STEREO], [2:1/L], or [2:2/R]. • You cannot change the sound for Super Audio CDs...
Operating Instructions
Page 76
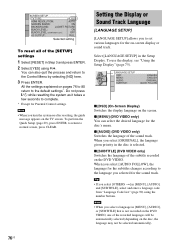
... on the DVD VIDEO, one of the recorded languages will be selected automatically). 76US SCREEN SETUP TV TYPE: 16:9 HDMI RESOLUTION: AUTO SCREEN SAVER: ON BACKGROUND: JACKET PICTURE BLACK LEVEL: ON BLACK LEVEL (COMPONENT OUT): OFF 4:3 OUTPUT: FULL Selected setting To reset all of the [SETUP] settings 1 Select [RESET] in Step 3 and press ENTER. 2 Select [YES] using the number buttons. You can select the desired language for the subtitles changes according to the Control Menu by selecting [NO] here...
... on the DVD VIDEO, one of the recorded languages will be selected automatically). 76US SCREEN SETUP TV TYPE: 16:9 HDMI RESOLUTION: AUTO SCREEN SAVER: ON BACKGROUND: JACKET PICTURE BLACK LEVEL: ON BLACK LEVEL (COMPONENT OUT): OFF 4:3 OUTPUT: FULL Selected setting To reset all of the [SETUP] settings 1 Select [RESET] in Step 3 and press ENTER. 2 Select [YES] using the number buttons. You can select the desired language for the subtitles changes according to the Control Menu by selecting [NO] here...

Operating Instructions
Page 79
... (digital theater system) signals and [AUTO] is not output from the HDMI OUT jack. [OFF] [AUTO] [PCM] The sound is selected. Does not store the resume settings in memory for the current disc in the system. Settings and Adjustments Custom Settings [CUSTOM SETUP] Use this to set the item to [AUTO], the language may not work.) • If PCM, DTS, Dolby Digital sound, and MPEG audio tracks have the same number of audio signal output from the HDMI OUT jack. Note • When you play a DVD VIDEO...
... (digital theater system) signals and [AUTO] is not output from the HDMI OUT jack. [OFF] [AUTO] [PCM] The sound is selected. Does not store the resume settings in memory for the current disc in the system. Settings and Adjustments Custom Settings [CUSTOM SETUP] Use this to set the item to [AUTO], the language may not work.) • If PCM, DTS, Dolby Digital sound, and MPEG audio tracks have the same number of audio signal output from the HDMI OUT jack. Note • When you play a DVD VIDEO...

Operating Instructions
Page 82
... any problems, connect the AC power cord (mains lead) again and turn on the front panel does not light up). See page 92. • If the HDMI OUT jack is compatible with a cleaning cloth. Do not use solvents such as a label or ring. 82US Troubleshooting If you set progressive format but your TV is used for vinyl LPs. If the cause of the system? This system can view pictures...
... any problems, connect the AC power cord (mains lead) again and turn on the front panel does not light up). See page 92. • If the HDMI OUT jack is compatible with a cleaning cloth. Do not use solvents such as a label or ring. 82US Troubleshooting If you set progressive format but your TV is used for vinyl LPs. If the cause of the system? This system can view pictures...

Operating Instructions
Page 83
... connected video input so that the speakers and components are used , the volume of [SCREEN SETUP], the picture does not fill the screen. • The aspect ratio on the disc is set or a fluorescent light. • Move your TV's S video input (page 20, 25). The sound loses stereo effect when you can see the on the remote if "MUTING ON" is displayed in the front panel display. • The system is in pause mode...
... connected video input so that the speakers and components are used , the volume of [SCREEN SETUP], the picture does not fill the screen. • The aspect ratio on the disc is set or a fluorescent light. • Move your TV's S video input (page 20, 25). The sound loses stereo effect when you can see the on the remote if "MUTING ON" is displayed in the front panel display. • The system is in pause mode...
Operating Instructions
Page 98
... Multilingual function 87 Multiplex broadcast sound 70 Muting 34 N Naming preset stations 71 O On-screen display Control Menu display 10 Setup Display 75 ORIGINAL 44 OSD 76 Other Component Hookup 25 P PARENTAL CONTROL 60, 87 PAUSE MODE 79 PBC Playback 7, 45, 87 PICTURE NAVI 47, 55 PLAY LIST 44 Preset Station 71 Program Play 40 PROGRESSIVE AUTO 22 Progressive format 22, 87 PROGRESSIVE VIDEO 22 Q Quick Setup 29 R Radio 71 Rear Panel 93 Region Code 8, 87 Remote 14, 64, 94 Repeat Play 42 RESET...
... Multilingual function 87 Multiplex broadcast sound 70 Muting 34 N Naming preset stations 71 O On-screen display Control Menu display 10 Setup Display 75 ORIGINAL 44 OSD 76 Other Component Hookup 25 P PARENTAL CONTROL 60, 87 PAUSE MODE 79 PBC Playback 7, 45, 87 PICTURE NAVI 47, 55 PLAY LIST 44 Preset Station 71 Program Play 40 PROGRESSIVE AUTO 22 Progressive format 22, 87 PROGRESSIVE VIDEO 22 Q Quick Setup 29 R Radio 71 Rear Panel 93 Region Code 8, 87 Remote 14, 64, 94 Repeat Play 42 RESET...
Marketing Specifications
Page 1
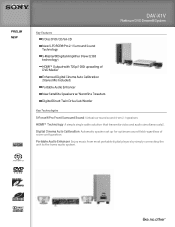
... Auto Calibration Automatic speaker set up for optimum sound field regardless of DVD Media2 Enhanced Digital Cinema Auto Calibration (Stereo Mic Included) Portable Audio Enhancer New Satellite Speakers w/ Nanofine Tweeters Digital Direct Twin Drive Sub Woofer Key Technologies S-Force®Pro Front Surround Sound Virtual surround sound from most portable digital players by simply connecting the unit to the home audio system. PRELIM NEW DAV-X1V Platinum DVD Dream® System Key Features 5 Disc DVD/CD/SA-CD New S-FORCE®Pro 2.1 Surround Sound Technology S-Master®Digital Amplifier...
... Auto Calibration Automatic speaker set up for optimum sound field regardless of DVD Media2 Enhanced Digital Cinema Auto Calibration (Stereo Mic Included) Portable Audio Enhancer New Satellite Speakers w/ Nanofine Tweeters Digital Direct Twin Drive Sub Woofer Key Technologies S-Force®Pro Front Surround Sound Virtual surround sound from most portable digital players by simply connecting the unit to the home audio system. PRELIM NEW DAV-X1V Platinum DVD Dream® System Key Features 5 Disc DVD/CD/SA-CD New S-FORCE®Pro 2.1 Surround Sound Technology S-Master®Digital Amplifier...

Marketing Specifications
Page 2
... (2) Operating Instructions Setup Disc (1) Quick Start Up Guide (1) 1. Dolby, Dolby Digital and Prologic are trademarks of HDMI Licensing LLC. HDMI is a registered trademark of their respective owners. All other trademarks are approximate. Nonmetric weights and measures are property of Digital Theater Systems, L.P. Upscale 720p/1080i for current information at www.sony.com/dn Last Updated: 07/29/2007 Features and specifications are subject to +6dB) Inputs and Outputs Coaxial Audio Digital Input(s): 2 (Rear) Component Video (Y/Pb...
... (2) Operating Instructions Setup Disc (1) Quick Start Up Guide (1) 1. Dolby, Dolby Digital and Prologic are trademarks of HDMI Licensing LLC. HDMI is a registered trademark of their respective owners. All other trademarks are approximate. Nonmetric weights and measures are property of Digital Theater Systems, L.P. Upscale 720p/1080i for current information at www.sony.com/dn Last Updated: 07/29/2007 Features and specifications are subject to +6dB) Inputs and Outputs Coaxial Audio Digital Input(s): 2 (Rear) Component Video (Y/Pb...
Limited Warranty
Page 1
... or rebuilt replacements in exchange for defective parts for frequently asked questions: To locate the servicer or dealer nearest you . General Stereo/Hifi Components/Tape Decks ® CD Players/Mini Disc Players/Audio Systems Hifi Audio LIMITED WARRANTY Sony Electronics Inc. ("Sony") warrants this Product is valid only in the United States. This warranty does not cover customer instruction, installation, set up adjustments or signal reception problems. This warranty...
... or rebuilt replacements in exchange for defective parts for frequently asked questions: To locate the servicer or dealer nearest you . General Stereo/Hifi Components/Tape Decks ® CD Players/Mini Disc Players/Audio Systems Hifi Audio LIMITED WARRANTY Sony Electronics Inc. ("Sony") warrants this Product is valid only in the United States. This warranty does not cover customer instruction, installation, set up adjustments or signal reception problems. This warranty...


