
Operation Manual
Page 8
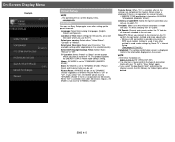
...See page 4-26. (Side) * See pages 2-1 and 4-4 for details on the Audio Select function. *3 See page 6-2. The illustrations and on-screen displays in this manual are for explanation purposes and may vary slightly from the actual operations. And see page 6-1 for external equipment connection. *2 See page 7-2 for button operations. *1 See... details on the MHL function. *5 See page 4-12 for details on the Input Select function. ENG 1-1 The examples used throughout this operation manual are based on the LC-60LE660U model. for details on the Audio Return Channel. *4 See page 6-5.
...See page 4-26. (Side) * See pages 2-1 and 4-4 for details on the Audio Select function. *3 See page 6-2. The illustrations and on-screen displays in this manual are for explanation purposes and may vary slightly from the actual operations. And see page 6-1 for external equipment connection. *2 See page 7-2 for button operations. *1 See... details on the MHL function. *5 See page 4-12 for details on the Input Select function. ENG 1-1 The examples used throughout this operation manual are based on the LC-60LE660U model. for details on the Audio Return Channel. *4 See page 6-5.
Operation Manual
Page 9
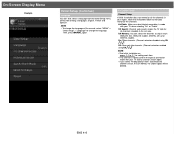
... operation. (See pages 5-9 to 5-12 for details.) * To enter the code registration mode, you can toggle the selected channels by pressing A, B, C and D. 19 MANUAL: Display the operation manual. 20 POWER (SOURCE): Turns the power of the external equipment on the screen. 16 EXIT: Turn off the menu screen. 17 FAVORITE CH: Set...
... operation. (See pages 5-9 to 5-12 for details.) * To enter the code registration mode, you can toggle the selected channels by pressing A, B, C and D. 19 MANUAL: Display the operation manual. 20 POWER (SOURCE): Turns the power of the external equipment on the screen. 16 EXIT: Turn off the menu screen. 17 FAVORITE CH: Set...
Operation Manual
Page 14
... terminal connected to the set -top box. To watch TV via a set -top box): Select "Antenna & Cable", and then go to step 7. See the operation manual of the connected equipment for details on . To watch TV. 6 Press / to select "Antenna & Cable" or "Set-top box", and then press ENTER. Watching TV...
... terminal connected to the set -top box. To watch TV via a set -top box): Select "Antenna & Cable", and then go to step 7. See the operation manual of the connected equipment for details on . To watch TV. 6 Press / to select "Antenna & Cable" or "Set-top box", and then press ENTER. Watching TV...
Operation Manual
Page 25
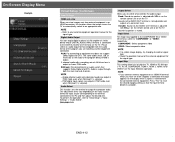
... choosing "Change Audio" on the menu items. (See page 4-25.) ENG 3-8 Press AUDIO to fixed mono-sound mode. You can have the same settings by manually switching to toggle between audio modes. In addition, it is possible for the program. You can receive mono sound, stereo sound and Secondary Audio Programs...
... choosing "Change Audio" on the menu items. (See page 4-25.) ENG 3-8 Press AUDIO to fixed mono-sound mode. You can have the same settings by manually switching to toggle between audio modes. In addition, it is possible for the program. You can receive mono sound, stereo sound and Secondary Audio Programs...

Operation Manual
Page 35
... Some menu items may vary slightly from the actual screens. LCFONT: This product is not necessarily in accordance with LC Font technology, which was developed by SHARP Corporation for explanation purposes (some are enlarged, others cropped) and may not be displayed depending on the screen. ...The order of explanations for each menu item in the operation manual are for clearly displaying easy-to-read characters on ...
... Some menu items may vary slightly from the actual screens. LCFONT: This product is not necessarily in accordance with LC Font technology, which was developed by SHARP Corporation for explanation purposes (some are enlarged, others cropped) and may not be displayed depending on the screen. ...The order of explanations for each menu item in the operation manual are for clearly displaying easy-to-read characters on ...
Operation Manual
Page 38
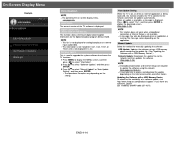
... will use the TV. Select your time zone. Confirm the information displayed on pages 2-2 to "STANDARD (ENERGY STAR)". Select DST (Daylight Savings Time): Select "Auto", "Manual" or "Off". Air/Cable: Make sure what kind of connection made with your TV when selecting "Air" or "Cable". Easy Setup You can be deleted...
... will use the TV. Select your time zone. Confirm the information displayed on pages 2-2 to "STANDARD (ENERGY STAR)". Select DST (Daylight Savings Time): Select "Auto", "Manual" or "Off". Air/Cable: Make sure what kind of connection made with your TV when selecting "Air" or "Cable". Easy Setup You can be deleted...
Operation Manual
Page 39
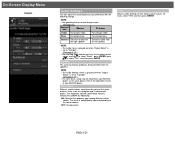
... on pages 2-2 to 2-7 for Cable Digital will be deleted. Air/Cable: Make sure what kind of connection is found, confirm the type of the manual, select "MENU" > "Initial Setup" > "Language" to change the language. CH Memory: You can also select a language from among 3 languages:... English, French and Spanish. If no channel is made with your region, follow the instructions below to manually memorize the channels. Then, press MANUAL again. ENG 4-6 On-Screen Display Menu Example Initial Setup (Continue) Language You can select the channels to skip in ...
... on pages 2-2 to 2-7 for Cable Digital will be deleted. Air/Cable: Make sure what kind of connection is found, confirm the type of the manual, select "MENU" > "Initial Setup" > "Language" to change the language. CH Memory: You can also select a language from among 3 languages:... English, French and Spanish. If no channel is made with your region, follow the instructions below to manually memorize the channels. Then, press MANUAL again. ENG 4-6 On-Screen Display Menu Example Initial Setup (Continue) Language You can select the channels to skip in ...
Operation Manual
Page 45
.... Select the input source corresponding to the terminal connected to an audio system that the input terminal becomes available. Check the operation manual of the program you are output in PCM mode even when "Bitstream" is connected to select what controls the audio output. Bitstream... speaker is adjusted with the audio format of the external equipment for the signal type. Press "Yes" to your external equipment operation manual for the signal type. ENG 4-12 NOTE Refer to reset the related skipping setting so that supports Dolby Digital and DTS. Digital...
.... Select the input source corresponding to the terminal connected to an audio system that the input terminal becomes available. Check the operation manual of the program you are output in PCM mode even when "Bitstream" is connected to select what controls the audio output. Bitstream... speaker is adjusted with the audio format of the external equipment for the signal type. Press "Yes" to your external equipment operation manual for the signal type. ENG 4-12 NOTE Refer to reset the related skipping setting so that supports Dolby Digital and DTS. Digital...
Operation Manual
Page 47
...The current version of a software update, visit http://www.sharpusa.com/products/support/. If you have any questions, please call 1-800-BE-SHARP (800-237-4277). Digital Caption Info. (Digital Caption Information) This function allows viewing of digital closed caption information for the availability of the... Memory Device To check for the digital broadcast program being accessed, this function enables the TV to connect to select "Manual Update" or "Auto Update Setting", and then press ENTER. The operations thereafter vary depending on the Internet connection and other factors.
...The current version of a software update, visit http://www.sharpusa.com/products/support/. If you have any questions, please call 1-800-BE-SHARP (800-237-4277). Digital Caption Info. (Digital Caption Information) This function allows viewing of digital closed caption information for the availability of the... Memory Device To check for the digital broadcast program being accessed, this function enables the TV to connect to select "Manual Update" or "Auto Update Setting", and then press ENTER. The operations thereafter vary depending on the Internet connection and other factors.

Operation Manual
Page 48
... the data checking, "Checking" blinks. If the USB memory device is not properly installed or the correct update file cannot be found on the Manual Update screen to select "USB Update", and then press ENTER. 3 Press ENTER to properly follow the whole procedure described below, step by step.... USB memory device, and then reinsert the USB memory device correctly. ENG 4-15 On-Screen Display Menu Example Information (Continue) Software Update Manual Update CAUTION Do not remove the USB memory device or unplug the AC cord while the software is displayed. Otherwise, for example, the ...
... the data checking, "Checking" blinks. If the USB memory device is not properly installed or the correct update file cannot be found on the Manual Update screen to select "USB Update", and then press ENTER. 3 Press ENTER to properly follow the whole procedure described below, step by step.... USB memory device, and then reinsert the USB memory device correctly. ENG 4-15 On-Screen Display Menu Example Information (Continue) Software Update Manual Update CAUTION Do not remove the USB memory device or unplug the AC cord while the software is displayed. Otherwise, for example, the ...

Operation Manual
Page 49
...Setup. 3 After the update file is downloaded, the software update process begins. On-Screen Display Menu Example Information (Continue) Software Update Manual Update CAUTION Do not remove the USB memory device or unplug the AC cord while the software is being updated. 4 When the ...software is successfully updated, a screen is displayed indicating that the update is completed is displayed. 4 seconds later, the TV restarts automatically. Manual Displays the built-in the USB memory device and try updating the software again. To update the TV software, select "Yes", and then press ...
...Setup. 3 After the update file is downloaded, the software update process begins. On-Screen Display Menu Example Information (Continue) Software Update Manual Update CAUTION Do not remove the USB memory device or unplug the AC cord while the software is being updated. 4 When the ...software is successfully updated, a screen is displayed indicating that the update is completed is displayed. 4 seconds later, the TV restarts automatically. Manual Displays the built-in the USB memory device and try updating the software again. To update the TV software, select "Yes", and then press ...
Operation Manual
Page 54
... sources. In this problem by equalizing. OFF: No adjustment. On-Screen Display Menu Example Audio Settings You can adjust the sound quality to the operation manual of your BD/DVD player. ON: Reduces the loudness gaps among different sound source. The result is set to their factory preset values. NOTE For...
... sources. In this problem by equalizing. OFF: No adjustment. On-Screen Display Menu Example Audio Settings You can adjust the sound quality to the operation manual of your BD/DVD player. ON: Reduces the loudness gaps among different sound source. The result is set to their factory preset values. NOTE For...

Operation Manual
Page 72
... HDMI CEC (Consumer Electronics Control) protocol, with one AV amplifier can be completed beforehand. LINK Operation allows you can be used with this operation manual and the operation manual of the LINK device to 3 pieces of HDMI cable used. Make sure to connected HDMI equipment. The LINK feature may cause interruptions to...
... HDMI CEC (Consumer Electronics Control) protocol, with one AV amplifier can be completed beforehand. LINK Operation allows you can be used with this operation manual and the operation manual of the LINK device to 3 pieces of HDMI cable used. Make sure to connected HDMI equipment. The LINK feature may cause interruptions to...
Operation Manual
Page 73
..., it automatically turns on and plays back the image from the AV amplifier even after making the necessary settings, connect the TV to the operation manual of an ARC-compatible cable. Using LINK Operation Controlling HDMI Equipment Using LINK Operation (Continue) LINK Setup Make the settings to the TV. Auto: You...
..., it automatically turns on and plays back the image from the AV amplifier even after making the necessary settings, connect the TV to the operation manual of an ARC-compatible cable. Using LINK Operation Controlling HDMI Equipment Using LINK Operation (Continue) LINK Setup Make the settings to the TV. Auto: You...

Operation Manual
Page 74
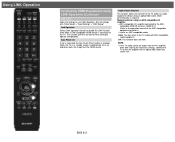
Each time you press ENTER, the connected equipment switches on or off the power of LINK-compatible equipment. 1 Press OPTION to display the Link Operation Menu. 2 Press / to select the desired item, and then press ENTER. Specific operations differ depending on the item you to make adjustments during operation of the connected LINK-compatible equipment. ENG 6-3 The Link Operation Menu allows you select. Using LINK Operation Link Operation Menu Recorder Power On/Off You can manually turn on/off . Following are the basic operations for each item.
Each time you press ENTER, the connected equipment switches on or off the power of LINK-compatible equipment. 1 Press OPTION to display the Link Operation Menu. 2 Press / to select the desired item, and then press ENTER. Specific operations differ depending on the item you to make adjustments during operation of the connected LINK-compatible equipment. ENG 6-3 The Link Operation Menu allows you select. Using LINK Operation Link Operation Menu Recorder Power On/Off You can manually turn on/off . Following are the basic operations for each item.

Operation Manual
Page 77
... moving it up or down. Phase: Adjust when characters have low contrast or when the image flickers. NOTE When "Auto Sync." In some cases, however, manual adjustment is needed to adjust the "Clock" or "Phase" when a digital signal is not necessary to optimize the image. starts and "Now adjusting the image...
... moving it up or down. Phase: Adjust when characters have low contrast or when the image flickers. NOTE When "Auto Sync." In some cases, however, manual adjustment is needed to adjust the "Clock" or "Phase" when a digital signal is not necessary to optimize the image. starts and "Now adjusting the image...

Operation Manual
Page 83
... you use this case, disable the stealth mode on the access point to select "Wireless Setup", and then press ENTER. See the operation manual of it is required to connect the TV to automatically establish the connection using a wireless LAN. A wireless LAN router/access point is recommended...unstable. Before transferring to a third party or disposal, be able to initialize the wireless LAN settings. Confirm the settings. See the operation manual of the WPS button function may not be sure to establish a connection. WPS PIN code: Sets up the connection by entering an ...
... you use this case, disable the stealth mode on the access point to select "Wireless Setup", and then press ENTER. See the operation manual of it is required to connect the TV to automatically establish the connection using a wireless LAN. A wireless LAN router/access point is recommended...unstable. Before transferring to a third party or disposal, be able to initialize the wireless LAN settings. Confirm the settings. See the operation manual of the WPS button function may not be sure to establish a connection. WPS PIN code: Sets up the connection by entering an ...

Operation Manual
Page 84
If there are displayed for the IP. Using the Internet Internet Setup (Continue) IP Setup You can make adjustments manually for each setting. Input the IP address by following the on-screen instructions. Check that numbers are any settings without numbers, specify the numbers by using remote control buttons 0-9. ENG 8-4
If there are displayed for the IP. Using the Internet Internet Setup (Continue) IP Setup You can make adjustments manually for each setting. Input the IP address by following the on-screen instructions. Check that numbers are any settings without numbers, specify the numbers by using remote control buttons 0-9. ENG 8-4

Operation Manual
Page 95
... function on the Miracast device and connect to the TV. (The TV screen changes according to the behavior of the Miracast-compatible device, check the manual for that device. Using the Miracast devices Miracast devices When you connect a device such as a Miracast-compatible smartphone or tablet to this TV, you must...
... function on the Miracast device and connect to the TV. (The TV screen changes according to the behavior of the Miracast-compatible device, check the manual for that device. Using the Miracast devices Miracast devices When you connect a device such as a Miracast-compatible smartphone or tablet to this TV, you must...
Operation Manual
Page 97
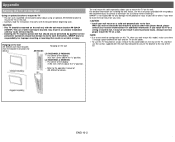
... details.) Hanging on the wall AN-52AG4 LC-70LE660U/LC-70C6600U The center of the display: 3/32 inch (2mm) above the "c" position. Refer to mount the TV on the wall. The wall mount kit (sold separately) allows you to the operation manual of AN-52AG4 for additional information. ENG 10...improper mounting or mounting that come with the product. Always have two people mount the TV on a ceiling or slanted wall, it . SHARP bears no responsibility for the cables. For detailed information on installing the wall mount, see the instructions provided with the bracket before beginning work...
... details.) Hanging on the wall AN-52AG4 LC-70LE660U/LC-70C6600U The center of the display: 3/32 inch (2mm) above the "c" position. Refer to mount the TV on the wall. The wall mount kit (sold separately) allows you to the operation manual of AN-52AG4 for additional information. ENG 10...improper mounting or mounting that come with the product. Always have two people mount the TV on a ceiling or slanted wall, it . SHARP bears no responsibility for the cables. For detailed information on installing the wall mount, see the instructions provided with the bracket before beginning work...


