Samsung UN55D6050 Research
Related Manual Pages


Related Videos

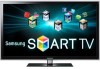
SAMSUNG UN55D6050 55? 1080P 120HZ SMART LED $1189.99
Duration: 1:51
Total Views: 2,123
Duration: 1:51
Total Views: 2,123
Samsung 55po UN55D6050 (anomalie) SmartTv / AubaineTV.com
Duration: 1:08
Total Views: 125
Duration: 1:08
Total Views: 125
Similar Questions

Manual Please. How To Set Up Directv On This?
just got this tv and dont know how to hook it up to directv and my blue-ray.
just got this tv and dont know how to hook it up to directv and my blue-ray.
(Posted by whittlegirls 6 years ago)

How Do I Remove The Base So I Can Mount The Tv On The Wall
(Posted by scottraugh 8 years ago)

What Are The Best Settings For Samsung Model Un55d6050
(Posted by pewpejo 10 years ago)

What Is The Automotion Plus Best Setting For The Samsung Un55d6050
(Posted by Jokainep 10 years ago)

Related Terms
The following terms were also used when searching for Samsung UN55D6050 Research:- model un55d6050
- review samsung un55d6050
- review un55d6050
- samsun un55d6050
- samsung model un55d6050
- samsung un55d6000
- samsung un55d6050
- samsung un55d6050 55
- samsung un55d6050 55-inch led tv
- samsung un55d6050 amazon
- samsung un55d6050 amazon instant video
- samsung un55d6050 amazon prime
- samsung un55d6050 audio out
- samsung un55d6050 av cable
- samsung un55d6050 best buy
- samsung un55d6050 best picture settings
- samsung un55d6050 best price
- samsung un55d6050 bluetooth
- samsung un55d6050 calibration
- samsung un55d6050 calibration settings
- samsung un55d6050 canada
- samsung un55d6050 cnet
- samsung un55d6050 connector board
- samsung un55d6050 connectors
- samsung un55d6050 dead
- samsung un55d6050 factory reset
- samsung un55d6050 firmware
- samsung un55d6050 firmware update
- samsung un55d6050 forum
- samsung un55d6050 hdtvs for sale
- samsung un55d6050 lcd tv review
- samsung un55d6050 led
- samsung un55d6050 led hdtv
- samsung un55d6050 led tv
- samsung un55d6050 led tv reviews
- samsung un55d6050 led tv screen flashing
- samsung un55d6050 manual
- samsung un55d6050 manual pdf
- samsung un55d6050 parts
- samsung un55d6050 photos
- samsung un55d6050 picture settings
- samsung un55d6050 power supply
- samsung un55d6050 price
- samsung un55d6050 prices
- samsung un55d6050 problems
- samsung un55d6050 rating
- samsung un55d6050 remote
- samsung un55d6050 review
- samsung un55d6050 reviews
- samsung un55d6050 settings
- samsung un55d6050 side view
- samsung un55d6050 smart tv
- samsung un55d6050 specification
- samsung un55d6050 specifications
- samsung un55d6050 specs
- samsung un55d6050 tv
- samsung un55d6050 tv canada
- samsung un55d6050 user guide
- samsung un55d6050 user manual
- samsung un55d6050 wall mount
- samsung un55d6050 web browser
- samsung un55d6050 won't turn on
- samsung un55d6050tf manual
- samsung un55d6050tf price
- samsung un55d6050tf prices
- samsung un55d6050tf tv
- un55d6050
- un55d6050 3d
- un55d6050 55
- un55d6050 55 led tv
- un55d6050 55-inch led tv
- un55d6050 amazon
- un55d6050 amazon instant video
- un55d6050 amazon prime
- un55d6050 amazon video
- un55d6050 audio out
- un55d6050 av cable
- un55d6050 best buy
- un55d6050 best color settings
- un55d6050 best picture settings
- un55d6050 best price
- un55d6050 bluetooth
- un55d6050 buzzing
- un55d6050 calibration
- un55d6050 calibration settings
- un55d6050 canada
- un55d6050 cnet
- un55d6050 color settings
- un55d6050 connector board
- un55d6050 connectors
- un55d6050 dead
- un55d6050 factory reset
- un55d6050 firmware
- un55d6050 firmware update
- un55d6050 for sale
- un55d6050 forum
- un55d6050 hdtvs for sale
- un55d6050 lcd tv
- un55d6050 lcd tv review
- un55d6050 led
- un55d6050 led hdtv
- un55d6050 led tv
- un55d6050 led tv reviews
- un55d6050 led tv screen flashing
- un55d6050 manual
- un55d6050 manual pdf
- un55d6050 netflix app update
- un55d6050 parts
- un55d6050 photos
- un55d6050 picture settings
- un55d6050 power consumption
- un55d6050 power supply
- un55d6050 price
- un55d6050 prices
- un55d6050 problems
- un55d6050 rating
- un55d6050 remote
- un55d6050 review
- un55d6050 review cnet
- un55d6050 reviews
- un55d6050 sale
- un55d6050 samsung
- un55d6050 samsung manual
- un55d6050 samsung review
- un55d6050 samsung tv
- un55d6050 settings
- un55d6050 side view
- un55d6050 smart tv
- un55d6050 specification
- un55d6050 specifications
- un55d6050 specs
- un55d6050 stand
- un55d6050 tv
- un55d6050 tv canada
- un55d6050 user guide
- un55d6050 user manual
- un55d6050 vibration
- un55d6050 wall mount
- un55d6050 web browser
- un55d6050 won't turn on
- un55d6050tf manual
- un55d6050tf price
- un55d6050tf prices
- un55d6050tf tv