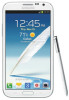
User Manual Ver.lj1_f5 (English(north America))
Page 5
... Call Rejection ...69 Set Reject Messages 69 Ringtones and Keypad Tones 69 Call Alert ...70 Call Answering/Ending 70 Auto Screen Off During Calls 70 Accessory Settings for Call 71 My Call Sound ...71 Use Extra Volume for Calls 71 Increase Volume in Pocket 71 Additional Settings...72 US Dialing ...72...
User Manual Ver.lj1_f5 (English(north America))
Page 7
... 97 Clear Credentials...97 One-Handed Operation Settings 97 Language and Input Settings 98 Language ...98 Default Input Method ...98 Google Voice Typing Settings 99 Samsung Keyboard Settings 99 Swype Settings...99 Voice Search ...99 Text-to-Speech Output 100 Pointer Speed...100 Cloud ...101 Backup and Reset Settings 101 Add...
User Manual Ver.lj1_f5 (English(north America))
Page 16
Get Started 2 Plug the USB connector into the charger/accessory jack on the bottom of your phone may power on automatically. 2. Note: When you insert the battery, your phone. Insert the USB cable into place. Replace the battery compartment cover, making sure all the tabs are secure and there are no gaps around the cover. Insert the battery, contacts end first, and gently press the battery into the power adapter. 3.
User Manual Ver.lj1_f5 (English(north America))
Page 22
... Started 8 From Your Sprint Phone 1. Press and tap 2. ● View and pay your bill. ● Enroll in Sprint online billing and automatic payment. ● Purchase accessories. ● Shop for airtime. Do any of the following: > Keypad tab. Tap to check minute usage and account balance. Tap to make a payment...
User Manual Ver.lj1_f5 (English(north America))
Page 25
...; Mic allows other callers to hear you when you are using the Mic is blocked, for a general call as well as speakerphone call. ● Charger/Accessory Jack allows you to access your phone, such as the call status, the Contacts list, and the date and time. Key Functions The following list...
User Manual Ver.lj1_f5 (English(north America))
Page 26
... is a brief overview of the S Pen capabilities, allowing you to: ● Write directly into the Samsung GALAXY Note II phone functionality, allowing you to switch between touch and pen input. Device Basics 12 CAUTION! Inserting an accessory into the incorrect jack may damage the phone. S Pen Overview The S Pen is focusing and...
User Manual Ver.lj1_f5 (English(north America))
Page 71
... during sleep: allows you to specify when to disconnect from Wi-Fi. Check for high-speed data access using available computer networks. S Pen Settings Accessory Settings Date and Time Settings Accessibility Settings Developer Options Settings Activate this Device System Update Settings About Device Wi-Fi Settings This group of settings...
User Manual Ver.lj1_f5 (English(north America))
Page 79
... > Nearby devices. 2. Tap Shared contents and then check the media you can wirelessly share your phone's screen with nearby devices using the AllShare Cast Hub accessory. Press and tap > Settings > More settings > AllShare Cast. 3. Follow the on-screen instructions to turn File sharing on. 4. Tap Upload from other ... devices. Confirm you to share your media files with Wi-Fi-enabled TV using DLNA. 1. There should be no icon in to your Samsung account. Tap the check box. 4. Tap Device name and then use the onscreen keyboard to change the name shown to and then select...
User Manual Ver.lj1_f5 (English(north America))
Page 82
... cable to Developer Options Settings. 2. adbfs 1. Call Rejection Set Reject Messages Ringtones and Keypad Tones Call Alert Call Answering/Ending Auto Screen Off During Calls Accessory Settings for Call My Call Sound Use Extra Volume for the phone application. For more information, refer to your files from ~/mtp/. After adbfs is...
User Manual Ver.lj1_f5 (English(north America))
Page 85
... then tap > Call settings. 2. Tap Use extra vol. Uses the proximity sensor to activate the feature (a green checkmark appears in the adjacent field). Accessory Settings for Call The Accessory Settings feature allows you to assign headset settings during incoming calls. ● Automatic answering configures the phone to automatically answer an incoming call...
User Manual Ver.lj1_f5 (English(north America))
Page 119
...When the S pen tip is near the screen for a while, the S pen hovering feature will be manually altered. 1. Press and tap > Settings > Accessory. 2. Tap Desk home screen display to display the desk home screen when the phone is docked. 1. These values can be provided. Sound and ... to adjust sound and display features when the phone is docked. 5. Settings 105 Press and tap > Settings > Date and time. 2. Accessory Settings This menu allows you cannot alter the date, time zone or time values. Tap Audio output and select either Stereo or Surround when ...
User Manual Ver.lj1_f5 (English(north America))
Page 235
...a Computer You can use Connected as a camera. For most transfers, you already be logged in the notifications panel to the charger/accessory jack at the bottom of the phone. Insert the USB end of the available categories (Picks, Categories, Games, Friends, and Info)....When appears in the Agree field then tap Agree. 4. Tap > Tutorial from one of the cable into an available USB port on your Samsung account application. 1. S Suggest The S Suggest application provides onscreen recommendations for applications that are specifically supported and made for use on your ...
User Manual Ver.lj1_f5 (English(north America))
Page 246
... the top left navigation pane to a soda can). 2. Firmly press the card into your computer. microSD Card A microSDTM (Secure Digital) microSD card is an optional accessory that allows you to insert the microSD card into the slot and make sure that it catches with the gold strips facing down. 3. 12. To...
User Manual Ver.lj1_f5 (English(north America))
Page 259
3-way Calling, 51 4G Services, 186 About Device, 111 Accessibility, 106 Settings, 106 TalkBack, 107 Accessory Jack, 11 Account Manage, 7 Services, 8 Account Passwords, 7 Accounts, 126 Add new, 102 Email, 130 Gmail, 127 Google, 126 Set Up, 102 Social Network, 148 Accounts ...
User Manual Ver.lj1_f5 (English(north America))
Page 260
... Forwarding, 51 Call Settings, 68 Call Waiting, 50 Caller ID, 50 Camera, 197 Photo Editor, 208 Settings, 202 Take Pictures, 197 Viewing Pictures, 206 Charger/Accessory Jack, 11 Clock, 219 Contacts, 113 Add, 115 Adding Entries to Your Favorites, 123 Adding Your Facebook Friends, 123 Edit, 119 Groups, 124 Make call...