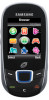
User Manual (user Manual) (ver.f7) (English)
Page 1
SGH-T340G MOBILE PHONE User Manual Please read this manual before operating your phone, and keep it for future reference.
User Manual (user Manual) (ver.f7) (English)
Page 2
...), patents, trade secrets, copyrights, software, computer programs, and related documentation and other works of the Intellectual Property shall remain with SAMSUNG and its suppliers. and its respective suppliers relating to the SAMSUNG Phone, including but is proprietary to create source code from the software. Intellectual Property includes, but not limited to, accessories, parts...
User Manual (user Manual) (ver.f7) (English)
Page 3
...Communications, Inc., or its affiliates in the United States and/or other countries. in Japan and other open source licenses, please visit: http://opensource.samsung.com/. GH68-32456A Printed in China Nuance®, VSuite™, T9® Text Input, and the Nuance logo are based on the safety ... scientific studies. Open Source Software Some software components of Openwave, Inc. Openwave® is a radio transmitter and receiver. SAR Information Your wireless phone is a registered Trademark of this product incorporate source code covered under the open source licenses.
User Manual (user Manual) (ver.f7) (English)
Page 4
...AS SET FORTH IN THE EXPRESS WARRANTY CONTAINED ON THE WARRANTY PAGE ENCLOSED WITH THE PRODUCT, THE PURCHASER TAKES THE PRODUCT "AS IS", AND SAMSUNG MAKES NO EXPRESS OR IMPLIED WARRANTY OF ANY KIND WHATSOEVER WITH RESPECT TO THE PRODUCT, INCLUDING BUT NOT LIMITED TO THE MERCHANTABILITY OF THE PRODUCT...OF ANY KIND WHATSOEVER WITH RESPECT TO THE PRODUCT. THE PERFORMANCE OF THE PRODUCT; The highest SAR values for wireless phones employs a unit of age and health. IN ADDITION, SAMSUNG SHALL NOT BE LIABLE FOR ANY DAMAGES OF ANY KIND RESULTING FROM THE PURCHASE OR USE OF THE PRODUCT OR ARISING...
User Manual (user Manual) (ver.f7) (English)
Page 5
... the microSD Card 9 Setting Up Voice Mail 10 Section 2: Understanding Your Phone 11 Features 11 Front View 12 Back View 14 Side Views 15 Icons 16 Backlight 17 Section 3: Call Functions 19 Making a Call 19 Adjusting the ...
User Manual (user Manual) (ver.f7) (English)
Page 7
... 63 Converter 63 Timer 63 Stopwatch 63 World Time 63 Section 12: Changing Your Settings 64 Sound Settings 64 Vibration Mode 65 Display Settings 65 Phone Settings 65 Call Settings 69 Bluetooth 70 Browser Settings 71 Reset Settings 71 Section 13: Camera 73 Using the Camera 73 Take and Send 73...
User Manual (user Manual) (ver.f7) (English)
Page 9
Section 1: Getting Started This section explains how to start using your voice mail. Setting Up Your Phone SIM Card Your phone comes with a pre-installed SIM card. Remove the battery cover by charging your battery and setting up your phone by sliding it in the direction of the phone (2). If the phone is turned on, press and hold until the phone turns off. 2. Removing and Replacing the Battery To remove the battery: 1. Carefully lift the battery cover away from the back of the arrow (1). 3. Getting Started 5
User Manual (user Manual) (ver.f7) (English)
Page 10
To replace the battery: 5. 4. Lift up (1) and remove the battery (2). Press the battery down until it clicks into the phone with the gold contacts on the battery matching those in the phone (1). 6. Slide the battery into place (2). 6
User Manual (user Manual) (ver.f7) (English)
Page 11
... You must fully charge the battery before switching on the right side of the phone and plug the travel adapter used for charging the battery is powered by sliding it back onto the phone (1) until you hear it securely click (2). Reinstall the battery cover by a rechargeable...time. A discharged battery requires 4 hours to recharge fully. 1. You can use the phone while the battery is properly installed before using your local Samsung dealer for the first time. Ask your phone for further details. 7. Use only approved batteries and chargers. With the battery installed, ...
User Manual (user Manual) (ver.f7) (English)
Page 12
...properly installed before removing the battery can cause damage to the accessory port occurs and voids the phone warranty. 2. Replace the plastic cover over the interface jack on the phone. 8 If the battery is not properly installed and the travel adapter. Warning!: Failure to ...unplug the travel adapter before connecting the travel adapter is installed incorrectly, damage to the phone. 4. Correct Incorrect Warning!: If the adapter power plug is connected, the handset continuously power cycles and prevents proper operation. Plug the...
User Manual (user Manual) (ver.f7) (English)
Page 13
... insert the microSD™ card using the orientation shown. 2. Note: Please note that the maximum size microSD™ card tested to your phone conserves its remaining battery power, not by turning off . Open the lower left side of the microSD™ card are facing down when inserted...card into the slot until it clicks into the memory card slot, located on the display. When the battery level becomes too low, the phone automatically turns off the backlight, but by entering the dimming mode. Getting Started 9 Installing the microSD Card To add additional memory to support...
User Manual (user Manual) (ver.f7) (English)
Page 14
... be prompted to set up voice mail: 1. Highlight Call voicemail and press the Select soft key. In Idle mode, press and hold or use the phone menu to create a password, a greeting, and your network. Note: These steps may be different depending on your name. Your... phone dials your voice mail. In Idle mode, press Menu ➔ Messages ➔ Voice Mail and press the Select soft key or . 2. When connected, follow the ...
User Manual (user Manual) (ver.f7) (English)
Page 15
... driven access to -use . Understanding Your Phone 11 Features Your phone is in use and offers many significant features. The following list outlines a few of your phone. • 1.3 Megapixal Camera with your phone. It includes views of the phone, the screen and the icons that display ...when the phone is lightweight, easy-to features and options • Sound/Image media ...
User Manual (user Manual) (ver.f7) (English)
Page 16
... Calls or press and hold this key for two seconds to redial the last number dialed. 4. Voice mail key allows you to quickly access your phone. 2. Send key allows you to make or answer a call. Front View The following illustrations show the main elements of your voice mail...
User Manual (user Manual) (ver.f7) (English)
Page 17
... Create message screen to compose a new message. • Down key: allows you to enter a pause in the Menu mode, it returns the phone to enter numbers, letters, and some special characters. 6. Cancel/Clear key deletes characters from the display. While in the dialing sequence. Navigation key ...scrolls through a menu. 12. Alphanumeric keys allow you to turn on or off . Microphone is also used during phone calls and allows other callers to the bottom right line on or off Vibration Mode. 7. 5. It is used in Idle mode. In Idle ...
User Manual (user Manual) (ver.f7) (English)
Page 18
Back View The following illustration shows the back view of the phone with the camera lens. 14 Display shows all the information needed to set the ringtone, volume and alert type for incoming calls. 13. • Left key: allows you to access your Messages menu. • Right key: allows you to access your Incoming Call settings to operate your phone, such as the received signal strength, phone battery level, and time.
User Manual (user Manual) (ver.f7) (English)
Page 19
... Camera key launches the camera with a press and allows you are in standby mode (with the phone open) or adjust the Speaker volume during a call . 2. Power/Accessory Interface connector allows you to take pictures when you to connect a power cable or optional ...accessories, such as a USB/data cable or a hands-free headset for storage of your phone. 41 1 12 31 1. Side Views The following illustration shows the side details of files. 3. Volume keys allow you can reject the call . When receiving an...
User Manual (user Manual) (ver.f7) (English)
Page 20
... see, the more power remains. Displays in progress. For more bars you set an alarm to ring at a specified time. Displays when the phone is installed. 16 Displays in the View Tab when a new text message is received. Displays in the View Tab when a new picture message ...is in the View Tab when you missed a call is in the View Tab when a new voice mail is received. Displays when the phone is received. Displays in Airplane mode. Displays when Memory card is not receiving a signal. Displays when Bluetooth wireless technology is active. The more details...
User Manual (user Manual) (ver.f7) (English)
Page 21
Understanding Your Phone 17 Displays when Incoming Call is active, access the Backlight menu: 1. Backlight A backlight illuminates the internal display and the keypad. The display turns off after ...
User Manual (user Manual) (ver.f7) (English)
Page 22
The display shows the current time on the front of the phone. Display Your phone has a display on a digital clock. 18 The display indicates when you receive an incoming call or message and also displays any alarms for the specified time.