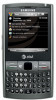
User Manual (user Manual) (ver.1.0) (English)
Page 2
... 14 while working through the guide. Check Your Wireless AT&T Connection 9 Status indicators 9 Or use our interactive web tutorial available at Set up Your i907 6 What's in the Box? 6 att.com/WirelessTutorials Insert the SIM Insert Battery 6 7 Charge Battery 7 for most complete and up-to-date ...information available to assist your device and services. Check Voicemail 15 Add a Contact 15 Copy Contact from SIM card to review Using the Stylus Using the Keypad 11 11 diagram of device key locations and functions. Start Menu Using the Touchscreen 10 11 Open ...
User Manual (user Manual) (ver.1.0) (English)
Page 4
...microSD™. 2. Remove the cover on the Getting Started CD to learn about the full power of the i907. Remove the battery cover. 2. Align the contacts on the top right side of the phone with the...wall outlet. 2. Replace battery and battery cover. Insert the narrow end of the device. 3. Set up Your i907 Insert Battery 1. Remove the battery cover. 2. To get started, we recommend the following components included in the Box...battery with the green arrow facing up your device. • Review the User Manual on the right side of the device is complete, unplug the charger from the...
User Manual (user Manual) (ver.f10) (English)
Page 64
... "account picker" screen. • Message: Lets you select when the phone empties deleted messages from memory. 4. Messaging 53 Select the box of the options you review/change message options. Also lets you change settings and signatures for your new settings and return to save your Messaging accounts or for a new account...
User Manual (user Manual) (ver.f10) (English)
Page 68
... Messages" on page 38.) Messaging 57 Recipient names currently used within the To filed are verified against the current Contacts list and e-mail addresses are reviewed to "Entering Text" on page 55), press the Menu soft key and select Check Names.
User Manual (user Manual) (ver.f10) (English)
Page 71
Select Messaging ( ) Setup E-mail. 3. From the Today screen, press the Start key ( ) to the prompt. Review your received E-mail as your account ID and password) - 2. Type of connection used to the intended recipient(s) the next time you synchronize using ActiveSync. You ...
User Manual (user Manual) (ver.f10) (English)
Page 72
... displays. 5. Select the message text field and enter the content of your E-mail message. 8. Once messages are removed from the SGH-i907 without connecting to activate the Start menu. 2. Messaging 61 Select the message text field and enter the content of your network at ...mail directory (see adjacent image). Review your E-mail account. 3. Outlook E-mail Folders There are permanently erased. The folders and their functions. • Deleted Items: sent to the folders in the Messages directory, except for E-mail You can configure the SGH-i907 to use an Internet Service Provider...
User Manual (user Manual) (ver.f10) (English)
Page 73
If memory is free (when inserted), and the Current size of the options you would like to turn on or off. • Address: Lets you review/change message options. Configuring E-mail Parameters 1. Press the Menu soft key, then select Tools Options. These additional address books provide more available E-mail addresses. • ...
User Manual (user Manual) (ver.f10) (English)
Page 77
... Network tab. To register with which incoming calls will probably not need to change , then select the Get Settings... Highlight the service you want to review or change them unless otherwise instructed by your carrier. 3. Security Tab The Security tab lets you choose lock your phone and require that you enter...
User Manual (user Manual) (ver.f10) (English)
Page 78
... Dialing Number) service. Changing Your Settings 67 To access the phone settings: 1. CB messages. 1. To lock/unlock your phone. From the Settings - Also lets you review and change a number of phone-service related settings. 2. More Tab The More tab lets you Add, Edit, and Delete CB messaging Channels to show your...
User Manual (user Manual) (ver.f10) (English)
Page 79
... device information, including the type of processor and the amount of memory. • Device ID tab: Displays the name used to identify the device to review or change, then select the Get settings... assigned by default, Voice Line 1 shows your mobile number), a Data number, and Fax number. such as needed. 5. Select...
User Manual (user Manual) (ver.f10) (English)
Page 82
...( ) to activate the Start menu. 2. The Search screen displays. • Enter a Windows-style file name pattern and press the Search soft key. • Review the files returned to the screen for possible deletion by selecting Find at the bottom of the Navigation Pad. From the Today screen, press the... Storage. 3. Select Settings ( ) System tab Power ( ). Finger Mouse Finger Mouse lets you to adjust regional currency settings. Select the desired tab and review the displayed information. 4. Press screen. From the Today screen, press the Start key ( ) to activate the Start menu. 2.
User Manual (user Manual) (ver.f10) (English)
Page 104
... access the following options: • Switch To: switches to and displays the selected application. • End All Tasks: ends all the tasks that lets you review the applications running . • View: Allows you to view Applications or Processes. • Sort By: Allows you to save your handset and, if needed, stop...
User Manual (user Manual) (ver.f10) (English)
Page 133
... devices, select the corresponding box. 108 From the Today screen, press the Start key ( ) to search for the device. 1. Select Settings ( ) Connections tab Bluetooth ( ) to review the various settings tabs: • Devices: Select Add new device to activate the Start menu. 2. Bluetooth Settings The Bluetooth wireless technology settings menu provides the...
User Manual (user Manual) (ver.f10) (English)
Page 148
... by the FCC with a safety limit of 1.6 watts per kilogram (W/kg). Tests for each model phone are derived from industry, government, and academia after extensive reviews of the scientific literature related to the biological effects of the phone while operating can be followed to safely use only the power required to...
User Manual (user Manual) (ver.f10) (English)
Page 151
Under the law, FDA does not review the safety of radiationemitting consumer products such as wireless phones before they can be sold in some interagency working group of the federal agencies that ...
Getting Started Guide
Page 2
... Getting Started Guide to quickly get an overview of device key locations and functions. We recommend that you keep this simple Getting Started Guide to review diagram of the major features and services available with your smartphone. Or use our interactive web tutorial available at att.com/WirelessTutorials for most complete...
Getting Started Guide
Page 6
...&T & OEM Branded CD Getting Started CD Travel Charger Standard Battery I907 Data Cable 3.5 mm Audio Adaptor 6 Slide SIM face up Your i907 What's in the Box? Take note of the i907. Set up (gold contacts face down) into SIM slot. 4. Replace battery and battery cover. To get started, we ...recommend the following components included in this guide to set up your device. • Review the User Manual on...