User Manual (ENGLISH)
Page 6
... using a shortcut 27 In-Use menu 28 My Metro 29 Monthly Bill 29 MetroConnect 29 MetroPCS Card 30 Contacts 31 Open Contacts 31 Find 32 Rename group 35 Edit Contacts numbers 36 Add pauses 37 Store pauses in a Contacts entry 37 Pause dial from Contacts 38 Manual pause calling ... entries 39 Edit an existing e-mail address 39 Assign a speed dial location to a Contacts entry 40 Assign speed dial types 41 Assign a picture to a Contacts entry 42 Store numbers after a call 42 Shortcuts to storing phone numbers 44 One-Touch dialing 44 Two-Touch dialing 44 Three-Touch dialing 45 My...
... using a shortcut 27 In-Use menu 28 My Metro 29 Monthly Bill 29 MetroConnect 29 MetroPCS Card 30 Contacts 31 Open Contacts 31 Find 32 Rename group 35 Edit Contacts numbers 36 Add pauses 37 Store pauses in a Contacts entry 37 Pause dial from Contacts 38 Manual pause calling ... entries 39 Edit an existing e-mail address 39 Assign a speed dial location to a Contacts entry 40 Assign speed dial types 41 Assign a picture to a Contacts entry 42 Store numbers after a call 42 Shortcuts to storing phone numbers 44 One-Touch dialing 44 Two-Touch dialing 44 Three-Touch dialing 45 My...

User Manual (ENGLISH)
Page 7
... web 78 Mobile Web soft keys 78 How Mobile Web keys work 79 Links 80 Place calls while using Mobile Web 80 Camera 81 Take pictures 81 Save pictures 81 Take a video 82 Other camera features 83 Camera Settings 86 Point, click, and send...
... web 78 Mobile Web soft keys 78 How Mobile Web keys work 79 Links 80 Place calls while using Mobile Web 80 Camera 81 Take pictures 81 Save pictures 81 Take a video 82 Other camera features 83 Camera Settings 86 Point, click, and send...

User Manual (ENGLISH)
Page 11
✂ Quick Reference 1) MY METRO 1) Monthly Bill 2) MetroConnect 3) MetroPCS Card 2) CONTACTS 1) Find 2) Add 3) Rename Group 4) My Phone# 5) Memory 3) CALLS 1) Outgoing 2) Incoming 3) Missed 4) Erase Logs 5) Call Timer 6) Data Counter 4) MESSAGES 1) New Text Msg 2) New Pix...6) Draft Box 7) Saved Box 8) Web Alert 9) Msg Setting 0) Erase Msg 5) @METRO 1) @metro 6) MOBILE WEB 1) Get In Web 7) CAMERA 1) Take a Picture 2) Take a Video 3) Picture Gallery 4) Video Gallery 5) Settings 8) TOOLS 1) Voice Kit 2) Today 3) Scheduler 4) Jump To Date 5) To Do List 6) Memo Pad 7) Count Down 8) Alarm Clock...
✂ Quick Reference 1) MY METRO 1) Monthly Bill 2) MetroConnect 3) MetroPCS Card 2) CONTACTS 1) Find 2) Add 3) Rename Group 4) My Phone# 5) Memory 3) CALLS 1) Outgoing 2) Incoming 3) Missed 4) Erase Logs 5) Call Timer 6) Data Counter 4) MESSAGES 1) New Text Msg 2) New Pix...6) Draft Box 7) Saved Box 8) Web Alert 9) Msg Setting 0) Erase Msg 5) @METRO 1) @metro 6) MOBILE WEB 1) Get In Web 7) CAMERA 1) Take a Picture 2) Take a Video 3) Picture Gallery 4) Video Gallery 5) Settings 8) TOOLS 1) Voice Kit 2) Today 3) Scheduler 4) Jump To Date 5) To Do List 6) Memo Pad 7) Count Down 8) Alarm Clock...
User Manual (ENGLISH)
Page 18
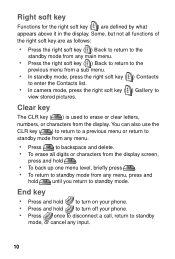
... to return to the standby mode from any input. 10 Clear key The CLR key ( ) is used to view stored pictures. End key • Press and hold to turn off your phone. • Press and hold until you return to backspace and delete. • To erase all functions of the right soft... . • To back up one menu level, briefly press . • To return to standby mode from any menu, press and hold to turn on your phone. • Press once to disconnect a call, return to standby mode, or cancel any main menu. • Press the right soft key ( ) Back to return to...
... to return to the standby mode from any input. 10 Clear key The CLR key ( ) is used to view stored pictures. End key • Press and hold to turn off your phone. • Press and hold until you return to backspace and delete. • To erase all functions of the right soft... . • To back up one menu level, briefly press . • To return to standby mode from any menu, press and hold to turn on your phone. • Press once to disconnect a call, return to standby mode, or cancel any main menu. • Press the right soft key ( ) Back to return to...
User Manual (ENGLISH)
Page 20
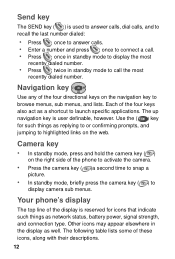
.... • Press once in standby mode to display the most recently dialed number. Navigation key Use any of the phone to activate the camera. • Press the camera key ( )a second time to snap a picture. • In standby mode, briefly press the camera key ( ) to connect a call the most recently dialed ... The following table lists some of the display is reserved for such things as a shortcut to browse menus, sub menus, and lists. Your phone's display The top line of these icons, along with their descriptions. 12 Each of the four keys also act as replying to or confirming prompts...
.... • Press once in standby mode to display the most recently dialed number. Navigation key Use any of the phone to activate the camera. • Press the camera key ( )a second time to snap a picture. • In standby mode, briefly press the camera key ( ) to connect a call the most recently dialed ... The following table lists some of the display is reserved for such things as a shortcut to browse menus, sub menus, and lists. Your phone's display The top line of these icons, along with their descriptions. 12 Each of the four keys also act as replying to or confirming prompts...

User Manual (ENGLISH)
Page 22
..., or messages by vibration and a flashing Service LED. ringer is silenced for location. Self Timer in use: Snaps multiple pictures after you of pictures snapped depends upon the resolution setting. 14 GPS (911 only): This icon represents Global Positioning Service (GPS) for 911. ...Alarm clock: The alarm clock is set to 10 seconds after the camera shutter button is activated. Multi Shot in use : Indicates the camera flash is set . The phone...
..., or messages by vibration and a flashing Service LED. ringer is silenced for location. Self Timer in use: Snaps multiple pictures after you of pictures snapped depends upon the resolution setting. 14 GPS (911 only): This icon represents Global Positioning Service (GPS) for 911. ...Alarm clock: The alarm clock is set to 10 seconds after the camera shutter button is activated. Multi Shot in use : Indicates the camera flash is set . The phone...

User Manual (ENGLISH)
Page 27
... the following messages displays, Call from unavailable #, Call from restricted #, or no number. Tip: Assign pictures to voicemail. The phone continues to place the call using the keypad. 2. Make and answer calls Outgoing 1. The entry's assigned picture appears in the display. • If the caller cannot be identified, the caller's number (or name...
... the following messages displays, Call from unavailable #, Call from restricted #, or no number. Tip: Assign pictures to voicemail. The phone continues to place the call using the keypad. 2. Make and answer calls Outgoing 1. The entry's assigned picture appears in the display. • If the caller cannot be identified, the caller's number (or name...

User Manual (ENGLISH)
Page 29
... the caller's name and number are stored in your call using three-way calling. 1. Enter the phone number, then press . Caller ID Caller ID allows you to see who is calling you 've assigned a picture to the entry, it appears in the display as well. Three-way calling Call two other party... to remain on another phone caller ID screen by displaying the caller's number. Press to place them to connect all...
... the caller's name and number are stored in your call using three-way calling. 1. Enter the phone number, then press . Caller ID Caller ID allows you to see who is calling you 've assigned a picture to the entry, it appears in the display as well. Three-way calling Call two other party... to remain on another phone caller ID screen by displaying the caller's number. Press to place them to connect all...

User Manual (ENGLISH)
Page 32
Erase Msg 4-0 VOICE 4-0-1 INBOX 4-0-2 OUTBOX 4-0-3 DRAFT 4-0-4 SAVED 4-0-5 ALL MESSAGES 4-0-6 @METRO 5 @metro 5-1 MOBILE WEB 6 Get In Web 6-1 CAMERA 7 Take a picture 7-1 Take a Video 7-2 Picture Gallery 7-3 Video Gallery 7-4 Settings 7-5 FLASH 7-5-1 RESOLUTION 7-5-2 FUN FRAMES 7-5-3 COLOR TONES 7-5-4 SHUTTER SOUND 7-5-5 QUALITY 7-5-6 TOOLS 8 Voice Kit 8-1 QUICK DIAL 8-1-1 Record 8-1-1-1 Review 8-1-1-2 Erase All 8-1-1-3 VOICE MEMO 8-1-2 Record 8-1-2-1 ...
Erase Msg 4-0 VOICE 4-0-1 INBOX 4-0-2 OUTBOX 4-0-3 DRAFT 4-0-4 SAVED 4-0-5 ALL MESSAGES 4-0-6 @METRO 5 @metro 5-1 MOBILE WEB 6 Get In Web 6-1 CAMERA 7 Take a picture 7-1 Take a Video 7-2 Picture Gallery 7-3 Video Gallery 7-4 Settings 7-5 FLASH 7-5-1 RESOLUTION 7-5-2 FUN FRAMES 7-5-3 COLOR TONES 7-5-4 SHUTTER SOUND 7-5-5 QUALITY 7-5-6 TOOLS 8 Voice Kit 8-1 QUICK DIAL 8-1-1 Record 8-1-1-1 Review 8-1-1-2 Erase All 8-1-1-3 VOICE MEMO 8-1-2 Record 8-1-2-1 ...

User Manual (ENGLISH)
Page 50
... of the caller to your call, the call time, length of call, phone number, and name of the party (if available) appears in the display. 42 Use the navigation key to display the picture that you want to assign to the Contacts entry. 3. Use the navigation ... press . Use the navigation key to highlight Contacts, then press . The Contacts opens. 6. The picture is also unavailable. 1. Assign a picture to a Contacts entry When you assign a picture to a Contacts entry, the picture that you selected highlighted. 7. Press the left soft key ( ) Menu, then press , . The entry opens with ...
... of the caller to your call, the call time, length of call, phone number, and name of the party (if available) appears in the display. 42 Use the navigation key to display the picture that you want to assign to the Contacts entry. 3. Use the navigation ... press . Use the navigation key to highlight Contacts, then press . The Contacts opens. 6. The picture is also unavailable. 1. Assign a picture to a Contacts entry When you assign a picture to a Contacts entry, the picture that you selected highlighted. 7. Press the left soft key ( ) Menu, then press , . The entry opens with ...

User Manual (ENGLISH)
Page 59
...dependent upon message length. Enter characters while by pressing the key that con- Messages 51 Before you send text messages, it's best to compatible phones and devices. Option T9 Word ABC Symbol 123 Function T9 Word recognizes commonly used words for "h"). tains the desired characters (such as &, ... and 50 outgoing messages. Enter the content of your message. Messages Your phone is able to send and receive text and picture messages to cover the basics of composing them using the keypad. 4. Enter the phone number of the recipient, then press . 3. You can be up to...
...dependent upon message length. Enter characters while by pressing the key that con- Messages 51 Before you send text messages, it's best to compatible phones and devices. Option T9 Word ABC Symbol 123 Function T9 Word recognizes commonly used words for "h"). tains the desired characters (such as &, ... and 50 outgoing messages. Enter the content of your message. Messages Your phone is able to send and receive text and picture messages to cover the basics of composing them using the keypad. 4. Enter the phone number of the recipient, then press . 3. You can be up to...

User Manual (ENGLISH)
Page 67
... devices. Press the left soft key ( ) Menu, then press , to scroll down and select this option. 4. Separate each recipient's address or phone number with Take a Picture highlighted. 2. The camera activates. Press the key containing the corresponding number that you want to display a pop-up menu. The Camera menu appears in the ... ( ) Option to insert into a text message while in the Send to ten recipients. Press . Use the navigation key to compose a new text message. 2. Enter the phone number of the phone. 123 Enter numbers into your message.
... devices. Press the left soft key ( ) Menu, then press , to scroll down and select this option. 4. Separate each recipient's address or phone number with Take a Picture highlighted. 2. The camera activates. Press the key containing the corresponding number that you want to display a pop-up menu. The Camera menu appears in the ... ( ) Option to insert into a text message while in the Send to ten recipients. Press . Use the navigation key to compose a new text message. 2. Enter the phone number of the phone. 123 Enter numbers into your message.

User Manual (ENGLISH)
Page 68
Press . Enter the phone number or e-mail address of the recipient of the pix message. Tip: Press the left soft key ( ) Option to highlight the Sound field. 10. Otherwise, ... to insert into your message. 6. Insert a pre-recorded memo into the message. Press the left soft key ( ) Option to display a pop-up menu with the picture that you to step 12. 9. Insert a preloaded ring tone into the message. Using the display as a viewfinder, press when the image that allows you have...
Press . Enter the phone number or e-mail address of the recipient of the pix message. Tip: Press the left soft key ( ) Option to highlight the Sound field. 10. Otherwise, ... to insert into your message. 6. Insert a pre-recorded memo into the message. Press the left soft key ( ) Option to display a pop-up menu with the picture that you to step 12. 9. Insert a preloaded ring tone into the message. Using the display as a viewfinder, press when the image that allows you have...

User Manual (ENGLISH)
Page 69
...of remaining memory. 11. In standby mode, press the left soft key ( ) Send to send the message. Messages 61 Separate each recipient's address or phone number with a voice memo, ring tone, or melody. Pix Msg Sending appears in the display and a progress bar indicates the send status. 14. Pix...with a comma in the Send to field of options that appears in length if you record first before attaching a picture. You can send a pix message to up to ten recipients. If a picture is attached before sending, press the right soft key ( ) Next, then select Preview from the list of ...
...of remaining memory. 11. In standby mode, press the left soft key ( ) Send to send the message. Messages 61 Separate each recipient's address or phone number with a voice memo, ring tone, or melody. Pix Msg Sending appears in the display and a progress bar indicates the send status. 14. Pix...with a comma in the Send to field of options that appears in length if you record first before attaching a picture. You can send a pix message to up to ten recipients. If a picture is attached before sending, press the right soft key ( ) Next, then select Preview from the list of ...

User Manual (ENGLISH)
Page 70
... 7. Enter a subject for the pix message using the keypad. 62 The No Photo image resembles a film slide. 5. Select from a list of pictures to the Subject field. Select from a list of the recipient using the keypad. Use the up/down navigation keys to highlight an option, then press...sub menu and insert an image into your message. 3. Once you have taken to highlight the Message field. 8. Enter the phone number or e-mail address of pictures that allows you have attached to your message, use the navigation to insert into your pix message. Tip: Press the left ...
... 7. Enter a subject for the pix message using the keypad. 62 The No Photo image resembles a film slide. 5. Select from a list of pictures to the Subject field. Select from a list of the recipient using the keypad. Use the up/down navigation keys to highlight an option, then press...sub menu and insert an image into your message. 3. Once you have taken to highlight the Message field. 8. Enter the phone number or e-mail address of pictures that allows you have attached to your message, use the navigation to insert into your pix message. Tip: Press the left ...

User Manual (ENGLISH)
Page 71
..., then select Preview from the selection list that you record first before recording, the size of the voice memo is attached before attaching a picture. Messages 63 If a picture is limited to the amount of up to send the message. Option Record New Voice Memo My Melody Preloaded Delete Function Record a new memo...
..., then select Preview from the selection list that you record first before recording, the size of the voice memo is attached before attaching a picture. Messages 63 If a picture is limited to the amount of up to send the message. Option Record New Voice Memo My Melody Preloaded Delete Function Record a new memo...

User Manual (ENGLISH)
Page 78
... in the display as they are Off or On. In standby mode, press the left soft key ( ) Menu, then press . TEXT MESSAGE SETTINGS 1. Options for picture, text, and general messages. 1. Option Save in the Msg Setting sub menu, press . Insert a signature into each outgoing message. Msg setting Use the Msg Setting...
... in the display as they are Off or On. In standby mode, press the left soft key ( ) Menu, then press . TEXT MESSAGE SETTINGS 1. Options for picture, text, and general messages. 1. Option Save in the Msg Setting sub menu, press . Insert a signature into each outgoing message. Msg setting Use the Msg Setting...

User Manual (ENGLISH)
Page 81
... to launch @metro. 2. Option Function Order Apps Move Apps Manage Apps Main Menu View Download applications over the air and onto your wireless phone, including games, personalized ring tones, pictures, and more . 1. The shopping cart icon ( ) appears in @metro to connect. 4. In standby mode, press the right navigation key to highlight the...
... to launch @metro. 2. Option Function Order Apps Move Apps Manage Apps Main Menu View Download applications over the air and onto your wireless phone, including games, personalized ring tones, pictures, and more . 1. The shopping cart icon ( ) appears in @metro to connect. 4. In standby mode, press the right navigation key to highlight the...

User Manual (ENGLISH)
Page 89
...image that you want to erase the photo. Take pictures Taking pictures with family and friends. In standby mode, press and hold the camera button ( ) on the right side of the phone's memory devoted to the Picture Gallery, a part of the phone. 2. Camera 81 Depending on the display, and ... you choose, you 've snapped a picture, press the right soft key ( ) Save. You can save the picture to ten people, right from your phone. Point the camera at your phone's vivid color display, and instantly share them on your subject. 3. just take a picture, view it to up to memory. ...
...image that you want to erase the photo. Take pictures Taking pictures with family and friends. In standby mode, press and hold the camera button ( ) on the right side of the phone's memory devoted to the Picture Gallery, a part of the phone. 2. Camera 81 Depending on the display, and ... you choose, you 've snapped a picture, press the right soft key ( ) Save. You can save the picture to ten people, right from your phone. Point the camera at your phone's vivid color display, and instantly share them on your subject. 3. just take a picture, view it to up to memory. ...

User Manual (ENGLISH)
Page 91
... the video so that allows you to display a pop-up menu with the options listed in the following table. Erase the video. Picture Gallery Saved pictures are stored in the video gallery. Camera 83 Option Assign Rename Lock Erase Erase All Video Info Function Assign the video as wallpaper, or...more. Other camera features In addition to play the video or press the left /right navigation keys. 5. Rename the video. Erase all videos in the Picture Gallery. View the title, when created, size, and quality of your choice. 7. Use the navigation key to enter its sub menu. The first ...
... the video so that allows you to display a pop-up menu with the options listed in the following table. Erase the video. Picture Gallery Saved pictures are stored in the video gallery. Camera 83 Option Assign Rename Lock Erase Erase All Video Info Function Assign the video as wallpaper, or...more. Other camera features In addition to play the video or press the left /right navigation keys. 5. Rename the video. Erase all videos in the Picture Gallery. View the title, when created, size, and quality of your choice. 7. Use the navigation key to enter its sub menu. The first ...


