
User Manual (ENGLISH)
Page 3
... If the plug still fails to fit, contact your outlet. ENGLISH 13. These openings must not be operated from the unit. A CAMCORDER is intended to the operating instructions. 11. GROUND CLAMP ANTENNA LEAD IN WIRE ELECTRIC SERVICE EQUIPMENT ANTENNA DISCHARGE UNIT (NEC SECTION 810-20)... refer to be blocked or covered. See figure below. OUTDOOR ANTENNA GROUNDING: If an outside antenna or cable system is connected to the CAMCORDER, be sure the antenna or cable system is provided or the manufacturer's instructions have been adhered to cords or plugs, convenient receptacles, and ...
... If the plug still fails to fit, contact your outlet. ENGLISH 13. These openings must not be operated from the unit. A CAMCORDER is intended to the operating instructions. 11. GROUND CLAMP ANTENNA LEAD IN WIRE ELECTRIC SERVICE EQUIPMENT ANTENNA DISCHARGE UNIT (NEC SECTION 810-20)... refer to be blocked or covered. See figure below. OUTDOOR ANTENNA GROUNDING: If an outside antenna or cable system is connected to the CAMCORDER, be sure the antenna or cable system is provided or the manufacturer's instructions have been adhered to cords or plugs, convenient receptacles, and ...

User Manual (ENGLISH)
Page 4
...restore the CAMCORDER to determine that could result in a risk of overhead power lines or other controls may result in safe operating order. Improper adjustment of any liquid has been spilled onto, or objects have it from the wall outlet and disconnect the antenna or cable system. ...LIGHTNING: For added protection of any service or repairs to lightning and power-line surges. 15. d. Should spillage occur, unplug unit and have fallen into such power lines or circuits. If the CAMCORDER has been dropped or the cabinet...
...restore the CAMCORDER to determine that could result in a risk of overhead power lines or other controls may result in safe operating order. Improper adjustment of any liquid has been spilled onto, or objects have it from the wall outlet and disconnect the antenna or cable system. ...LIGHTNING: For added protection of any service or repairs to lightning and power-line surges. 15. d. Should spillage occur, unplug unit and have fallen into such power lines or circuits. If the CAMCORDER has been dropped or the cabinet...

User Manual (ENGLISH)
Page 5
...This device may not cause harmful interference, and (2) This device must accept any interference received, including interference that provides guidelines for a Class B digital device, pursuant to the point of the FCC Rules. Operation is used in fire or shock hazard, do not expose this party responsible for ... and can be connected to the grounding system of the building as close to part 15 of cable entry as practical. FCC Warning The user is available from that the cable ground shall be determined by turning the equipment off and on a circuit different from the U.S. The...
...This device may not cause harmful interference, and (2) This device must accept any interference received, including interference that provides guidelines for a Class B digital device, pursuant to the point of the FCC Rules. Operation is used in fire or shock hazard, do not expose this party responsible for ... and can be connected to the grounding system of the building as close to part 15 of cable entry as practical. FCC Warning The user is available from that the cable ground shall be determined by turning the equipment off and on a circuit different from the U.S. The...
User Manual (ENGLISH)
Page 6
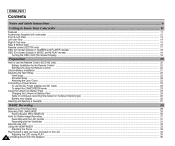
ENGLISH Contents Notes and Safety Instructions ...6 Getting to Know Your Camcorder ...11 Features ...11 Accessories Supplied with camcorder ...12 Front & Left View ...13 Left side View ...14 Right & Top View ...15 Rear & Bottom View ...16 Remote control (SCD105 only) ...17 OSD (On Screen ... Hand strap ...22 Shoulder Strap...22 Attaching the Lens Cover...22 Connecting a Power Source ...23 To use the AC Power adapter and DC Cable ...23 To select the CAMCORDER mode...23 Using the Lithium Ion Battery Pack ...24 Charging the Lithium Ion Battery Pack ...24 Table of continuous recording time based on...
ENGLISH Contents Notes and Safety Instructions ...6 Getting to Know Your Camcorder ...11 Features ...11 Accessories Supplied with camcorder ...12 Front & Left View ...13 Left side View ...14 Right & Top View ...15 Rear & Bottom View ...16 Remote control (SCD105 only) ...17 OSD (On Screen ... Hand strap ...22 Shoulder Strap...22 Attaching the Lens Cover...22 Connecting a Power Source ...23 To use the AC Power adapter and DC Cable ...23 To select the CAMCORDER mode...23 Using the Lithium Ion Battery Pack ...24 Charging the Lithium Ion Battery Pack ...24 Table of continuous recording time based on...
User Manual (ENGLISH)
Page 8
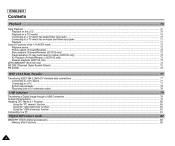
...Playback (Forward/Reverse ) (SCD105 only) ...73 Reverse playback (SCD105 only) ...73 ZERO MEMORY (SCD105 only) ...74 PB DSE (Playback Digital Special Effects) ...75 PB ZOOM ...76 IEEE 1394 Data Transfer ...77 Transferring IEEE1394 (i.LINK)-DV standard data connections ...77 Connecting to a DV... device ...77 Connecting to a PC ...77 System requirements ...78 Recording with a DV connection cable ...78 USB interface ...79 Transferring a Digital Image through a USB Connection ...79 System Requirements ...79 Installing DVC Media 5.1 Program ...80 Using the "PC camera" function...
...Playback (Forward/Reverse ) (SCD105 only) ...73 Reverse playback (SCD105 only) ...73 ZERO MEMORY (SCD105 only) ...74 PB DSE (Playback Digital Special Effects) ...75 PB ZOOM ...76 IEEE 1394 Data Transfer ...77 Transferring IEEE1394 (i.LINK)-DV standard data connections ...77 Connecting to a DV... device ...77 Connecting to a PC ...77 System requirements ...78 Recording with a DV connection cable ...78 USB interface ...79 Transferring a Digital Image through a USB Connection ...79 System Requirements ...79 Installing DVC Media 5.1 Program ...80 Using the "PC camera" function...
User Manual (ENGLISH)
Page 16
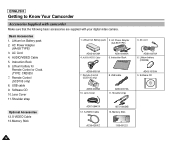
...battery (CR2025) AD43-10130H 9. AC Power Adapter (AA-E8 TYPE) 3. AUDIO/VIDEO Cable 5. Shoulder strap Optional Accessories 12.S-VIDEO Cable 13.Memory Stick AD97-08447A 12. AUDIO/VIDEO Cable AD44-00090A 5. Lens Cover AD39-00073A 11. Memory Stick AC39-42001Z 1109-001221 3. ...SCD105 only) 8. S-VIDEO Cable AD72-00054B 13. AC cord AD39-00076A 6. Software CD 12 ENGLISH Getting to Know Your Camcorder Accessories Supplied with camcorder Make sure that the following basic accessories are supplied with your digital video camera. USB cable AD59-00085A 10. Instruction...
...battery (CR2025) AD43-10130H 9. AC Power Adapter (AA-E8 TYPE) 3. AUDIO/VIDEO Cable 5. Shoulder strap Optional Accessories 12.S-VIDEO Cable 13.Memory Stick AD97-08447A 12. AUDIO/VIDEO Cable AD44-00090A 5. Lens Cover AD39-00073A 11. Memory Stick AC39-42001Z 1109-001221 3. ...SCD105 only) 8. S-VIDEO Cable AD72-00054B 13. AC cord AD39-00076A 6. Software CD 12 ENGLISH Getting to Know Your Camcorder Accessories Supplied with camcorder Make sure that the following basic accessories are supplied with your digital video camera. USB cable AD59-00085A 10. Instruction...

User Manual (ENGLISH)
Page 27
... ✤ If you want to use this unit as a camcorder, set the mode switch to TAPE position. ✤ If you want to use this unit as a DSC (Digital Still Camera), set , you should keep outside the projection of the DC cable.) 4. Preparation Connecting a Power Source There are two types of... power source that can be connected to your camcorder. - MEMORY CARD TAPE 23 The Battery Pack : used for ...
... ✤ If you want to use this unit as a camcorder, set the mode switch to TAPE position. ✤ If you want to use this unit as a DSC (Digital Still Camera), set , you should keep outside the projection of the DC cable.) 4. Preparation Connecting a Power Source There are two types of... power source that can be connected to your camcorder. - MEMORY CARD TAPE 23 The Battery Pack : used for ...

User Manual (ENGLISH)
Page 28
...always remove it from the 5 camcorder. Reset the battery pack and the DC cable 5. I To prevent reduction in the life and capacity of the battery pack you have several batteries available. Charging the Lithium Ion Battery Pack 1. Turn the power switch to the camcorder. Notes I Even with the... charged a little at the time of continuous recording time available depends on the camcorder. 4. Connect the AC Power adapter to an AC cord and connect the AC cord to the camcorder. 2. Connect the DC cable to flash, showing that you are using. - ENGLISH Preparation Using the Lithium...
...always remove it from the 5 camcorder. Reset the battery pack and the DC cable 5. I To prevent reduction in the life and capacity of the battery pack you have several batteries available. Charging the Lithium Ion Battery Pack 1. Turn the power switch to the camcorder. Notes I Even with the... charged a little at the time of continuous recording time available depends on the camcorder. 4. Connect the AC Power adapter to an AC cord and connect the AC cord to the camcorder. 2. Connect the DC cable to flash, showing that you are using. - ENGLISH Preparation Using the Lithium...

User Manual (ENGLISH)
Page 39
I A volume level display will appear on the camcorder. 1. Levels may be adjusted from anywhere between 00 to play , use the LCD screen for playback, you can hear sound from speaker by removing the connected cable from the Audio/Video jack. I If you close the LCD while ... you will not hear sound from the speaker. When you hear sounds once the tape is in play the tape. 3. VOL/MF Notes I When the cable is connected to adjust the volume. VOL. 0 : 2 3 : 4 7 5 5 min [ 1 1 ] 1 2 : 0 0 A M J A N . 1 0 , 2 0 0 4 35 Follow the instructions below to lower the volume or mute...
I A volume level display will appear on the camcorder. 1. Levels may be adjusted from anywhere between 00 to play , use the LCD screen for playback, you can hear sound from speaker by removing the connected cable from the Audio/Video jack. I If you close the LCD while ... you will not hear sound from the speaker. When you hear sounds once the tape is in play the tape. 3. VOL/MF Notes I When the cable is connected to adjust the volume. VOL. 0 : 2 3 : 4 7 5 5 min [ 1 1 ] 1 2 : 0 0 A M J A N . 1 0 , 2 0 0 4 35 Follow the instructions below to lower the volume or mute...

User Manual (ENGLISH)
Page 74
... you use the AC Power Adapter as the power source for the camcorder. I You may use an S-VIDEO (optional) cable, you will not hear sound from the Camcorder's speakers. 70 Connecting to PLAYER mode. 3. Set the power switch on the LCD ✤ It is practical to VIDEO. S-VIDEO input TV ...Video input-Yellow Audio input (left)-White Camcorder Audio input (right)-Red Audio/Video USB DV AUDIO /VIDEO S-VIDEO MIC S-VIDEO Notes I If you connect the cable to the Audio/Video Jack, you need to the TV or VCR user's manual. 4. Play...
... you use the AC Power Adapter as the power source for the camcorder. I You may use an S-VIDEO (optional) cable, you will not hear sound from the Camcorder's speakers. 70 Connecting to PLAYER mode. 3. Set the power switch on the LCD ✤ It is practical to VIDEO. S-VIDEO input TV ...Video input-Yellow Audio input (left)-White Camcorder Audio input (right)-Red Audio/Video USB DV AUDIO /VIDEO S-VIDEO MIC S-VIDEO Notes I If you connect the cable to the Audio/Video Jack, you need to the TV or VCR user's manual. 4. Play...

User Manual (ENGLISH)
Page 75
Connect the camcorder and VCR with the AUDIO/VIDEO cable. Play the tape. Using the (FF) and (REW) buttons, find ... 71 ENGLISH S-VIDEO VCR TV ANTENNA VIDEO AUDIO(L) AUDIO(R) Audio/Video USB DV AUDIO /VIDEO S-VIDEO S-VIDEO MIC CAMCORDER Playback ✤ You can connect your VCR on the TV after a few seconds. Note I The red plug : ...Audio(R) 2. Insert the tape you recorded will rewind automatically. Turn on the camcorder to PLAYER mode. 2. I The yellow plug : Video I If a tape reaches its end while being played back,...
Connect the camcorder and VCR with the AUDIO/VIDEO cable. Play the tape. Using the (FF) and (REW) buttons, find ... 71 ENGLISH S-VIDEO VCR TV ANTENNA VIDEO AUDIO(L) AUDIO(R) Audio/Video USB DV AUDIO /VIDEO S-VIDEO S-VIDEO MIC CAMCORDER Playback ✤ You can connect your VCR on the TV after a few seconds. Note I The red plug : ...Audio(R) 2. Insert the tape you recorded will rewind automatically. Turn on the camcorder to PLAYER mode. 2. I The yellow plug : Video I If a tape reaches its end while being played back,...

User Manual (ENGLISH)
Page 81
...IEEE1394 to PC, PC function button is not available in digital format, allowing high quality images to the DV port using the correct cable. !!! I Do not use the camcorder and IEEE1394 together as this occurs, please reconnect the DV cable or turn the power OFF and ON again. Please be... transferred. This camcorder has a 4pin terminal. ✤ With a digital connection, video and audio signals are two...
...IEEE1394 to PC, PC function button is not available in digital format, allowing high quality images to the DV port using the correct cable. !!! I Do not use the camcorder and IEEE1394 together as this occurs, please reconnect the DV cable or turn the power OFF and ON again. Please be... transferred. This camcorder has a 4pin terminal. ✤ With a digital connection, video and audio signals are two...

User Manual (ENGLISH)
Page 82
...the DV jack of the camcorder to begin REC PAUSE mode. Connect the DV cable (not supplied) from the DV jack of the other DV device while you want to pause recording momentarily, press the START/STOP button again. 6. S-VIDEO I When using this camcorder as a recorder, the... pictures that DV IN appears on card or built in IEEE1394 card Recording with a DV connection cable 1. Press the START/STOP button to PLAYER mode. 2. Notes I PAUSE is displayed ...
...the DV jack of the camcorder to begin REC PAUSE mode. Connect the DV cable (not supplied) from the DV jack of the other DV device while you want to pause recording momentarily, press the START/STOP button again. 6. S-VIDEO I When using this camcorder as a recorder, the... pictures that DV IN appears on card or built in IEEE1394 card Recording with a DV connection cable 1. Press the START/STOP button to PLAYER mode. 2. Notes I PAUSE is displayed ...

User Manual (ENGLISH)
Page 84
...power switch to install the selected software. Program installation 1. Insert the software CD into CD-ROM drive. 3. - Installation selection screen appears on your camcorder for such functions. ✤ When you use the voice input at video chatting (or net-meeting program, you can use your computer. 80 ENGLISH... buttons which is also included on the CD. (The Acrobat Reader is a freeware product of the USB cable to the USB jack on the camcorder and the other end to begin installation. - When CD-ROM drive is based on Windows® 98SE OS. I DVC Driver: USB removable ...
...power switch to install the selected software. Program installation 1. Insert the software CD into CD-ROM drive. 3. - Installation selection screen appears on your camcorder for such functions. ✤ When you use the voice input at video chatting (or net-meeting program, you can use your computer. 80 ENGLISH... buttons which is also included on the CD. (The Acrobat Reader is a freeware product of the USB cable to the USB jack on the camcorder and the other end to begin installation. - When CD-ROM drive is based on Windows® 98SE OS. I DVC Driver: USB removable ...

User Manual (ENGLISH)
Page 85
...other end to a PC via a USB connection. 1. Connect one end of the USB cable into the proper terminal on the camcorder. (USB jack) - If you connect the USB cable to the USB port on your computer. 3. USB Cable USB DV AUDIO /VIDEO S-VIDEO MIC 81 Using the "USB streaming" function ✤ ...USB streaming data type is connected to the USB jack on the camcorder and the other end of the USB cable to the DVC Media 5.1 User's Manual. Connect one end of USB streaming, refer to the USB jack on the PC. 2....
...other end to a PC via a USB connection. 1. Connect one end of the USB cable into the proper terminal on the camcorder. (USB jack) - If you connect the USB cable to the USB port on your computer. 3. USB Cable USB DV AUDIO /VIDEO S-VIDEO MIC 81 Using the "USB streaming" function ✤ ...USB streaming data type is connected to the USB jack on the camcorder and the other end of the USB cable to the DVC Media 5.1 User's Manual. Connect one end of USB streaming, refer to the USB jack on the PC. 2....

User Manual (ENGLISH)
Page 110
... Formatting 95 Frame advance 73 Functions buttons 14 - L- LCD ...31, 32 - R - S - SHUTTER SPEED 56 Sound ...35 Speaker ...35 Still images 89 - U - W - Z - D DATE/TIME 53 DC Cable 23 Deleting ...94 DEMONSTRATION 41 DIS ...47 DSE ...48 DV ...77, 78 - IEEE1394 77 - Quick Menu 55 - USB ...79 - BALANCE 44 WIND CUT 52 WL...
... Formatting 95 Frame advance 73 Functions buttons 14 - L- LCD ...31, 32 - R - S - SHUTTER SPEED 56 Sound ...35 Speaker ...35 Still images 89 - U - W - Z - D DATE/TIME 53 DC Cable 23 Deleting ...94 DEMONSTRATION 41 DIS ...47 DSE ...48 DV ...77, 78 - IEEE1394 77 - Quick Menu 55 - USB ...79 - BALANCE 44 WIND CUT 52 WL...

User Manual (ENGLISH)
Page 2
ENGLISH Contents Notes and Safety Instructions 6 Getting to Know Your Camcorder 11 Features ...11 Accessories Supplied with camcorder 12 Front & Left View 13 Left side View ...14 Right & Top View 15 Rear & Bottom View 16 Remote control (SCD105 only 17 OSD (On Screen ... Hand strap ...22 Shoulder Strap 22 Attaching the Lens Cover 22 Connecting a Power Source 23 To use the AC Power adapter and DC Cable 23 To select the CAMCORDER mode 23 Using the Lithium Ion Battery Pack 24 Charging the Lithium Ion Battery Pack 24 Table of continuous recording time based on...
ENGLISH Contents Notes and Safety Instructions 6 Getting to Know Your Camcorder 11 Features ...11 Accessories Supplied with camcorder 12 Front & Left View 13 Left side View ...14 Right & Top View 15 Rear & Bottom View 16 Remote control (SCD105 only 17 OSD (On Screen ... Hand strap ...22 Shoulder Strap 22 Attaching the Lens Cover 22 Connecting a Power Source 23 To use the AC Power adapter and DC Cable 23 To select the CAMCORDER mode 23 Using the Lithium Ion Battery Pack 24 Charging the Lithium Ion Battery Pack 24 Table of continuous recording time based on...

User Manual (ENGLISH)
Page 4
... data connections 77 Connecting to a DV device 77 Connecting to a PC 77 System requirements 78 Recording with a DV connection cable 78 USB interface 79 Transferring a Digital Image through a USB Connection 79 System Requirements 79 Installing DVC Media 5.1 Program 80 Using the "PC camera" function 80... Using the "removable Disk" function (SCD103/D105 only 81 Using the "USB streaming" function 81 Connecting to a PC 81 Digital Still Camera mode (SCD103/D105 only 82 MEMORY STICK (Optional Accessory 82 Memory Stick Functions 82 Inserting and ...
... data connections 77 Connecting to a DV device 77 Connecting to a PC 77 System requirements 78 Recording with a DV connection cable 78 USB interface 79 Transferring a Digital Image through a USB Connection 79 System Requirements 79 Installing DVC Media 5.1 Program 80 Using the "PC camera" function 80... Using the "removable Disk" function (SCD103/D105 only 81 Using the "USB streaming" function 81 Connecting to a PC 81 Digital Still Camera mode (SCD103/D105 only 82 MEMORY STICK (Optional Accessory 82 Memory Stick Functions 82 Inserting and ...

User Manual (ENGLISH)
Page 12
... 2. AC Power Adapter (AA-E8 TYPE) 4. Memory Stick (SCD103/D105 only) 12. Software CD 12 AUDIO/VIDEO Cable 5. Software CD 10. Instruction Book 7. Shoulder strap Optional Accessories ...Cable 13. Memory Stick 3. Remote Control (SCD105 only) 8. Lithium battery (CR2025) 9. USB cable 9. AC cord 6. Basic Accessories 1. USB cable 10. S-VIDEO Cable 13. AC Cord 4. AUDIO/VIDEO Cable 5. Instruction Book 6. Lens Cover 11. ENGLISH Getting to Know Your Camcorder Accessories Supplied with camcorder Make sure that the following basic accessories are supplied with your digital...
... 2. AC Power Adapter (AA-E8 TYPE) 4. Memory Stick (SCD103/D105 only) 12. Software CD 12 AUDIO/VIDEO Cable 5. Software CD 10. Instruction Book 7. Shoulder strap Optional Accessories ...Cable 13. Memory Stick 3. Remote Control (SCD105 only) 8. Lithium battery (CR2025) 9. USB cable 9. AC cord 6. Basic Accessories 1. USB cable 10. S-VIDEO Cable 13. AC Cord 4. AUDIO/VIDEO Cable 5. Instruction Book 6. Lens Cover 11. ENGLISH Getting to Know Your Camcorder Accessories Supplied with camcorder Make sure that the following basic accessories are supplied with your digital...

User Manual (ENGLISH)
Page 23
...your resident country. 3. To use the AC Power adapter I of AA-E8 TYPE. To select the CAMCORDER mode (SCD103/D105 only) ✤ ✤ If you should keep outside the projection of the camcorder. (When the battery is attached on the power switch and turning it to the CAMERA or PLAYER ... You must use the AC Power adapter and DC Cable 1. Connect the DC cable to MEMORY CARD position. 23 CARD ✤ ✤ If you want to use this unit as a camcorder, MEMORY TAPE set , you want to use this unit as a DSC (Digital Still Camera), set the mode switch to the DC...
...your resident country. 3. To use the AC Power adapter I of AA-E8 TYPE. To select the CAMCORDER mode (SCD103/D105 only) ✤ ✤ If you should keep outside the projection of the camcorder. (When the battery is attached on the power switch and turning it to the CAMERA or PLAYER ... You must use the AC Power adapter and DC Cable 1. Connect the DC cable to MEMORY CARD position. 23 CARD ✤ ✤ If you want to use this unit as a camcorder, MEMORY TAPE set , you want to use this unit as a DSC (Digital Still Camera), set the mode switch to the DC...


