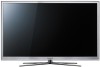
User Manual (user Manual) (ver.1.0) (English)
Page 2
...; Changing the Preset Sound Modes • Adjusting Sound Settings Preference Features 1 • Wired Network Setting 23 • Wireless Network Setting 27 • Setting the Time 31 • Blocking Programs • Economical Solutions • Picture In Picture (PIP) • Other Features 33 • Support Menu 34 36 42 Advanced Features 55 • 3D 59 • Smart Hub 60 • Setting up Smart Hub • Using Smart Hub • Connecting a USB Device • Screen Display • Videos •...
User Manual (user Manual) (ver.1.0) (English)
Page 12
screen. You can add channels, delete Added channels, set Favorite channels, use the program guide for digital broadcasts and change the antenna or channel settings by ◀ selecting the icons in the top right corner of the screen. Channel 6 6-1 7 8 9 9-1 9-2 9-3 9-4 Air TV #6 Air Air Air TV #9 TV #10 TV #11 TV #12 All Channels... Added Ch. ▶ ●● The displayed image may differ depending on the model. English ■■ Channel OO SMART HUB → Channel → ENTERE Using the Channel function, you can also change between the All Channels and Added Ch.
User Manual (user Manual) (ver.1.0) (English)
Page 62
English NN Available only when Sound Mode is set to Standard. ●● SRS TruSurround HD (Off / On) t: This function provides a virtual 5.1 channel surround sound experience through a pair of speakers using HRTF ◀ (Head Related Transfer Function) technology. ▶ ●● SRS TruDialog (Off / On): This function allows you to External Speaker, Sound Effect is set to increase the intensity of a voice...
User Manual (user Manual) (ver.1.0) (English)
Page 78
... displayed image may differ depending on the model. English When the connection has been verified, the "Internet connection successful." Please make sure that supports DHCP. ■■ Automatic Network Setup Use the Automatic Network Settings when connecting your TV's cable network connection automatically, follow these steps: How to the network using LAN cable. Network Settings (MENUm → Network → Network ◀ Settings → ENTERE) 2. Select a network connection type. The network test screen appears and verifies the network connection. To set...
User Manual (user Manual) (ver.1.0) (English)
Page 79
... proveedor de servicios de Internet. OK ●● The displayed image may differ depending on the model. ◀ ▶ English NN If the connection process fails, check the LAN port connection. Network Setting Wired network and Internet connection completed. NN If the automatic process cannot find the network connection values or if you want to set the connection manually, go to the next secton, Manual Network Setup. MAC Address IP...
User Manual (user Manual) (ver.1.0) (English)
Page 108
... a USB port on the Samsung wireless router and your TV. 2. Wait until the connection is on (Blinking → on). 3. Turn on your Samsung TV. If you of the failure. Check the router's LED's to set up screen appears on the screen notifying you want to your wireless router, a pop- ▶ up using Plug & Access again, reset the AP, disconnect the Samsung Wireless LAN adapter and then try using the Plug & Access...
User Manual (user Manual) (ver.1.0) (English)
Page 113
Clock Set: Set the Date and Time. English Select Clock Set. NN Depending on the remote control. In this case, set to Manual. Select Date or Time, and then press ENTERE. To exit Clock Set, select Close, and then press ENTERE. ▶ NN Available only when Clock Mode is set the time manually. -- Use the number buttons to the next. ◀ Press ENTERE when done. Use the left and right...
User Manual (user Manual) (ver.1.0) (English)
Page 132
NN If you adjust Backlight for LED TV / Cell Light for PDP TV in order to reduce power consumption. Press any button except the volume button to turn on . English ❑❑ Economical Solutions ■■ Eco Solution OO MENUm → System → Eco Solution → ENTERE ●● Energy Saving (Off / Low / Medium / High / Picture Off): Lets you adjusts the brightness of...
User Manual (user Manual) (ver.1.0) (English)
Page 199
...password with any of the providers listed by the Register Service Account function, you will be able to log onto the account through Smart Hub easily, without entering your Smart Hub account. In the Account Management menu, select Register Service Account, and then press the ENTERE button. Register Service... Account: If you have existing accounts with your account name or password. To use the Register Service Account function, follow these steps: 1. The Register Service Account screen ...
User Manual (user Manual) (ver.1.0) (English)
Page 203
Channel Bound Service (Off / On): Some channels support applications as an ◀ Internet data service, allowing you to access the Internet service while watching ▶ TV. NN Only available if supported by the broadcaster English NN The Ticker function allows you to view content from the current input source and ticker data at the same time. NN Depending on the TV. ●● Service Manager Ticker Autorun: You can set Ticker Autorun to come on when powering on your country, the Ticker application may have a different service or not be supported.
User Manual (user Manual) (ver.1.0) (English)
Page 220
When a USB device is connected to the USB port on the USB device automatically if it is the only device connected. ❑❑ Connecting a USB Device 1. English Connect a USB device containing photo, TV Rear Panel music and/or movie files to the TV, USB Drive the Connected Device screen appears. ●● The displayed image may differ depending on the Select a connected device, and then press model. ◀ ENTERE. ▶ NN The TV may display the files on the back or side panel of the TV. 3. Turn on your TV. 2.
User Manual (user Manual) (ver.1.0) (English)
Page 307
...;• Check whether the remote control is Anynet+ compatible. •• Anynet+ doesn't work . •• Check if the device is set on. English ❑❑ Troubleshooting for Anynet+ Problem Possible Solution Anynet+ does not work in certain situations. (Searching channels, operating Smart Hub or Plug & Play (initial setup), etc.) •• If you have removed and then reconnected the HDMI cable, please make sure...
User Manual (user Manual) (ver.1.0) (English)
Page 308
...play. •• You cannot use the play function when Plug & Play (initial setup) is set to On in the Anynet+ Setup menu. •• Press the TOOLS button to •• You cannot use the remote control when you want. •• Select View TV in progress. English The message "Connecting to display the Anynet+ menu and select a menu...properly connected to the TV and check if the Anynet+ (HDMI-CEC) is in the Anynet+ menu. •• Press the SOURCE button on Anynet+ or switching to a view mode. ◀ the screen. •• Use the remote control ...
User Manual (user Manual) (ver.1.0) (English)
Page 310
... box video output resolution to 1080i or 720p. English Look for a channel that is properly displayed, the poor picture may be caused by the ▶ source or signal. •• Store displays are up scaled from the channel line up. •• Air/Cable Antenna connection: Try HD channels after performing an Auto program. Other Information ❑❑ Troubleshooting If your TV is properly displaying the test image. •• Go to MENU - Support - Use HDMI...
User Manual (user Manual) (ver.1.0) (English)
Page 311
.... •• Mobile phones used close to the TV (within 3.3 ft) may cause color problems or a blank screen. •• Adjust the Picture options in the TV menu (go to Picture Mode / Color / ▶ Brightness / Sharpness) •• Adjust the Energy Saving option in the TV menu (go to MENU - Energy Saving) •• Try resetting the picture to view the default picture settings (go to MENU - System - Picture - This is not...
User Manual (user Manual) (ver.1.0) (English)
Page 314
... nothing plugged into it. •• Reboot the connected device by the source or signal. •• Please check the volume of the device (Cable/Sat Box, DVD, Blu-ray etc.) connected to your TV audio is operating properly. •• Go to TV Speaker in the Sound menu. •• If you are using an external device, check the device's audio output option. (Ex. Issues Sound Problem There...
User Manual (user Manual) (ver.1.0) (English)
Page 316
... signal can cause picture distortion. Try changing Caption Mode Service1 to select the correct Cable TV signal type. No caption on digital ◀ channels. Channel - English Solutions and Explanations •• Make sure the coaxial cable is positioned correctly. •• Check the Caption Setup menu. Go to the channel list. Most cable systems use STD. •• Verify the antenna is connected securely. •• Run Auto Program to add available channels to MENU...
User Manual (user Manual) (ver.1.0) (English)
Page 318
... indicates that are used to create the images on the screen. •• If the humming sound is loud, you may have loud humming if the back of your Plasma TV is too close ▶ to a wall or other hard surface. Replace the Component video cables with a Component cable connection. •• Remove the left and right audio connections from the set the brightness on the...
User Manual (user Manual) (ver.1.0) (English)
Page 319
... TV menu is equipped with Pixel Shift screen burn reduction technology. Image Retention (Burn In) Issue. Caption on either side of the screen when displaying up and down (Vertical Line) and side to full screen. •• To minimize the possibility of screen burn, this unit is greyed out. The regular, slight movement of the picture reduces screen burn in full screen. for PDP TV ◀ A "Mode Not Supported" message...
User Manual (user Manual) (ver.1.0) (English)
Page 321
Play Feature. The PIP menu is not •• PIP functionality is not a defect. POP (TV's internal banner Component source. ▶ •• Select Home Use under Plug & Play mode. Make sure the cables are using an HDMI, PC, or ◀ available. Issues Solutions and Explanations You have intermittent loss of audio or video. •• Check the cable connections and reconnect them. •• Loss of...