Samsung LN55C630K1F Research
View Results Below
Free Samsung LN55C630K1F manuals!
Problems with Samsung LN55C630K1F?
Ask a Question
Free Samsung LN55C630K1F manuals!
Problems with Samsung LN55C630K1F?
Ask a Question
Related Manual Pages


Related Videos

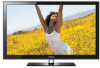
Samsung 55 inch (LN55C630K1F ) + Samsung Sound Bar w/ Wireless Sub (HW-4510)
Duration: 2:06
Total Views: 10,185
Duration: 2:06
Total Views: 10,185
Similar Questions

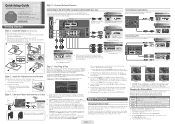
Manual Please. How To Set Up Directv On This?
just got this tv and dont know how to hook it up to directv and my blue-ray.
just got this tv and dont know how to hook it up to directv and my blue-ray.
(Posted by whittlegirls 6 years ago)

How Do I Remove The Base So I Can Mount The Tv On The Wall
(Posted by scottraugh 8 years ago)

Samsung Tv Model Ln55c630k1f No Picture No Red Light Does Have Power Was
watching & screen &sound went out
watching & screen &sound went out
(Posted by Missbami 10 years ago)

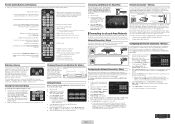
How To Get Audio Out From My Samsung Tv Ln55c630k1f
(Posted by kylelti 10 years ago)

Some Times When I Turn Tv On Pictures Shakes All The Time (maybe Freqvecy)
how to fix it please let me know LN55C630K1FXZA
how to fix it please let me know LN55C630K1FXZA
(Posted by davidoff71 12 years ago)