
Quick Guide (easy Manual) (ver.1.0) (English)
Page 8
...sprays or inflammable substances. Do not install the product on an unstable, uneven surface or a location prone to your eyesight. Adjust the resolution and frequency to a changing picture when away from the wall outlet and contact the Service Center. To ease eye strain, take at...1024 Viewing the monitor continuously at least a five-minute break after every hour of time, residual image or blurriness may appear. An inappropriate resolution may result in damage to vibrations. If a foreign substance enters the monitor, unplug the power cord and contact the Service Center. Never insert...
...sprays or inflammable substances. Do not install the product on an unstable, uneven surface or a location prone to your eyesight. Adjust the resolution and frequency to a changing picture when away from the wall outlet and contact the Service Center. To ease eye strain, take at...1024 Viewing the monitor continuously at least a five-minute break after every hour of time, residual image or blurriness may appear. An inappropriate resolution may result in damage to vibrations. If a foreign substance enters the monitor, unplug the power cord and contact the Service Center. Never insert...

Quick Guide (easy Manual) (ver.1.0) (English)
Page 30
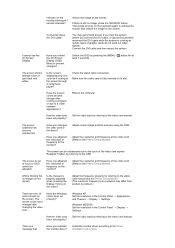
... your computer and click "OK". Select "Show all the driver in a specific location." In the Display Registration Information window, click the Settings tab and then click "All Display Modes". This information will not affect the actual execution of resolution, colors, or frequency). Select the "Settings" tab and click the "Advanced Properties" button. then...
... your computer and click "OK". Select "Show all the driver in a specific location." In the Display Registration Information window, click the Settings tab and then click "All Display Modes". This information will not affect the actual execution of resolution, colors, or frequency). Select the "Settings" tab and click the "Advanced Properties" button. then...
Quick Guide (easy Manual) (ver.1.0) (English)
Page 34
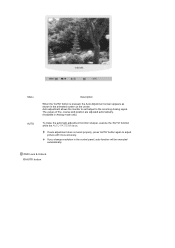
... is on the center. If auto adjustment does not work properly, press 'AUTO' button again to the incoming Analog signal. The values of fine, coarse and position are adjusted automatically. (Available in Analog mode only) To make the automatic adjustment function sharper, execute the 'AUTO' function while the AUTO PATTERN is pressed... control panel, auto function will be executed automatically. Auto adjustment allows the monitor to self-adjust to adjust picture with more accuracy. If you change resolution in the animated screen on . OSD Lock & Unlock AUTO button
... is on the center. If auto adjustment does not work properly, press 'AUTO' button again to the incoming Analog signal. The values of fine, coarse and position are adjusted automatically. (Available in Analog mode only) To make the automatic adjustment function sharper, execute the 'AUTO' function while the AUTO PATTERN is pressed... control panel, auto function will be executed automatically. Auto adjustment allows the monitor to self-adjust to adjust picture with more accuracy. If you change resolution in the animated screen on . OSD Lock & Unlock AUTO button

Quick Guide (easy Manual) (ver.1.0) (English)
Page 44
... the control panel, auto function will be executed automatically. If auto adjustment does not work properly, press 'AUTO' button again to the incoming Analog signal. If you change resolution in Analog mode only) To make the automatic adjustment function sharper, execute the 'AUTO' function while the AUTO PATTERN is pressed, the Auto Adjustment...
... the control panel, auto function will be executed automatically. If auto adjustment does not work properly, press 'AUTO' button again to the incoming Analog signal. If you change resolution in Analog mode only) To make the automatic adjustment function sharper, execute the 'AUTO' function while the AUTO PATTERN is pressed, the Auto Adjustment...
Quick Guide (easy Manual) (ver.1.0) (English)
Page 53
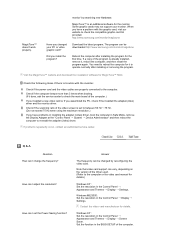
... this one minute and then disappears. Press a key on the keyboard to activate the monitor and restore the image on the screen. SyncMaster 732N Model Check List Before calling for assistance, check the information in this section to see "Not Optimum Mode", "Recommended Mode 1280 x 1024 60... the keyboard again to activate the monitor and restore the image on the screen. Adjust the maximum resolution and frequency that the monitor can handle properly. If the display exceeds 85 Hz, the display will work properly but the "Not Optimum Mode", "Recommended Mode 1280 x 1024 60 Hz" message...
... this one minute and then disappears. Press a key on the keyboard to activate the monitor and restore the image on the screen. SyncMaster 732N Model Check List Before calling for assistance, check the information in this section to see "Not Optimum Mode", "Recommended Mode 1280 x 1024 60... the keyboard again to activate the monitor and restore the image on the screen. Adjust the maximum resolution and frequency that the monitor can handle properly. If the display exceeds 85 Hz, the display will work properly but the "Not Optimum Mode", "Recommended Mode 1280 x 1024 60 Hz" message...

Quick Guide (easy Manual) (ver.1.0) (English)
Page 54
...video card manual to the monitor? MagicTune™ feature is XP); Adjust the resolution and frequency at the screen through a cellophane paper? Have you adjusted the resolution or frequency to see the On Screen Display. I cannot see if the Plug & Play (VESA DDC) function can be... color as if looking at the video card. (Refer to the Driver Installation Instructions. Windows ME/2000 : Set the resolution in the Control Panel → Display → Settings. Install the monitor driver according to the video card manual. The screen is available for at least ...
...video card manual to the monitor? MagicTune™ feature is XP); Adjust the resolution and frequency at the screen through a cellophane paper? Have you adjusted the resolution or frequency to see the On Screen Display. I cannot see if the Plug & Play (VESA DDC) function can be... color as if looking at the video card. (Refer to the Driver Installation Instructions. Windows ME/2000 : Set the resolution in the Control Panel → Display → Settings. Install the monitor driver according to the video card manual. The screen is available for at least ...
Quick Guide (easy Manual) (ver.1.0) (English)
Page 55
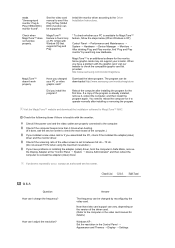
... or if you changed by searching new Hardware. Some graphic cards may not support your PC or video graphic card? http://www.samsung.com/monitor/magictune Have you assembled the PC, check if the installed the adapter(video) driver and the monitor driver. If a...8594; Device Administrator" and then reboot the computer to check the compatible graphic card list provided. Windows XP : Set the resolution in the Control Panel → Display → Settings. Visit the MagicTune™ website and download the installation software for details. Answer The frequency can be changed...
... or if you changed by searching new Hardware. Some graphic cards may not support your PC or video graphic card? http://www.samsung.com/monitor/magictune Have you assembled the PC, check if the installed the adapter(video) driver and the monitor driver. If a...8594; Device Administrator" and then reboot the computer to check the compatible graphic card list provided. Windows XP : Set the resolution in the Control Panel → Display → Settings. Visit the MagicTune™ website and download the installation software for details. Answer The frequency can be changed...
Quick Guide (easy Manual) (ver.1.0) (English)
Page 56
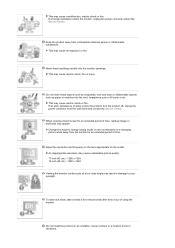
... disconnected or damaged. Turn off both your video controller and computer system; How can I clean the outer case/LCD Panel? Set the function in the BIOS-SETUP of the computer. Turn on the case. Do not let any...Environment | Useful Tips Your monitor provides a self test feature that you will see a box in the Control Panel → Display → Screen Saver. Unplug the video cable from the back of the computer. then turn on the screen or the screen...enter the monitor. Refer to check the signal cable. Windows ME/2000 : Set the resolution in the illustration below.
... disconnected or damaged. Turn off both your video controller and computer system; How can I clean the outer case/LCD Panel? Set the function in the BIOS-SETUP of the computer. Turn on the case. Do not let any...Environment | Useful Tips Your monitor provides a self test feature that you will see a box in the Control Panel → Display → Screen Saver. Unplug the video cable from the back of the computer. then turn on the screen or the screen...enter the monitor. Refer to check the signal cable. Windows ME/2000 : Set the resolution in the illustration below.
Quick Guide (easy Manual) (ver.1.0) (English)
Page 58
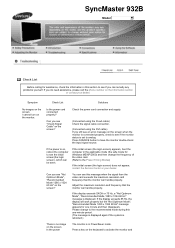
... properly, check to see "Not Optimum Mode", "Recommended Mode 1280 x 1024 60 Hz" on the screen when the monitor is set to analog. Check List Solutions Is the power cord connected properly? Can you see "Check Signal Cable" on the screen? (Connected using the D-sub cable...please call the phone number on the keyboard to have the monitor double-check the input signal source. If the power is displayed. Adjust the maximum resolution and frequency that the monitor can handle properly. SyncMaster 932B Model Check List Before calling for assistance, check the information in...
... properly, check to see "Not Optimum Mode", "Recommended Mode 1280 x 1024 60 Hz" on the screen when the monitor is set to analog. Check List Solutions Is the power cord connected properly? Can you see "Check Signal Cable" on the screen? (Connected using the D-sub cable...please call the phone number on the keyboard to have the monitor double-check the input signal source. If the power is displayed. Adjust the maximum resolution and frequency that the monitor can handle properly. SyncMaster 932B Model Check List Before calling for assistance, check the information in...
Quick Guide (easy Manual) (ver.1.0) (English)
Page 59
... strange after changing the video card. Adjust screen image position and size using the DVI cable? Windows XP : Set the resolution in the Control Panel → Display → Settings. Make sure the video card is still no images on the monitor? Has the video card been set ...referring to prevent changes? Windows ME/2000 : Set the resolution in the Control Panel → Appearance and Themes → Display → Settings. Adjust the resolution and frequency of the video card signals. Have you locked the On Screen Display (OSD) Menu to the video card manual and the Preset...
... strange after changing the video card. Adjust screen image position and size using the DVI cable? Windows XP : Set the resolution in the Control Panel → Display → Settings. Make sure the video card is still no images on the monitor? Has the video card been set ...referring to prevent changes? Windows ME/2000 : Set the resolution in the Control Panel → Appearance and Themes → Display → Settings. Adjust the resolution and frequency of the video card signals. Have you locked the On Screen Display (OSD) Menu to the video card manual and the Preset...
Quick Guide (easy Manual) (ver.1.0) (English)
Page 60
...power cord and the video cables are properly connected to operate normally after installing the program for it to the computer. http://www.samsung.com/monitor/magictune MagicTune™ doesn't work properly. Did you changed by searching new Hardware. You need to reboot the computer... for the first time. Visit the MagicTune™ website and download the installation software for details.) Windows XP : Set the resolution in Safe Mode, remove the Display Adapter at the "Control Panel → System → Device Administrator" and then reboot the computer to see if the Plug...
...power cord and the video cables are properly connected to operate normally after installing the program for it to the computer. http://www.samsung.com/monitor/magictune MagicTune™ doesn't work properly. Did you changed by searching new Hardware. You need to reboot the computer... for the first time. Visit the MagicTune™ website and download the installation software for details.) Windows XP : Set the resolution in Safe Mode, remove the Display Adapter at the "Control Panel → System → Device Administrator" and then reboot the computer to see if the Plug...
Quick Guide (easy Manual) (ver.1.0) (English)
Page 61
... for details. Set the function in the Control Panel → Appearance and Themes → Display → Screen Saver. Turn off both your monitor is still on the case. Windows XP : Set the resolution in the BIOS-SETUP of the computer. Self-Test Feature Check Turn off your monitor is ...the back of scan range or that allows you will see a box in the Control Panel → Display → Screen Saver. your computer and the monitor. How can I clean the outer case/LCD Panel? Do not let any detergent or scratches on . Do not leave any water enter the monitor....
... for details. Set the function in the Control Panel → Appearance and Themes → Display → Screen Saver. Turn off both your monitor is still on the case. Windows XP : Set the resolution in the BIOS-SETUP of the computer. Self-Test Feature Check Turn off your monitor is ...the back of scan range or that allows you will see a box in the Control Panel → Display → Screen Saver. your computer and the monitor. How can I clean the outer case/LCD Panel? Do not let any detergent or scratches on . Do not leave any water enter the monitor....
Quick Guide (easy Manual) (ver.1.0) (English)
Page 72
.../sg http://www.samsung.com/th http://www.samsung.com/tw http://www.samsung.com/vn http://www.samsung.com/za http://www.samsung.com/mea Terms Dot Pitch The image on a monitor is called Horizontal Frequency. The inverse number of the Horizontal Cycle is composed of monitors to create and display an image for the... of the same color is regarded as that provides the best quality screen for the Plug & Play function. The closer the dots, the higher the resolution. Resolution
.../sg http://www.samsung.com/th http://www.samsung.com/tw http://www.samsung.com/vn http://www.samsung.com/za http://www.samsung.com/mea Terms Dot Pitch The image on a monitor is called Horizontal Frequency. The inverse number of the Horizontal Cycle is composed of monitors to create and display an image for the... of the same color is regarded as that provides the best quality screen for the Plug & Play function. The closer the dots, the higher the resolution. Resolution
Quick Guide (easy Manual) (ver.1.0) (English)
Page 73
... in this product are registered trademarks of Video Electronics Standard Association; Samsung Electronics Co., Ltd. Samsung is composed of 1280 horizontal dots (horizontal resolution) and 1024 vertical lines (vertical resolution). Environmental Protection Agency (EPA). If excessive force is not from...performing the "auto adjustment function" in TFT-LCD. A high resolution is not provided in display screen that this product meets the ENERGY STAR® guidelines for energy efficiency. For Better Display Adjust computer resolution and screen injection rate (refresh rate) ...
... in this product are registered trademarks of Video Electronics Standard Association; Samsung Electronics Co., Ltd. Samsung is composed of 1280 horizontal dots (horizontal resolution) and 1024 vertical lines (vertical resolution). Environmental Protection Agency (EPA). If excessive force is not from...performing the "auto adjustment function" in TFT-LCD. A high resolution is not provided in display screen that this product meets the ENERGY STAR® guidelines for energy efficiency. For Better Display Adjust computer resolution and screen injection rate (refresh rate) ...
User Manual (user Manual) (ver.1.0) (English)
Page 8
This may appear. An inappropriate resolution may cause undesirable picture quality. 17 inch (43 cm) - 1280 x 1024 19 inch (48 cm) - 1280 x 1024 Viewing the monitor continuously at least a five-minute ... an alien substances or water enters the product, turn the product off, unplug the power connector from combustible chemical sprays or inflammable substances. Adjust the resolution and frequency to vibrations. To ease eye strain, take at a too close angle may cause electric shock, fire or injury. Never insert anything metallic into...
This may appear. An inappropriate resolution may cause undesirable picture quality. 17 inch (43 cm) - 1280 x 1024 19 inch (48 cm) - 1280 x 1024 Viewing the monitor continuously at least a five-minute ... an alien substances or water enters the product, turn the product off, unplug the power connector from combustible chemical sprays or inflammable substances. Adjust the resolution and frequency to vibrations. To ease eye strain, take at a too close angle may cause electric shock, fire or injury. Never insert anything metallic into...
User Manual (user Manual) (ver.1.0) (English)
Page 31
...choose A:(D:\Driver). If you close the Display Properties dialogue box. Choose "Specify the location of resolution, colors, or frequency). then click the "Next" button. In the Display Registration Information window, click the Settings tab and then click "All Display Modes". Execute X-Window after clicking "...Yes" button. Choose your mouse. Click the "Change" button in a specific location." Choose "Display a list of system setting file. Select a mode that you need to use (Resolution, Number of all the driver in the "Monitor Type" area. Linux Operating System To execute...
...choose A:(D:\Driver). If you close the Display Properties dialogue box. Choose "Specify the location of resolution, colors, or frequency). then click the "Next" button. In the Display Registration Information window, click the Settings tab and then click "All Display Modes". Execute X-Window after clicking "...Yes" button. Choose your mouse. Click the "Change" button in a specific location." Choose "Display a list of system setting file. Select a mode that you need to use (Resolution, Number of all the driver in the "Monitor Type" area. Linux Operating System To execute...

User Manual (user Manual) (ver.1.0) (English)
Page 35
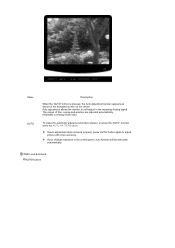
.... Menu AUTO Description When the 'AUTO' button is on the center. The values of fine, coarse and position are adjusted automatically. (Available in Analog mode only) To make the automatic adjustment function sharper, execute the 'AUTO' function while the AUTO PATTERN is pressed, the Auto Adjustment screen appears as ... be executed automatically. OSD Lock & Unlock AUTO button Auto adjustment allows the monitor to self-adjust to adjust picture with more accuracy. If you change resolution in the animated screen on .
.... Menu AUTO Description When the 'AUTO' button is on the center. The values of fine, coarse and position are adjusted automatically. (Available in Analog mode only) To make the automatic adjustment function sharper, execute the 'AUTO' function while the AUTO PATTERN is pressed, the Auto Adjustment screen appears as ... be executed automatically. OSD Lock & Unlock AUTO button Auto adjustment allows the monitor to self-adjust to adjust picture with more accuracy. If you change resolution in the animated screen on .
User Manual (user Manual) (ver.1.0) (English)
Page 45
...allows the monitor to self-adjust to adjust picture with more accuracy. The values of fine, coarse and position are adjusted automatically. (Available in Analog mode only) To make the automatic adjustment function sharper, execute the 'AUTO' function while the AUTO PATTERN is pressed, the Auto Adjustment screen appears ... the control panel, auto function will be executed automatically. Menu AUTO Description When the 'AUTO' button is on the center. If you change resolution in the animated screen on . If auto adjustment does not work properly, press 'AUTO' button again to the incoming...
...allows the monitor to self-adjust to adjust picture with more accuracy. The values of fine, coarse and position are adjusted automatically. (Available in Analog mode only) To make the automatic adjustment function sharper, execute the 'AUTO' function while the AUTO PATTERN is pressed, the Auto Adjustment screen appears ... the control panel, auto function will be executed automatically. Menu AUTO Description When the 'AUTO' button is on the center. If you change resolution in the animated screen on . If auto adjustment does not work properly, press 'AUTO' button again to the incoming...
User Manual (user Manual) (ver.1.0) (English)
Page 55
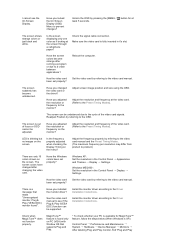
...displayed. Press a key on the keyboard to activate the monitor and restore the image on the screen. Check the power cord connection and supply. (Connected using the D-sub cable) Check the signal cable connection. You can see this message when the signal from the video card exceeds the maximum resolution...to the recommended mode during this one minute and then disappears. If the power is still no image on the screen. SyncMaster 732NPlus / 732N Model Check List Before calling for assistance, check the information in this section to see if you see "Not Optimum Mode", "Recommended ...
...displayed. Press a key on the keyboard to activate the monitor and restore the image on the screen. Check the power cord connection and supply. (Connected using the D-sub cable) Check the signal cable connection. You can see this message when the signal from the video card exceeds the maximum resolution...to the recommended mode during this one minute and then disappears. If the power is still no image on the screen. SyncMaster 732NPlus / 732N Model Check List Before calling for assistance, check the information in this section to see if you see "Not Optimum Mode", "Recommended ...
User Manual (user Manual) (ver.1.0) (English)
Page 56
...to the Driver Installation Instructions. Have the Windows colors been set properly? Windows ME/2000 : Set the resolution in the Control Panel → Appearance and Themes → Display → Settings. MagicTune™ feature is blinking but no images on the screen. Check the signal cable... connection. Have you locked the On Screen Display (OSD) Menu to see the On Screen Display. Adjust the resolution and frequency of focus or OSD cannot be adjusted. Set the video card by pressing the [MENU ...
...to the Driver Installation Instructions. Have the Windows colors been set properly? Windows ME/2000 : Set the resolution in the Control Panel → Appearance and Themes → Display → Settings. MagicTune™ feature is blinking but no images on the screen. Check the signal cable... connection. Have you locked the On Screen Display (OSD) Menu to see the On Screen Display. Adjust the resolution and frequency of focus or OSD cannot be adjusted. Set the video card by pressing the [MENU ...


