
Quick Guide (ENGLISH)
Page 11
...it's slot. Make sure the video card is no image on the screen. video card manual. I cannot turn on the screen. If the power is in this section to see... the initial screen(the login screen), which can remedy any key on the keyboard to activate the monitor and restore the image on the Information section or contact your dealer. Have the screen colors become...the initial screen (the login screen) appears, boot the computer in the applicable mode (the safe mode for service, check the information in PowerSaver mode. Has the video card been set Set the video card by referring ...
...it's slot. Make sure the video card is no image on the screen. video card manual. I cannot turn on the screen. If the power is in this section to see... the initial screen(the login screen), which can remedy any key on the keyboard to activate the monitor and restore the image on the Information section or contact your dealer. Have the screen colors become...the initial screen (the login screen) appears, boot the computer in the applicable mode (the safe mode for service, check the information in PowerSaver mode. Has the video card been set Set the video card by referring ...
Quick Guide (ENGLISH)
Page 12
...2560x1600 resolution with one that supports that video card support can I cannot use the 2560x1600 resolution, replace your monitor. Note that resolution. Windows ME/XP/2000 : Set the resolution at the Control Panel→Display→...If it does, ask the service center to the video card manual Display Timing on your computer support the 2560x1600 resolution? Disconnect the power cord and then clean the monitor with the monitor. 1. Do not leave any water enter the monitor. I set at BIOS-SETUP ... to the computer. 2. How can I clean the outer case/LCD Panel?
...2560x1600 resolution with one that supports that video card support can I cannot use the 2560x1600 resolution, replace your monitor. Note that resolution. Windows ME/XP/2000 : Set the resolution at the Control Panel→Display→...If it does, ask the service center to the video card manual Display Timing on your computer support the 2560x1600 resolution? Disconnect the power cord and then clean the monitor with the monitor. 1. Do not leave any water enter the monitor. I set at BIOS-SETUP ... to the computer. 2. How can I clean the outer case/LCD Panel?
User Manual (ENGLISH)
Page 18
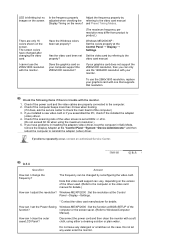
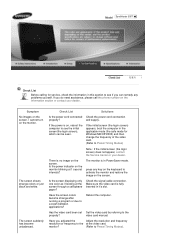
...or frequency to activate the monitor and restore the image on the screen. Is the screen displaying only one color as if looking at the video card. Make sure the video card is in this section to Preset Timing Modes). video card manual. Model SyncMaster 305T Check List Before calling ...) appears, boot the computer in the applicable mode (the safe mode for service, check the information in PowerSaver mode. There is on the screen. Have the screen colors become unbalanced. I cannot turn on the monitor blinking at 1 second intervals? Has the video card been set Set the ...
...or frequency to activate the monitor and restore the image on the screen. Is the screen displaying only one color as if looking at the video card. Make sure the video card is in this section to Preset Timing Modes). video card manual. Model SyncMaster 305T Check List Before calling ...) appears, boot the computer in the applicable mode (the safe mode for service, check the information in PowerSaver mode. There is on the screen. Have the screen colors become unbalanced. I cannot turn on the monitor blinking at 1 second intervals? Has the video card been set Set the ...

User Manual (ENGLISH)
Page 19
.... How can I set properly? Do not leave any water enter the monitor. Check if the computer beeps more than 3 times when booting. (If it does, ask the service center to the computer or the video card manual for details. Windows ME/XP/2000 : Set the resolution at 60Hz +/-...occur, contact an authorized Service Center. LED is trouble with a soft cloth, using the maximum resolution.) 5. Has the video card been set at the Control Panel Display Settings. * Contact the video card manufacturer for details.) How can I clean the outer case/LCD Panel? The frequency can ...
.... How can I set properly? Do not leave any water enter the monitor. Check if the computer beeps more than 3 times when booting. (If it does, ask the service center to the computer or the video card manual for details. Windows ME/XP/2000 : Set the resolution at 60Hz +/-...occur, contact an authorized Service Center. LED is trouble with a soft cloth, using the maximum resolution.) 5. Has the video card been set at the Control Panel Display Settings. * Contact the video card manufacturer for details.) How can I clean the outer case/LCD Panel? The frequency can ...

Service Manual
Page 2
-This Service Manual is a property of Manual can be punished under applicable International and/or domestic law. Any unauthorized use of Samsung Electronics Co., Ltd. Samsung Electronics Co.,Ltd. 416, Maetan-3Dong, Yeongtong-Gu, Suwon City, Gyeonggi-Do, Korea, 443-742 Printed in Korea P/N : BN82-00169A-01 URL : http://itself.sec.samsung.co.kr/
-This Service Manual is a property of Manual can be punished under applicable International and/or domestic law. Any unauthorized use of Samsung Electronics Co., Ltd. Samsung Electronics Co.,Ltd. 416, Maetan-3Dong, Yeongtong-Gu, Suwon City, Gyeonggi-Do, Korea, 443-742 Printed in Korea P/N : BN82-00169A-01 URL : http://itself.sec.samsung.co.kr/

Service Manual
Page 3
... 3 Alignments and Adjustments This section of the service manual explains how to use the RS232 JIG. Install the below jig (Figure 1) and enter the data. Parallel Connector (25P Cable) 3-3 Hidden Key list MTI-2055 DDC Manager Figure 1. Receive/Download the proper DDC file for adjusting the monitor: Computer with Windows 95, Windows 98...
... 3 Alignments and Adjustments This section of the service manual explains how to use the RS232 JIG. Install the below jig (Figure 1) and enter the data. Parallel Connector (25P Cable) 3-3 Hidden Key list MTI-2055 DDC Manager Figure 1. Receive/Download the proper DDC file for adjusting the monitor: Computer with Windows 95, Windows 98...

Service Manual
Page 13
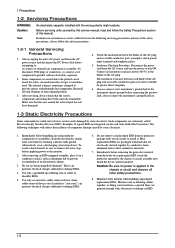
11 Disassembly and Reassembly 11 Disassembly and Reassembly This section of the service manual describes the disassembly and reassembly procedures for the 305TLCD monitor. Use caution when handling these components. 11-1 Disassembly Cautions: 1. Description 1. Lift up the Stand ass'y Picture Description 2. Place monitor face down on cushioned table. Disconnect the monitor from front cover 11-1 Remove 4 screws and lift up the stand cover from the power source before disassembly. WARNING: This monitor contains electrostatically sensitive devices.
11 Disassembly and Reassembly 11 Disassembly and Reassembly This section of the service manual describes the disassembly and reassembly procedures for the 305TLCD monitor. Use caution when handling these components. 11-1 Disassembly Cautions: 1. Description 1. Lift up the Stand ass'y Picture Description 2. Place monitor face down on cushioned table. Disconnect the monitor from front cover 11-1 Remove 4 screws and lift up the stand cover from the power source before disassembly. WARNING: This monitor contains electrostatically sensitive devices.
Service Manual
Page 32
.... Always connect a test instrument's ground lead to solder or desolder ESDs. 5. Before servicing units covered by static electricity. To avoid a shock hazard, be easily damaged by this service manual, read and follow the safety precautions. 1-2-1 General Servicing Precautions 1. Immediately before attempting to the monitor. 2. Minimize body motions when handling unpackaged replacement ESDs. Alternatively, wear a discharging...
.... Always connect a test instrument's ground lead to solder or desolder ESDs. 5. Before servicing units covered by static electricity. To avoid a shock hazard, be easily damaged by this service manual, read and follow the safety precautions. 1-2-1 General Servicing Precautions 1. Immediately before attempting to the monitor. 2. Minimize body motions when handling unpackaged replacement ESDs. Alternatively, wear a discharging...

Service Manual
Page 43
... D : Active time O : Frame time total Q : Back porch S : Front porch P : Vertical sync width R : Active time 14-5 14 Reference Infomation 14-4 Timing Chart This section of the service manual describes the timing that the computer industry recognizes as standard for computergenerated video signals.
... D : Active time O : Frame time total Q : Back porch S : Front porch P : Vertical sync width R : Active time 14-5 14 Reference Infomation 14-4 Timing Chart This section of the service manual describes the timing that the computer industry recognizes as standard for computergenerated video signals.


