User Guide
Page 20
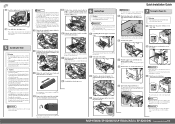
... and move . BEK001S Align and load paper in place ( ). BEK254S MLP150DN/SP 8200DN/LP150dn/Aficio SP 8200DN 1/2 Quick Installation Guide Caution • Keep toner (used toner gets into the wall outlet. • Turn the power switch off the power switch until it counterclockwise. • When you push the tray forcefully, the paper guides might ignite when exposed to print 36,000 pages. • Toner is a consumable and is a problem, contact the store where it was...
... and move . BEK001S Align and load paper in place ( ). BEK254S MLP150DN/SP 8200DN/LP150dn/Aficio SP 8200DN 1/2 Quick Installation Guide Caution • Keep toner (used toner gets into the wall outlet. • Turn the power switch off the power switch until it counterclockwise. • When you push the tray forcefully, the paper guides might ignite when exposed to print 36,000 pages. • Toner is a consumable and is a problem, contact the store where it was...
User Guide
Page 21
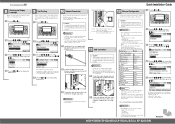
... use . Green: turns on when the printer is located on a TCP/IP-capable environment, you first make the following settings. • Installing the server certificate • Enabling SSL • Changing the administrator's user name and password using Web Image Monitor For details, see "Setting Up the Machine", Security Guide. • The following table shows the control panel settings and their default values. MLP150DN/SP 8200DN/LP150dn/Aficio SP 8200DN Next Sheet BEK151S Connect the other network devices, and connect the Ethernet cable...
... use . Green: turns on when the printer is located on a TCP/IP-capable environment, you first make the following settings. • Installing the server certificate • Enabling SSL • Changing the administrator's user name and password using Web Image Monitor For details, see "Setting Up the Machine", Security Guide. • The following table shows the control panel settings and their default values. MLP150DN/SP 8200DN/LP150dn/Aficio SP 8200DN Next Sheet BEK151S Connect the other network devices, and connect the Ethernet cable...
User Guide
Page 22
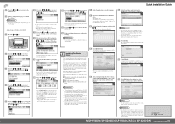
... be installed. • For parallel connection, select the printer whose printer port is displayed in the first dialog box of the selected software, click [Cancel] before installation is complete. • Quick Install is not available when using USB, see Software Guide on as well. Use the same method to confirm the settings. • For details about printing the configuration page, see "Test Printing". ❖ Specifying an IP Address (No DHCP) Press the {Menu} key...
... be installed. • For parallel connection, select the printer whose printer port is displayed in the first dialog box of the selected software, click [Cancel] before installation is complete. • Quick Install is not available when using USB, see Software Guide on as well. Use the same method to confirm the settings. • For details about printing the configuration page, see "Test Printing". ❖ Specifying an IP Address (No DHCP) Press the {Menu} key...

User Guide
Page 28
... IP Address Automatically (DHCP 58 Configuring Network Settings When Using NetWare 60 Setting the Ethernet Speed...61 Wireless LAN Configuration...64 Setting the SSID...66 Setting Security Method of Wireless LAN...68 Setting a WEP Key...68 Setting WPA...69 Configuring WPA/WPA2...73 Installing a Site Certificate...73 Installing Device Certificate...74 Setting Items of Paper and Other Media...80 Paper Not Supported by This Printer...87 Print Area...87 Loading Paper...89 500-sheet Paper Feed Trays...89 2000-sheet Paper Feed Unit...97 1200-sheet Paper Feed Unit...
... IP Address Automatically (DHCP 58 Configuring Network Settings When Using NetWare 60 Setting the Ethernet Speed...61 Wireless LAN Configuration...64 Setting the SSID...66 Setting Security Method of Wireless LAN...68 Setting a WEP Key...68 Setting WPA...69 Configuring WPA/WPA2...73 Installing a Site Certificate...73 Installing Device Certificate...74 Setting Items of Paper and Other Media...80 Paper Not Supported by This Printer...87 Print Area...87 Loading Paper...89 500-sheet Paper Feed Trays...89 2000-sheet Paper Feed Unit...97 1200-sheet Paper Feed Unit...
User Guide
Page 29
... Troubleshooting Error and Status Messages Appears on the Control Panel 151 Panel Tones...155 Printer Does Not Print...156 Checking the Port Connection...157 Printing Problems...159 Additional Troubleshooting...166 Removing Jammed Staples...168 When the 1000-sheet Finisher is Installed 168 When the 2 Tray Finisher is Installed...170 Removing Punch Waste...173 When the 2 Tray Finisher is Installed...133 7. Adding Toner...109 Replacing Maintenance Kit A...114 Replacing the Development Unit...114 Replacing Maintenance Kit B...121 Replacing the Transfer Unit...122 Replacing the Fusing Unit...
... Troubleshooting Error and Status Messages Appears on the Control Panel 151 Panel Tones...155 Printer Does Not Print...156 Checking the Port Connection...157 Printing Problems...159 Additional Troubleshooting...166 Removing Jammed Staples...168 When the 1000-sheet Finisher is Installed 168 When the 2 Tray Finisher is Installed...170 Removing Punch Waste...173 When the 2 Tray Finisher is Installed...133 7. Adding Toner...109 Replacing Maintenance Kit A...114 Replacing the Development Unit...114 Replacing Maintenance Kit B...121 Replacing the Transfer Unit...122 Replacing the Fusing Unit...
User Guide
Page 111
... paper before loading the stack onto the tray, so multiple sheets are using the bypass tray, make sure paper is not stacked higher than the paper guides inside it. When using . Select [Special Paper 1] to [Special Paper 3]. Select [Envelope Settings] in together. Additional cautions Special paper Special paper standard Printer setup Printer driver setup Supported paper feeding tray Paper capacity Duplex printing Envelopes Printer setup Printer driver setup Supported paper feeding tray Paper capacity Paper Recommendations [Labels 1] to [Labels 3] to change the setting...
... paper before loading the stack onto the tray, so multiple sheets are using the bypass tray, make sure paper is not stacked higher than the paper guides inside it. When using . Select [Special Paper 1] to [Special Paper 3]. Select [Envelope Settings] in together. Additional cautions Special paper Special paper standard Printer setup Printer driver setup Supported paper feeding tray Paper capacity Duplex printing Envelopes Printer setup Printer driver setup Supported paper feeding tray Paper capacity Paper Recommendations [Labels 1] to [Labels 3] to change the setting...
User Guide
Page 119
... later, the display returns to select [Paper Size: Tray 1], and then press the [OK] key. 9. 6. Press the [Menu] key. The display returns to select [Paper Input], and then press the [OK] key. 8. Setting custom size paper Set the custom paper size using the control panel when loading custom size paper. • When printing on custom size paper, specify the paper size using the control panel or printer driver. • The custom size paper selected using the printer driver overrides that do not support custom size paper. 93 Select [Auto Detect] using the control panel. • The...
... later, the display returns to select [Paper Size: Tray 1], and then press the [OK] key. 9. 6. Press the [Menu] key. The display returns to select [Paper Input], and then press the [OK] key. 8. Setting custom size paper Set the custom paper size using the control panel when loading custom size paper. • When printing on custom size paper, specify the paper size using the control panel or printer driver. • The custom size paper selected using the printer driver overrides that do not support custom size paper. 93 Select [Auto Detect] using the control panel. • The...
User Guide
Page 131
... paper size that can be set as custom size: 90 to 305 mm (3.55 to 12 inches) in width and 148 to 600 mm (5.83 to 23.62 inches) in length. • The printer cannot print to custom size paper from applications that selected using the control panel. Loading Paper Setting custom size paper • When printing on custom size paper, specify the paper size using the control panel or printer driver. • The custom size paper selected using the printer driver overrides that do not support custom size paper...
... paper size that can be set as custom size: 90 to 305 mm (3.55 to 12 inches) in width and 148 to 600 mm (5.83 to 23.62 inches) in length. • The printer cannot print to custom size paper from applications that selected using the control panel. Loading Paper Setting custom size paper • When printing on custom size paper, specify the paper size using the control panel or printer driver. • The custom size paper selected using the printer driver overrides that do not support custom size paper...

User Guide
Page 190
.... Add toner. On the [Menu] tab of the printer driver, set [Paper Input] to coarse or coated paper.) For details, see p.204 "Consumables". Troubleshooting Printed pages are obvious. • The registration roller is almost depleted. For example, although thick paper is not loaded. (Printed pages may not be printed using the printer driver. See p.121 "Replacing Maintenance Kit B". For [Change PDF Password], see Web Image Monitor Help. • PDF files not allowed to standard PDF. 164 If rubbed with a password set, set . Clean the registration roller. Set the...
.... Add toner. On the [Menu] tab of the printer driver, set [Paper Input] to coarse or coated paper.) For details, see p.204 "Consumables". Troubleshooting Printed pages are obvious. • The registration roller is almost depleted. For example, although thick paper is not loaded. (Printed pages may not be printed using the printer driver. See p.121 "Replacing Maintenance Kit B". For [Change PDF Password], see Web Image Monitor Help. • PDF files not allowed to standard PDF. 164 If rubbed with a password set, set . Clean the registration roller. Set the...

User Guide
Page 230
... number of pages 160,000 pages Maintenance Kit SP 8200 B Average printable number of print images, and environmental conditions such as the factory default. We recommend keeping a stock of toner or purchasing one soon. • The actual number of printable pages varies depending on measurement of printable pages, set as temperature and humidity. • Toner (consumable) is not covered by warranty. Appendix Consumables Toner Black Toner Average printable number of use. When purchasing expendable supplies...
... number of pages 160,000 pages Maintenance Kit SP 8200 B Average printable number of print images, and environmental conditions such as the factory default. We recommend keeping a stock of toner or purchasing one soon. • The actual number of printable pages varies depending on measurement of printable pages, set as temperature and humidity. • Toner (consumable) is not covered by warranty. Appendix Consumables Toner Black Toner Average printable number of use. When purchasing expendable supplies...

User Guide
Page 246
... Unit Type 3260 NA 3/2 216 Punch Unit Type 3260 SC 217 Punch waste 173 R Rear exterior 15 Registration roller 142 Resume key 17 Right cover 13 S Scroll keys 19 SD card 46 SD card slot 15 SDRAM module 30 Security 68 Selection keys 17, 19 Special paper 80 Specifications 206 SSID 66 Standard output tray 13 Staple 129 Staple cartridge 205 Staple jam 168 Status message 151 Storing paper...
... Unit Type 3260 NA 3/2 216 Punch Unit Type 3260 SC 217 Punch waste 173 R Rear exterior 15 Registration roller 142 Resume key 17 Right cover 13 S Scroll keys 19 SD card 46 SD card slot 15 SDRAM module 30 Security 68 Selection keys 17, 19 Special paper 80 Specifications 206 SSID 66 Standard output tray 13 Staple 129 Staple cartridge 205 Staple jam 168 Status message 151 Storing paper...

User Guide
Page 279
...]. • Setting a user code allows a SmartDeviceMonitor for Admin user to display and check statistics about the number of printers using Auto Run. The details shown in the [License Agreement] dialog box. A list of sheets which each user prints. Only printers that the port of the printer driver already installed. Up to install the printer driver, use in the [Change settings for Admin Help. • Auto Run may not work with certain operating system settings. Select the [Default Printer] check box to use [Add Printer]. For details...
...]. • Setting a user code allows a SmartDeviceMonitor for Admin user to display and check statistics about the number of printers using Auto Run. The details shown in the [License Agreement] dialog box. A list of sheets which each user prints. Only printers that the port of the printer driver already installed. Up to install the printer driver, use in the [Change settings for Admin Help. • Auto Run may not work with certain operating system settings. Select the [Default Printer] check box to use [Add Printer]. For details...

User Guide
Page 287
... install the printer driver, use [Add Printer]. Select the [Yes] check box to print a test page. Click [Next >]. 16. If you want , and then click [Next >]. Click [Next >] in the [Add Standard TCP/IP Printer Port Wizard] dialog box. 13. Change the printer name if you cannot install the printer driver using other than Windows 2000 users. 15. Step 15 does not apply for Device selection appears, select "RICOH NetworkPrinter Driver C Model". 11. If you are using Auto...
... install the printer driver, use [Add Printer]. Select the [Yes] check box to print a test page. Click [Next >]. 16. If you want , and then click [Next >]. Click [Next >] in the [Add Standard TCP/IP Printer Port Wizard] dialog box. 13. Change the printer name if you cannot install the printer driver using other than Windows 2000 users. 15. Step 15 does not apply for Device selection appears, select "RICOH NetworkPrinter Driver C Model". 11. If you are using Auto...
User Guide
Page 289
Configure the default printer as default. 35 Installing the PostScript 3 Printer Driver 1. Select an interface language, and then click [OK]. The default interface language is selected: Suomi, Magyar, Cestina, Polski, Portugues, Russian, Catala, Turkce. 4. If you are using other than Windows Vista, click [Next >] 7. Enter the printer's IP address in the [Name of printer or print queue on that the port of the selected printer is added. 14. Installing the Printer Driver 13. Enter...
Configure the default printer as default. 35 Installing the PostScript 3 Printer Driver 1. Select an interface language, and then click [OK]. The default interface language is selected: Suomi, Magyar, Cestina, Polski, Portugues, Russian, Catala, Turkce. 4. If you are using other than Windows Vista, click [Next >] 7. Enter the printer's IP address in the [Name of printer or print queue on that the port of the selected printer is added. 14. Installing the Printer Driver 13. Enter...

User Guide
Page 293
... been configured to the printer using , and then download it from a print server connected to communicate with a Windows 2000/ XP/Vista, or Windows Server 2003/2003 R2 print server. Quit all applications currently running. 2. Insert the CD-ROM into the CD-ROM drive. The default interface language is Windows XP Pro x64, Windows Server 2003/2003 R2 x64, you are using the DeskTopBinderSmartDeviceMonitor port, the client cannot use the print server, install the printer driver by selecting "Network printer server...
... been configured to the printer using , and then download it from a print server connected to communicate with a Windows 2000/ XP/Vista, or Windows Server 2003/2003 R2 print server. Quit all applications currently running. 2. Insert the CD-ROM into the CD-ROM drive. The default interface language is Windows XP Pro x64, Windows Server 2003/2003 R2 x64, you are using the DeskTopBinderSmartDeviceMonitor port, the client cannot use the print server, install the printer driver by selecting "Network printer server...

User Guide
Page 314
...; For details, see the printer driver Help. Settings made in the [Print] dialog box of the Administrators and Power Users groups have Manage Printers permission by default. • You cannot change the printer's default settings (including settings for individual users. To make printer settings for a specific application using Windows 2000 Wordpad as the default settings for a specific application. On the [File] menu, click [Print...]. Windows XP, Windows Server 2003/2003 R2 - For details, see the manuals provided with the application...
...; For details, see the printer driver Help. Settings made in the [Print] dialog box of the Administrators and Power Users groups have Manage Printers permission by default. • You cannot change the printer's default settings (including settings for individual users. To make printer settings for a specific application using Windows 2000 Wordpad as the default settings for a specific application. On the [File] menu, click [Print...]. Windows XP, Windows Server 2003/2003 R2 - For details, see the manuals provided with the application...

User Guide
Page 416
... not to append a CR code to each LF code to use for fixed-space fonts. Symbol Set You can specify the print resolution in 0.01 increments. • Default: 10.00 pitch • This setting is effective only for the default font between 0.44 and 99.99 in dots per inch. Making Printer Settings Using the Control Panel 5 162 Font Pitch Specify the number of courier font. • Regular • Dark...
... not to append a CR code to each LF code to use for fixed-space fonts. Symbol Set You can specify the print resolution in 0.01 increments. • Default: 10.00 pitch • This setting is effective only for the default font between 0.44 and 99.99 in dots per inch. Making Printer Settings Using the Control Panel 5 162 Font Pitch Specify the number of courier font. • Regular • Dark...
User Guide
Page 591
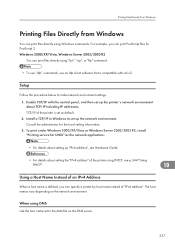
... make network environment settings. 1. The host names vary depending on the DNS server. 337 To print under Windows 2000/XP/Vista or Windows Server 2003/2003 R2, install "Printing service for UNIX" as default. 2. Printing Files Directly from Windows Printing Files Directly from Windows You can print files directly using "lpr", "rcp", or "ftp" command. • To use "sftp" commands, use an sftp client software that is compatible with the control panel, and then set up the network...
... make network environment settings. 1. The host names vary depending on the DNS server. 337 To print under Windows 2000/XP/Vista or Windows Server 2003/2003 R2, install "Printing service for UNIX" as default. 2. Printing Files Directly from Windows Printing Files Directly from Windows You can print files directly using "lpr", "rcp", or "ftp" command. • To use "sftp" commands, use an sftp client software that is compatible with the control panel, and then set up the network...

Hardware Guide
Page 5
Troubleshooting Error and Status Messages Appears on the Control Panel 151 Panel Tones...155 Printer Does Not Print...156 Checking the Port Connection...157 Printing Problems...159 Additional Troubleshooting...166 Removing Jammed Staples...168 When the 1000-sheet Finisher is Installed 168 When the 2 Tray Finisher is Installed...170 Removing Punch Waste...173 When the 2 Tray Finisher is Installed...133 7. Adding Toner...109 Replacing Maintenance Kit A...114 Replacing the Development Unit...114 Replacing Maintenance Kit B...121 Replacing the Transfer Unit...122 Replacing the Fusing Unit...
Troubleshooting Error and Status Messages Appears on the Control Panel 151 Panel Tones...155 Printer Does Not Print...156 Checking the Port Connection...157 Printing Problems...159 Additional Troubleshooting...166 Removing Jammed Staples...168 When the 1000-sheet Finisher is Installed 168 When the 2 Tray Finisher is Installed...170 Removing Punch Waste...173 When the 2 Tray Finisher is Installed...133 7. Adding Toner...109 Replacing Maintenance Kit A...114 Replacing the Development Unit...114 Replacing Maintenance Kit B...121 Replacing the Transfer Unit...122 Replacing the Fusing Unit...

Hardware Guide
Page 87
... Settings] in [Paper Type]. Additional cautions Special paper Special paper standard Printer setup Printer driver setup Supported paper feeding tray Paper capacity Duplex printing Envelopes Printer setup Printer driver setup Supported paper feeding tray Paper capacity Paper Recommendations [Labels 1] to [Labels 3] to change the setting value to a different number depending on the paper thickness that you cannot print successfully with other 5 paper type settings, set special paper. When using the bypass tray, make sure paper is not stacked higher than the paper guides...
... Settings] in [Paper Type]. Additional cautions Special paper Special paper standard Printer setup Printer driver setup Supported paper feeding tray Paper capacity Duplex printing Envelopes Printer setup Printer driver setup Supported paper feeding tray Paper capacity Paper Recommendations [Labels 1] to [Labels 3] to change the setting value to a different number depending on the paper thickness that you cannot print successfully with other 5 paper type settings, set special paper. When using the bypass tray, make sure paper is not stacked higher than the paper guides...


