User Guide
Page 1
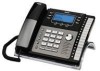
4-Line Intercom Speakerphone User's Guide Quick Guide on Pgs. 7-14 Please read this manual before operating product for the first time. Model 25423/24
4-Line Intercom Speakerphone User's Guide Quick Guide on Pgs. 7-14 Please read this manual before operating product for the first time. Model 25423/24
User Guide
Page 5
... 16 Phone Name 17 Intercom Auto Answer 17 Flash Time 18 Call Alert Tone 18 No Unknown/Blocked 18 Display Contrast 19 Local Area Code 19 Regional Area Codes 19 Manually Setting the Time and Date 20 Hour Format 21 Restoring the Default Settings 21 Basic Operation 21 Making Calls with the... 28 Paging All Stations 29 Caller ID 29 Summary Screen 29 Receiving and Storing CID Records 29 Reviewing CID Records 30 Saving a CID Record to Phone Book Memory... 30 Deleting a CID Record 30 Deleting All Call Records 30 Dialing Back 30 If You Programmed Your Local Area Code... 30 If You...
... 16 Phone Name 17 Intercom Auto Answer 17 Flash Time 18 Call Alert Tone 18 No Unknown/Blocked 18 Display Contrast 19 Local Area Code 19 Regional Area Codes 19 Manually Setting the Time and Date 20 Hour Format 21 Restoring the Default Settings 21 Basic Operation 21 Making Calls with the... 28 Paging All Stations 29 Caller ID 29 Summary Screen 29 Receiving and Storing CID Records 29 Reviewing CID Records 30 Saving a CID Record to Phone Book Memory... 30 Deleting a CID Record 30 Deleting All Call Records 30 Dialing Back 30 If You Programmed Your Local Area Code... 30 If You...

User Guide
Page 16
..., determine if there are too many phones connected to save. Use the Vol (+ or -) buttons to scroll up or down to 2 rings. Press the Sel/Save button again to automatically set the Delay Ring to SET PHONE ID. 5. If you manually select a phone ID that you set the phone ID, or press any time to... SET PHONE OPTIONS. 3. Use the Vol (+ or -) buttons to scroll up or down to 0 ring up or down to...
..., determine if there are too many phones connected to save. Use the Vol (+ or -) buttons to scroll up or down to 2 rings. Press the Sel/Save button again to automatically set the Delay Ring to SET PHONE ID. 5. If you manually select a phone ID that you set the phone ID, or press any time to... SET PHONE OPTIONS. 3. Use the Vol (+ or -) buttons to scroll up or down to 0 ring up or down to...
User Guide
Page 20
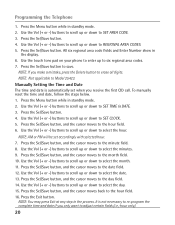
To manually reset the time and date, follow the steps below. 1. Use the Vol (+ or -) buttons to scroll up ... or down to six regional area codes. 7. Use the Vol (+ or -) buttons to scroll up to select the month. 11. Manually Setting the Time and Date The time and date is not necessary to re-program the complete time and date if you make a mistake...cursor moves to Model 25423. Press the Sel/Save button to the hour field. 6. Use the touch tone pad on your phone to enter up or down to erase all digits. All six regional area code fields and Enter Number show in standby mode....
To manually reset the time and date, follow the steps below. 1. Use the Vol (+ or -) buttons to scroll up ... or down to six regional area codes. 7. Use the Vol (+ or -) buttons to scroll up to select the month. 11. Manually Setting the Time and Date The time and date is not necessary to re-program the complete time and date if you make a mistake...cursor moves to Model 25423. Press the Sel/Save button to the hour field. 6. Use the touch tone pad on your phone to enter up or down to erase all digits. All six regional area code fields and Enter Number show in standby mode....
User Guide
Page 22
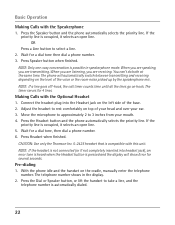
...tone is heard when the Headset button is occupied, it selects an open line. Wait for a dial tone then dial a phone number. 3. With the phone idle and the handset on top of the voice or the room noise picked up by the speakerphone mic. Press the Dial...selects the priority line. Press the Headset button and the phone automatically selects the priority line. Press Headset when finished. Basic Operation Making Calls with the Optional Headset 1. OR Press a Line button to rest comfortably on the cradle, manually enter the telephone number. CAUTION: Use only the Thomson...
...tone is heard when the Headset button is occupied, it selects an open line. Wait for a dial tone then dial a phone number. 3. With the phone idle and the handset on top of the voice or the room noise picked up by the speakerphone mic. Press the Dial...selects the priority line. Press the Headset button and the phone automatically selects the priority line. Press Headset when finished. Basic Operation Making Calls with the Optional Headset 1. OR Press a Line button to rest comfortably on the cradle, manually enter the telephone number. CAUTION: Use only the Thomson...
User Guide
Page 36
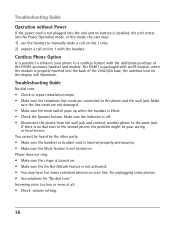
...to enhance your wiring or local service. You cannot be your phone to the same jack. Phone does not ring. • Make sure the ringer is turned on the display will illuminate. Make sure the line cords are connected to the phone and the wall jack. The H5401 is packaged with an RF... module, when the module is possible to manually make a call on line 1 only, 2) answer a call on line 1 with the additional ...
...to enhance your wiring or local service. You cannot be your phone to the same jack. Phone does not ring. • Make sure the ringer is turned on the display will illuminate. Make sure the line cords are connected to the phone and the wall jack. The H5401 is packaged with an RF... module, when the module is possible to manually make a call on line 1 only, 2) answer a call on line 1 with the additional ...

User Guide
Page 40
... its equivalent to the rental firm, whichever comes first.) What we will be obtained from your warranty does not cover: • Customer instruction. (Your Owner's Manual provides information regarding operating instructions and user controls.
... its equivalent to the rental firm, whichever comes first.) What we will be obtained from your warranty does not cover: • Customer instruction. (Your Owner's Manual provides information regarding operating instructions and user controls.

User Guide
Page 43
... with the Handset 21 Making Calls with the Optional Headset 22 Making Calls with the Speakerphone 22 Manually Setting the Time and Date 20 Memory Delete/Clear 34 Memory Log and Phone Book (Directory) Memory 31 Message Waiting 26 Mute 23 N No Unknown/Blocked 18 O One-Touch... 29 Index Redial 25 Regional Area Codes 19 Releasing a Call from Hold 24 Restoring the Default Settings 21 Reviewing CID Records 30 Reviewing Phone Book (Directory) Memory 32 Reviewing the Intercom/Memory Log (memory location) 32 Reviewing the Redial Numbers 25 Ringer Tone 15 Ringer Volume...
... with the Handset 21 Making Calls with the Optional Headset 22 Making Calls with the Speakerphone 22 Manually Setting the Time and Date 20 Memory Delete/Clear 34 Memory Log and Phone Book (Directory) Memory 31 Message Waiting 26 Mute 23 N No Unknown/Blocked 18 O One-Touch... 29 Index Redial 25 Regional Area Codes 19 Releasing a Call from Hold 24 Restoring the Default Settings 21 Reviewing CID Records 30 Reviewing Phone Book (Directory) Memory 32 Reviewing the Intercom/Memory Log (memory location) 32 Reviewing the Redial Numbers 25 Ringer Tone 15 Ringer Volume...
User Guide
Page 44
Trademark(s) ® Registered Marca(s) Registrada(s) Model 25423/24 00020876 (Rev. 1 E/S) 07-34 Printd in this manual or on the carton. Visit the RCA web site at www.rca.com Please do not send any products to the Indianapolis address listed in China Thomson Inc. 101 West 103rd Street Indianapolis, IN 46290-1102 © 2007 Thomson Inc. This will only add delays in service for your product.
Trademark(s) ® Registered Marca(s) Registrada(s) Model 25423/24 00020876 (Rev. 1 E/S) 07-34 Printd in this manual or on the carton. Visit the RCA web site at www.rca.com Please do not send any products to the Indianapolis address listed in China Thomson Inc. 101 West 103rd Street Indianapolis, IN 46290-1102 © 2007 Thomson Inc. This will only add delays in service for your product.


