
Canadian English Manual
Page 2
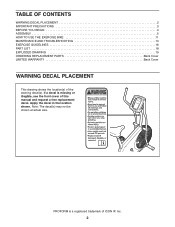
... at actual size. PROFORM is missing or illegible, see the front cover of this manual and request a free replacement decal. Apply the decal in the location shown. TABLE OF CONTENTS WARNING DECAL PLACEMENT 2 IMPORTANT PRECAUTIONS 3 BEFORE YOU BEGIN 4 ASSEMBLY 5 HOW TO USE THE EXERCISE BIKE 11 MAINTENANCE AND TROUBLESHOOTING 14 EXERCISE GUIDELINES 16 PART LIST...
... at actual size. PROFORM is missing or illegible, see the front cover of this manual and request a free replacement decal. Apply the decal in the location shown. TABLE OF CONTENTS WARNING DECAL PLACEMENT 2 IMPORTANT PRECAUTIONS 3 BEFORE YOU BEGIN 4 ASSEMBLY 5 HOW TO USE THE EXERCISE BIKE 11 MAINTENANCE AND TROUBLESHOOTING 14 EXERCISE GUIDELINES 16 PART LIST...
Canadian English Manual
Page 14
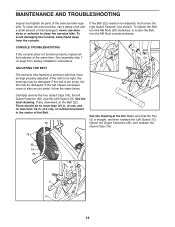
... the four Guard Clips (76), the left . never use a damp cloth and a small amount of the exercise bike regularly. See assembly step 7 22 on the Belt (22). MAINTENANCE AND TROUBLESHOOTING Inspect and tighten all the batteries at the left Guard Fastener (35), and the Left Guard (13...the Guard Fasteners (35), and reattach the Guard Clips (76). 76 35 13 76 22 5 14 To clean the exercise bike, use abrasives or solvents to clean the exercise bike. To tighten the Belt, turn the M6 Nuts counterclockwise. Press downward on page 8 for battery installation instructions. 53 ...
... the four Guard Clips (76), the left . never use a damp cloth and a small amount of the exercise bike regularly. See assembly step 7 22 on the Belt (22). MAINTENANCE AND TROUBLESHOOTING Inspect and tighten all the batteries at the left Guard Fastener (35), and the Left Guard (13...the Guard Fasteners (35), and reattach the Guard Clips (76). 76 35 13 76 22 5 14 To clean the exercise bike, use abrasives or solvents to clean the exercise bike. To tighten the Belt, turn the M6 Nuts counterclockwise. Press downward on page 8 for battery installation instructions. 53 ...


