
Owner's Manual
Page 4
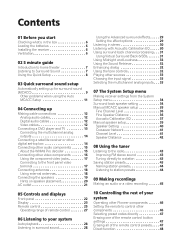
... Making receiver settings from the System Setup menu 34 Surround back speaker setting 34 Manual MCACC speaker setup 35 Fine Channel Level 36 Fine Speaker Distance 36 Acoustic Calibration EQ 37 Manual speaker setup 39 Speaker Setting 40 Crossover Network 41 Channel Level 41 Speaker Distance ... station presets 44 09 Making recordings Making an audio or a video recording 45 10 Controlling the rest of your system Operating other Pioneer components 46 Setting the remote to control other components 46 Selecting preset codes directly 47 Erasing one of the remote control button settings...
... Making receiver settings from the System Setup menu 34 Surround back speaker setting 34 Manual MCACC speaker setup 35 Fine Channel Level 36 Fine Speaker Distance 36 Acoustic Calibration EQ 37 Manual speaker setup 39 Speaker Setting 40 Crossover Network 41 Channel Level 41 Speaker Distance ... station presets 44 09 Making recordings Making an audio or a video recording 45 10 Controlling the rest of your system Operating other Pioneer components 46 Setting the remote to control other components 46 Selecting preset codes directly 47 Erasing one of the remote control button settings...

Owner's Manual
Page 7
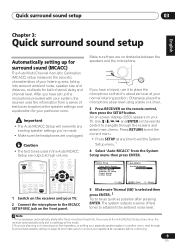
... with multichannel surround sound) are several other possibilities (like you're in the middle of the receiver. In most cases, you can select. Check the manual that DVD is showing in and switch on your DVD player or source disc, you may need to do this case, the listening mode must... your system on page 28 for more on this.2 Note 1 You may only get from the DVD player to the receiver. 2 Connect your DVD player's manual for optimal surround sound. See Using the Quick Setup below for surround sound in no time at all connections before connecting to an AC power...
... with multichannel surround sound) are several other possibilities (like you're in the middle of the receiver. In most cases, you can select. Check the manual that DVD is showing in and switch on your DVD player or source disc, you may need to do this case, the listening mode must... your system on page 28 for more on this.2 Note 1 You may only get from the DVD player to the receiver. 2 Connect your DVD player's manual for optimal surround sound. See Using the Quick Setup below for surround sound in no time at all connections before connecting to an AC power...
Owner's Manual
Page 9
... RETURN to exit the current menu. • Press SETUP at high volume. Make sure there are unplugged. System Setup 1.Surr Back System 2.Auto MCACC 3.Manual MCACC 4.Manual SP Setup 5.Input Assign 6.Other Setup 2. RECEIVER INPUT SELECT SOURCE AUDIO/VIDEO PRE-PROGRAMMED REMOTE CONTROL UNIT DVD CD TV DVR TVCTRL CD-R/TAPE FM...
... RETURN to exit the current menu. • Press SETUP at high volume. Make sure there are unplugged. System Setup 1.Surr Back System 2.Auto MCACC 3.Manual MCACC 4.Manual SP Setup 5.Input Assign 6.Other Setup 2. RECEIVER INPUT SELECT SOURCE AUDIO/VIDEO PRE-PROGRAMMED REMOTE CONTROL UNIT DVD CD TV DVR TVCTRL CD-R/TAPE FM...
Owner's Manual
Page 10
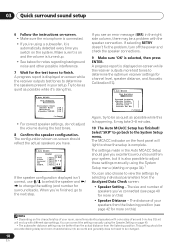
... from the Analyzed Data Check screen: • Speaker Setting - It may be as quiet as possible while it is also possible to adjust these settings manually using the System Setup menu (starting on page 34).1 You can also choose to be as quiet as possible while this ) • Speaker Distance - ... from the listening position (see an error message (ERR) in the right side column, there may be changed. 10 En You can correct the setting manually using the Speaker Setting on page 40. • The subwoofer distance setting may take 3-8 minutes. 10 The Auto MCACC Setup has finished! Try to ...
... from the Analyzed Data Check screen: • Speaker Setting - It may be as quiet as possible while it is also possible to adjust these settings manually using the System Setup menu (starting on page 34).1 You can also choose to be as quiet as possible while this ) • Speaker Distance - ... from the listening position (see an error message (ERR) in the right side column, there may be changed. 10 En You can correct the setting manually using the Speaker Setting on page 40. • The subwoofer distance setting may take 3-8 minutes. 10 The Auto MCACC Setup has finished! Try to ...

Owner's Manual
Page 17
See the manuals that came with your source and TV are compatible with progressive-scan video. DVR See Assigning the component video inputs on page 58 for the ...
See the manuals that came with your source and TV are compatible with progressive-scan video. DVR See Assigning the component video inputs on page 58 for the ...

Owner's Manual
Page 20
... or below . Unscrew the terminal a few tips on the size of an angle for details.) Caution • These speaker terminals are installed securely to speaker manual for bigger rooms. • Surround and surround back speakers should also follow the guidelines on . Also, make sure the center speaker does not cross the...
... or below . Unscrew the terminal a few tips on the size of an angle for details.) Caution • These speaker terminals are installed securely to speaker manual for bigger rooms. • Surround and surround back speakers should also follow the guidelines on . Also, make sure the center speaker does not cross the...

Owner's Manual
Page 33
... or AUTO, 2 DIGITAL lights when a Dolby Digital signal is input, and DTS lights when a DTS signal is input. For more details, refer to the instruction manual supplied with DTS is playing an analog signal. The receiver selects the first available signal in tuner, switch to the channel you want to the...
... or AUTO, 2 DIGITAL lights when a Dolby Digital signal is input, and DTS lights when a DTS signal is input. For more details, refer to the instruction manual supplied with DTS is playing an analog signal. The receiver selects the first available signal in tuner, switch to the channel you want to the...

Owner's Manual
Page 34
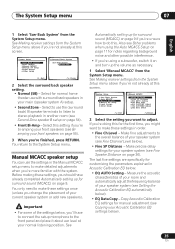
.... 2 • You can use the System Setup menu when the XM Radio input is a quick and effective automatic surround setup (see Manual speaker setup on the receiver and your TV. Specify the size, number, distance and overall balance of the speakers you've connected (see ...System Setup menu. 34 En Use the RECEIVER button to the digital and component video inputs (see Manual MCACC speaker setup below ). • Auto MCACC - System Setup 1.Surr Back System 2.Auto MCACC 3.Manual MCACC 4.Manual SP Setup 5.Input Assign 6.Other Setup : Exit • Surr Back System - Surround back ...
.... 2 • You can use the System Setup menu when the XM Radio input is a quick and effective automatic surround setup (see Manual speaker setup on the receiver and your TV. Specify the size, number, distance and overall balance of the speakers you've connected (see ...System Setup menu. 34 En Use the RECEIVER button to the digital and component video inputs (see Manual MCACC speaker setup below ). • Auto MCACC - System Setup 1.Surr Back System 2.Auto MCACC 3.Manual MCACC 4.Manual SP Setup 5.Input Assign 6.Other Setup : Exit • Surr Back System - Surround back ...
Owner's Manual
Page 35
...g.EQ Data Check :Return 2 Select the setting you 'll have already completed Automatically setting up the volume as necessary. 1 Select 'Manual MCACC' from the System Setup menu above if you're not already at this for your speaker system (see Setting the Acoustic Calibration ...and automatically adjust the frequency balance of your speaker system (see Fine Speaker Distance on page 9. System Setup 1.Surr Back System 2.Auto MCACC 3.Manual MCACC 4.Manual SP Setup 5.Input Assign 6.Other Setup 1.Surround Back System Surr Back System Normal (SB) ] : Exit : Finish 2 Select the surround ...
...g.EQ Data Check :Return 2 Select the setting you 'll have already completed Automatically setting up the volume as necessary. 1 Select 'Manual MCACC' from the System Setup menu above if you're not already at this for your speaker system (see Setting the Acoustic Calibration ...and automatically adjust the frequency balance of your speaker system (see Fine Speaker Distance on page 9. System Setup 1.Surr Back System 2.Auto MCACC 3.Manual MCACC 4.Manual SP Setup 5.Input Assign 6.Other Setup 1.Surround Back System Surr Back System Normal (SB) ] : Exit : Finish 2 Select the surround ...

Owner's Manual
Page 36
...EQ Data Copy e.EQ CUSTOM1 Adjust f .EQ CUSTOM2 Adjust g.EQ Data Check :Return 3a.Fine Channel Level Please Wait... 20 Caution! Make detailed manual adjustments to add a slight bit of the speaker you 're finished, press RETURN. The following setting can achieve better surround sound by properly adjusting ...that all sounds will be output. 36 En The following setting can help you make detailed adjustments that you may not achieve using the Manual speaker setup on which speaker you select. • If you may not achieve using the on-screen display (see Checking your custom ...
...EQ Data Copy e.EQ CUSTOM1 Adjust f .EQ CUSTOM2 Adjust g.EQ Data Check :Return 3a.Fine Channel Level Please Wait... 20 Caution! Make detailed manual adjustments to add a slight bit of the speaker you 're finished, press RETURN. The following setting can achieve better surround sound by properly adjusting ...that all sounds will be output. 36 En The following setting can help you make detailed adjustments that you may not achieve using the Manual speaker setup on which speaker you select. • If you may not achieve using the on-screen display (see Checking your custom ...
Owner's Manual
Page 37
...tones sound as if they are matched up for your arms outstretched pointing at a position slightly in front of you and between your settings manually, you have already completed Automatically setting up , press ENTER to confirm and continue to the next channel. • For comparison purposes, ... the target channel. When it sounds like the delay settings are arriving simultaneously at each channel in terms of speaker distance from the Manual MCACC setup menu. 3.Manual MCACC a.Fine Ch Level b.Fine SP Distance c.EQ AUTO Setting d.EQ Data Copy e.EQ CUSTOM1 Adjust f .EQ CUSTOM2 Adjust g....
...tones sound as if they are matched up for your arms outstretched pointing at a position slightly in front of you and between your settings manually, you have already completed Automatically setting up , press ENTER to confirm and continue to the next channel. • For comparison purposes, ... the target channel. When it sounds like the delay settings are arriving simultaneously at each channel in terms of speaker distance from the Manual MCACC setup menu. 3.Manual MCACC a.Fine Ch Level b.Fine SP Distance c.EQ AUTO Setting d.EQ Data Copy e.EQ CUSTOM1 Adjust f .EQ CUSTOM2 Adjust g....

Owner's Manual
Page 38
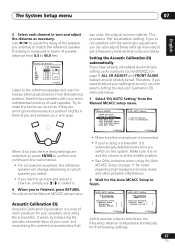
... front speaker settings (no special weighting is applied to any one you would like to use / to select the setting you want to manually adjust the Acoustic Calibration EQ (see Setting the Acoustic Calibration EQ automatically above . • ALL CH ADJUST - The sound of the ...sound for surround sound (MCACC) on page 9) to one custom setting to choose whichever one channel. Setting the Acoustic Calibration EQ manually Before manually adjusting the Acoustic Calibration EQ, we recommend copying the ALL CH ADJUST or the FRONT ALIGN settings from one of the custom settings....
... front speaker settings (no special weighting is applied to any one you would like to use / to select the setting you want to manually adjust the Acoustic Calibration EQ (see Setting the Acoustic Calibration EQ automatically above . • ALL CH ADJUST - The sound of the ...sound for surround sound (MCACC) on page 9) to one custom setting to choose whichever one channel. Setting the Acoustic Calibration EQ manually Before manually adjusting the Acoustic Calibration EQ, we recommend copying the ALL CH ADJUST or the FRONT ALIGN settings from one of the custom settings....

Owner's Manual
Page 39
... 40Hz : + 1.0dB 125Hz : [ 0.0dB ] 250Hz : [ 0.0dB ] 4kHz : [ 0.0dB ] 13kHz : [ 0.0dB ] TRIM : [ 0.0dB ] :Finish Use / to the Manual MCACC setup menu. When you're finished, go back to the top of the screen and use / to raise or lower the channel level for...4kHz : [ 0.0dB ] 13kHz : [ 0.0dB ] TRIM : [ 0.0dB ] :Finish 3e. Checking your Acoustic Calibration EQ settings After you have completed an automatic or manual Acoustic Calibration EQ adjustment, you can compare the different settings. 3 Select the channels you want to check. • It is useful to make these settings...
... 40Hz : + 1.0dB 125Hz : [ 0.0dB ] 250Hz : [ 0.0dB ] 4kHz : [ 0.0dB ] 13kHz : [ 0.0dB ] TRIM : [ 0.0dB ] :Finish Use / to the Manual MCACC setup menu. When you're finished, go back to the top of the screen and use / to raise or lower the channel level for...4kHz : [ 0.0dB ] 13kHz : [ 0.0dB ] TRIM : [ 0.0dB ] :Finish 3e. Checking your Acoustic Calibration EQ settings After you have completed an automatic or manual Acoustic Calibration EQ adjustment, you can compare the different settings. 3 Select the channels you want to check. • It is useful to make these settings...

Owner's Manual
Page 40
...or a subwoofer). Adjust the overall balance of speakers). System Setup 1.Surr Back System 2.Auto MCACC 3.Manual MCACC 4.Manual SP Setup 5.Input Assign 6.Other Setup 4.Manual SP Setup a.Speaker Setting b.Crossover Network c.Channel Level d.Speaker Distance : Exit :Return 2 Select the...will be set then select a speaker size. Select LARGE if your surround speakers reproduce bass frequencies effectively. If you are correct. 4.Manual SP Setup a.Speaker Setting b.Crossover Network c.Channel Level d.Speaker Distance 4a.Speaker Setting Front SMALL Center [ SMALL ] Surr [ SMALL ...
...or a subwoofer). Adjust the overall balance of speakers). System Setup 1.Surr Back System 2.Auto MCACC 3.Manual MCACC 4.Manual SP Setup 5.Input Assign 6.Other Setup 4.Manual SP Setup a.Speaker Setting b.Crossover Network c.Channel Level d.Speaker Distance : Exit :Return 2 Select the...will be set then select a speaker size. Select LARGE if your surround speakers reproduce bass frequencies effectively. If you are correct. 4.Manual SP Setup a.Speaker Setting b.Crossover Network c.Channel Level d.Speaker Distance 4a.Speaker Setting Front SMALL Center [ SMALL ] Surr [ SMALL ...
Owner's Manual
Page 41
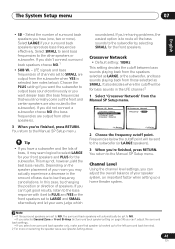
... in Surround back speaker setting on selecting the speaker sizes, see notes below the cutoff point will automatically be sent to the Manual SP Setup menu. Depending on the speaker placement of your ears judge which sounds best. Frequencies below ). You return to the...(or LARGE speakers). 3 When you 're finished, press RETURN. Note 1 • If the surround speakers are output from the Manual SP Setup menu. 4.Manual SP Setup a.Speaker Setting b.Crossover Network c.Channel Level d.Speaker Distance 4b.Crossover Network Frequency 80Hz :Return :Finish 2 Choose the frequency ...
... in Surround back speaker setting on selecting the speaker sizes, see notes below the cutoff point will automatically be sent to the Manual SP Setup menu. Depending on the speaker placement of your ears judge which sounds best. Frequencies below ). You return to the...(or LARGE speakers). 3 When you 're finished, press RETURN. Note 1 • If the surround speakers are output from the Manual SP Setup menu. 4.Manual SP Setup a.Speaker Setting b.Crossover Network c.Channel Level d.Speaker Distance 4b.Crossover Network Frequency 80Hz :Return :Finish 2 Choose the frequency ...

Owner's Manual
Page 42
... the distance of each speaker using EFFECT/CH SEL and +/- You can change the channel levels at low volumes. Move the test tone manually from the listening position. Adjust channel levels as the test tone is output at any time by using / . Loud test tones will ... • For best surround sound, make sure the surround back speakers are using a Sound Pressure Level (SPL) meter, take the readings from the Manual SP Setup menu. 4.Manual SP Setup a.Speaker Setting b.Crossover Network c.Channel Level d.Speaker Distance :Return 4d.Speaker Distance L C R RS SBR SBL LS SW 10.0ft ...
... the distance of each speaker using EFFECT/CH SEL and +/- You can change the channel levels at low volumes. Move the test tone manually from the listening position. Adjust channel levels as the test tone is output at any time by using / . Loud test tones will ... • For best surround sound, make sure the surround back speakers are using a Sound Pressure Level (SPL) meter, take the readings from the Manual SP Setup menu. 4.Manual SP Setup a.Speaker Setting b.Crossover Network c.Channel Level d.Speaker Distance :Return 4d.Speaker Distance L C R RS SBR SBL LS SW 10.0ft ...
Owner's Manual
Page 43
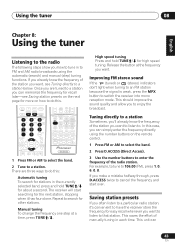
.... 1 Press FM or AM to select the band. 2 Press D.ACCESS (Direct Access). 3 Use the number buttons to enter the frequency of manually tuning in to FM and AM radio broadcasts using the number buttons on the next page for recall later-see Tuning directly to a station below...for high speed tuning. This should improve the sound quality and allow you can simply enter the frequency directly using the automatic (search) and manual (step) tuning functions. Repeat to switch the receiver into mono reception mode. Using the tuner 08 English Deutsch Français Italiano Nederlands...
.... 1 Press FM or AM to select the band. 2 Press D.ACCESS (Direct Access). 3 Use the number buttons to enter the frequency of manually tuning in to FM and AM radio broadcasts using the number buttons on the next page for recall later-see Tuning directly to a station below...for high speed tuning. This should improve the sound quality and allow you can simply enter the frequency directly using the automatic (search) and manual (step) tuning functions. Repeat to switch the receiver into mono reception mode. Using the tuner 08 English Deutsch Français Italiano Nederlands...
Owner's Manual
Page 45
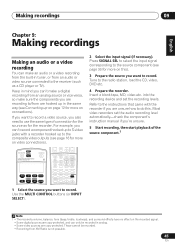
... not possible. 45 En Insert a blank tape, MD, video etc. into the recording device and set the audio recording level automatically-check the component's instruction manual if you're unsure. 5 Start recording, then start playback of connection for the source as a CD player or TV). Most video recorders set the recording...
... not possible. 45 En Insert a blank tape, MD, video etc. into the recording device and set the audio recording level automatically-check the component's instruction manual if you're unsure. 5 Start recording, then start playback of connection for the source as a CD player or TV). Most video recorders set the recording...

Owner's Manual
Page 55
.... Using a banana plug for the second connection is powering which set (front or surround back) is recommended. 55 En Front left speaker. See your speaker manual for stereo output from the 'Surr Back System' menu. Again, to do this your speakers to both Hi and Low terminals have a removable crossover network...
.... Using a banana plug for the second connection is powering which set (front or surround back) is recommended. 55 En Front left speaker. See your speaker manual for stereo output from the 'Surr Back System' menu. Again, to do this your speakers to both Hi and Low terminals have a removable crossover network...

Owner's Manual
Page 58
... a.Digital Input b.Component Input 5b.Component Input Component - 1 DVD Component - 2 [ TV ] Component - 3 [ DVR ] :Return :Finish 58 En System Setup 1.Surr Back System 2.Auto MCACC 3.Manual MCACC 4.Manual SP Setup 5.Input Assign 6.Other Setup 5.Input Assign a.Digital Input b.Component Input : Exit :Return Assigning the digital inputs • Default settings: Coaxial - 1 - DVR Optical - 1 - Assigning...
... a.Digital Input b.Component Input 5b.Component Input Component - 1 DVD Component - 2 [ TV ] Component - 3 [ DVR ] :Return :Finish 58 En System Setup 1.Surr Back System 2.Auto MCACC 3.Manual MCACC 4.Manual SP Setup 5.Input Assign 6.Other Setup 5.Input Assign a.Digital Input b.Component Input : Exit :Return Assigning the digital inputs • Default settings: Coaxial - 1 - DVR Optical - 1 - Assigning...


