
Owner's Manual
Page 4
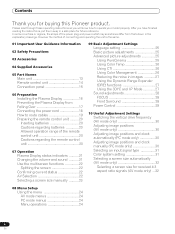
... manually (PC mode only 30 Selecting an input signal type 31 Color system setting 31 Selecting a screen size automatically (AV mode only 32 Selecting a screen size for buying this Pioneer product. Please read through these operating instructions so you have finished reading the ...screen 22 Confirming current status 22 AV Selection 22 Selecting a screen size manually ...........23 09 Basic Adjustment Settings Language setting 25 Basic picture adjustments 25 Advanced picture adjustments 25 Using PureCinema 25 Using Color Temp 26 Using CTI 26 Using Color Management 26 Reducing the ...
... manually (PC mode only 30 Selecting an input signal type 31 Color system setting 31 Selecting a screen size automatically (AV mode only 32 Selecting a screen size for buying this Pioneer product. Please read through these operating instructions so you have finished reading the ...screen 22 Confirming current status 22 AV Selection 22 Selecting a screen size manually ...........23 09 Basic Adjustment Settings Language setting 25 Basic picture adjustments 25 Advanced picture adjustments 25 Using PureCinema 25 Using Color Temp 26 Using CTI 26 Using Color Management 26 Reducing the ...
Owner's Manual
Page 6
However, please limit its use of parts and accessories manufactured by using a vacuum cleaner set to its lifetime, the luminosity of the Pioneer PRO-FHD1 Plasma Display will diminish very slowly, such as very precise and highly advanced technology. After viewing masked...can ensure longer and satisfactory results from other components. • Do not leave the same picture freeze-framed or paused continuously over in possible malfunction. The Pioneer PureVision PRO-FHD1 incorporates the latest in order to previous models. Use of a phosphor-based matrix display and ...
However, please limit its use of parts and accessories manufactured by using a vacuum cleaner set to its lifetime, the luminosity of the Pioneer PRO-FHD1 Plasma Display will diminish very slowly, such as very precise and highly advanced technology. After viewing masked...can ensure longer and satisfactory results from other components. • Do not leave the same picture freeze-framed or paused continuously over in possible malfunction. The Pioneer PureVision PRO-FHD1 incorporates the latest in order to previous models. Use of a phosphor-based matrix display and ...
Owner's Manual
Page 23
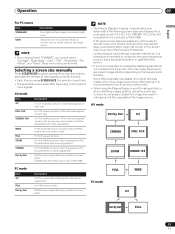
...several hours, or for each side, and you cannot select "Contrast", "Brightness", "Color", "Tint", "Sharpness", "Pro Adjust", and "Reset"; For 16:9 squeeze pictures. If the above screen sizes are displayed continuously for several days, a permanent after-image may deteriorate if the following screen... using the Plasma Display in a profit-making activity, or when exhibiting images publicly, using the screen size function to customize settings as desired. Enabled only when input source size is switched. • The selectable screen sizes differ depending on each input source....
...several hours, or for each side, and you cannot select "Contrast", "Brightness", "Color", "Tint", "Sharpness", "Pro Adjust", and "Reset"; For 16:9 squeeze pictures. If the above screen sizes are displayed continuously for several days, a permanent after-image may deteriorate if the following screen... using the Plasma Display in a profit-making activity, or when exhibiting images publicly, using the screen size function to customize settings as desired. Enabled only when input source size is switched. • The selectable screen sizes differ depending on each input source....
Owner's Manual
Page 24
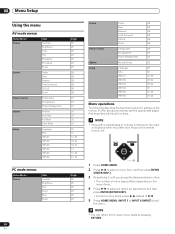
... • Items within parentheses ( ) indicate notations for setting up the menus. NOTE • You can return to exit the menu. 08 Menu Setup Menu Setup Using the menu AV mode menus Home Menu Picture Sound Power Control Option Setup Item Contrast Brightness Color Tint Sharpness Pro Adjust Reset Treble Bass Balance Front Surround... 29 29 29 30 32 32 30 25 37 31, 35 33, 34 33, 34 31 31, 33 31, 33 PC mode menus Home Menu Picture Item Contrast Brightness Red Green Blue Reset Page 25 25 25 25 25 25 24 En Sound Power Control Option Setup Treble Bass Balance Front...
... • Items within parentheses ( ) indicate notations for setting up the menus. NOTE • You can return to exit the menu. 08 Menu Setup Menu Setup Using the menu AV mode menus Home Menu Picture Sound Power Control Option Setup Item Contrast Brightness Color Tint Sharpness Pro Adjust Reset Treble Bass Balance Front Surround... 29 29 29 30 32 32 30 25 37 31, 35 33, 34 33, 34 31 31, 33 31, 33 PC mode menus Home Menu Picture Item Contrast Brightness Red Green Blue Reset Page 25 25 25 25 25 25 24 En Sound Power Control Option Setup Treble Bass Balance Front...
Owner's Manual
Page 25
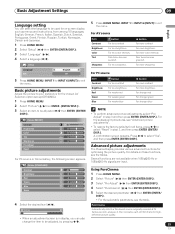
... advanced picture adjustments, select "Pro Adjust" in display, you can select the language to be used for on these functions, see the tables. Picture STANDARD Contrast 40 Brightness 0 Advanced picture adjustments The Plasma Display provides various advanced functions for the chosen AV Selection option (except DYNAMIC). Using PureCinema 1 Press HOME MENU. Basic Adjustment Settings 09...
... advanced picture adjustments, select "Pro Adjust" in display, you can select the language to be used for on these functions, see the tables. Picture STANDARD Contrast 40 Brightness 0 Advanced picture adjustments The Plasma Display provides various advanced functions for the chosen AV Selection option (except DYNAMIC). Using PureCinema 1 Press HOME MENU. Basic Adjustment Settings 09...
Owner's Manual
Page 26
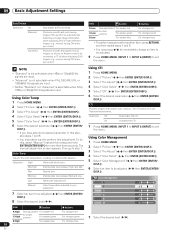
... ( / then ENTER (ENTER/DISP.)). Selections High White with clearer color contours. Using Color Management 1 Press HOME MENU. 2 Select "Picture" ( / then ENTER (ENTER/DISP.)). 3 Select "Pro Adjust" ( / then ENTER (ENTER/DISP.)). 4 Select "Color Detail" ( / then ENTER (ENTER/DISP.)). 5 Select "Color Management... For weaker red for Color Transient Improvement. 4 Select "Color Detail" ( / then ENTER (ENTER/DISP.)). 09 Basic Adjustment Settings PureCinema Selections Off Standard Advanced Deactivates the PureCinema. NOTE • "Standard" is not selectable when 480p or 720p@60 Hz signals...
... ( / then ENTER (ENTER/DISP.)). Selections High White with clearer color contours. Using Color Management 1 Press HOME MENU. 2 Select "Picture" ( / then ENTER (ENTER/DISP.)). 3 Select "Pro Adjust" ( / then ENTER (ENTER/DISP.)). 4 Select "Color Detail" ( / then ENTER (ENTER/DISP.)). 5 Select "Color Management... For weaker red for Color Transient Improvement. 4 Select "Color Detail" ( / then ENTER (ENTER/DISP.)). 09 Basic Adjustment Settings PureCinema Selections Off Standard Advanced Deactivates the PureCinema. NOTE • "Standard" is not selectable when 480p or 720p@60 Hz signals...

Owner's Manual
Page 27
... Adjusts the gamma characteristics (image gradation characteristics). High Enhanced 3DYC Mid Standard 3DYC Low Moderate 3DYC 27 En Basic Adjustment Settings 09 Item R Y button Closer to magenta Closer to red button Closer to yellow Closer to green • You can...distinct. Activates the Black Level. On Activates the ACL. Using the Dynamic Range Expander (DRE) functions 1 Press HOME MENU. 2 Select "Picture" ( / then ENTER (ENTER/DISP.)). 3 Select "Pro Adjust" ( / then ENTER (ENTER/DISP.)). 4 Select "DRE" ( / then ENTER (ENTER/DISP.)). 5 Select an item to be...
... Adjusts the gamma characteristics (image gradation characteristics). High Enhanced 3DYC Mid Standard 3DYC Low Moderate 3DYC 27 En Basic Adjustment Settings 09 Item R Y button Closer to magenta Closer to red button Closer to yellow Closer to green • You can...distinct. Activates the Black Level. On Activates the ACL. Using the Dynamic Range Expander (DRE) functions 1 Press HOME MENU. 2 Select "Picture" ( / then ENTER (ENTER/DISP.)). 3 Select "Pro Adjust" ( / then ENTER (ENTER/DISP.)). 4 Select "DRE" ( / then ENTER (ENTER/DISP.)). 5 Select an item to be...

Owner's Manual
Page 29
... No power management If no signal is detected for power saving. Item Standard Save1 Save2 Description Does not decrease the picture brightness. Item Disable Enable Description Does not place the Plasma Display into the standby mode if no signal is disabled during... drop level. NOTE • INPUT1 to INPUT6 are enabled. Decreases the picture brightness and lowers power consumption. 5 Press HOME MENU, INPUT 1 to INPUT 6 (INPUT) to exit the menu. Basic Adjustment Settings 09 English Power Control Power Control provides convenient functions for one of the...
... No power management If no signal is detected for power saving. Item Standard Save1 Save2 Description Does not decrease the picture brightness. Item Disable Enable Description Does not place the Plasma Display into the standby mode if no signal is disabled during... drop level. NOTE • INPUT1 to INPUT6 are enabled. Decreases the picture brightness and lowers power consumption. 5 Press HOME MENU, INPUT 1 to INPUT 6 (INPUT) to exit the menu. Basic Adjustment Settings 09 English Power Control Power Control provides convenient functions for one of the...
Owner's Manual
Page 38
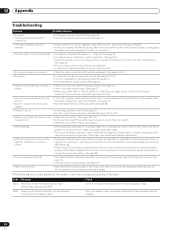
...screen, check the corresponding items in the table. Remove any objects blocking vent or clean. (See page 16.) • Check the power control setting. (See page 29.) • Panel sounds /noises • Panel generated sounds,examples: Fan motor noise, Electrical Circuit Humming/Glass Panel buzzing ...if you using either speaker has been disconnected. (See page 15.) • Has the balance been correctly adjusted? (See page 28.) • Picture is high. Replace with new batteries. (See page 20.) • Operate the remote control unit while pointing it is minimized. Check Check if ...
...screen, check the corresponding items in the table. Remove any objects blocking vent or clean. (See page 16.) • Check the power control setting. (See page 29.) • Panel sounds /noises • Panel generated sounds,examples: Fan motor noise, Electrical Circuit Humming/Glass Panel buzzing ...if you using either speaker has been disconnected. (See page 15.) • Has the balance been correctly adjusted? (See page 28.) • Picture is high. Replace with new batteries. (See page 20.) • Operate the remote control unit while pointing it is minimized. Check Check if ...

