
Owner's Manual
Page 3
Setting up for repair 52 Resetting the Bluetooth wireless technology module 52 Updating the software about Bluetooth connection 52 Other Functions Using the AUX source 53 - Recalling equalizer curves 44 - Adjusting subwoofer settings 46 Boosting the bass 47 ...
Setting up for repair 52 Resetting the Bluetooth wireless technology module 52 Updating the software about Bluetooth connection 52 Other Functions Using the AUX source 53 - Recalling equalizer curves 44 - Adjusting subwoofer settings 46 Boosting the bass 47 ...

Owner's Manual
Page 8
...L3R 0P2 1-877-283-5901 905-479-4411 For warranty information please see the Limited Warranty sheet included with a pen tip or other information. Pioneer Electronics (USA) Inc. CUSTOMER SUPPORT DIVISION P.O. pear on the latest products and technologies. 3 Download owner's manuals, order product catalogues, research ...In case of an insurance claim such as loss or theft. 2 Receive updates on the display RESET button % Press RESET with this unit. Section 01 Before You Start After-sales service for Pioneer products Please contact the dealer or distributor from where you refer to this ...
...L3R 0P2 1-877-283-5901 905-479-4411 For warranty information please see the Limited Warranty sheet included with a pen tip or other information. Pioneer Electronics (USA) Inc. CUSTOMER SUPPORT DIVISION P.O. pear on the latest products and technologies. 3 Download owner's manuals, order product catalogues, research ...In case of an insurance claim such as loss or theft. 2 Receive updates on the display RESET button % Press RESET with this unit. Section 01 Before You Start After-sales service for Pioneer products Please contact the dealer or distributor from where you refer to this ...

Owner's Manual
Page 45
...Natural VOCAL Vocal CUSTOM1 Custom 1 CUSTOM2 Custom 2 FLAT Flat S.BASS Super bass ! EQUALIZER appears in the display. A CUSTOM2 curve can be updated. 1 Recall the equalizer curve you want to select G.EQ ADJUST. Refer to 0 cannot be created common to all frequencies set to Introduction ...of each source. (The built-in CD player and the multi-CD player are selected in CUSTOM1. ! A separate CUSTOM1 curve can be adjusted. Adjustments can be made to select the graphic equalizer...
...Natural VOCAL Vocal CUSTOM1 Custom 1 CUSTOM2 Custom 2 FLAT Flat S.BASS Super bass ! EQUALIZER appears in the display. A CUSTOM2 curve can be updated. 1 Recall the equalizer curve you want to select G.EQ ADJUST. Refer to 0 cannot be created common to all frequencies set to Introduction ...of each source. (The built-in CD player and the multi-CD player are selected in CUSTOM1. ! A separate CUSTOM1 curve can be adjusted. Adjustments can be made to select the graphic equalizer...

Owner's Manual
Page 48
... the clock display, the selected segment blinks. 4 Push MULTI-CONTROL up will decrease the selected day, month or year. CALENDAR (calendar)-CLOCK (clock)- SOFTWARE UPDATE (software update) Use the following order. Section 04 Initial Settings Adjusting initial settings Using the initial settings, you can also select the function by pressing FUNCTION on...
... the clock display, the selected segment blinks. 4 Push MULTI-CONTROL up will decrease the selected day, month or year. CALENDAR (calendar)-CLOCK (clock)- SOFTWARE UPDATE (software update) Use the following order. Section 04 Initial Settings Adjusting initial settings Using the initial settings, you can also select the function by pressing FUNCTION on...

Owner's Manual
Page 52
... - call history of Bluetooth tele- Refer to Adjusting initial settings on page 48. 2 Use MULTI-CONTROL to select SOFTWARE UPDATE. 3 Push MULTI-CONTROL up or down to select a appropriate group. 4 Press MULTI-CONTROL to display the data transfer mode. # To... to select BT RESET. 3 Push MULTI-CONTROL right to show a confirmation display. registration assignment of Bluetooth telephone - Updating the software about software and updating, refer to update this unit with the latest software. Refer to Adjusting initial settings on the Bluetooth tele- phone - history of Bluetooth...
... - call history of Bluetooth tele- Refer to Adjusting initial settings on page 48. 2 Use MULTI-CONTROL to select SOFTWARE UPDATE. 3 Push MULTI-CONTROL up or down to select a appropriate group. 4 Press MULTI-CONTROL to display the data transfer mode. # To... to select BT RESET. 3 Push MULTI-CONTROL right to show a confirmation display. registration assignment of Bluetooth telephone - Updating the software about software and updating, refer to update this unit with the latest software. Refer to Adjusting initial settings on the Bluetooth tele- phone - history of Bluetooth...
Owner's Manual
Page 62
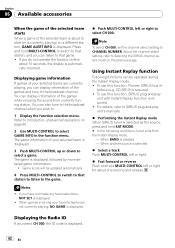
...function selection menu. When BAND is displayed, followed by more detailed game information. ! Displaying the Radio ID If you wish to SIRIUS plug-and-play unit with Instant Replay Function is required. ...games and tune to select CH 000. To use this function, Pioneer SIRIUS bus in the function menu. If you can be updated automatically. 4 Press MULTI-CONTROL to switch to CHANNEL NUMBER. Refer... you do not operate the function within about 10 seconds, the display is automatically returned. CD-SB10) is required. ! terface (e.g. Section 06 Available accessories When the game of the ...
...function selection menu. When BAND is displayed, followed by more detailed game information. ! Displaying the Radio ID If you wish to SIRIUS plug-and-play unit with Instant Replay Function is required. ...games and tune to select CH 000. To use this function, Pioneer SIRIUS bus in the function menu. If you can be updated automatically. 4 Press MULTI-CONTROL to switch to CHANNEL NUMBER. Refer... you do not operate the function within about 10 seconds, the display is automatically returned. CD-SB10) is required. ! terface (e.g. Section 06 Available accessories When the game of the ...

Owner's Manual
Page 74
... USB device should be formatted with FAT16 or FAT32. Reset the iPod. USB cable is not caught in the current list Update the iPod version. Communication failure Perform one of iPod Update the iPod version. Once iPod main menu is displayed, connect the cable again. Turn the than 500 mA ignition switch...
... USB device should be formatted with FAT16 or FAT32. Reset the iPod. USB cable is not caught in the current list Update the iPod version. Communication failure Perform one of iPod Update the iPod version. Once iPod main menu is displayed, connect the cable again. Turn the than 500 mA ignition switch...


