
Owner's Manual
Page 2
...28 - Using Sound Retriever 19 - Selecting files from the file name list 18 - Browsing for Pioneer products 8 Visit our website 8 In case of trouble 8 Resetting the microprocessor 8 About the ...songs in random order 19 - Changing audiobook speed 26 Bluetooth Audio 26 - Introduction to advanced operations 18 - Installing the battery 9 - Remote control 11 - Power ON/OFF 13 - Selecting a repeat play range 19 2...- Tuning in strong signals 15 Built-in a random order (shuffle all songs in CD Player 16 - Selecting an audio file directly in the current folder 21 - Displaying text...
...28 - Using Sound Retriever 19 - Selecting files from the file name list 18 - Browsing for Pioneer products 8 Visit our website 8 In case of trouble 8 Resetting the microprocessor 8 About the ...songs in random order 19 - Changing audiobook speed 26 Bluetooth Audio 26 - Introduction to advanced operations 18 - Installing the battery 9 - Remote control 11 - Power ON/OFF 13 - Selecting a repeat play range 19 2...- Tuning in strong signals 15 Built-in a random order (shuffle all songs in CD Player 16 - Selecting an audio file directly in the current folder 21 - Displaying text...

Owner's Manual
Page 5
...installation. If this equipment dose cause harmful interference to radio or television reception, which the receiver is deemed to comply without appropriate authorization may cause harmful interference to radio communications. Wash hands after handling. Before You Start Section 01 Before You Start Information to User FCC ID: AJDK017 MODEL NO.: FH-P8000BT... device may not cause interference, and (2) this unit are designed to which can radiate radio frequency energy and, if not installed and used in North America. These limits are allocated for use in accordance with FCC/IC...
...installation. If this equipment dose cause harmful interference to radio or television reception, which the receiver is deemed to comply without appropriate authorization may cause harmful interference to radio communications. Wash hands after handling. Before You Start Section 01 Before You Start Information to User FCC ID: AJDK017 MODEL NO.: FH-P8000BT... device may not cause interference, and (2) this unit are designed to which can radiate radio frequency energy and, if not installed and used in North America. These limits are allocated for use in accordance with FCC/IC...
Owner's Manual
Page 8
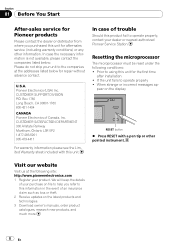
... the companies listed below for repair without advance contact. CUSTOMER SUPPORT DIVISION P.O. Section 01 Before You Start After-sales service for Pioneer products Please contact the dealer or distributor from where you refer to using this unit for the first time after -sales service ...site: http://www.pioneerelectronics.com 1 Register your product. Prior to this information in the event of trouble Should this unit for after installation ! We will keep the details of Canada, Inc. CUSTOMER SATISFACTION DEPARTMENT 300 Allstate Parkway Markham, Ontario L3R 0P2 1-877-283-5901...
... the companies listed below for repair without advance contact. CUSTOMER SUPPORT DIVISION P.O. Section 01 Before You Start After-sales service for Pioneer products Please contact the dealer or distributor from where you refer to using this unit for the first time after -sales service ...site: http://www.pioneerelectronics.com 1 Register your product. Prior to this information in the event of trouble Should this unit for after installation ! We will keep the details of Canada, Inc. CUSTOMER SATISFACTION DEPARTMENT 300 Allstate Parkway Markham, Ontario L3R 0P2 1-877-283-5901...

Owner's Manual
Page 9
Press DISP during feature demo operation to start. Use and care of the remote control Installing the battery Slide the tray on /off operations. Do not handle the battery with the plus (+) and minus (-) poles aligned properly. ! "Perchlorate Material ... tools. ! See www.dtsc.ca.gov/hazardouswaste/ perchlorate. (Applicable to operate. ! CAUTION ! If the battery leaks, wipe the remote control completely clean and install a new battery. ! Should the battery be drained. Important The red lead (ACC) of the front panel to California, U.S.A.)" Using the remote control Point the...
Press DISP during feature demo operation to start. Use and care of the remote control Installing the battery Slide the tray on /off operations. Do not handle the battery with the plus (+) and minus (-) poles aligned properly. ! "Perchlorate Material ... tools. ! See www.dtsc.ca.gov/hazardouswaste/ perchlorate. (Applicable to operate. ! CAUTION ! If the battery leaks, wipe the remote control completely clean and install a new battery. ! Should the battery be drained. Important The red lead (ACC) of the front panel to California, U.S.A.)" Using the remote control Point the...

Owner's Manual
Page 53
...and assigned to external unit's owner's manual. When connected, auxiliary devices are connected, the external unit is automatically allocated to the installation manual. Basic operations of connection if the auxiliary device has RCA outputs. For details concerning functions, refer to AUX1 or AUX2. Selecting...the source. # If the auxiliary setting is explained below . Selecting AUX as the source % Press SOURCE to a Pioneer product (such as ones available in CD player. Other Functions Section 05 Other Functions Using the AUX source Up to two auxiliary devices such as VCR or ...
...and assigned to external unit's owner's manual. When connected, auxiliary devices are connected, the external unit is automatically allocated to the installation manual. Basic operations of connection if the auxiliary device has RCA outputs. For details concerning functions, refer to AUX1 or AUX2. Selecting...the source. # If the auxiliary setting is explained below . Selecting AUX as the source % Press SOURCE to a Pioneer product (such as ones available in CD player. Other Functions Section 05 Other Functions Using the AUX source Up to two auxiliary devices such as VCR or ...

Other Manual
Page 5
... microphone clip on the rear side of the vehicle. - In such case, use the optional installation kit (ADT-VA133). • When installing, to the factory radio-mounting bracket. Be sure to install the unit in such a way that will enable it may cause injury to a passenger as near the heater ... this unit, make sure you leave ample space behind the rear panel and wrap any of the vehicle. • Do not install this unit where: - Factory radio mounting bracket Binding screw or flush surface screw Be sure to use of unauthorized parts may (i) obstruct the driver's vision, (ii...
... microphone clip on the rear side of the vehicle. - In such case, use the optional installation kit (ADT-VA133). • When installing, to the factory radio-mounting bracket. Be sure to install the unit in such a way that will enable it may cause injury to a passenger as near the heater ... this unit, make sure you leave ample space behind the rear panel and wrap any of the vehicle. • Do not install this unit where: - Factory radio mounting bracket Binding screw or flush surface screw Be sure to use of unauthorized parts may (i) obstruct the driver's vision, (ii...


