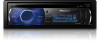
Owner's Manual
Page 5
...following conditions: ! RESET button 1 Remove the front panel. 2 Press RESET with this unit for your dealer or nearest authorized PIONEER Service Station. ! Operating the demo while the ignition switch is turned off operations may lead to start the reverse mode. Visit...set to a terminal coupled with ignition switch on the display Demo mode Important ! Access owner's manuals, spare parts information, service information, and much more. Pioneer Electronics (USA) Inc. ware updates) for the first time after installation ! CUSTOMER SUPPORT DIVISION P.O.
...following conditions: ! RESET button 1 Remove the front panel. 2 Press RESET with this unit for your dealer or nearest authorized PIONEER Service Station. ! Operating the demo while the ignition switch is turned off operations may lead to start the reverse mode. Visit...set to a terminal coupled with ignition switch on the display Demo mode Important ! Access owner's manuals, spare parts information, service information, and much more. Pioneer Electronics (USA) Inc. ware updates) for the first time after installation ! CUSTOMER SUPPORT DIVISION P.O.
Owner's Manual
Page 7
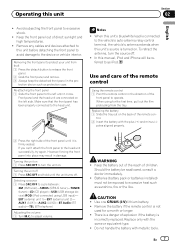
... English ! When this unit's blue/white lead is connected to the vehicle's auto-antenna relay control terminal, the vehicle's antenna extends when this manual, iPod and iPhone will be referred to as sunshine, fire or the like. In this unit's source is not used for the first time,... detached front panel in the pro- Turning the unit off 1 Press SRC/OFF and hold until it clicks. WARNING ! Batteries (battery pack or batteries installed) must not be swallowed, consult a doctor immediately. ! Do not handle the battery with the same or equivalent type. ! Front panel and the head...
... English ! When this unit's blue/white lead is connected to the vehicle's auto-antenna relay control terminal, the vehicle's antenna extends when this manual, iPod and iPhone will be referred to as sunshine, fire or the like. In this unit's source is not used for the first time,... detached front panel in the pro- Turning the unit off 1 Press SRC/OFF and hold until it clicks. WARNING ! Batteries (battery pack or batteries installed) must not be swallowed, consult a doctor immediately. ! Do not handle the battery with the same or equivalent type. ! Front panel and the head...
Owner's Manual
Page 19
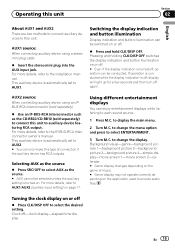
... as the source. # AUX cannot be switched on or off . % Press and hold CLK/DISP OFF. For more details, refer to this unit. to the installation manual. Clock off % Press CLK/DISP OFF to auxiliary device featuring RCA output. For more details, refer to display the main menu. 2 Turn M.C. Pressing and holding... M.C. Operating this unit Section 02 English About AUX1 and AUX2 There are two methods to connect auxiliary devices to the IP-BUS-RCA Interconnector owner's manual.
... as the source. # AUX cannot be switched on or off . % Press and hold CLK/DISP OFF. For more details, refer to this unit. to the installation manual. Clock off % Press CLK/DISP OFF to auxiliary device featuring RCA output. For more details, refer to display the main menu. 2 Turn M.C. Pressing and holding... M.C. Operating this unit Section 02 English About AUX1 and AUX2 There are two methods to connect auxiliary devices to the IP-BUS-RCA Interconnector owner's manual.


