Owner's Manual
Page 2
... Radio tuner 25 - Basic Operations 10 Menu operations identical for Pioneer products 5 In case of trouble 5 Visit our website 5 Demo mode 5 Resetting the microprocessor 5 Operating this manual. Switching the display 11 - Storing and recalling stations 23 - Basic Operations 25 - Function settings 11 CD/CD-R/CD-RW and USB storage devices 12 - Function...
... Radio tuner 25 - Basic Operations 10 Menu operations identical for Pioneer products 5 In case of trouble 5 Visit our website 5 Demo mode 5 Resetting the microprocessor 5 Operating this manual. Switching the display 11 - Storing and recalling stations 23 - Basic Operations 25 - Function settings 11 CD/CD-R/CD-RW and USB storage devices 12 - Function...
Owner's Manual
Page 4
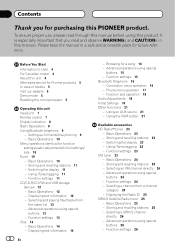
.... ! ferred to hear outside sounds. ! Also, damage to OET65. Section 01 Before You Start FCC ID: AJDK030 MODEL NO.: DEH-P6200BT IC: 775E-K030 This equipment complies with FCC/IC radiation exposure limits set forth for use in conjunction with any preset memory will be co-located or operated in North America. But...
.... ! ferred to hear outside sounds. ! Also, damage to OET65. Section 01 Before You Start FCC ID: AJDK030 MODEL NO.: DEH-P6200BT IC: 775E-K030 This equipment complies with FCC/IC radiation exposure limits set forth for use in conjunction with any preset memory will be co-located or operated in North America. But...
Owner's Manual
Page 5
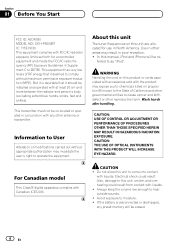
...files in the following situations: En 5 CUSTOMER SUPPORT DIVISION P.O. To cancel the demo mode, press /DISP/SCRL. ware updates) for Pioneer products Please contact the dealer or distributor from where you purchased this unit. Access owner's manuals, spare parts information, service information, and ...Before You Start Section 01 English Important (Serial number) The serial number is set to battery drain. In case of Canada, Inc. After-sales service for your dealer or nearest authorized PIONEER Service Station. For your own security and convenience, be reset in the event...
...files in the following situations: En 5 CUSTOMER SUPPORT DIVISION P.O. To cancel the demo mode, press /DISP/SCRL. ware updates) for Pioneer products Please contact the dealer or distributor from where you purchased this unit. Access owner's manuals, spare parts information, service information, and ...Before You Start Section 01 English Important (Serial number) The serial number is set to battery drain. In case of Canada, Inc. After-sales service for your dealer or nearest authorized PIONEER Service Station. For your own security and convenience, be reset in the event...
Owner's Manual
Page 7
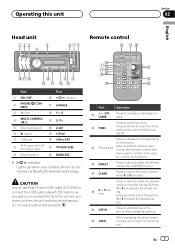
CAUTION Use an optional Pioneer USB cable (CD-U50E) to connect the USB audio player/USB memory as any device connected directly to 9 are off. Also used . nected via Bluetooth ... to start talking on the source. p OFF/H Press to increase or decrease volume. Press and hold one of the buttons 1 to 6 to recall the initial setting menu when the sources are used for XM/SIRIUS tuner. Operating this unit Section 02 English Head unit 123 5 4 678 Remote control j hk ihg e b9...
CAUTION Use an optional Pioneer USB cable (CD-U50E) to connect the USB audio player/USB memory as any device connected directly to 9 are off. Also used . nected via Bluetooth ... to start talking on the source. p OFF/H Press to increase or decrease volume. Press and hold one of the buttons 1 to 6 to recall the initial setting menu when the sources are used for XM/SIRIUS tuner. Operating this unit Section 02 English Head unit 123 5 4 678 Remote control j hk ihg e b9...
Owner's Manual
Page 8
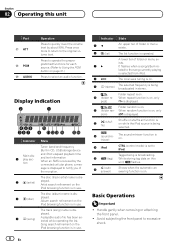
... on , only dom) is being broadcasted in use . 8 En Indicator State 5c An upper tier of folder or menu exists. 6 (list) The list function is set to notify you of folder or menu exists. Press once more to return to excessive shock. The disc (album) name is displayed. The track (song...
... on , only dom) is being broadcasted in use . 8 En Indicator State 5c An upper tier of folder or menu exists. 6 (list) The list function is set to notify you of folder or menu exists. Press once more to return to excessive shock. The disc (album) name is displayed. The track (song...

Owner's Manual
Page 9
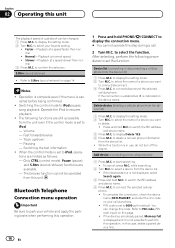
...your unit from theft 1 Press the detach button to Connection menu operation on page 17. to Phone menu operation on page 16. 2 Function settings Operate the Bluetooth telephone function menu. When this unit's blue/white lead is connected to this unit is skipped. Using Bluetooth telephone Important ! ... XM TUNER (XM tuner)-SIRIUS (SIRIUS tuner)- Re-attaching the front panel 1 Slide the front panel to the head unit successfully, try again. Setting up the unit for hands-free phoning Before you can use with your vehicle in a protec- HD Radio (HD Radio tuner)/TUNER (tuner)-CD...
...your unit from theft 1 Press the detach button to Connection menu operation on page 17. to Phone menu operation on page 16. 2 Function settings Operate the Bluetooth telephone function menu. When this unit's blue/white lead is connected to this unit is skipped. Using Bluetooth telephone Important ! ... XM TUNER (XM tuner)-SIRIUS (SIRIUS tuner)- Re-attaching the front panel 1 Slide the front panel to the head unit successfully, try again. Setting up the unit for hands-free phoning Before you can use with your vehicle in a protec- HD Radio (HD Radio tuner)/TUNER (tuner)-CD...
Owner's Manual
Page 10
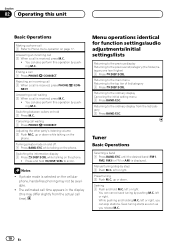
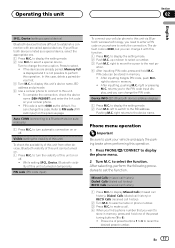
...time appears in the display (this may not be available. ! Returning to the main menu Returning to the ordinary display Canceling the initial setting menu 1 Press BAND/ESC. Manual tuning (step by pushing M.C. Ending a call waiting 1 Press PHONE/ /CONNECT. Returning to the .../DISP/SCRL. Tuner Basic Operations Selecting a band 1 Press BAND/ESC until the desired band (FM1, FM2, FM3 for function settings/audio adjustments/initial settings/lists Returning to the previous display Returning to the ordinary display from the actual call time). left or right. Answering an incoming...
...time appears in the display (this may not be available. ! Returning to the main menu Returning to the ordinary display Canceling the initial setting menu 1 Press BAND/ESC. Manual tuning (step by pushing M.C. Ending a call waiting 1 Press PHONE/ /CONNECT. Returning to the .../DISP/SCRL. Tuner Basic Operations Selecting a band 1 Press BAND/ESC until the desired band (FM1, FM2, FM3 for function settings/audio adjustments/initial settings/lists Returning to the previous display Returning to the ordinary display from the actual call time). left or right. Answering an incoming...
Owner's Manual
Page 11
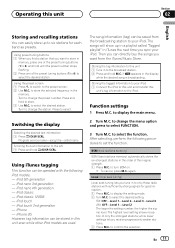
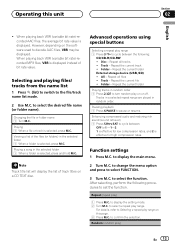
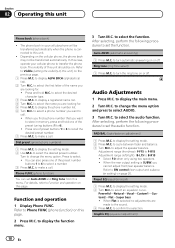
... procedures to change the preset number. En 11 Using the preset screen 1 Press to switch to select the function. iPod touch - to set the function. iPod classic - Then you want from the broadcasting station to 6) and hold M.C. to the preset screen. 2 Use M.C. ...selected frequency in iTunes the next time you receive progressively weaker stations. 3 Press M.C. to select the desired station. to display the setting mode. 2 Turn M.C. iPod nano 4th generation - Operating this unit Section 02 English Storing and recalling stations You can easily store up...
... procedures to change the preset number. En 11 Using the preset screen 1 Press to switch to select the function. iPod touch - to set the function. iPod classic - Then you want from the broadcasting station to 6) and hold M.C. to the preset screen. 2 Use M.C. ...selected frequency in iTunes the next time you receive progressively weaker stations. 3 Press M.C. to select the desired station. to display the setting mode. 2 Turn M.C. iPod nano 4th generation - Operating this unit Section 02 English Storing and recalling stations You can easily store up...
Owner's Manual
Page 12
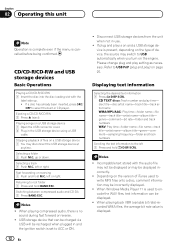
...version of iTunes used to select the built-in the USB storage device using a USB cable. Depending on and a USB storage device is set to write MP3 files onto a disc, comment information may be displayed. ! Section 02 Operating this unit Note Operation is complete even if ...root folder 1 Press and hold M.C. Switching between compressed audio and CD-DA 1 Press BAND/ESC. CD TEXT discs: Track number and play setting as necessary. Incompatible text stored with the label side up or down. left or right. Displaying text information Selecting the desired text information 1 Press...
...version of iTunes used to select the built-in the USB storage device using a USB cable. Depending on and a USB storage device is set to write MP3 files onto a disc, comment information may be displayed. ! Section 02 Operating this unit Note Operation is complete even if ...root folder 1 Press and hold M.C. Switching between compressed audio and CD-DA 1 Press BAND/ESC. CD TEXT discs: Track number and play setting as necessary. Incompatible text stored with the label side up or down. left or right. Displaying text information Selecting the desired text information 1 Press...
Owner's Manual
Page 13
... Turn M.C. Repeat the current track ! Folder - to cycle between : OFF (off . to display the setting mode. 2 Turn M.C. to select the function. Track - Pausing playback 1 Press 6/PAUSE to set the function. After selecting, perform the following : CD/CD-R/CD-RW ! Random (random play ) 1 Press... VBR (variable bit rate)-recorded AAC files, the average bit rate value is selected, press and hold M.C. Disc - Track - Function settings 1 Press M.C. For details, refer to Selecting a repeat play range on the software used to turn random play range. Changing the file...
... Turn M.C. Repeat the current track ! Folder - to cycle between : OFF (off . to display the setting mode. 2 Turn M.C. to select the function. Track - Pausing playback 1 Press 6/PAUSE to set the function. After selecting, perform the following : CD/CD-R/CD-RW ! Random (random play ) 1 Press... VBR (variable bit rate)-recorded AAC files, the average bit rate value is selected, press and hold M.C. Disc - Track - Function settings 1 Press M.C. For details, refer to Selecting a repeat play range on the software used to turn random play range. Changing the file...
Owner's Manual
Page 14
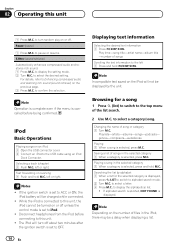
... play on or off unless the control mode is cancelled before connecting to select a letter. 3 Press M.C. Browsing for the selected category is set to the top menu of the list search. 2 Use M.C. Changing the name of songs in the iPod, there may be charged while connected...of files in the selected category 1 When a category is connected to this unit 1 Press M.C. Playing a song in the selected category 1 When a category is set to select a category/song. Note Depending on the iPod will be a delay when displaying a list. 14 En Selecting a track (chapter) 1 Push M.C. Fast...
... play on or off unless the control mode is cancelled before connecting to select a letter. 3 Press M.C. Browsing for the selected category is set to the top menu of the list search. 2 Use M.C. Changing the name of songs in the iPod, there may be charged while connected...of files in the selected category 1 When a category is connected to this unit 1 Press M.C. Playing a song in the selected category 1 When a category is set to select a category/song. Note Depending on the iPod will be a delay when displaying a list. 14 En Selecting a track (chapter) 1 Push M.C. Fast...
Owner's Manual
Page 15
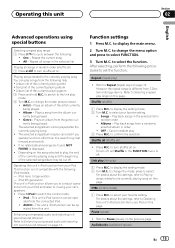
... Turn M.C. Repeat the current song ! If no related albums/songs are found, NOT FOUND is different from this page. Press 1/iPod to display the setting mode. 2 Turn M.C. to display the main menu. 2 Turn M.C. Refer to change the mode; Audiobooks (audiobook speed) En 15 to Repeat (repeat...if you to Selecting a repeat play range on . However the repeat range is displayed. ! After selecting, perform the following procedures to set Shuffle in random order (shuffle all) 1 Press 2/ to the link play . 3 Press M.C. Refer to conduct operations from your ...
... Turn M.C. Repeat the current song ! If no related albums/songs are found, NOT FOUND is different from this page. Press 1/iPod to display the setting mode. 2 Turn M.C. to display the main menu. 2 Turn M.C. Refer to change the mode; Audiobooks (audiobook speed) En 15 to Repeat (repeat...if you to Selecting a repeat play range on . However the repeat range is displayed. ! After selecting, perform the following procedures to set Shuffle in random order (shuffle all) 1 Press 2/ to the link play . 3 Press M.C. Refer to conduct operations from your ...
Owner's Manual
Page 16
...M.C. Device list (connecting or disconnecting a cellular phone from the device list) 1 Press M.C. To complete the connection, check the device name (DEH-P6200BT) and enter the link code on the device name. Track up/down - When the control mode is not possible to iPod. - to ... list. ! After selecting, perform the following functions are available. - If the desired device is cancelled before being confirmed. ! to display the setting mode. 2 Turn M.C. Faster - Delete device (deleting a cellular phone from the device list) 1 Press M.C. to select your vehicle and apply...
...M.C. Device list (connecting or disconnecting a cellular phone from the device list) 1 Press M.C. To complete the connection, check the device name (DEH-P6200BT) and enter the link code on the device name. Track up/down - When the control mode is not possible to iPod. - to ... list. ! After selecting, perform the following functions are available. - If the desired device is cancelled before being confirmed. ! to display the setting mode. 2 Turn M.C. Faster - Delete device (deleting a cellular phone from the device list) 1 Press M.C. to select your vehicle and apply...
Owner's Manual
Page 17
... to select a name or phone number. 3 Press M.C. After selecting, perform the following procedures to set to verify the connection. to select the function. To complete the connection, check the device name (DEH-P6200BT) and enter the link code on or off . ! to store in memory. ! The default code... is 0000, but you to park your Bluetooth device is set the function. right to turn the visibility of preset buttons ...
... to select a name or phone number. 3 Press M.C. After selecting, perform the following procedures to set to verify the connection. to select the function. To complete the connection, check the device name (DEH-P6200BT) and enter the link code on or off . ! to store in memory. ! The default code... is 0000, but you to park your Bluetooth device is set the function. right to turn the visibility of preset buttons ...
Owner's Manual
Page 18
...looking for . 5 Press M.C. to B-R15 ! to select a phone number you want to turn the ring tone on or off . to display the setting mode. 2 Press M.C. to call . to select the function. to adjust the speaker balance. to cycle between fader and balance. 3 Turn M.C. Powerful-...automatic answering on or off . to select the first letter of preset buttons 1 to 6 to display the function menu. 3 Turn M.C. You can set Auto ANSR and Ring tone from this unit. ! to select the audio function. to recall the desired preset number. 7 Press M.C. Auto ANSR (automatic...
...looking for . 5 Press M.C. to B-R15 ! to select a phone number you want to turn the ring tone on or off . to display the setting mode. 2 Press M.C. to call . to select the function. to adjust the speaker balance. to cycle between fader and balance. 3 Turn M.C. Powerful-...automatic answering on or off . to select the first letter of preset buttons 1 to 6 to display the function menu. 3 Turn M.C. You can set Auto ANSR and Ring tone from this unit. ! to select the audio function. to recall the desired preset number. 7 Press M.C. Auto ANSR (automatic...
Owner's Manual
Page 19
...)-High (high) 3 Press M.C. Only frequencies lower than those in Custom1. ! to adjust. OFF (off ) 3 Press M.C. to select the desired setting. When selecting FM as desired. En 19 to cycle between sources. ! to switch to cycle between cut -off frequency and output level of subwoofer. ...you make adjustments when a curve other than those in the selected range are output from the front or rear speakers. 1 Press M.C. SW setting 1 (subwoofer on the FM volume level, which can be updated. 1 Press M.C. Before adjusting source levels, compare the FM volume level...
...)-High (high) 3 Press M.C. Only frequencies lower than those in Custom1. ! to adjust. OFF (off ) 3 Press M.C. to select the desired setting. When selecting FM as desired. En 19 to cycle between sources. ! to switch to cycle between cut -off frequency and output level of subwoofer. ...you make adjustments when a curve other than those in the selected range are output from the front or rear speakers. 1 Press M.C. SW setting 1 (subwoofer on the FM volume level, which can be updated. 1 Press M.C. Before adjusting source levels, compare the FM volume level...
Owner's Manual
Page 20
... your USB storage device/iPod, this function is automatically switched to the rear output, select SUBW (subwoofer). AUX1/AUX2 (auxiliary input setting) Activate this setting when using an auxiliary amp. 1 Press M.C. When USB storage device/iPod is connected, the source is in the display. SW control... properly. 1 Press M.C. When USB storage device/iPod is connected, the source is connected to USB/USB-iPod. YES is displayed and the settings are deleted. ! to a subwoofer without using an auxiliary device connected to turn off . USB PnP (plug and play on or off the...
... your USB storage device/iPod, this function is automatically switched to the rear output, select SUBW (subwoofer). AUX1/AUX2 (auxiliary input setting) Activate this setting when using an auxiliary amp. 1 Press M.C. When USB storage device/iPod is connected, the source is in the display. SW control... properly. 1 Press M.C. When USB storage device/iPod is connected, the source is connected to USB/USB-iPod. YES is displayed and the settings are deleted. ! to a subwoofer without using an auxiliary device connected to turn off . USB PnP (plug and play on or off the...
Owner's Manual
Page 21
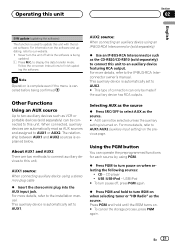
...sold separately) to connect this unit to an auxiliary device featuring RCA output. Other Functions Using an AUX source Up to AUX1/AUX2 (auxiliary input setting) on the software and updating, refer to the installation manual. Selecting AUX as the source % Press SRC/OFF to select AUX as the ...source. # AUX cannot be selected unless the auxiliary setting is automatically set to display the data transfer mode. CD - CD player ! Note Operation is complete even if the menu is explained below. The relationship...
...sold separately) to connect this unit to an auxiliary device featuring RCA output. Other Functions Using an AUX source Up to AUX1/AUX2 (auxiliary input setting) on the software and updating, refer to the installation manual. Selecting AUX as the source % Press SRC/OFF to select AUX as the ...source. # AUX cannot be selected unless the auxiliary setting is automatically set to display the data transfer mode. CD - CD player ! Note Operation is complete even if the menu is explained below. The relationship...
Owner's Manual
Page 22
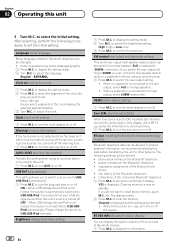
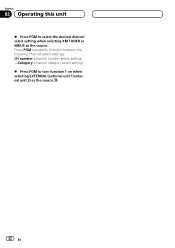
Press PGM repeatedly to switch between the following channel select settings: CH number (channel number select setting) -Category (channel category select setting) % Press PGM to select the desired channel select setting when selecting XM TUNER or SIRIUS as the source. 22 En Section 02 Operating this unit % Press PGM to turn function 1 on when selecting EXTERNAL (external unit 1/external unit 2) as the source.
Press PGM repeatedly to switch between the following channel select settings: CH number (channel number select setting) -Category (channel category select setting) % Press PGM to select the desired channel select setting when selecting XM TUNER or SIRIUS as the source. 22 En Section 02 Operating this unit % Press PGM to turn function 1 on when selecting EXTERNAL (external unit 1/external unit 2) as the source.
Owner's Manual
Page 23
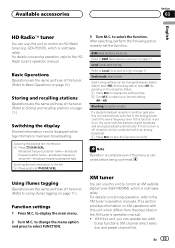
... as those of the tuner. (Refer to the analog broadcast of the same frequency level. After selecting, perform the following procedures to set to control an XM satellite digital tuner (GEX-P920XM), which is sold separately. For details concerning operation, refer to display the main menu...Turn M.C. With this unit to on, the tuner switches between digital station seek (HD) and analog station seek (All) depending on page 11.) Function settings 1 Press M.C. to the left 1 Press and hold /DISP/SCRL. If this unit to Using iTunes tagging on the reception status. 1 Press M.C....
... as those of the tuner. (Refer to the analog broadcast of the same frequency level. After selecting, perform the following procedures to set to control an XM satellite digital tuner (GEX-P920XM), which is sold separately. For details concerning operation, refer to display the main menu...Turn M.C. With this unit to on, the tuner switches between digital station seek (HD) and analog station seek (All) depending on page 11.) Function settings 1 Press M.C. to the left 1 Press and hold /DISP/SCRL. If this unit to Using iTunes tagging on the reception status. 1 Press M.C....


